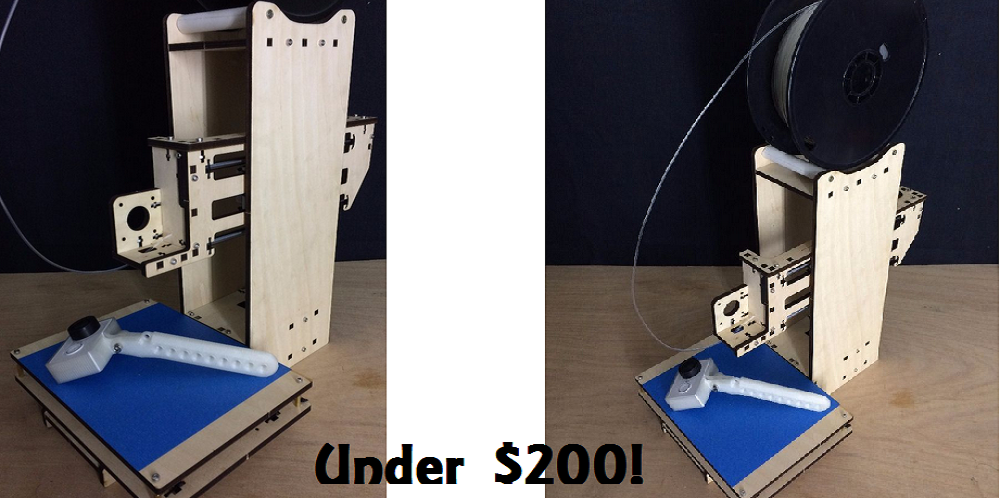
How to Build a 3D Printer For Under $200 — The Tower XL 3D Printer with Hardware Store Parts

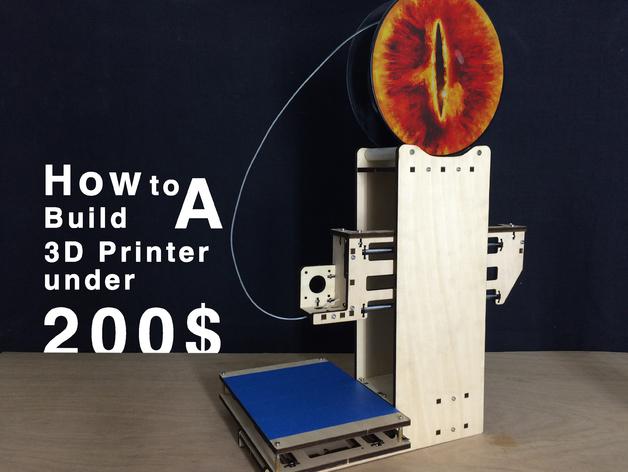 For all of you fellow Lord of the Rings fans out there on a budget who are looking to get started in 3D printing, Almus Yang has a fun new, affordable challenge for you, a helpful Instructables project, and downloadable files listed on Thingiverse. We’ll have to check back with Yang on the customized Eye of Sauron filament holder, though.
While the craze in replication has been 3D printing everything and 3D printing inexpensive 3D printers and so on and so on, for those on a budget it can indeed be a total case of the egg must come before the chicken. Let’s build the 3D printer first for affordability and go from there, if it is truly realistic. According to Yang, his open source design for the 3D printer, offering a build plate of 6″ x 6″ x 6″, can be constructed for under $200, and does not have any 3D printed parts. So, while a 3D printer is not required, a laser cutter is.
You will either have to hit the hardware store or empty out some of the mechanical parts inventory from your workshop. Once you have all the pieces cut and all the parts laid out, Yang’s instructions are very clear and if you are somewhat handy, you should have no difficulty in putting together your very own ‘3D Printer of Sauron’ as Yang names his 3D printer with some tongue-in-cheek humor.
For mechanical parts, you’ll need to stock up on the following for completing Yang’s DIY 3D printer: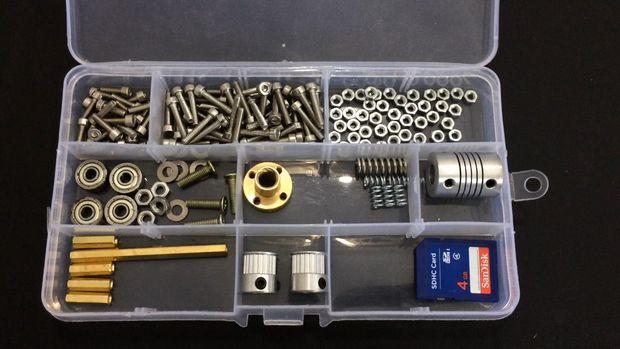
- M3 10mm screws *29
- M3 16mm screws *48
- M3 nuts *42
- M4 16mm screws *4
- M4 nuts *4
- M4 shim *4
- 624 bearing *4
- T8 Leadscrew 285mm *1
- Leadscrew nuts *1
- M3 spring 8mm *5
- M5 spring 20mm *1
- Coupler 5mm to 8mm *1
- M3 pillars 16mm *5
- M3 pillars 60mm *1
- MXL 20T pulley *2
- MXL belt *2
- Cylinder Liner Rail Linear 8-215MM *4
- Cylinder Liner Rail Linear 8-340MM *2
- End stop *3
- Nema 17 *4
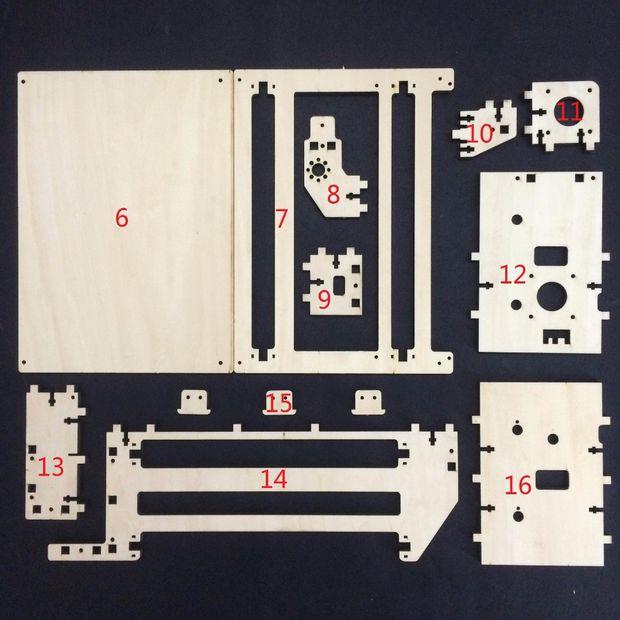
After using the laser cutter to produce the parts you can download from Thingiverse, you’ll want to screw the nema 17 stepper motor to the acrylic piece. After that comes putting together the main body where you will employ the laser cut pieces 1, 4, 5, 12, and 16, as well as installing the acrylic part into the main body.
After mounting the leadscrew nut, it’s time to use laser cut parts 8 and 10. After bearings are zip tied to the base with smooth rods placed through them, be sure to tighten them appropriately, and then move on to zip tying the bearings to the appropriate acrylic parts, again placing rods through bearings, and tightening.
You will then want to:
- Insert smooth rods into LM8UU bearings.
- Attach part 7 to the rest of assembly by zip tying it onto smooth rods, with nubs on the outside of the print platform, and the M3 16mm screw on the left side.
- You’ll want to follow the step-by-step instructions for setting up the X and Z axis, listed in the Instructable. After that, you’ve successfully put together your own Tower Simple XL. Yang is publishing the electronics parts list soon, as well as the updated firmware.
Is this a design you are interested in building, or have you made something similar? Discuss in the Tower XL thread over at 3DPB.com.
Subscribe to Our Email Newsletter
Stay up-to-date on all the latest news from the 3D printing industry and receive information and offers from third party vendors.
You May Also Like
ATLANT 3D’s Atomic-level 3D Printing Gets $15M in Series A+
After completing the hard work of developing a complete 3D printer in 2024, ATLANT 3D secured a $15M Series A+ round, following its Series A round in 2022. Both rounds were...
3D Printing Financials: AML3D and Titomic Bet Big on U.S. Growth
Australia’s leading metal 3D printing companies, AML3D and Titomic, are expanding fast, but their financial results show different paths. AML3D (ASX: AL3) delivered a 206% revenue increase, crossing the AUD...
Sintavia Buys AMCM Metal 3D Printer with nLight Lasers
Additive manufacturing (AM) service specialist Sintavia recently received a $10 million investment and is already putting the funds to use. The company has purchased a twin-laser AMCM M290-2, equipped with...
Largest American Shipbuilder Installs 3D Printed Assembly on Aircraft Carrier
Shipbuilder Huntington Ingalls Industries (HII) has announced that Newport News Shipbuilding has installed a 3D-printed valve manifold assembly on an aircraft carrier. The company stated, “The use of certified 3D-printed...