
3D Printing for Preppers: Investment Casting with PolyCast Filament


While disaster has not yet befallen my humble family, there is no shortage of emergencies globally and the COVID-19 pandemic has demonstrated just how useful even desktop 3D printing can be during disaster situations. Provided with the opportunity to review an Ultimaker S3 3D printer and several unique filaments, I thought I’d explore the 3D printing of simple goods that might be useful during emergency situations to get an idea for just how useful a desktop 3D printer might be.
In addition to providing an overview of the subject, I’ve reviewed the Ultimaker S3 and spoken to Ultimaker about the use of desktop 3D printers in emergency and disaster scenarios. I also had an opportunity to test out some copper filament made by The Virtual Foundry, which was sintered by Sapphire3D. I spoke to the manufacturer about the material, as well as its myriad other unique metal filaments.
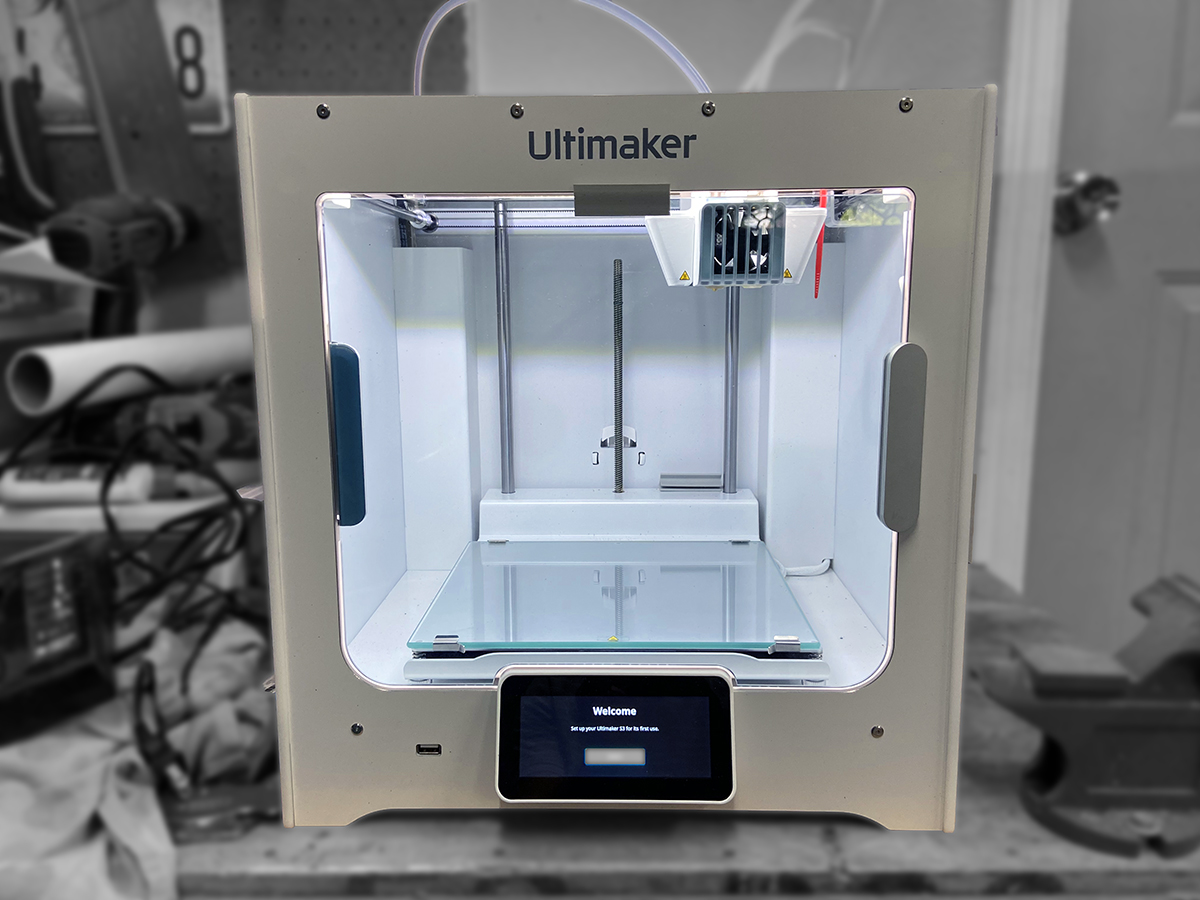 The Ultimaker S3 unit we reviewed.
While metal filaments open up some interesting options for making metal parts with a desktop 3D printer, it does require some additional equipment and expertise to be able to make adequate parts. There is, however, a 5,000-year-old process that has recently gotten a 3D printed makeover that anyone with a 3D printer can try at home, if they’re cautious.
I am, of course, referring to investment casting. The oldest discovered item made with lost-wax casting is a 6,000-year-old amulet from the Indus Valley Civilization, a Bronze-age society in the northwestern regions of South Asia. The technique involves making a model out of a material, such as wax, before creating a mold from that model and then pouring molten model into the mold to create a solid metal replica. Obviously, there are more specific details involved than provided here and we’ll get into them a bit later.
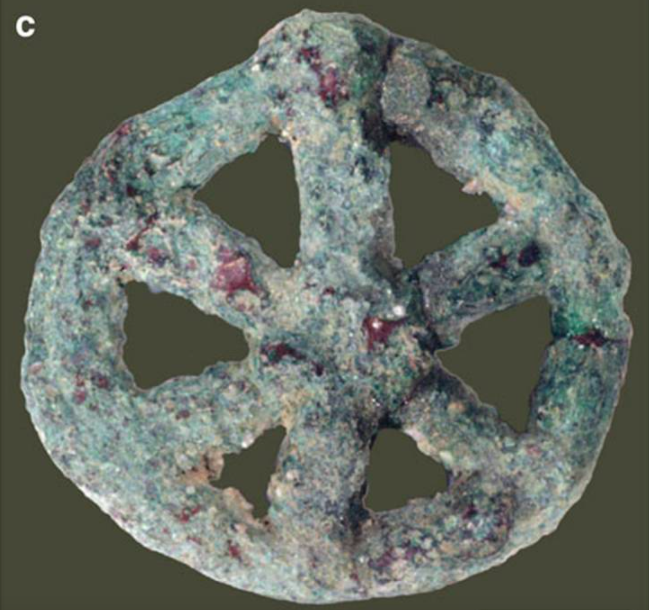 The oldest known piece made with lost-wax casting, a 6,000-year-old amulet from Mehrgarh (modern day Pakistan). Image courtesy of Nature Communications.
As one of the oldest metal manufacturing methods, it exists in many forms and, though models were initially craft by hand using clay or wax, 3D printing has lowered the barrier for artistic skill required to prepare these designs. Now, it’s possible to take a model from an online repository, generate a replica of a physical object with 3D scanning, or use CAD tools to design something to cast.
Moreover, a number of 3D printers and materials exist for just such purposes. For professional applications, such as jewelry or dental crowns, vat photopolymerization (digital light processing [DLP] and stereolithography[SLA]) or inkjet 3D printing (Solidscape wax printing) are usually the technologies of choice, as they can achieve much higher resolution with the right materials. However, low-cost material extrusion (fused filament fabrication [FFF]) and DLP systems are capable of producing models for casting, as well.
As an FFF printer, the Ultimaker I reviewed had many fewer options to choose from in terms of materials compared to cheap DLP machines. Typically, DIY casting enthusiasts have actually used your standard PLA or flexible filaments for printing their initial models. However, there are a couple of filaments engineered specifically for casting on the market. The two most notable are MOLDLAY from Kai Parthy and PolyCast from Polymaker.
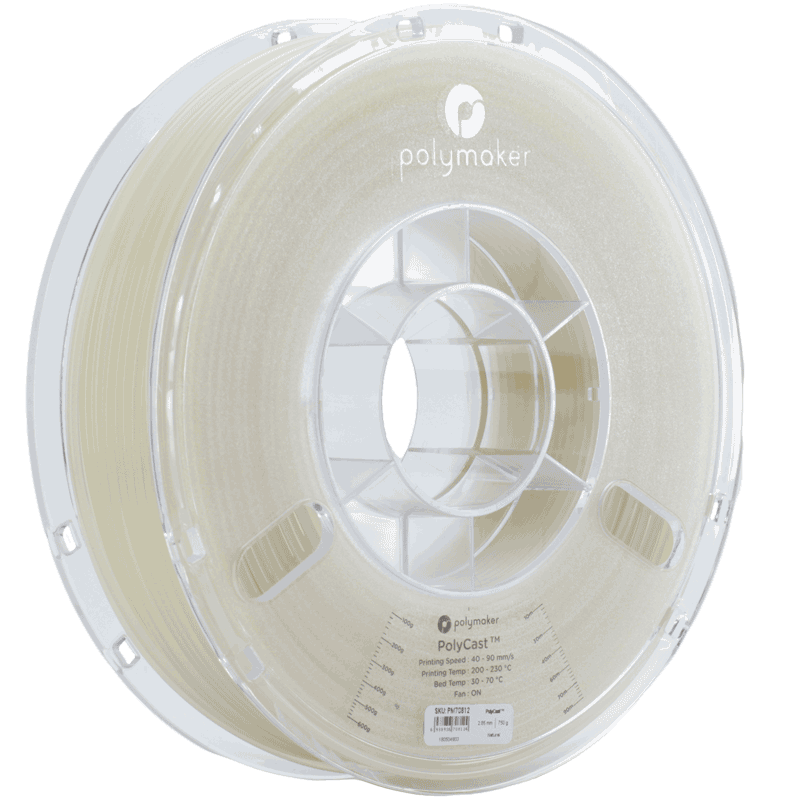 PolyCast 3D printing filament for casting from Polymaker. Image courtesy of Polymaker.
The team at Polymaker was kind enough to send me a free sample of their Polycast material to try out. This filament is designed to have what is called low “burnout,” in that, when cast, there is a minimal amount of ash left. That way, when the liquid metal is poured into the mold, it won’t receive any defects from any debris in the mold cavity. For this reason, it’s also important to post-process any prints, sanding off any support structures and polishing them smooth. This will ensure a smoother casted object, with fewer defects.
By this point in the review process, I had sufficiently clogged my second nozzle, so no longer had access to dissolvable supports. I did not want to risk having too many defects from support structures made from the PolyCast, so I printed objects without overhangs. These were still meant to be practical in case of emergency. I chose a wrench and surgical retractor, the same models as those I had made from PLA in a previous article in this series.
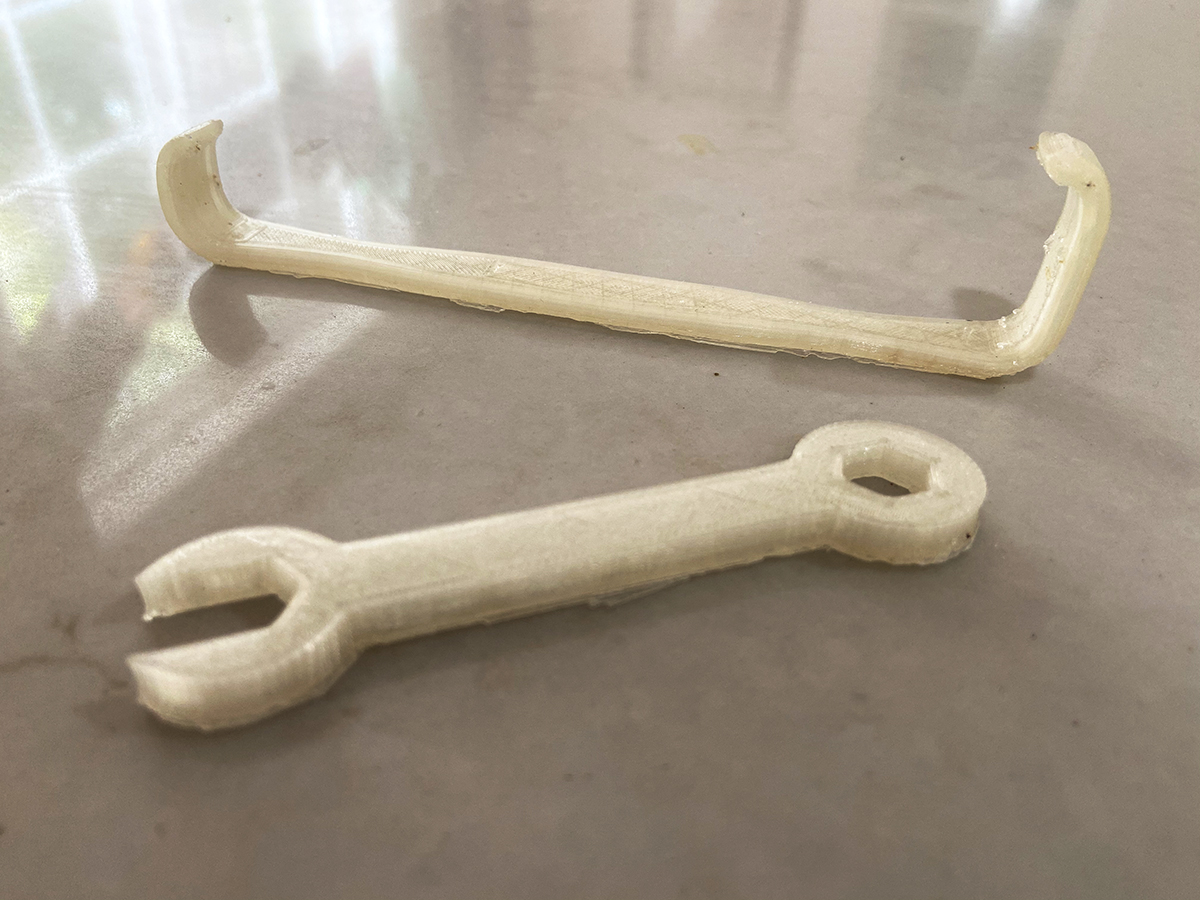 A surgical retractor and wrench 3D printed from PolyCast.
Printing them was easy, as easy as PLA. Because the material was in a sealed bag with desiccants, there was no issue with moisture. I simply added the PolyCast printer profile to Cura and, upon starting the Ultimaker, the profile was loaded. After loading the filament, the printer had no issues at all.
The difficult part came when I had to cast the prints. With a toddler and baby at home, quarantining during a deadly pandemic, it’s not easy or safe to create your own casting station, but it was something I considered. I will explain how some people have approached performing their own casting below (somewhat interesting) before getting into how I went about it (less interesting). This isn’t meant to be a guide, as I didn’t conduct the casting myself, but should be informative enough for readers to get a sense of how it is performed.
Based on numerous accounts online, it’s not difficult to do your own casting, if you take the proper precautions, and it is pretty feasible in an emergency situation. In fact, as the video below demonstrates, it’s possible to make a backyard foundry for under $20, to create ingots from aluminum cans.
This video demonstrates you can even make one with a soup can:
Once you’ve got a model you’d like to cast, you have to make a tree. This wax structure will hold the figure in place and burn out with the model during casting. This process, known as spruing, is typically performed with a wax rod and wax wires that are melted together; however, it is also possible to 3D print the sprues directly with your model if you have the CAD skills (or automated software).
With the positive pattern made of the final part, the next step is to create a negative. You can purchase casting kits that come with all of the equipment needed, but you can also buy and make much of what’s needed for quite cheap. Basically, you need a container and a medium that can withstand the heat of molten metal that will be poured into your mold.
 Plaster process for investment casting with a 3D printed pattern. Image one shows a 3D printed part within a drywall tub. Image two, that tub once the investment plaster has been poured in. Image three, the mold removed from the tub. Images courtesy of user scottiek on Instructables.
For the container, I’ve seen one DIY caster use a drywall tub and enough investment plaster to protect the tub from the heat. The model is then placed into the container and immersed in investment plaster, a toxic material that requires that you wear protective eyewear, gloves, an N95-style respirator and a well-ventilated area. Some DIYers have made their own investment plaster by mixing hobby-grade plaster with fine silica sand.
If you use a larger container, you’ll end up taking your plaster mold out of the container and performing subsequent steps. However, if you use a small enough, steel container, this can be your flask, which will end up going into a kiln with the plaster and 3D printed pattern.
Key to a good final cast is the elimination of air pockets from the slurry, which requires the use of a vacuum chamber. One caster, Adam Zeloof, relied on a mechanical pump connected to a coffee tin before pouring it into the container you’re using for your mold. Another method is to clean the 3D printed part with isopropyl alcohol right before coating it with the investment plaster.
Both of these techniques are meant to prevent bubbles from forming in the next step. This is when you place your 3D print, with sprues, into your container and fill the area with investment plaster. The plaster then hardens overnight.
Once you have hardened the plaster mold around your 3D printed pattern, you can heat it in a furnace or kiln to burn out the pattern, leaving a negative that you will then fill with molten metal. Yep, that means we’re almost at the direct manufacturing step. This requires heating metal up to its melting temperature, whether by backyard forge or purchased kiln, and then pouring it into the mold.
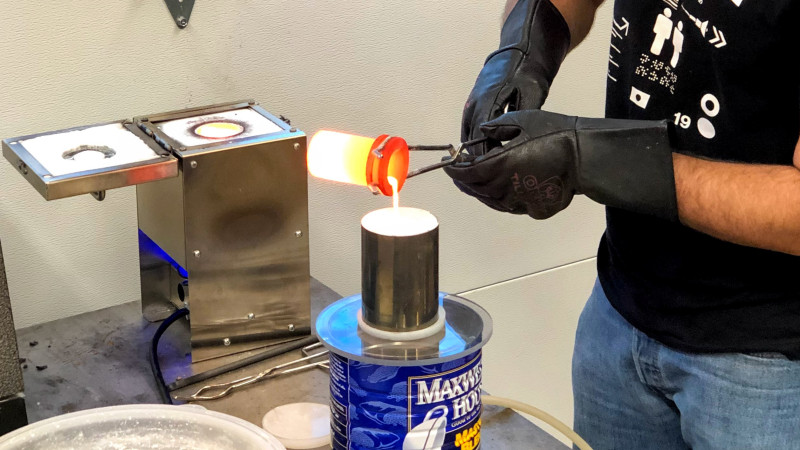 Adam Zeloof pouring molten metal into an investment plaster mold, within a steel flask and atop his coffee can vacuum chamber. Image courtesy of Adam Zeloof/Hackaday.
Zeloof, mentioned above, explains that there are several techniques for achieving the best metal part because simply tilting the liquid metal into the mold may not result in an even coating and pour. His method of choice involves using the same DIY vacuum chamber made from a pump and coffee can.
Once the metal has cooled, the mold can be dropped into a bucket of cold water. The plaster mold is broken apart to reveal a metal replica of your 3D printed part, plus sprues. Finally, you’ll need to saw off the sprues and polish the part.
It is a somewhat involved process, particularly if you haven’t done it before, but, if you have the supplies and the work area, it doesn’t seem all that difficult, once you get the hang of it. Although, there is obviously a lot of trial-and-error involved and expertise to actually doing an adequate job. Then again, I haven’t done it!
What I did was find the closest casting business. Because I live in a remote part of the country, I actually had to mail my 3D printed parts to Reinmuth Bronze Studio a couple hours north of where I live and have it professionally cast. In a SHTF scenario, a two-hour drive might not be too bad for an emergency part. When I worked for a medical clinic in a rainforest in Bolivia, this would be pretty standard for carting a patient out to the city when the necessary equipment or expertise was unavailable in the middle of the jungle. Of course, it all depends on the scenario.
 My final parts cast in bronze.
The casting of these two parts in bronze cost $118. They arrived in great condition and, as I have learned, due to the presence of copper in bronze, they may even have some anti-bacterial properties. If I were a prepper, though, I would definitely want to begin building my own forging and casting station, where I could melt aluminum cans in my backyard.
Subscribe to Our Email Newsletter
Stay up-to-date on all the latest news from the 3D printing industry and receive information and offers from third party vendors.
Print Services
Upload your 3D Models and get them printed quickly and efficiently.


You May Also Like
AM Asia Watch: Chinese Company Claims Advances in Titanium Powder Beyond 700C
They’re a familiar sight at trade shows: Chinese powder companies with barren stands lacking parts. There’s maybe some glass vessel with powder in it and a semi-complete data sheet, but...
Aires Tide Designed with AI, Supercomputers, and 3D Printing
The Department of Energy‘s National Nuclear Security Administration (DOE/NNSA) is part of the US government that manages the US nuclear stockpile, helping to upgrade, improve, and maintain nuclear weapons, and...
Largest Publicly Announced, Single Order in EOS History: Beehive Industries Spends $50M on M4 ONYX 3D Printers
Earlier this year, Beehive Industries received a $29.7 million contract to produce its Frenzy 6 and Frenzy 8 engines for the US Air Force. The metal additive manufacturing (AM) user...
Blue Origin’s New Glenn Explosion Comes During Major Manufacturing Push
Blue Origin‘s orbital New Glenn rocket exploded during a hot-fire test at Launch Complex 36 in Cape Canaveral on May 29, setting back the company’s launch ambitions at a time...


