3D Printing for Preppers: A Review of the Ultimaker S3 3D Printer

While disaster has not yet befallen my humble family, there is no shortage of emergencies globally and the COVID-19 pandemic has demonstrated just how useful even desktop 3D printing can be during disaster situations. Provided with the opportunity to review an Ultimaker S3 3D printer and several unique filaments, I thought I’d explore the 3D printing of simple goods that might be useful during emergency situations to get an idea for just how useful a desktop 3D printer might be. Read part one here.
In addition to discussions with companies involved in this series, we will cover how specialty materials, such as copper and investment casting filaments, might be used to produce metal parts when traditional supply chains are compromised or inaccessible. Before getting to those topics, we wanted to provide a review of one 3D printer in particular, the Ultimaker S3, to determine how useful it might be for a novice to 3D print objects during a crisis.

The Ultimaker S3 was pulled right out of the box and, after a five minute setup, was ready to 3D print across WiFi.
At roughly $3,850, the Ultimaker S3 is priced significantly higher than the sort of machine someone new to 3D printing might purchase because it is designed to be used for professional applications. Many of the features that make it a professional machine, however, also make it ideal for novices and consumers generally. This includes:
- active leveling, in which the printhead acts as a touch probe, registering points on the bed before initiating a print in order to ensure that the build remains level throughout the fabrication process
- upgraded feeder motors and increased build plate temperature that allow for the use of a wider range of materials, including abrasive filaments
- touchscreen interface and WiFi connectivity, allowing for an enhanced user experience and remote print management and monitoring
Given that we are reviewing the S3 in terms of using the device in the context of an emergency or disaster scenario, the upgraded feeder motors with swappable print cores were of particular importance, as they allowed for the use of a number of materials we will discuss here and in future installments. The great ease-of-use also proved highly valuable for a novice 3D printer user.
Compared to my own kit-based 3D printer and even the other systems I have reviewed in the past, the Ultimaker S3 was about as plug and play as one can get. It came fully assembled and required about the same level of setup as a new 2D inkjet office printer. Simply pull it out of the box, plug it in, attach the spool holder, insert the second print core and you can begin loading materials for printing. The entire process took about five minutes.
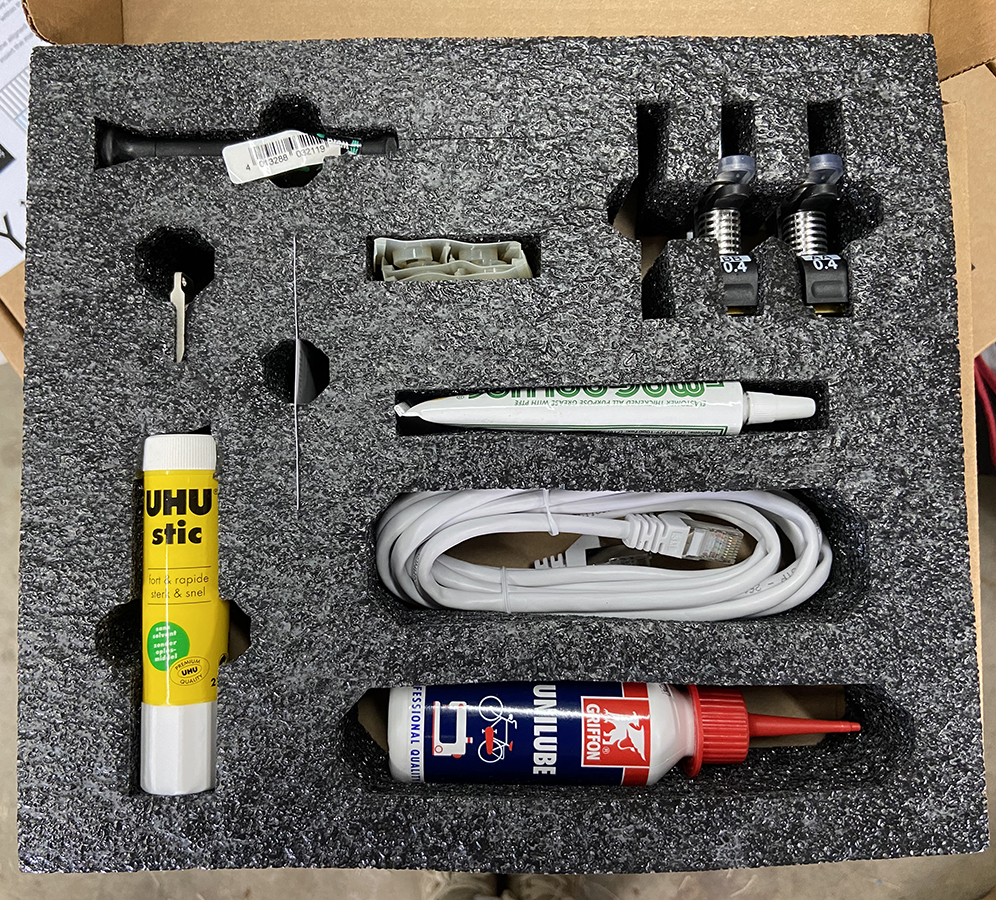
Accessory package provided with the Ultimaker S3.
The printer comes packaged with a number of accessories, including glue for the glass build plate, a backup printcore, a screwdriver, extra fans and nozzle covers, and more. None of this was necessary for the short period of time in which I used the machine, including the glue. Even the traditionally more difficult materials I worked with—including TPU, carbon fiber filled PET, copper filament and PolyCast—adhered to the bed without any issues every time.
The printer shipped with Ultimaker Tough PLA and Natural PVA, for printing soluble support structures. The Tough PLA, as one might expect, printed perfectly nearly every time. With it, I printed a variety of objects, including a spare part for a drill of a friend that had cracked. He whipped up a simple design in SketchUp and I printed it for him in less than a half-hour. Unfortunately, the material did not hold up to the heat generated from the drill’s motor. So, I printed a replacement out of carbon fiber filled PET (Lehvoss PET CF) and it was able to withstand the high temperature.
Other parts I printed from Tough PLA included mask4all mask clips from the EDAG Group, which can easily clip to a piece of fabric to create an instant face mask now required in most places in the U.S. trying to prevent the spread of the SARS-CoV-2 virus. Additionally, I made a surgical retractor developed by the U.S. Army and Navy.
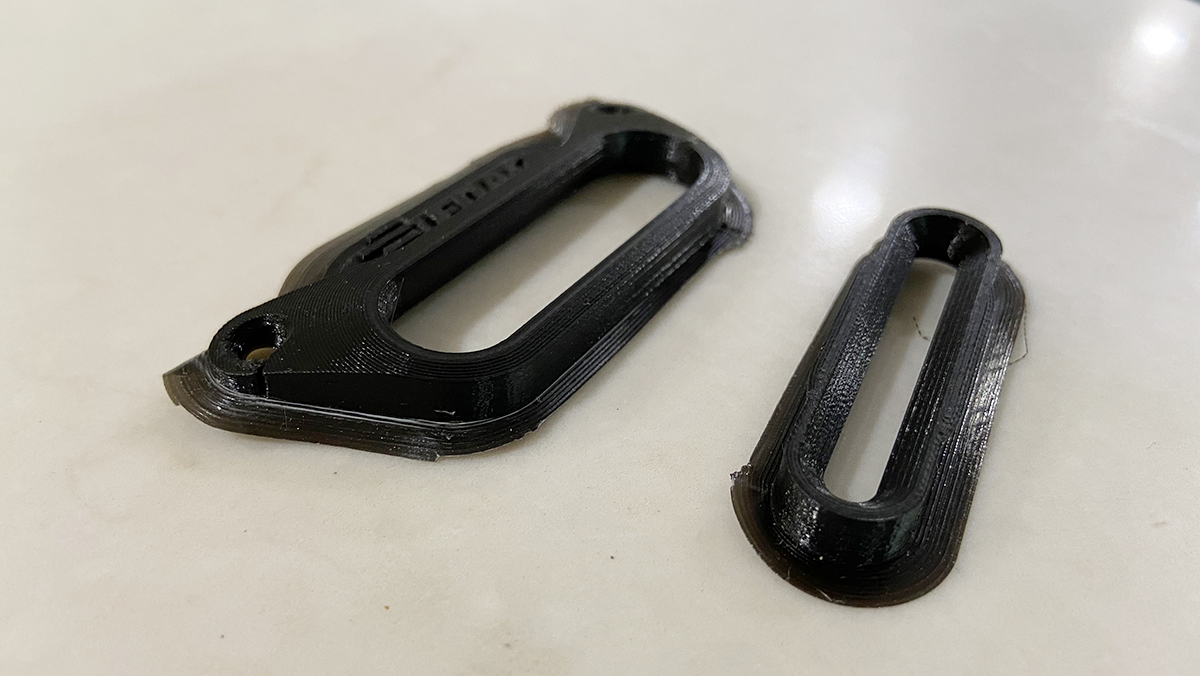
mask4all parts 3D printed on the Ultimaker S3.
The original study in which it was created saw the device printed from PLA, so my replica seemed to be sufficient; however, I also printed it out of PET CF and PolyCast with the goal of having a metal version made via investment casting. That latter process will be detailed in a follow-up post.
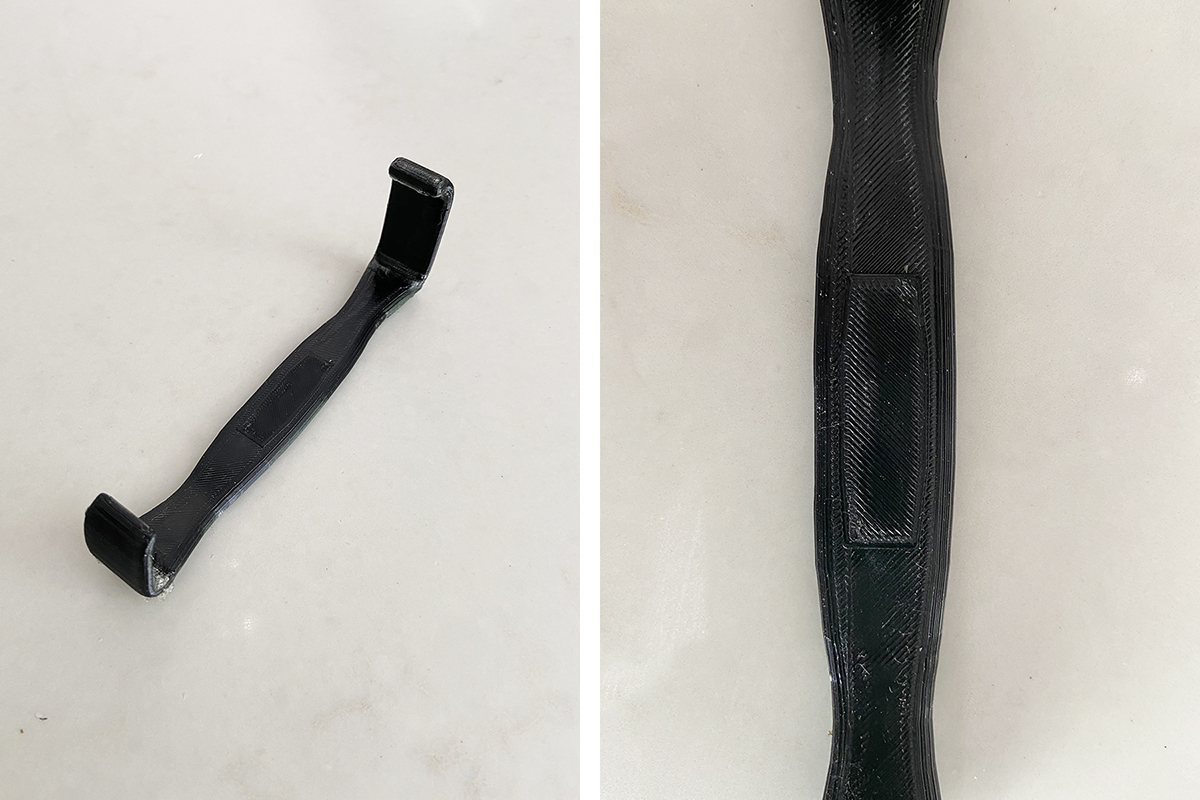
A surgical retractor 3D printed using Tough PLA.
Using Huntsman Iroprint TPU, I printed several small items that I reasoned could be used in an emergency or resource-restricted scenario. One was a battery holder, which can keep four AA batteries in place for transport. More unique, however, was a dust sprayer that I thought might be useful for propelling diatomaceous earth around food supplies. This material is a natural insect killer that lacks the carcinogenic properties of insecticide which we spray in my household to keep ants from coming into our pantry and to prevent lice and other bugs from infesting our chicken coop.

Parts 3D printed from TPU. The image on the right shows that layer lines are barely visible.
Though perhaps the most useful object one can print with TPU is the simple gasket. It may not look like much, but gaskets are necessary as seals for any number of otherwise leaky connections, including hoses and oil canisters.
I’ll note one issue that came up but didn’t have to do with the printer itself but with my own inexperience with soluble support material. I printed with both the provided Ultimaker Natural PVA and Infinite AquaSys 120. However, I didn’t store the material properly, causing them to absorb ambient moisture, rendering them near unprintable. Before this occurred, I was able to print a complex, gyroscopic ball that would have been almost impossible without soluble supports. But I wasn’t able to print any useful objects that would have required soluble supports.
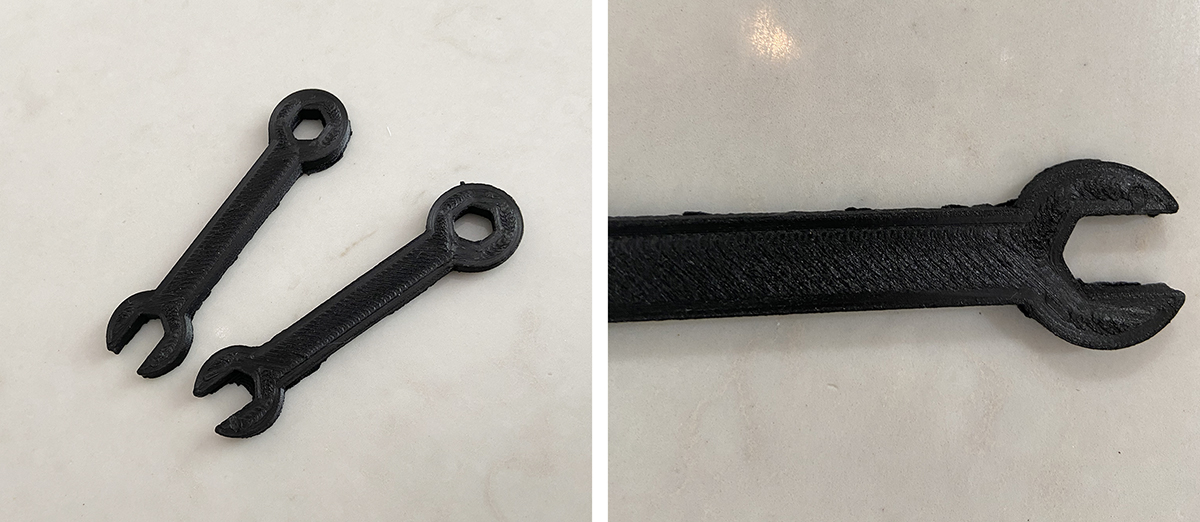
Wrenches 3D printed from PET CF. Resolution was very good. Raft was not entirely removed from the print before photographing.
While I wanted to print an all-in-one wrench from PET CF, which necessitates AquaSys 120 rather than PVA for supports, the material clogged the print nozzle on the Ultimaker and, no matter how much I unclogged the hot end, I couldn’t get the filament to print properly. Instead, I resorted to printing a much simpler wrench with no moving parts.
It is possible to dry out filaments that absorb moisture, but this usually requires keeping it in a temperature of 70°C (158°F) for three to four hours and, though it’s possible to perform this with an oven, doing so may not be safe. Ultimaker recommends keeping the material on the print bed at 45-55 °C for two hours, but that wasn’t sufficient for drying out the soluble materials. One trick that I didn’t have time to try but seems to work for people is using an off-the-shelf food dehydrator.
While most materials could be printed with the standard AA core supplied, abrasive materials like the PET CF and copper filament required the use of the CC core, specially designed for tough filaments. Swapping a new print core into the machine is easy as pie. The touchscreen guides users through every procedure on the printer, from popping in a new print core to changing filaments to performing filament cleaning procedures (which I conducted countless times in order to clear clogs while moving from one plastic to the next). Once the CC core was installed, the S3 had absolutely no issues printing with either the PET CF or copper materials.
If I were a prepper and getting ready for the Big One, the Ultimaker S3 really did seem like it could do the trick for a 3D printing novice. Other printers capable of handling a diverse range of materials might work just as well. However, with this machine, anyone could begin printing pretty much instantaneously. As long as they are gentle with the printer and store their materials properly, they shouldn’t run into many issues, aside from the standard hiccups one experiences.
In the next article in our series, we will be speaking with an applications engineer at Ultimaker about some of the other ways that even desktop 3D printers can be used in emergencies, including the COVID-19 crisis and more.
Subscribe to Our Email Newsletter
Stay up-to-date on all the latest news from the 3D printing industry and receive information and offers from third party vendors.
Print Services
Upload your 3D Models and get them printed quickly and efficiently.


You May Also Like
ARC & ORNL Form Partnership to Accelerate AI-Enabled Manufacturing for Defense
Last year, Autonomous Resource Corporation (ARC) became the surprising owner of Desktop Metal’s (DM’s) assets following the bankruptcy of the one-time additive manufacturing (AM) unicorn, an acquisition that cost ARC...
RAPID 2026 in Pictures: The Coolest & Craziest Things on the Show Floor
Last week, North America’s premier 3D printing trade show, RAPID+TCT 2026, came to Boston. I spent two days trekking the show floor, trying to see as much as I could,...
Euler Viewer for Metal LPBF 3D Printing Released
Icelandic software startup Euler has released Euler Viewer, a real time build viewer for metal LPBF. The product does not need to be installed, and doesn’t require hardware to be...
3D Printing News Briefs, April 8, 2026: LiDAR Scanning, Vapor Smoothing, FDM Optimization, & More
We’ll kick off today’s 3D Printing News Briefs with some 3D scanning news from Artec 3D, and then move on to new America Makes Project Calls. Then, Raise3D and AMT...