Researchers from the Czech Republic and Brazil have come together to highlight ultrasonic testing for stress analysis in ‘Residual stress analysis of additive manufacturing of metallic parts using ultrasonic waves: State of the art review.’
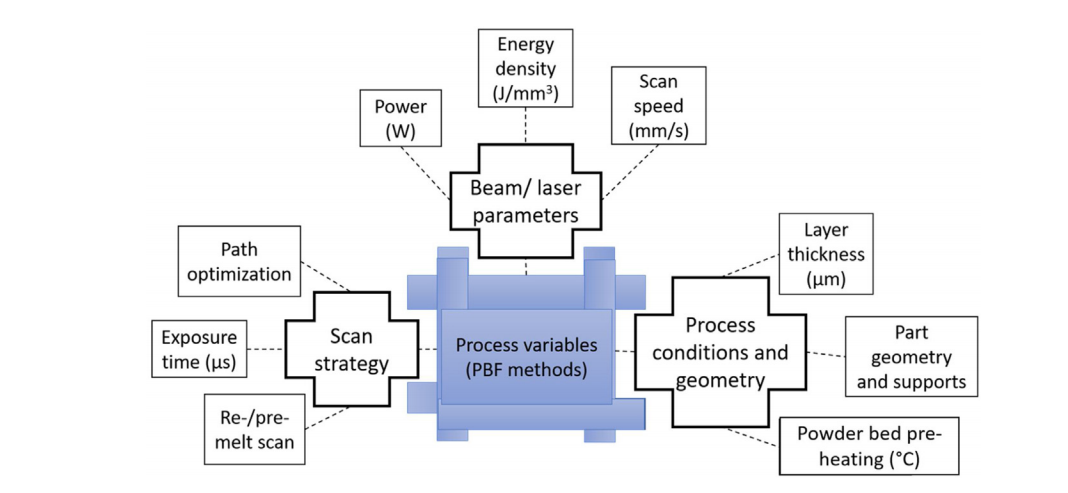
Residual stresses (RS) are still a notorious problem in metal 3D printing, with the rapid heating and cooling resulting in potentially numerous defects, part failure and even damage to an additive manufacturing (AM) machine. Other factors also come into play such as grain size, porosity, voids, shape or structure, supports, and processing parameters. In turn, RS can cause the following issues in printed parts:
- Deformation
- Poor fatigue resistance
- Critical failure during operation
- Lower chemical resistance
- Lower magnetization
- Decreased strength
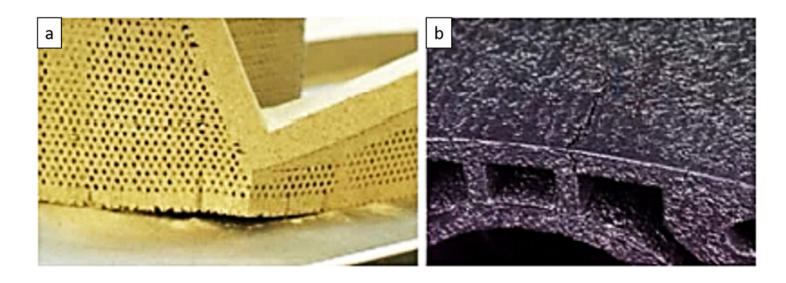
Direct consequences of residual stresses in AM parts – (a) distortion and separation from the base plate; (b) crack formation [10].
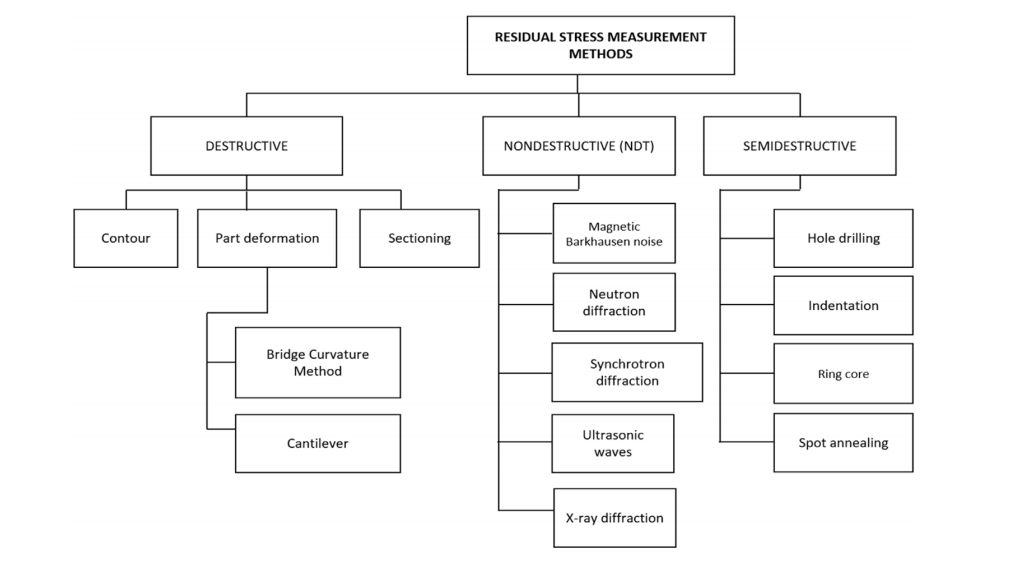
The authors suggest a number of benefits to the technique, including accuracy, speed, repeatability, affordability, unlimited types of materials that can be tested, minimal influence from temperature and the fact that it is not destructive, so that it can even be incorporated into monitoring systems built into 3D printers. Its drawbacks, however, include limited spatial resolution, issues with differentiated multi-axial stresses. It is more suited to measuring RS in the entire part, rather than specific areas.
This compares to other testing techniques, such as hole drilling (HD) and X-ray diffraction. While HD and X-ray diffraction are still the most common methods for measurement of RS—offering precision and reliability for industrial users—there are still constrictions in terms of small sample size, rough surfaces rather than the desired polish for measuring, and limitations with X-rays overall. HD measurements may also be destructive, as well as posing numerous errors.
The authors highlight a number of research developments currently underway dedicated to the use of UT in testing for RS, including Spatially Resolved Acoustic Spectroscopy (SRAS), which uses two lasers to inspect surface and near subsurface features, and a variety of other laser-based methods. They suggest that—while most machines today rely on X-rays, infrared cameras, and high resolution cameras—these UT techniques could be incorporated into metal AM systems to perform in-situ monitoring of parts, stating:
“This method has great potential to be employed in the next generation of metal-AM machines, focusing on the measurement of RS, voids, roughness, and defects. The most remarkable challenges remain in the field of data exchange, surface effects and spatial resolution. Namely, the optimization of the link between UT apparatus and the AM hardware is required.”
The biggest challenge for UT as a quality control mechanism is the complex geometries of AM parts. As users continue to 3D print parts that are expected to be strong and highly functional, they must also be conscious of the need to be aware of the effects of printing parameters and update accordingly. The connection between material properties must be analyzed also for improving quality, precision, and efficiency in production.
[Source / Applications: ‘Residual stress analysis of additive manufacturing of metallic parts using ultrasonic waves: State of the art review’. Feature image: Olympus.]Subscribe to Our Email Newsletter
Stay up-to-date on all the latest news from the 3D printing industry and receive information and offers from third party vendors.
Print Services
Upload your 3D Models and get them printed quickly and efficiently.
You May Also Like
Portsmouth Naval Shipyard Installs 3D Printed Part on In-Service Submarine in Key Milestone for US Defense Sector
I’ve been tracking the US Navy’s additive manufacturing (AM) buildup as it relates to submarines for a while now, and even amidst the AM efforts that all the branches have embarked...
University of Glasgow Researchers Develop 3D Printed Compostable Electronics
Recycling is one of those things that people support, but, for the most part, don’t actually do. If it sounds like I’m being judgmental, let me be the first to...
Continuum Powders Releases Two New Copper-Nickel 3D Printing Powders
The significance of critical minerals to global geopolitics is showing no sign of slowdown as we approach the new year; if anything, it looks like 2025 was just the very...
6K Additive Goes Public on ASX
After years of negative investor sentiment in public markets, the additive manufacturing (AM) industry has seen a modest resurgence in Initial Public Offering (IPO) interest in 2025. Back in August,...


