Loren Bradenburg Re-Introduces Age-old Technique of Friction Filling to Repair 3D Prints

 One of the most discouraging things that can happen while 3D printing an object, is that something goes wrong close to the end of the print. This may occur because of small pieces of filament getting stuck in places where they shouldn’t be, or for other unforeseen reasons. Time and time again I personally have had prints come off of my 3D printer with little holes, blemishes, or tears in them. This can be quite upsetting, especially when it occurs on an object that had been printing for several hours. Most of the time, I end up throwing these objects in the trash, wasting a large amount of filament, and having to spend another half day printing it out again.
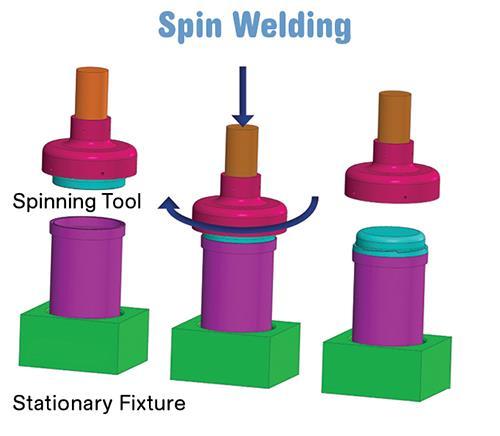
Traditional spin welder
A man named Loren Bradenburg has re-introduced a solution to this problem, and surprisingly it is not a new technique. The process is known as friction filling, and it has been around for quite some time. The premise is based on the fact that plastic has a relatively low melting temperature, a temperature easily obtainable with friction. If you can rub the plastic against an object fast enough, the friction will cause enough heat for that plastic to melt. This melted plastic (3D printer filament in this case) can then be used to fill in holes, gaps, and other blemishes on a 3D printed object.
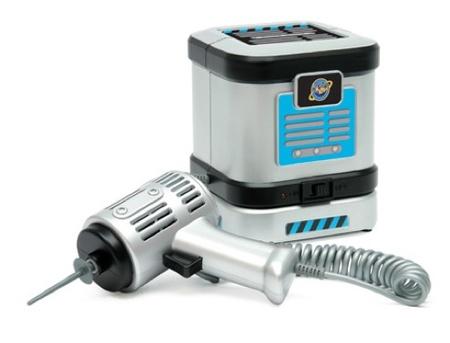
Back in the 1970’s a toy company, Mattel, sold what could be one of the most dangerous toys ever created, a “Spin Welder”, which was basically a plastic welding device. It allowed kids to construct things, fix toys, and take part in other interesting projects.
Luckily, in order to use this creative process, you don’t need to find an old 1970’s spin welder, as there are other tools available today that can work in its place. Any rotary tool, such a Dremel should work fine. All that is needed is a 3D printed object in need of filling, a Dremel (or other rotary tool), a 3/32 collet, and an inch or so of filament. The Dremel should be set to approximately 10,000 RPM, and then you are ready to go to work, filling and fixing your 3D printed object.
The piece of filament is put into the chuck at the end of the Dremel, with about 3/4 of an inch sticking out. Once ready, the Dremel can be turned on, and filling of a print can begin (as seen in the video above). When the Dremel is powered on, and the filament begins to spin, it will create enough friction when pressed up against the printed object, to make the plastic melt, thus attaching itself to the object.
What is really interesting about this technique, is that it can be done with any color filament, meaning that color, designs, names, etc can be added to 3D printed objects using this method. While this isn’t a revolutionary technique by any means, it is something that can be added to the repertoire of post processing methods for 3D printed objects.
Have you ever tried friction filling with your 3D prints? How did your results turn out? We’d love to hear about and see your results in the friction filling forum thread on 3DPB.com.
Subscribe to Our Email Newsletter
Stay up-to-date on all the latest news from the 3D printing industry and receive information and offers from third party vendors.
Print Services
Upload your 3D Models and get them printed quickly and efficiently.


You May Also Like
RAPID 2026 in Pictures: The Coolest & Craziest Things on the Show Floor
Last week, North America’s premier 3D printing trade show, RAPID+TCT 2026, came to Boston. I spent two days trekking the show floor, trying to see as much as I could,...
ExOne Cuts Costs for U.S. Customers as Printhead Production Moves to Detroit
ExOne Global Holdings, created through the 2025 integration of ExOne and voxeljet, is making changes across its U.S. operations. These include starting printhead manufacturing in the Detroit area and lowering...
Euler Viewer for Metal LPBF 3D Printing Released
Icelandic software startup Euler has released Euler Viewer, a real time build viewer for metal LPBF. The product does not need to be installed, and doesn’t require hardware to be...
3D Printing News Briefs, April 11, 2026: Energy Targets, DoW Contracts, Nike Air Max, & More
We’re starting with 3D printing for energy applications in this weekend’s 3D Printing News Briefs, and then moving on to military and defense 3D printing. Finally, Nike Sportswear is focusing...