One, Two, 3D Print Your Own Shoe–in Any Style You See Fit, from Sneakers to Sandals

 While 3D printing a pair of shoes might sound like a simple enough feat these days, the idea that the basic designer now has the tools to pull this off is something we’ve all been looking toward. The actual ability to 3D print a product like shoes is also notable–and exciting–on several levels.
One, shoes are a basic need in life, so being able to make a normal pair (as opposed to an outrageous one-off haute couture work of art to be seen on the runway) at home or in the workshop offers substantial self-sustainability we have not known previously. Two, digital design offers us the incredible capability to edit, tweak, and customize on a whim–or make a size change–meaning we can change the style according to mood–or go up in measurements as children grow, not to mention the fact that they can be included in style brainstorming. Lastly–but definitely not least–imagine the amounts of money that can be saved while we also get a better fit and hopefully better or equal quality as well.
This is exciting, but there’s one problem. Making your own 3D printed shoes might be possible, but it’s not easy. This is the latest news in from student designer and Instructables member iwillspy13, who has made several fairly complicated 3D printed projects (shown on his Instructables page) previously. Deciding to design and produce a 3D printed sneaker for his final project in a product design class ended up being quite the challenge, but he managed to pull it off, and he gives us guidelines on how to do the same.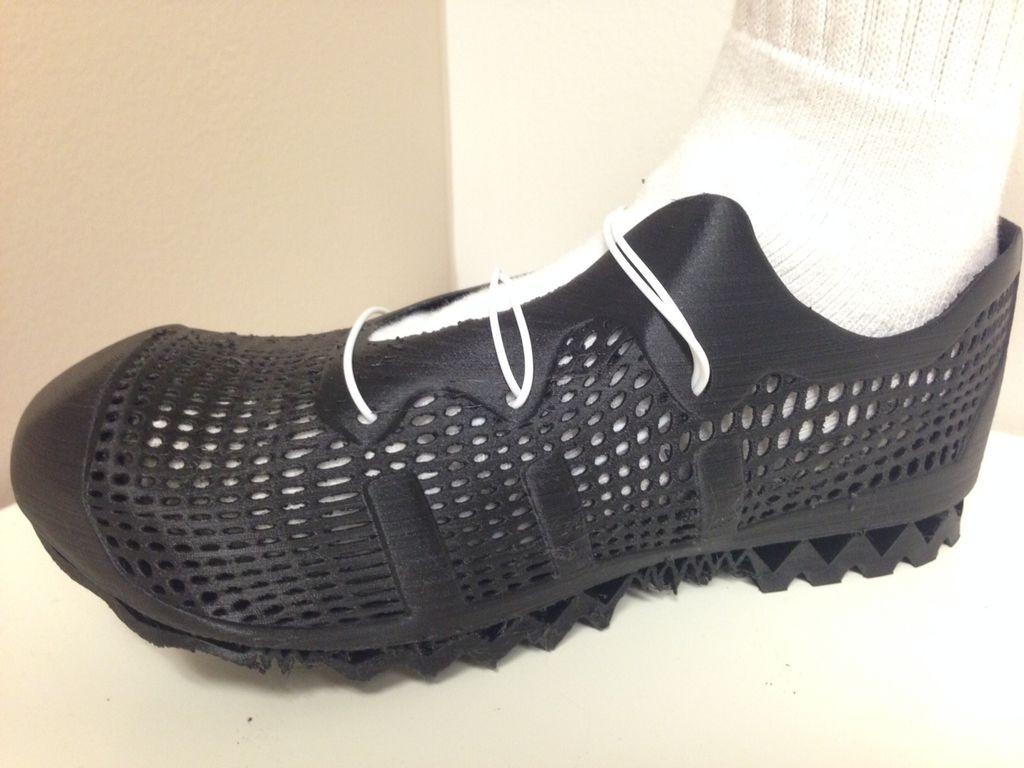
“…it took a long time and a lot of hard work. So this is not a weekend project, this will take you awhile,” said iwillspy13. “But the effort is totally worth it. The satisfaction you’ll get from creating something from nothing, and then being able to put that something to use is unparalleled.”
Note that iwillspy13 also entered his 3D printed shoes in the latest Instructables 3D Printing Contest, so if you appreciate this design, be sure to vote for it here.
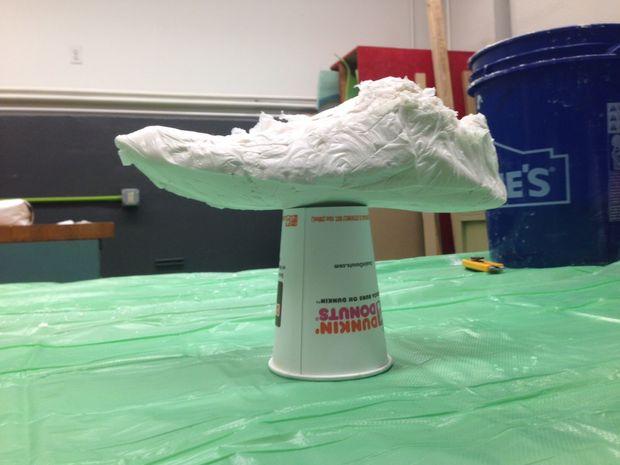
The first thing on your list to-do is to decide what style of shoe you want to 3D print. After that, you’ll need to produce a shoe of the same configuration (sneaker, sandal, etc.) to make a plaster ‘last’ form, which is basically a form for the shoe, representing the inner volume. To do this, you’ll need: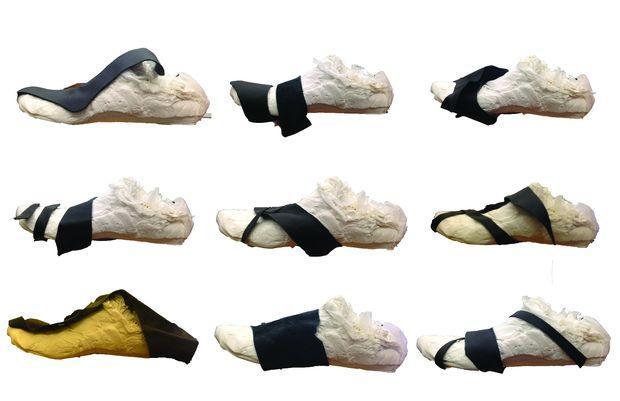
- An old shoe with similar design
- Plastic bag
- Plaster and all the materials necessary to make it
- Fabric strips
- Smartphone camera
- 3D modeling software (preferably 3DS Max)
- A 3D printer
You’ll want to follow the directions for (fun!) making the cast of the innards of your shoe and then allow it to dry. Be prepared upon attempting to remove the plaster that you might have to wiggle and even work to pry it out. After you have the plaster sample, it’s time to decide on your basic design, drawing some sketches before you get to the final point of going digital.
iwillspy13 used 123D Catch to import his design plan for a sneaker into digital form.
“To use this program, you take a bunch of pictures all around an object from three different heights, and plug them into the program,” said iwillspy13. “Then it will stitch all the pictures together and spit out a 3D model that we will then use to model our sneaker.”
 It’s recommended that you use the phone app to take several sets of photos–about 40 shots total–of the shoe from above, below, and at eye level; once finished, you can upload that to 3DS Max and then begin modeling. Here’s where things get a little tricky, and you will probably want to give yourself a lot of extra time for trial and error–not to mention reading iwillspy13’s Instructable thoroughly and learning from his mistakes and challenges. iwillspy13 decided to design the shoe in two pieces, which he reported as being difficult to work with, but ending up being successful in the end after great effort.
He based a lot of the design work in this phase from an Autodesk tutorial which he strongly suggests watching if you are making this design. You can also import iwillspy13’s file from Thingiverse, inspired by his favorite Adidas shoe.
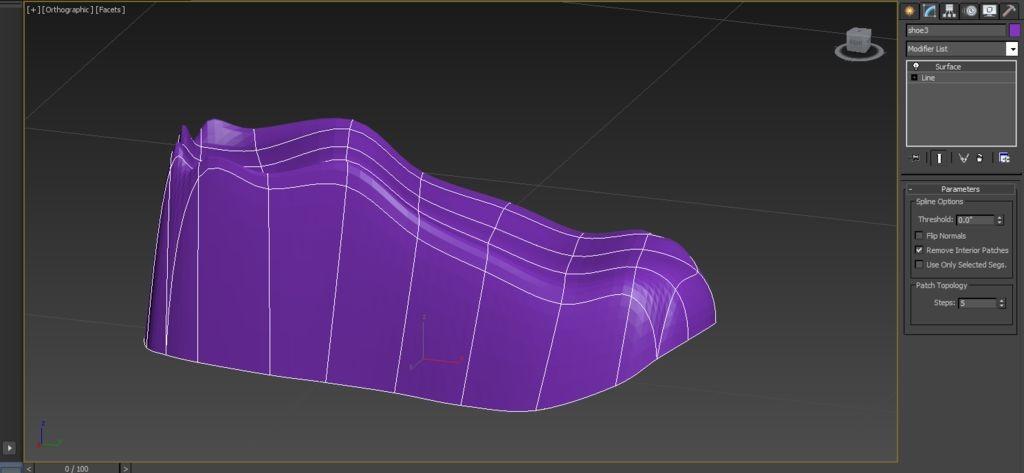
“Basically you use Refine and Connect to make a web of points and lines that can be the moved to create your desired shape,” said iwillspy13. “Now if you want your sole/treads to be attached to the main sneaker from the beginning it should be pretty simple to do.”
“I added a surface modifier and started moving points around to create the shape of my sneaker. You will need to edit the Bezier curves on some points to smooth out the surface of the shape. After that, it’s just tweaking the shape, adding an edit poly, manipulating polygons as needed (adding, subtracting, extruding, etc), and slapping on a mesh smooth.”
Encouraging every designer to use their own level of creativity for the project, iwillspy13 reiterates that he only gives guidelines, but he does do a clear job of walking you through the basic details in his Instructa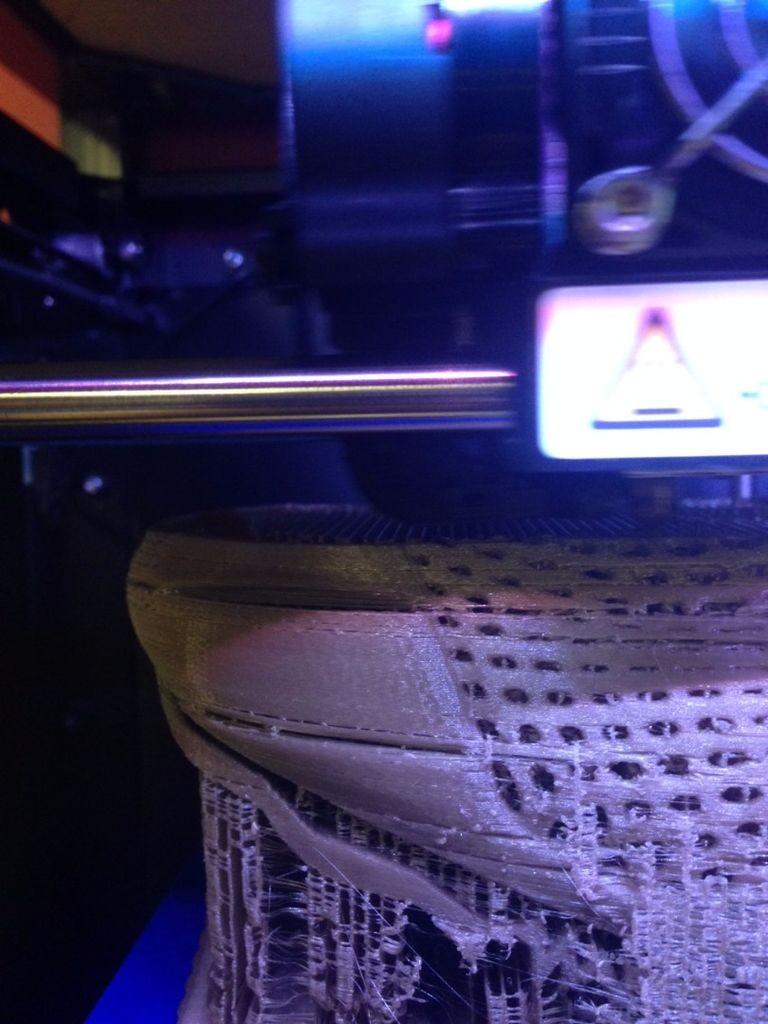 ble, and especially issuing the warning of how very, very important it is to make copies frequently while editing your design.
Once you’ve checked your file to verify that it’s good for 3D printing, you’ve got a major part of the complicated work out of the way. iwillspy13 used his MakerBot software and Replicator 2 to 3D print his pair of shoes, which required a great deal of support during the printing process. Checking your settings is very important here.
“You can check what the support material will look like by looking at the print preview. Also, change the orientation of your model to see what will give you the least amount of support material,” said iwillspy13. “Additionally, I highly endorse adding a raft to your print; it helps a lot with minimizing warping of your object.”
You’ll need to experiment with whether or not your model will fit on the build plate and with what orientation, as well as which material you want to use, with the recommendation to go with PLA while you do lots and lots of test prints.
Once you’ve finished your print, iwillspy13 encourages you to post pictures of your results and comments on the design project as well in his Instructables comments section. Is this a project you are interested in attempting? Discuss in the 3D Print Your Own Shoe forum thread over at 3DPB.com.

Subscribe to Our Email Newsletter
Stay up-to-date on all the latest news from the 3D printing industry and receive information and offers from third party vendors.
You May Also Like
Changing the Landscape: 1Print Co-Founder Adam Friedman on His Unique Approach to 3D Printed Construction
Additive construction (AC) is much more versatile than it seems, at first: as natural as it is to focus on the exciting prospect of automated home construction, there’s far more...
US Army Corps of Engineers’ Megan Kreiger on the State of Construction 3D Printing
Despite last year’s gloomy reports about the financial state of the additive manufacturing (AM) industry, there’s no doubt that we’re actually witnessing the birth of a sector rather than its...
3D Printing Webinar and Event Roundup: April 21, 2024
It’s another busy week of webinars and events, starting with Hannover Messe in Germany and continuing with Metalcasting Congress, Chinaplas, TechBlick’s Innovation Festival, and more. Stratasys continues its advanced training...
Profiling a Construction 3D Printing Pioneer: US Army Corps of Engineers’ Megan Kreiger
The world of construction 3D printing is still so new that the true experts can probably be counted on two hands. Among them is Megan Kreiger, Portfolio Manager of Additive...