“2.5D Printing” — Block Printing With a 3D Printer


 Long before Gutenberg made his historical contribution with the printing press back in 1440, the Chinese were making prints. As early as the 5th century CE, Chinese artisans created woodblock prints, primarily for producing colorful fabrics. Fast forward to further developments in printmaking, whether for artistic or commercial purposes or for getting the word out via printed text, and consider just how far we’ve come. We’re printing in three dimensions!
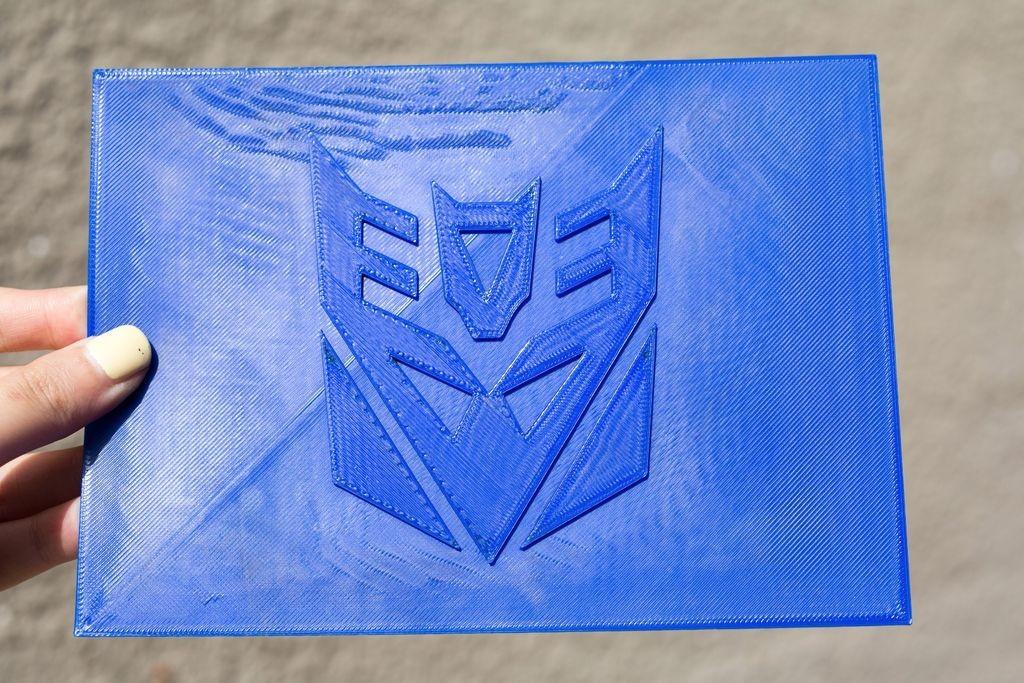
Rather than technological advancements rendering old methods of printing and printmaking obsolete, however, creative and innovative people like a recent Instructables contributor who goes by the pseudonym, Wanjun, has shared the results of a recent project: 3D printing block plates for traditional 2D printing. The process is something like printing using a prepared wood or linoleum block. However, instead you create your plate digitally using vector and 3D design programs and then print the plate using a conventional printing press. Wanjun refers to the technique as “2.5D printing,” which pretty accurately describes the sort of between-two-printing-processes method.
While it sounds like a real time-saving method compared to the painstaking process of carving a lino or wood block, there is a caveat: You need to be able to create a digital version of your art and then a 3D model of the plate, so there is a learning curve whether you use the 3D printing route for making a plate or the old-fashioned method of carving. It all depends upon which skills you prefer to hone, but should you elect to give this project a try, there are a number of materials and supplies you will need in addition to digital design skills.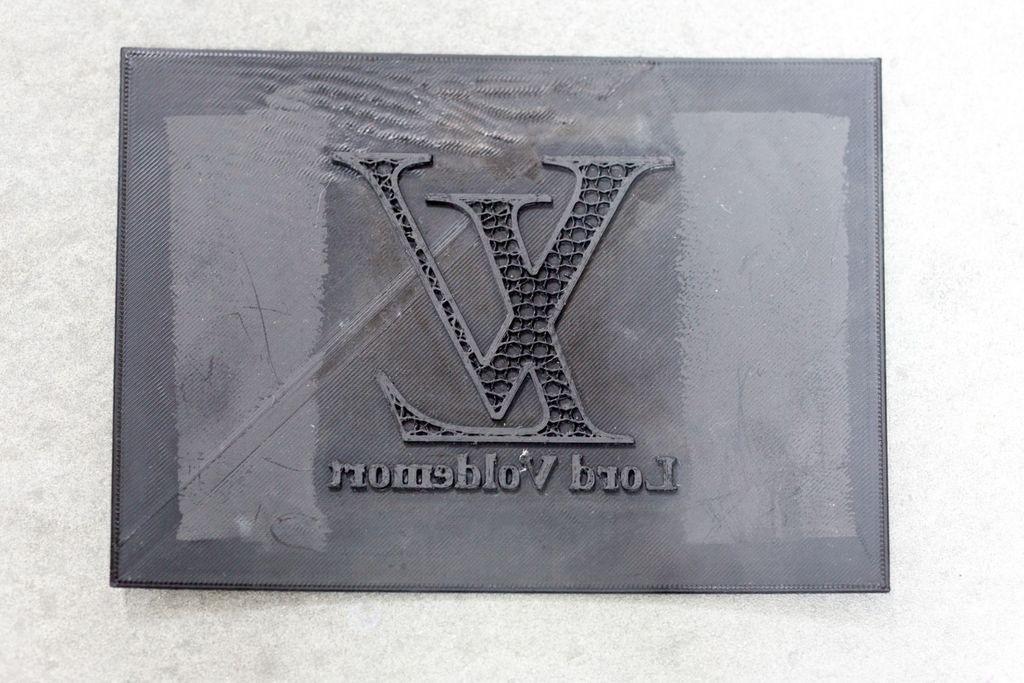
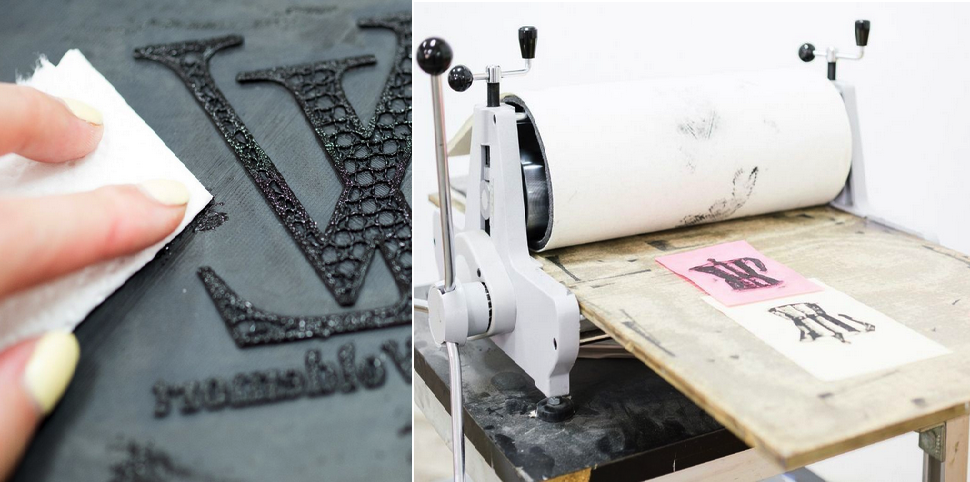
The two major tools you’ll need for this project are: 1) A 3D printer, and 2) A printing press. As for the first, you can always use a web-based 3D printing service like Shapeways, where you’ll upload your finished designs, order your print, and continue with the project once you’ve received your print (or prints) in the mail. As for big item #2, you can use a print press at an area art school or local arts center, or you can print without using a press at all. Generally speaking, this is done by using some kind of burnishing tool to get a firm impression of the inked plate onto the paper. Check Youtube.com for how-to videos–there are plenty of them out there.
As for other supplies (besides 3D printing filament, which doesn’t apply if you’re ordering your prints online), you’ll need some basic printmaking tools and materials, including a brayer (a kind of roller for putting down ink), some plexiglass for getting the brayer inked, a small paintbrush (if you’re printing on fabric), block printing ink (Speedball water-based ink is recommended if you’re printing on paper; they also have oil-based inks for fabric prints), paper (printmaking or watercolor paper is best; note that the kind of paper you use will dramatically affect the quality of the print). See the Instructables page for additional, inexpensive materials.
As for the digital part of this project, you’ll be using Adobe Illustrator to generate your design. If you’d prefer, you can also use Inkscape, the free version of Illustrator. TinkerCad can then be used for for 3D modeling as it’s fairly easy to learn and free to use, although you do need to register for an account. If you’re already an experienced 3D modeler, then use whatever software you prefer.
Finally, you’ll need slicer software for your 3D printer–check out Slic3r or Simplify3D or Cura. For detailed instructions on completing the digital steps in this project, see the step-by-step ones provided on the Instructables page. Note that when you’re 3D printing your blocks, you should use a light-colored filament so that you can see whether the ink has properly covered the portions on the block that you wish to print onto the paper.
As noted above, one of the best things about this project is that you don’t have to know how to carve a wood or linoleum block to create impressive, handmade prints. If you have to learn to use the digital tools to create these high-tech print blocks, then you’re acquiring some seriously marketable new skills. Best of all, this project ingeniously combines the oldest printing methods with the newest, yet it isn’t merely about nostalgia, or about holding onto a rapidly vanishing past art form. Rather, it’s (in my mind, anyway) about applying state-of-the-art technology to an established process and seeing what happens!
Let us know if you decide to take this project on. Show us your results in the 2.5D Printing forum thread on 3DPB.com.
Subscribe to Our Email Newsletter
Stay up-to-date on all the latest news from the 3D printing industry and receive information and offers from third party vendors.
Print Services
Upload your 3D Models and get them printed quickly and efficiently.


You May Also Like
3D Printing News Briefs, June 20, 2026: Holograms, Insoles, & Prosthetics
We’re focused on volumetric 3D printing, 3D printed insoles, and 3D printed prosthetics in this weekend’s 3D Printing News Briefs. Read on for all the details! Researchers Using Holograms to...
3D Printing News Briefs, June 18, 2026: Reseller, Relocation, Metal Space Powder, & More
We’ll start with business news in today’s 3D Printing News Briefs, as XJet appointed a value-added reseller in Germany, BIO INX is expanding its presence in the Italian market, and...
Fabri Raises $13.5 Million to Create Digital Foundry
Fabri is a startup that wants to create a “digital foundry,” and just raised some funds to help it reach this goal. There are far too few foundries in America....
Scientists Use BMF to 3D Print Seal Whiskers That Track Prey Long After It’s Gone
Seals use their whiskers to hunt. Not Navy Seals, although they may in some way also, but this article is about lowercase seals. Not Seal the musician either; as far...