Researchers Put 3D Printing Quality Under the Microscope, Analyzing Structure & Production Evolution
 Like a high speed train on an infinite course, the industry as well as the evolution taking place within 3D printing is full of dynamic energy and innovation we never imagined previously, with one idea topping the next. Just the 3D products we’ve seen this year, covering the gamut of sectors from automotive to art, have been nothing short of eye opening.
And now, scientists are taking the eye-opening process a lot farther–and quite literally–as they employ microscopy and all it entails in regards to the tiniest details imaginable in the 3D printing world. Using their fine-tuned instruments that have been developed over many generations, researchers from Carl Zeiss Microscopy GmbH are studying 3D printing and working to help this relativey new environment develop further and with greater quality.
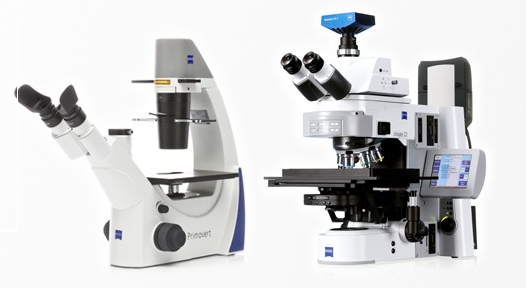 To the naked eye, while some 3D printed objects are a curiosity and some innovations are just completely above our heads, the majority illicit a range of admiration with many ooohs and aaahs thrown in. Not so fast though, say the researchers from Carl Zeiss. According to them, we have a lot of work to do in the areas of improving accuracy, creating better surface quality, and making tools that have better design and structure.
As experts in their field, the researchers from Carl Zeiss are using microscopy to evaluate and take an extreme close-up regarding how 3D printing can be analyzed–and improved–especially in terms of 3D printing with ceramics, alloys, and metal powders. Different microscopes need to be used to look at each aspect of the technology, and that’s no problem since Carl Zeiss Microscopy–named for and founded in the mid-1800s by microscope maker Carl Zeiss–has a wide range of instruments on hand, from standard microscopes to those that are extremely specialized for many different research and industry uses.
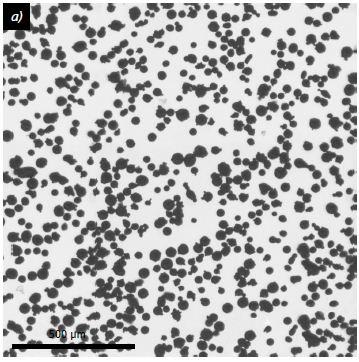
Using a light microscope, the Axio Zoom.V16, the researchers are able to magnify particles and examine their quality in 3D printing. For powder morphology and examining both shape and masses that affect flow, electron microscopes capable of scanning are employed. Using such tools, we can see the quality–or lack thereof–in such 3D printing examples as those using steel powder. The act of powder characterization allows for manufactures to pinpoint and improve on defects.
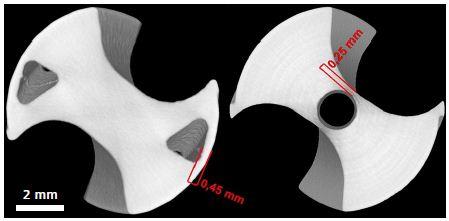
CT imaging, already used as a tool in both digital design and the ultimate creation of 3D printing, can actually also be used as a great tool for studying the outcomes of the technology itself, especially as it is able to explore the quality of structures. What the researchers at Carl Zeiss have found is that in 3D printing, creating more complex geometries to include inner networks with better cooling structures would be an improvement. With the CT, all of these structures can be explored in terms of measurements, thickness, and cross-sections. It’s obvious that upon examination and improvement, better quality is achieved overall.
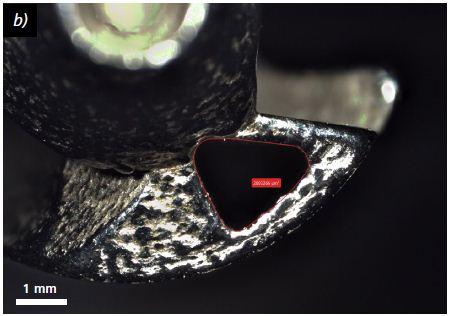
Upon stating that ‘dimensional accuracy’ is something that must be studied and improved further, the researchers used their Smartzoom 5 to take an intense look at a 3D printed cutting insert as an example. With the microscope they could analyze its geometry, as well as the quality of its cooling channels.
Not only can the microscope shed light on the quality of 3D printed models, it can also help tell the history of what added to or detracted from the quality and changing structure of the print during production. Researchers used the Axio Imager.Z2m light microscope to examine density, porosity, distribution, and size of pores, and for ‘quantitative characteristic’ examination, they used AxioVision Rel 9.1 software.
In the production of high-quality components, quality checks and assurance are a key point on the checklist before 3D printed parts are used, installed, or shipped to customers. Because some items are produced for sectors that involve safety risk within industries like aerospace and the automotive industries, take an extreme close-up is obviously a necessary precaution–and what better way to do it is there than putting the product under a microscope? It’s for certain that as 3D printing takes over further, quality assurance procedures will become much more intensive.
What are your thoughts on examining 3D printed products more closely with the use of microscopy? Do you think this could be applied to and helpful with any of your own 3D printed projects? Discuss in the 3D Printing Quality Under the Microscope forum thread over at 3DPB.com.
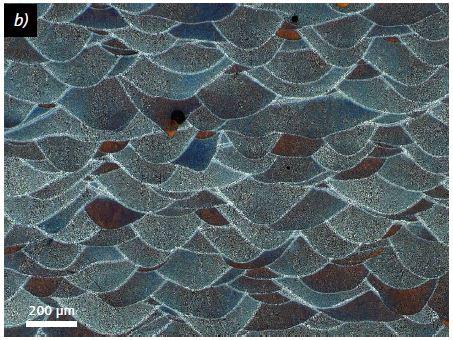
White lines are used to illustrate laser tracks and layer construction overall during 3D printing process
Subscribe to Our Email Newsletter
Stay up-to-date on all the latest news from the 3D printing industry and receive information and offers from third party vendors.
You May Also Like
Gorilla Sports GE’s First 3D Printed Titanium Cast
How do you help a gorilla with a broken arm? Sounds like the start of a bad joke a zookeeper might tell, but it’s an actual dilemma recently faced by...
Nylon 3D Printed Parts Made More Functional with Coatings & Colors
Parts 3D printed from polyamide (PA, Nylon) 12 using powder bed fusion (PBF) are a mainstay in the additive manufacturing (AM) industry. While post-finishing processes have improved the porosity of...
$25M to Back Sintavia’s Largest Expansion of Metal 3D Printing Capacity Since 2019
Sintavia, the digital manufacturing company specializing in mission-critical parts for strategic sectors, announced a $25 million investment to increase its production capacity, the largest expansion to its operations since 2019....
Velo3D Initiates Public Offering in a Bid to Strengthen Financial Foundations and Drive Future Growth
Velo3D (NYSE: VLD) has been among a number of publicly traded 3D printing firms that have attempted to weather the current macroeconomic climate. After posting a challenging financial report for 2023,...


