Adafruit Creates Small but Powerful 3D Printed Raspberry Pi-based Home Computer

Buying a computer used to be something you had to plan and save money for, at least if you wanted one that would last for a while and have the capacity to function beyond being a word processor or a tool for checking email and doing internet searches. Now you can set yourself up with a powerful computer that will also keep you in the loop. That is, you will learn how the device actually works when you set it up and 3D print some of its components!
Adafruit, our favorite purveyor of electronics tools, equipment, and know-how, recently shared instructions and a tools and supplies list for creating your own powerful little Raspberry Pi-based computer for about $225 (not including the 3D printer or printing cost) from the prolific Ruiz Brothers, who have created some incredibly impressive projects. They shared the project on Thingiverse and on an Adafruit Learning System blog.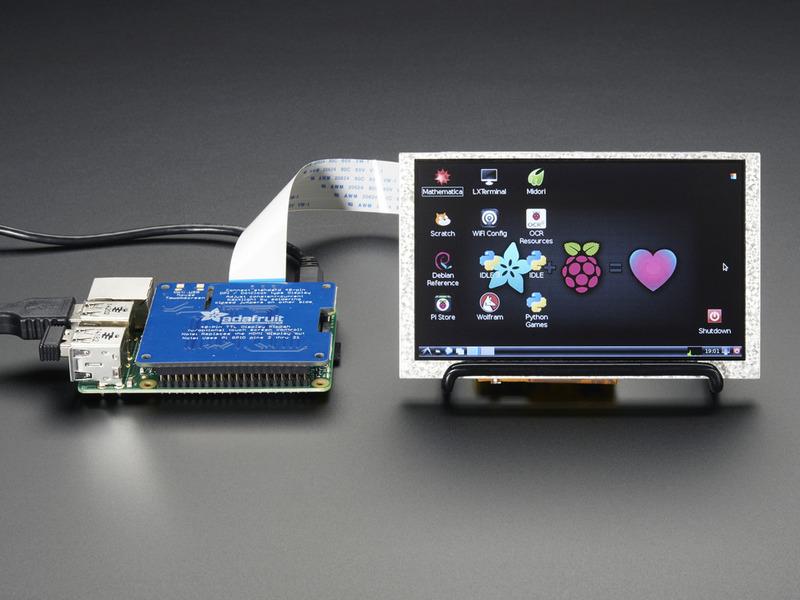
Raspberry Pi is an inexpensive (about $30), mini (credit card size) computer. It can plug into a computer monitor or a television. You use a standard keyboard and mouse with it. It can do most everything a desktop computer can do, from playing high-def video, word processing, gaming, and surfing the web. It has the capacity to, as its makers explain, “interact with the outside world,” with almost limitless applications like weather stations in remote areas, digital maker projects, and even “tweeting” birdhouses. One of the best things about Raspberry Pi is that it can be used to learn programming, which–it probably goes without saying–is a tremendously useful skill for anyone.
There’s even a Raspberry Pi Foundation, thanks to Adafruit, its maker. The goal of the foundation is to foster computer literacy and children and adults. Adafruit was founded by a graduate of MIT, Limor “Ladyada” Fried, who was determined to create an online community to promote learning in electronics and computing. The company now has over 50 employees, a 15,000 sq. foot factory in New York City, and offers tools, equipment, and electronics. Think Raspberry Pi, Arduino.
This DIY project involves, in essence, putting together a Raspberry Pi with a power source, a display, and even built-in audio (optional but surely desired). The entire process is fairly simple but it does involve some programming and some wiring. Have courage, however! The Ruiz Brothers provide a handy, helpful guide, and the folks at Adafruit are more than happy to assist you as is the maker community of Thingiverse. At worst, you’ll make some new friends while you’re learning some invaluable new skills and you get a new computer out of the deal!
As for the 3D printing portion of the project, the 3D printed enclosure for your Raspberry Pi-based computer was designed specifically to fit the components on the Adafruit list and will not fit on the smaller print beds (as with, for instance, the PrintrBot Simple). A 3D printer with a build area of 100 x 168 x 30 mm or more is required for this project. However, if you can’t spring for your own machine at the moment, take heart! You can always use a web-based 3D printing service like Shapeways or find a local 3D printer via MakeXYZ or 3D Hubs.
If you’ve been eager to make the leap into the maker universe, this really is the project that combines all of the best elements, from programming and computing to electronics and 3D printing–it’s DIY alchemy and it’s affordable!
The Ruiz Brothers keep the parts and tools lists relatively straightforward, noting that you’ll need:
Parts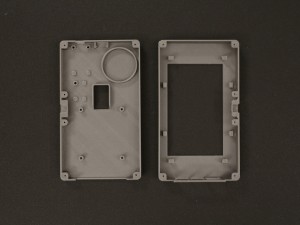
- Adafruit DPI Display Kippah
- Raspberry Pi 2
- Raspberry Pi B+
- 5″ TFT display 40-pin
- PowerBoost 100C
- PAM8302 Amplifier
- Thin plastic speaker
- 2500mAh lithium polymer battery
- Slide switch
- Right-angle 3.5mm stereo plug to pigtail cable
Tools & Supplies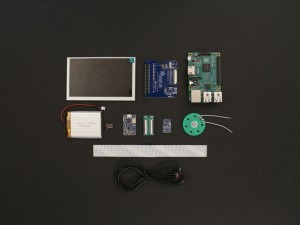
- 3D Printer
- Filament
- Wire Strippers/Cutters
- 30/26AWG silicone-coatedstranded wire
- Soldering Iron
- Solder
- Helping-third hands
- Panavise Jr.
- 6 #2-56 3/8 flat Phillips machine screws
- 8 #4-40 3/8 flat Phillips machine screws
- 1/4″ to 3/8″ screw adapter for Tripods
With some circuitry, programming, 3D printing, and a bit of assembly, this project will come together to present a fully functional little device that packs a lot of punch.
Subscribe to Our Email Newsletter
Stay up-to-date on all the latest news from the 3D printing industry and receive information and offers from third party vendors.
You May Also Like
3D Printing Financials: Fathom Struggles in Financial Quicksand During Critical Transition
Facing a year of key transitions and financial pressures, Fathom (Nasdaq: FTHM) has filed its annual report for 2023 with the U.S. Securities and Exchange Commission (SEC). The document outlines...
Latest Earnings Overview for Australian 3D Printing Firms Titomic and AML3D
Australian 3D printing manufacturing firms Titomic (ASX: TTT) and AML3D (ASX: AL3) reported their financial results for the period from July to December 2023, marking the first half of their...
3D Printing Webinar and Event Roundup: April 7, 2024
Webinars and events in the 3D printing industry are picking back up this week! Sea-Air-Space is coming to Maryland, and SAE International is sponsoring a 3D Systems webinar about 3D...
3D Printing Financials: Unpacking Farsoon and BLT’s 2023 Performance
In the Chinese 3D printing industry, two companies, Farsoon (SHA: 688433) and Bright Laser Technologies, or BLT (SHA: 688333), have recently unveiled their full-year earnings for 2023. Farsoon reported increases...