

Finnish Maker Designs 3D Printed Internet Radio


Miska Karvonen is one of those makers who would be happiest just making and tinkering for a living. In a sense, he’s already doing that very thing. He regularly posts projects he’s completed on Instructables and tries to streamline them so that they’re both affordable and as easy to make as possible (like his previously featured MiniNES). Also, 24-year-old Karvonen, who lives in Oulu, Finland, is an engineering student, so there’s a pretty good chance he’s going to steer his career in a rewarding direction that’s relevant to his current work.
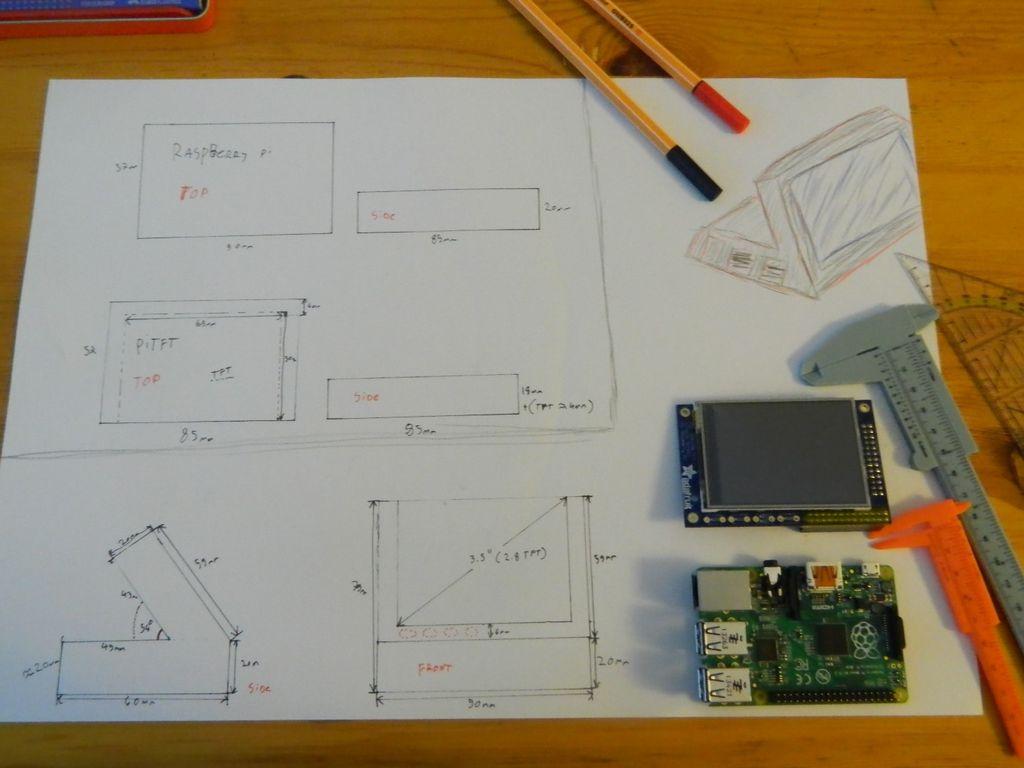
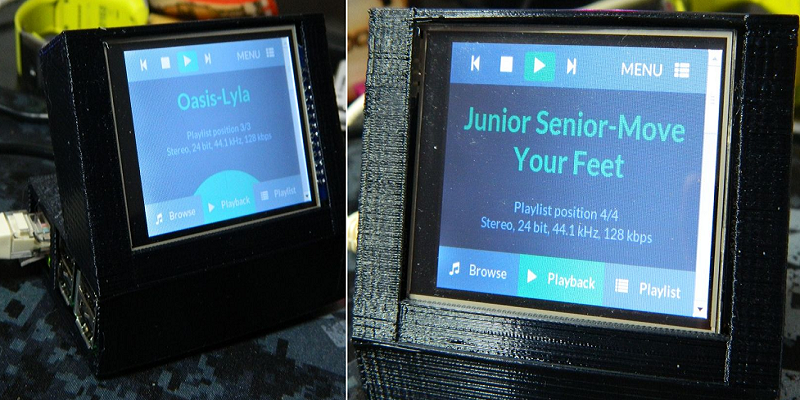
Karvonen, a regular contributor to Instructables, makes practical things using the latest technology. His latest project is a 2.8” touchscreen Internet Radio. It can be controlled with a PC, a smartphone, or any device with a browser and an internet connection. He used a Raspberry Pi (noting that basically any from the first generation will work for this project), an Adafruit PiTFT touch screen, and a cable to connect the two. He 3D printed the box that holds the electronic components using his PrintrBot 3D printer, which he assembled himself from a PrintrBot Makers Kit (the kits are currently on backorder but regularly cost around $350). They’re great little machines–kind of a starter 3D printer with a build volume of 4” x 4” x 4”. That sounds limiting but remember that you can print objects in pieces, including 3D printing something like Karvonen’s great internet radio (the box, anyway).
Karvonen designed the case for the radio using SketchUp, which is pretty user friendly–and it’s free! He’s a college student and the father of a 3-year-old, so Karvonen is asking those who download the ready-to-print model to contribute $1, which isn’t much!
Printing time is about 2.5 hours or less. The layer height should be 0.2mm and the speed 50mm/s. Karvonen used a 0.4mm nozzle. Note that if you don’t own a 3D printer yet, you can always use one of the web-based 3D printing services like Shapeways or i.materialise, or you can find a home 3D printer nearby who can do the job for you by connecting via 3D Hubs with the button right on Instructables.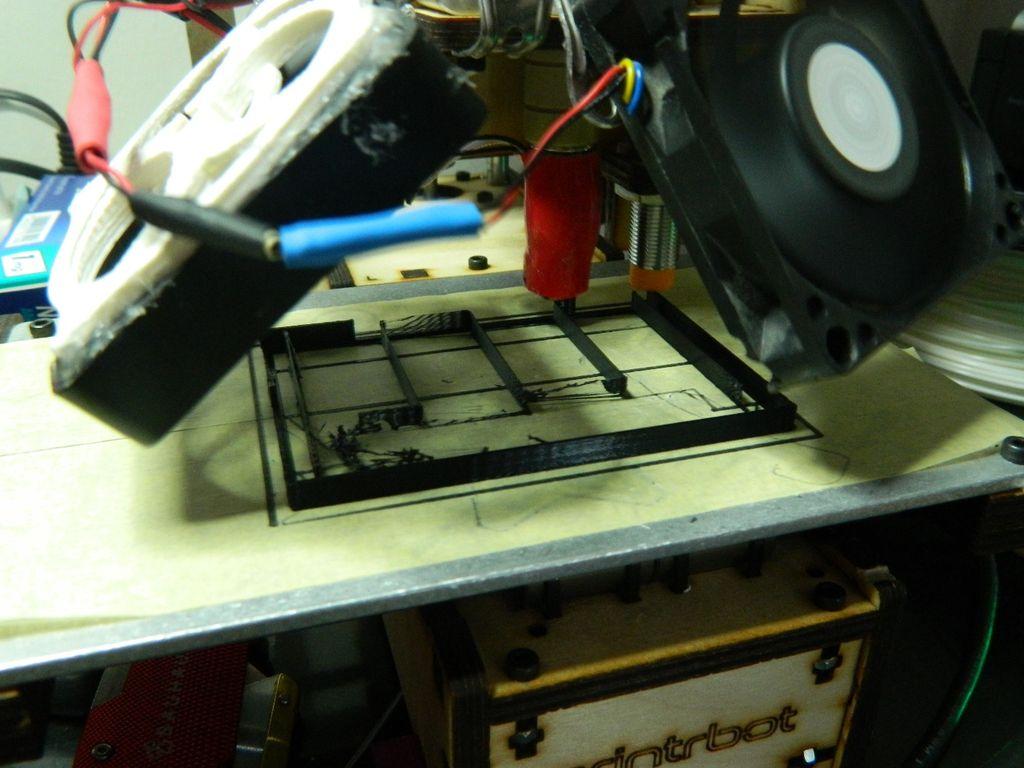
Once the box for the electronics is 3D printed, you’ll be installing the touch screen. Don’t forget that, as you’re connected the electronics, be sure you fold the cable properly into the case. You can also include buttons under the screen. Karvonen designed spaces for them in the box but didn’t have any on hand that were suitable for his own internet radio.
Some basic programming and installation of the drivers is involved to get the screen up and running. Karvonen provides instructions and advice on how to complete these steps to get the radio up and running.
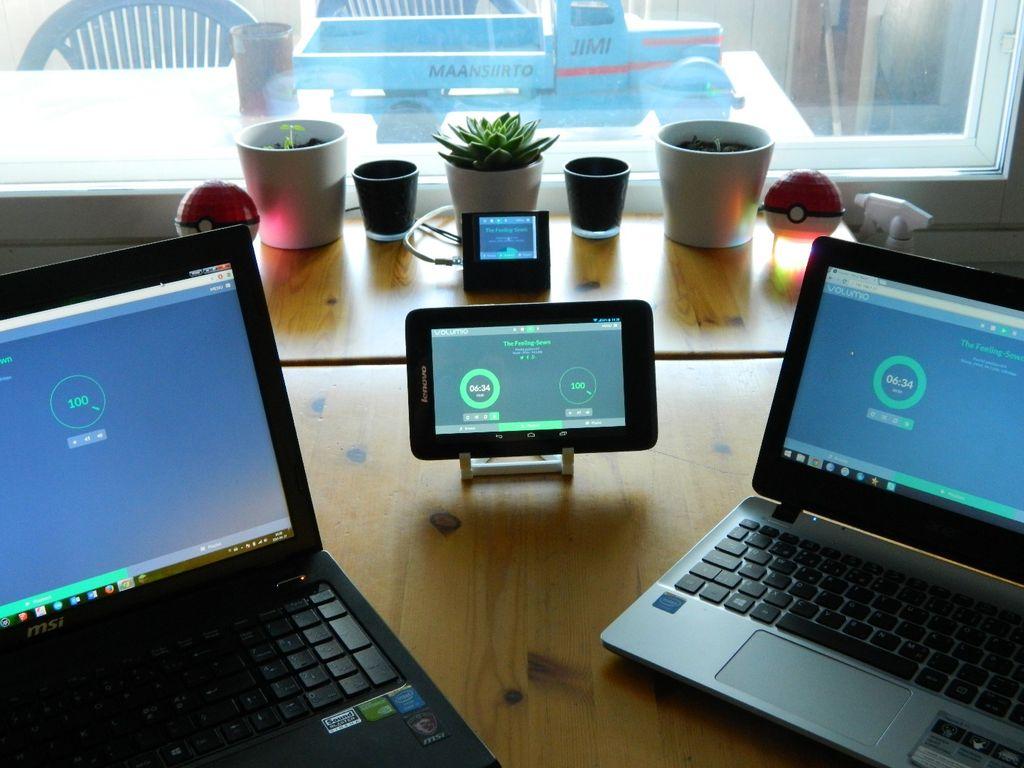
Note that he used Volumio, an operating system for embedded computers. If you install it on a supported device, it will become an Audiophile Music Player. Note that you must use the 1.41 version of Volumio to make the TFT screen work. The last thing you’ll need is some speakers and you’ll be able to control your internet radio from any internet-connected device with a browser. Happy making, tinkering, and listening!
Is this handy radio project one you’ll try to widen your collection of music players? Let us know how it goes for you in the 3D Printed Internet Radio forum thread over at 3DPB.com.

Subscribe to Our Email Newsletter
Stay up-to-date on all the latest news from the 3D printing industry and receive information and offers from third party vendors.
Print Services
Upload your 3D Models and get them printed quickly and efficiently.


You May Also Like
Q5D and Molrix To Supply US Army With Harness Robots
Q5D Technologies and Molrix will offer their advanced harness production manufacturing units to the US Army. One production cell will be used for the SkyFoundry project, while two further systems...
Excellent Desktop Injection Molding, Made in Italy by Robot Factory
I was captivated when I saw my first Robot Factory 3D printer. The robust, precise machine was built to last. And this was in an era of very flimsy, disposable,...
RAPID 2026: 6K Additive’s Domestic Metal Powders & Consolidation Plan
6K Additive (ASX: 6KA), a U.S. supplier and manufacturer of metal powders for additive manufacturing (AM), has been very busy lately. I caught up with CEO Frank Roberts and Chief...
Walking into the Future: 3D Printed Footwear Moves Closer to the Mainstream
Footwear is quickly becoming one of the most active and promising applications for additive manufacturing (AM). What once seemed experimental—midsoles and concept shoes—is now expanding into full products, new materials,...


