His Name is Awesometron and He Came Here to Party, 3D Printed Style

3D printing has certainly come a long way in the last decade. When makers first started tinkering around with 3D printers, the idea of making a 24″ tall model on an FDM printer with a 7″ build volume would have been hard to believe. Especially a model that you wouldn’t even be able to tell was 3D printed unless someone told you.
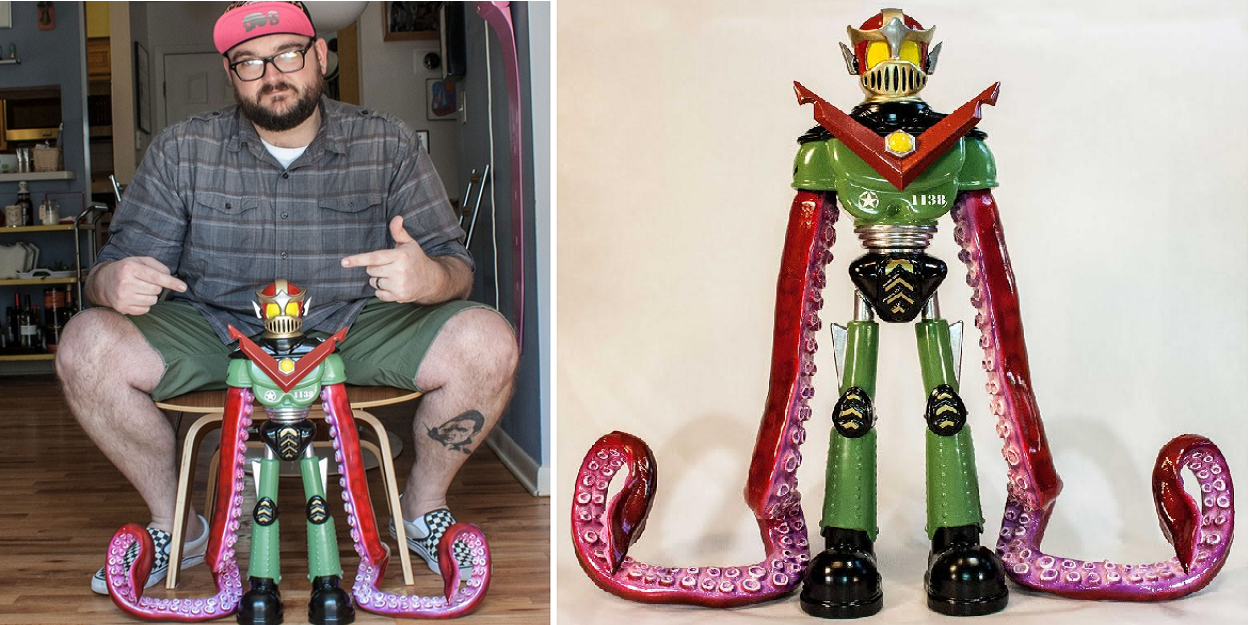
Instructables user and custom toy designer Brutherford (aka Ryan Rutherford) posted a great new project showing how to turn regular-sized models into massive builds, even with a small printer bed. By combining some good old fashioned clever design work and some of the new post processing techniques that are just starting to become available, Awesometron was born.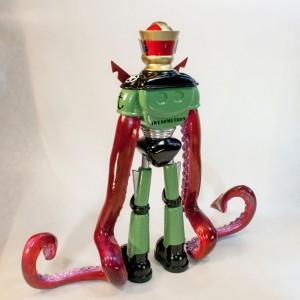
Rutherford’s Awesometron robot (with tentacles for arms, because why not) started as a drawing that he had made almost a decade ago. After seeing an XYZ Da Vinci 1.0 on sale he decided to bring a new 3D printer into his home and turn his Awesometron drawing into a cool, but standard 7″ sized 3D model. But when an opportunity to enter one of his designs into a custom toy show came up suddenly he decided to see if he could show off and make a huge 2-foot-tall version.
“I have been working in 3D software since around 2001 and have been using rapid prototyping equipment for nearly as long. Throughout my career i have owned and had access to some of the highest end 3D printing technologies, but this whole project came out of a machine that I bought off the shelf at a local store for $400 and that kind of blows my mind,” Rutherford explained.
The original model based off of his drawing was made in Solidworks and the tentacles modelled in ZBrush, so blowing it up to 24 inches wasn’t difficult. But he had to print the parts out on a printer with a pretty small build volume. So he chopped up the model into smaller parts, added in some bosses and pockets to help the parts line up, and he would use steel pins and epoxy to hold Awesometron’s parts together.
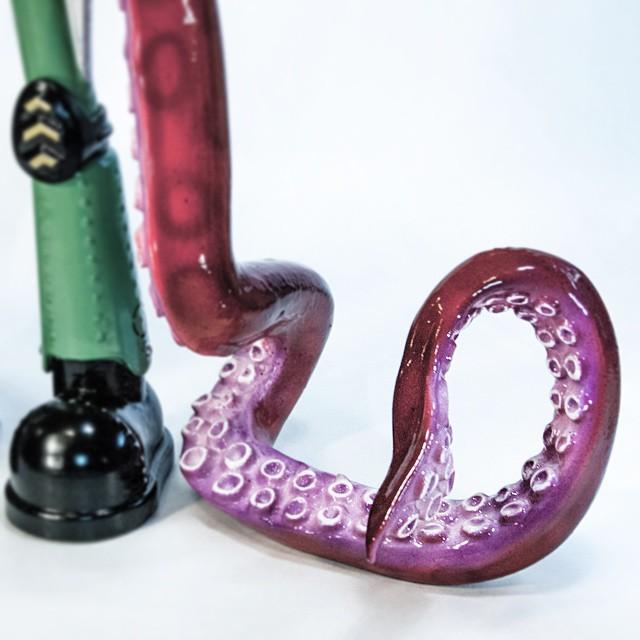
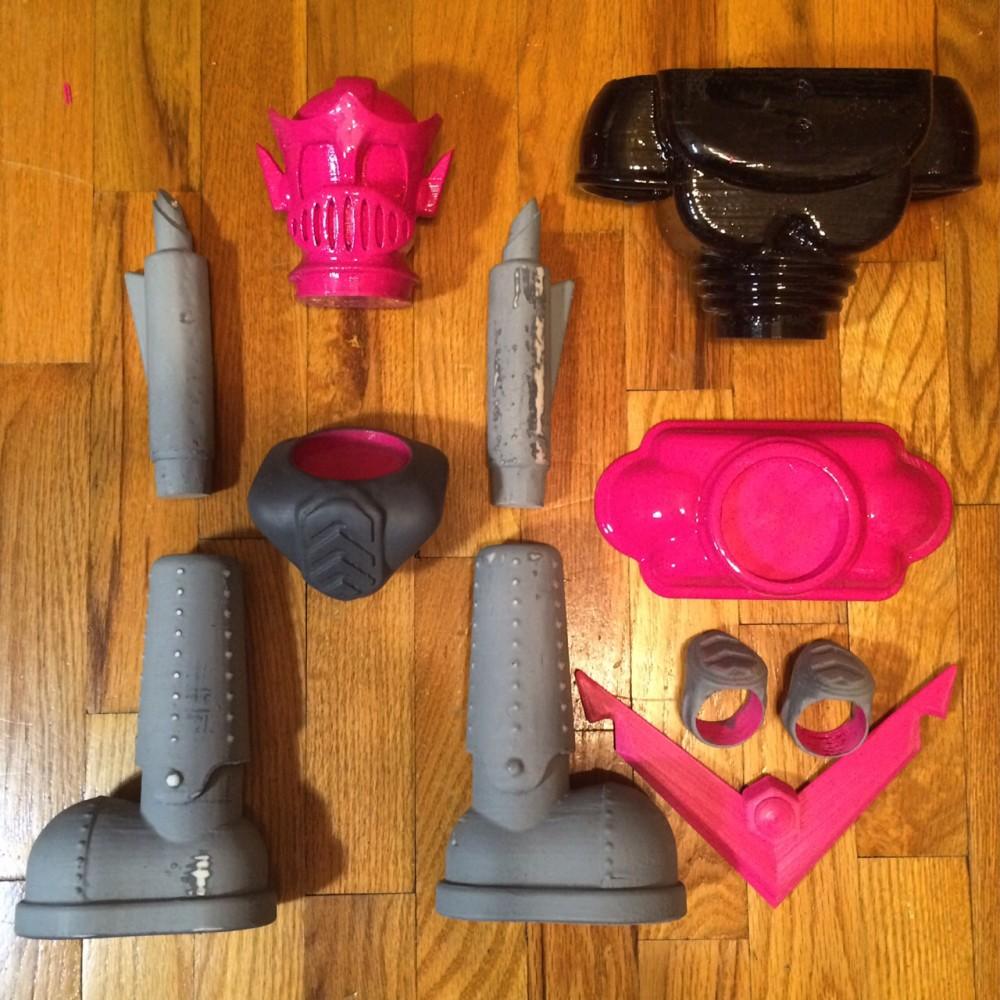 After 14 different print jobs and a total of 250 hours of printing, Rutherford had 19 individual parts that needed to be smoothed out, assembled, and painted. He first applied two coats of XTC-3D from Smooth-On to all of the parts to eliminate the striation and any small gaps in the joints. The tentacles were a little trickier, as they were more organic and any gaps and imperfections would be more obvious. He circumvented this by using bondo to fill in the gaps at the joints, and then sanded them until they were smooth enough to be hidden by the XTC-3D.
After that Awesometron just needed his awesome paint job, which was done with a combination of Rustoleum and Krylon spray paints and detailed with Testors acrylic airbrush paints. He also added some details using vinyl decals that he designed in Photoshop.
While this project sounds like it would be something that only an expert could manage, up until this point Rutherford had never used ZBrush, a XYZ Da Vinci 1.0 3D printer, the XTC-3D, or the Testers airbrush paint. I would say Awesometron is a pretty great result for a bunch of first-time experimentations.
Have you used any of the products and programs that Rutherford used to create Awesometron? And what do you think of his final result? Let us know your thoughts over on the Awesometron Party forum thread over at 3DPB.com.
Subscribe to Our Email Newsletter
Stay up-to-date on all the latest news from the 3D printing industry and receive information and offers from third party vendors.
Print Services
Upload your 3D Models and get them printed quickly and efficiently.


You May Also Like
The Dental Additive Manufacturing Market Could Nearly Double by 2033, According to AM Research
According to an AM Research report from 2024, the medical device industry, specifically in dentistry, prosthetics, and audiology, is expected to see significant growth as these segments continue to benefit from...
Heating Up: 3D Systems’ Scott Green Discusses 3D Printing’s Potential in the Data Center Industry
The relentless rise of NVIDIA, the steadily increasing pledges of major private and public investments in national infrastructure projects around the world, and the general cultural obsession with AI have...
AM Research Webinar Explores Continuum’s Sustainable Metal Additive Manufacturing Powders
Metal additive manufacturing (AM) powder supplier Continuum Powders is working to develop solutions that empower industries to reduce waste and optimize their resources. An independent life cycle assessment (LCA) of...
3D Printed Footwear Startup Koobz Lands $7.2M in Seed Round
California-based Koobz is focused on reshoring the U.S. footwear supply chain with advanced manufacturing processes, including 3D printing. The startup just announced that it has added $6 million to its...