TestrBot: 3D Print Your Own Machine to Test 3D Printed Part Strength—and More—for $300

The world of 3D printing, as well as marketing of items and products, currently still has a great deal of latitude on virtually every level because it is still such a new industry. From issues like copyrighting and legalities, to honesty in advertising versus reality, there is the usual gamut of concerns ready to emerge in one big buzzkill. Along with these issues that accompany a novel technology steadily going mainstream comes the matter of testing products. How does a normal person test their own—or another—3D printed product, accurately?
 Michael Graham (MechEngineerMike), of Engineer Dog, sharing his Instructables project for TestrBot, has not only designed a tester for 3D printed products and materials, but he’s 3D printed nearly the entire TestrBot machine, which is of course, self-replicating. So, time to get testy and get your friends going with their own TestrBots too, after you print them off the materials to make their own.
“3D printing is still new enough that there are many questions that do not yet have definitive answers,” says Michael. “While the basic physical properties of raw ABS & PLA have been well established, there are still many esoteric material properties that cannot be determined without doing actual mechanical testing.”
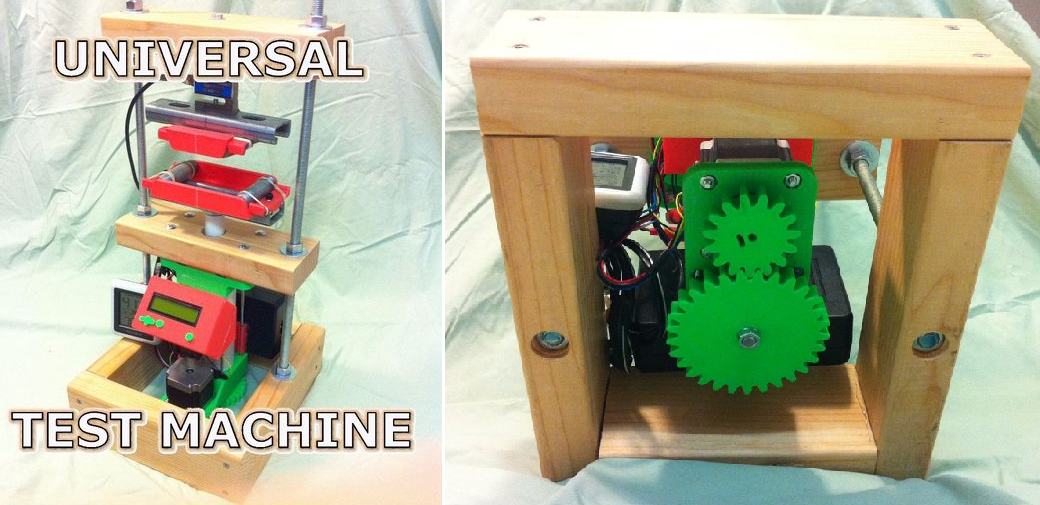
Assembled with all 3D printed parts except for some parts found at your common hardware store, as well as some that were ordered online, the TestrBot is a $300 machine that can be used to test 3D printed parts up to 200 lbs., whether for tension or compression.
“It was designed to allow me to run a gambit of physical tests on 3D printed specimens,” stated Michael.
While testing for force and displacement, Michael emphasizes how much can be discovered in those processes. Measuring displacement at distance increments of .00014” or about 1/28th the thickness of a sheet of paper, its readings for force are slightly more limited. The TestrBot can measure as small a force as .195 lbs.
The testing equipment has been tested itself and proves to be extremely reliable, which you can discover yourself by testing something more than once. With 50 parts total, Michael created an Excel file, which you can download in the Instructable for clear instruction.
Special required tools are: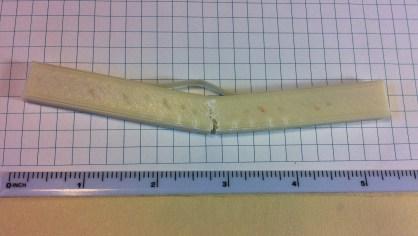
- 3D printer
- Miter saw or tool for cutting straight edges
- Drill press or tool for drilling straight holes
- Electronics soldering equipment
- Purple PVC primer & ABS transition cement
- Digital level for aligning the cross heads
With the 50 parts you will want to take a look at from the Excel file, you will need to assemble the TestrBot for the following major areas of the machine:
Frame – Made of all wood and steel, all of the parts can be purchased at your hardware store. Michael built a prototype frame also, that you can take a look at on Thingiverse.
While it’s crucial to make sure all holes are drilled squarely, Michael points out that you’ll need to employ sandwiching, a beam design technique which requires you to glue two steel sheets on either side of a lightweight printed core. If you are not comfortable with the labor intensive aspects of that process, he suggests using a wooden 2×4.
Test Fixturer – Pointing out that assembly of the test fixture is extremely easy, Michael does explain that he used the the four point bend, as he finds it to be a great method for testing 3D prints due to its realistic loading method, simple design, sensitivity, and its facility in exposing flaws and defects.
Actuator – Picking a stroke of 5.375”, you can choose any that you like. Below are the equations to determine actuator component lengths for a given stroke:
Stroke = Your choice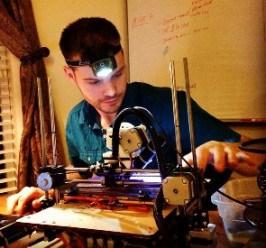
Small PVC pipe length = stroke + 3.125”
Large PVC pipe length = stroke + 1.625”
Anti-Rotation Rod length = stroke + 2.625”
Threaded Rod length = stroke + 4”
Controls – This is where the more complex part of assembly is required. While 3D printing the case should be simple and you can download the files, soldering the protoboard may be time consuming. Check out the circuit diagrams in the Instructable for greater ease.
Once everything is assembled and you are ready to use your TestrBot, check the display screen for the following:
- Current load
- Displacement
- Status of the actuator
You may want to connect the TestrBot to your PC as Michael suggests, using it to read data and generate professional-looking Excel graphs upon analysis of 3D printed parts—or anything else for that matter, as you will find that this machine is good for testing many other items as well.
Is this a design you are interested in 3D printing? What are you interested in testing? Share with us in the TestrBot forum over at 3DPB.com.
Subscribe to Our Email Newsletter
Stay up-to-date on all the latest news from the 3D printing industry and receive information and offers from third party vendors.
Print Services
Upload your 3D Models and get them printed quickly and efficiently.


You May Also Like
Making Space: Stratasys Global Director of Aerospace & Defense Conrad Smith Discusses the Space Supply Chain Council
Of all the many verticals that have been significant additive manufacturing (AM) adopters, few have been more deeply influenced by the incorporation of AM into their workflows than the space...
EOS in India: AM’s Rising Star
EOS is doubling down on India. With a growing base of aerospace startups, new government policies, and a massive engineering workforce, India is quickly becoming one of the most important...
PostProcess CEO on Why the “Dirty Little Secret” of 3D Printing Can’t Be Ignored Anymore
If you’ve ever peeked behind the scenes of a 3D printing lab, you might have caught a glimpse of the post-processing room; maybe it’s messy, maybe hidden behind a mysterious...
Stratasys & Automation Intelligence Open North American Tooling Center in Flint
Stratasys has opened the North American Stratasys Tooling Center (NASTC) in Flint, Michigan, together with automation integrator and software firm Automation Intelligence. Stratasys wants the new center to help reduce...