Man Turns 3D Printer in Line Art Fabricator & You Can Too

 3D printers are very useful tools in creating… well…. 3-dimensional objects. However, one man, named Emmanuel Adetutu has decided to take a step back in history and use his 3D printer to create something as ancient as a 2-dimensional drawing. That’s like taking a high definition television and playing old black and white movies on it, right? Who in their right mind would want to do something like that?
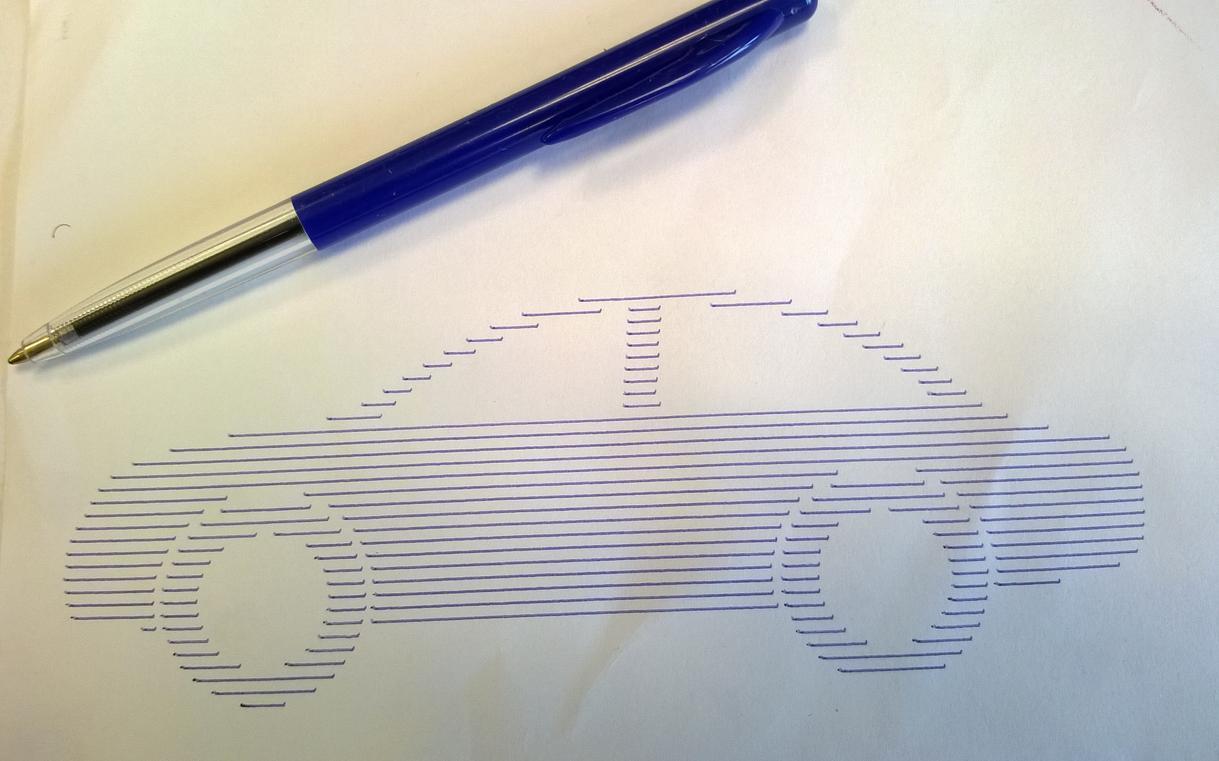
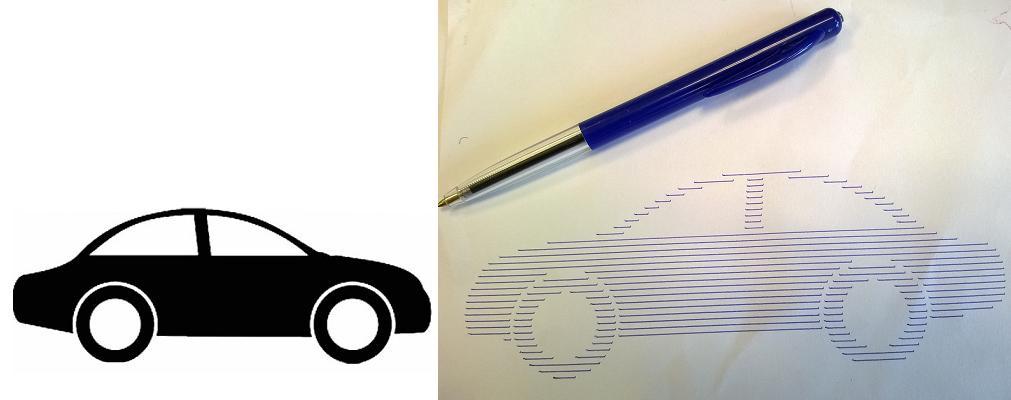
Well, before you start your critique of Adetutu, you must first see some of his results, as well as how quickly and easily they can be fabricated. Very precise line art is what Adetutu has created, using nothing more than his 3D printer, a pen, and a little duct tape. Add to this a program that he coded to convert images to Gcode, and as you can see, the results are quite fantastic.
The process is really quite simple, and Adetutu provides details on how to go about creating your very own line art at home, on his blog.
First you need to attach a pen or pencil to your 3D printer. This can be done through several different methods. The easiest is probably just using a zip tie or duct tape, but it’s also possible to use a custom made (even 3D printed) pen holder. The pen must be attached in such a way that it does not move away from the printer when it hits the paper.
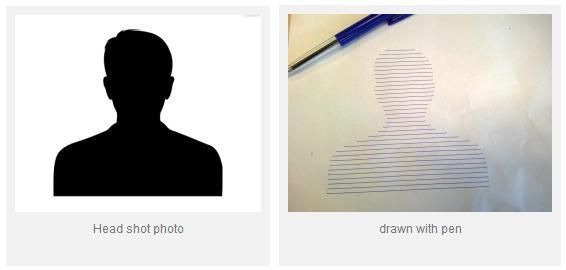
Next, you need to find an image that is completely black. A simple Google search for “silhouette image” should bring up plenty of results. Also searching for “solid black image” or “solid white image” should give you some results as well.
Next, you need to do some calculations, to ensure that your image will be printed correctly on your 3D printer. You must know the maximum X and Y lengths so that the pen does not try and draw off of your build plate. Then you must convert this into pixels. The easy formula to figure out the maximum amount of pixels in each direction, is to take the printer’s X axis maximum (in mm) and multiply it by 3.78. Then do the same for the Y axis maximum. For example, if the build plate on your 3D printer is 250mm X 250mm, the pixel conversion would simply be 250 * 3.78 = 945 pixels in each direction. You must then make sure that the image you are about to print is no larger than 945 X 945 pixels. Otherwise your 3D printer could be damaged as the pen would try and print off of the build plate.
The final step, prior to creating your line art, is to convert your silhouette image into Gcode which your 3D printer can understand. Adetutu has created a website which will do this for you. Simply choose the image file you would like to upload, then enter a height (in mm) that you would like your pen to be lifted when moving from point to point, as well as the spacing you would like between lines, and the drawing speed. Enter your email address, and click on “Convert to Gcode”, and the file will be sent to you in a matter of a few seconds.
You will then be ready to begin printing. Make sure you adhere a piece of paper to the build plate, preferably with bulldog clips or double sided tape, and then simply send the Gcode to your printer. “My advice is that you try to run the Gcode without any pen attached first, see how it moves and determine if the speed is OK,” wrote Adetutu.
Have you tried this? We’d love to see what you came up with. Feel free to share in the 3D Printed Line Art forum thread on 3DPB.com.
Subscribe to Our Email Newsletter
Stay up-to-date on all the latest news from the 3D printing industry and receive information and offers from third party vendors.
You May Also Like
Profiling a Construction 3D Printing Pioneer: US Army Corps of Engineers’ Megan Kreiger
The world of construction 3D printing is still so new that the true experts can probably be counted on two hands. Among them is Megan Kreiger, Portfolio Manager of Additive...
US Army Corps of Engineers Taps Lincoln Electric & Eaton for Largest 3D Printed US Civil Works Part
The Soo Locks sit on the US-Canadian border, enabling maritime travel between Lake Superior and Lake Huron, from which ships can reach the rest of the Great Lakes. Crafts carrying...
Construction 3D Printing CEO Reflects on Being Female in Construction
Natalie Wadley, CEO of ChangeMaker3D, could hear the words of her daughter sitting next to her resounding in her head. “Mum, MUM, you’ve won!” Wadley had just won the prestigious...
1Print to Commercialize 3D Printed Coastal Resilience Solutions
1Print, a company that specializes in deploying additive construction (AC) for infrastructure projects, has entered an agreement with the University of Miami (UM) to accelerate commercialization of the SEAHIVE shoreline...