Get a Second Opinion on Orthotics at the 3D Printer for Less Than $5

 One of the most time consuming things in life can be dealing with that daily and weekly mother of a to-do list. We might be guilty of procrastinating and holding up the completion process of checking items off here and there, but most of what we end up focusing on is making phone calls, setting appointments, confirming that we are going to appointments, setting up follow-ups, and on and on it goes. While you and I both know our time is just as valuable as anyone else’s, somehow we often end up being at the mercy of the rest of the world’s schedule. What is one to do when we need an important service or product and have to wait on someone else to provide it? Not only that, we may be paying a premium as well just to go through a huge hassle for something that might not even be up to par. In the health industry, this can be particularly frustrating. Take dealing with something like custom orthotics for instance.
I have a good friend who was in a terrible accident years ago and nearly lost a leg. Since then she’s had multiple surgeries that allow her to walk, but she must wear shoes with properly fitting orthotics to get around without hobbling. Finding a good fit seems nearly impossible though and she’s often going back for fittings, ordering new shoes, and dealing with the constant challenge of locomoting with some semblance of comfort. Every appointment means hours off from work, waiting on the new devices, and on and on the cycle goes.
At some point many of us do want to throw our hands up in the air and shout, “I should just make the damn things myself!” That might not be realistic in a number of cases, but as the maker and DIY community grows, many innovations are shared to allow you to make something for yourself that previously was expensive, time consuming to deal with, and not always a quality product in the end.
 The 3D printing industry has shown us that much of the world is changing when it comes to medical devices that previously were cost-prohibitive and required many steps to manufacture. With self-sustainability available at the 3D printer, designers like “matter921” are showing us exactly how you can handle foot care on your own and with very little expense. His Instructable is definitely worth checking out before your purchase any more custom orthotics or arches. Both matter921 and his friend Nate put together the project. They are both makers, as well as students of science and engineering, who put hours of effort into researching and then designing these fairly simple orthotics.
“Orthotics are supports for the arch of the foot that go inside shoes, helping relieve pain and improve quality of life,” says matter921. “Virtually everyone can benefit from having them. Problem is they generally cost upwards of $500… simply too much for many individuals on a tight budget.”
“An unsupported arch can lead to knee pain, bunions, and lower back pain, but can also cause serious conditions like plantar fasciitis, hallux rigidus, morton’s neuroma, metatarsalgia (nothing that feels good).”
What will surprise you most about this ‘recipe’ for making orthotics is that you’ll need to spend less than $5, and you may have most of the ingredients in your kitchen cabinet already. You don’t need prior experience of any sort to make these, although you will need access to 3D printing. The results are effective, precise orthotics with a comfortable, custom fit. Not only that, you can make these in just several hours.
For making the imprint, you’ll need:
- Flour and salt
- Cooking oil
- Cream of tartar
- Food coloring
Other items:
- Smartphone, tablet, or camera
- Access to a 3D printer (don’t forget what a great resource 3D Hubs can be!)
 You’ll also want to download the following free software, as you may find all of these come in handy for this particular project. Take a look at:
- 123D Catch: for turning your phone into a 3D scanner and capturing the impressions of the feet.
- Meshmixer: for editing the 123D Catch files. The designers point out that ‘this is the real workhorse of this project.’
- netfabb Basic: for repairing fragmented .stl files, you may need this at several points during the project.
- 3D slicing software like Slic3r and Cura: for converting the model to instructions that the printer can follow for making the part.
“First, we have to make or obtain clay that will be used to make a mold of the underside of the foot,” says matter921. “By doing a 3D scan of the mold, we’ll digitize the model, and send it through a few software tools to allow for 3D printing! It’s a super fun process!”
As for all those ingredients we listed previously for making the imprint? Now, you’ll want to mix them all together, forming a nice big glob of imprinting clay (note: you can use Play-Doh or soft clay as well). Follow these steps:
- Mix flour, salt, and cream of tartar in a medium-sized pot.
- Add oil and colored water and stir until ingredients are well blended.
- Place pot on the stove over low to medium heat.
- Cook the soft clay, stirring frequently, until it begins to pull away from the sides of the pot after three to five minutes.
- After cooling knead the dough for a minute or so, and then store in an airtight container.
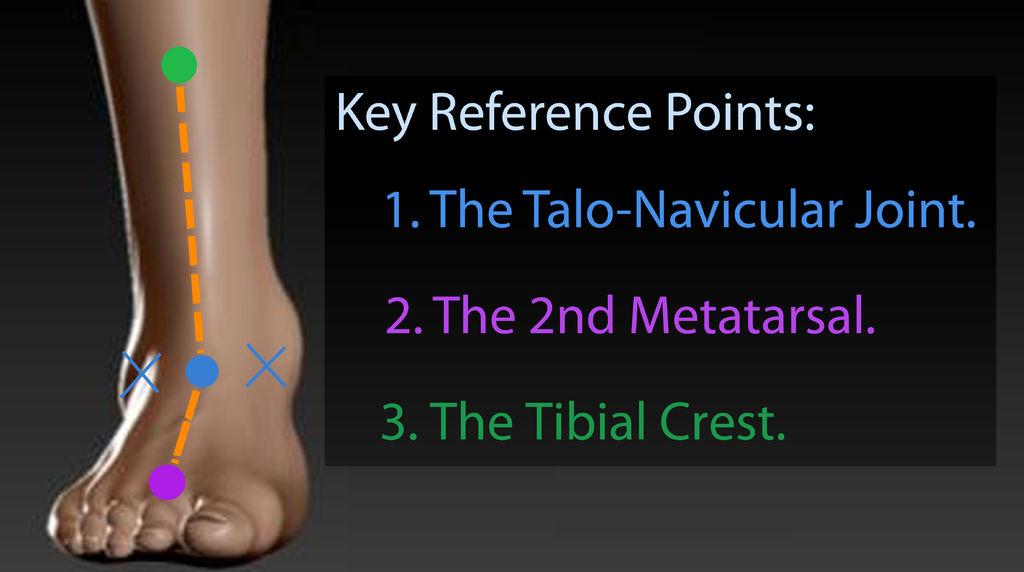
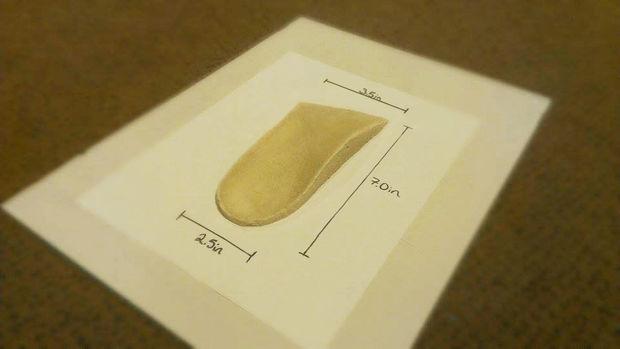
Next, you’ll need to obtain your foot cast—and this is where things get interesting! The DIY designers point out that while this might seem like an intimidating step, it does not have to be; there are all the details you’ll need in the Instructable as they show you how to use the ICB method, with key reference points, corresponding to the image shown:
- The talo-navicular reference points. Bisect as shown.
- The second metatarsal head—the joint just above your second toe.
- The tibial crest, a clear crest that can be found while feeling your shin.
You will want to mark each spot as instructed in the image, and then matter921 says to finish up by drawing a line down the tibial crest to the intersection of the talo-navicular points. After that, draw a line up from the second metatarsal to this bisection point as well.
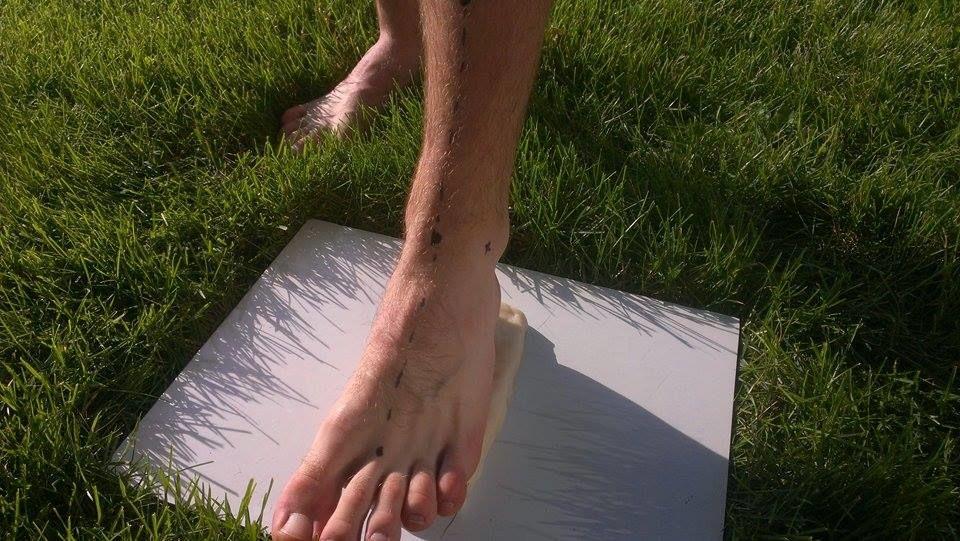
Making the imprint is very important, obviously, so make sure to pay very close attention as you are working on aligning and imprinting the foot. It really helps if you have a partner to assist in guiding the foot. Follow the detailed instructions within the Instructable at Step Three after watching the tutorial (see below).
After you have your plaster casts, it’s time to get really professional and translate them into a digital file, using 123D Catch to scan them. Make sure to take a lot of pictures from different angles. For this project, they took over 70 shots! Tips: try using a colorful background behind the orthotics, like a patterned piece of newspaper or a map. This helps the program in positioning the photo for each series. Also, avoid shiny surfaces and any movement, if possible.
Once you’ve processed the scans and converted them into a 3D model, you can begin your work in Meshmixer, following Step Six for leveling, adding a base, and scaling correctly, as well as correctly orienting in Step Seven, scaling further in Step Eight, and applying any fixes to the model in Step Nine.
Finally, you are ready for 3D printing. While ABS filament is highly recommended, the designers state that they think PLA would probably be a good option as well, along with a specialty filament should you desire to experiment with one.
Recommended settings are as follows, but may vary depending on your 3D printer:
- Layer Height: 300mm
- Fill spacing: 20mm
- Outer walls: 2
- Bottom surface layers: 2
- Top surface layers: 14
“Make sure to not use more than the recommended outer walls and bottom surface layers, and keep the fill spacing high,” advises matter921. “All of this material gets removed in the next step, and basically is just functioning as support during the printing process.”
Also, be sure that top surface layers are high. Remember—these orthotics will be used on a daily basis and you want to prevent them from flexing or breaking.
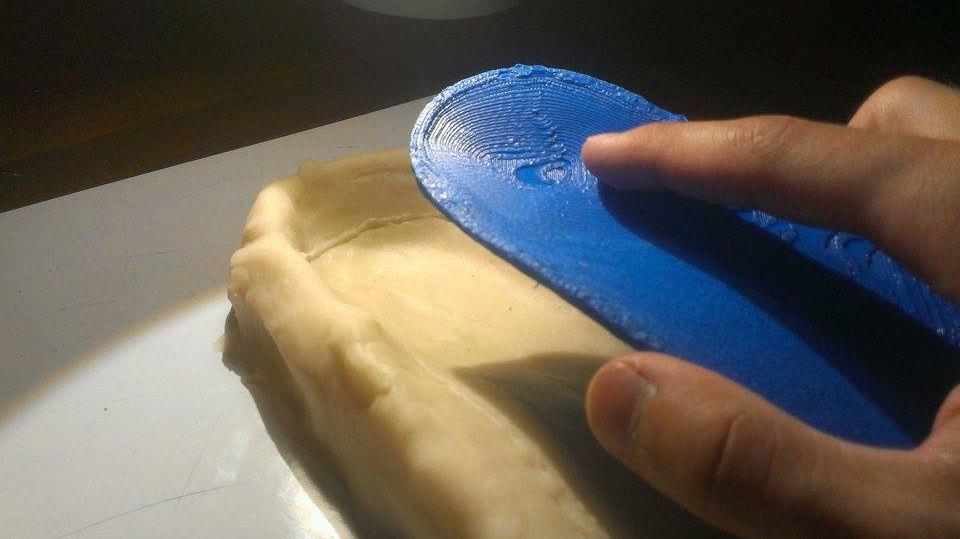
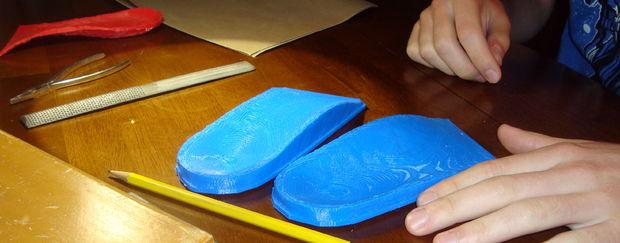
Last, you’ll want to remove the support materials with pliers, poking through the bottom surface, which is two layers thick. After that, remove material from the sides and then the infill material from the bottom. Make certain that the heel and the toe are level. According to matter921, the thickness of the orthotics are about a constant 3mm thick. You are nearly done, but may need to first do a bit of clean-up, smoothing and shaping of the structure.
“The fit of these orthotics astounded us, and really helped relieve tension and pain for those we printed them for,” said matter921.
While the designers certainly don’t mean to try and replace medical professionals like doctors or podiatrists, this certainly looks like a great 3D printing project and offers an affordable way for you to achieve comfort, with ease. Discuss your thoughts on this new project over in the 3D Printed Orthotics forum at 3DPB.com.
Subscribe to Our Email Newsletter
Stay up-to-date on all the latest news from the 3D printing industry and receive information and offers from third party vendors.
You May Also Like
Boom Supersonic Test Flies Demonstrator Aircraft
Boom Supersonic hopes to revolutionize air travel by reintroducing supersonic passenger flights. The company has amassed over $700 million in funding, with notable contributions from entities like Japan Airlines, and...
Conglomerates Are Auctioning GE Metal 3D Printers and More
As the additive manufacturing (AM) industry continues to slough through its economic downturn, we’ve seen not only smaller firms like Uniformity Labs and Arevo go belly up, but larger entities restructuring in...
Interview: GE Additive Provides Series 3 Metal Binder Jet Update
For another year running, I survived the bustling insanity that is formnext. With a reported 859 exhibitors, 196 speakers, 32,851 visitors (50% international), and 54,000 m² of exhibition space, Europe’s...
Del Toro’s Pinocchio Achieves Stop-Motion First with Metal 3D Printed Metal Puppets
Did you know that the stop-motion puppetry featured in Guillermo del Toro’s 2022 film Pinocchio was accomplished through the use of metal 3D printing? Our story begins in the year...