Instructables: Just Released Lego 3D Printer 3.0 is More Complex & Eight Times Faster


 Instructables user William (W1ll14m) has allowed us to watch the evolution of a veritable work of art. There’s no greater recipe for success in designing than to be able to evaluate your own work and see what has failed and needs work, and to allow all of these processes to help you grow as an artist.
Certainly no one could be harder on himself and his work than William through three iterations of the Lego 3D Printer–a common practice with some of the greatest inventors in history–placing him in good company. With each Lego 3D printer, William has pointed out what he’d like to change, as well as hinting at a new release to come in the near future. It would seem the reward of all that blood, sweat, and hot glue at the 3D printer has paid off with the Lego 3D Printer 3.0.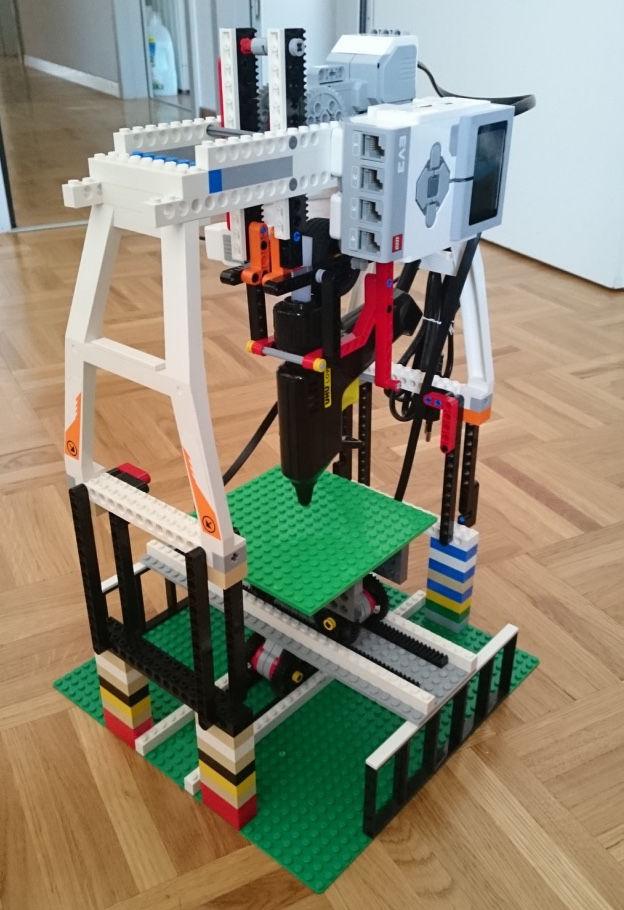
With only a few months in between iterations, William’s come back to us stronger and faster.
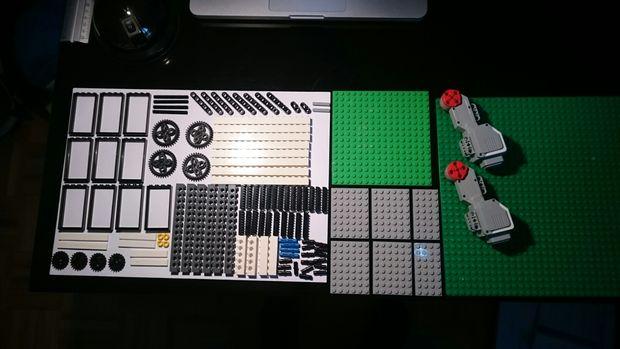
Lego supplies for X and Y axes
He lays out all the pieces you’ll need for the X and Y axes in a very concise fashion, and even after looking at several of these machines from William, as well as other Lego style 3D printers, it’s still pretty amazing to think that you can take these parts which could have come out of your child’s toy bin and begin a veritable 3D printing mini-factory in your basement, should you wish.
With numerous visuals in William’s Instructable (he’s not big on words here), you’ll be able to figure out how to put together all of the various Lego components that make up this printer, including the doors, which are responsible for its equilibrium.
All the parts are laid out for the Z axis in the Instructable and then you can really see 3.0 coming together in structure. (With the use of Legos, it is truly amazing how easy it is to offer a visual show of what to do in assembly.)
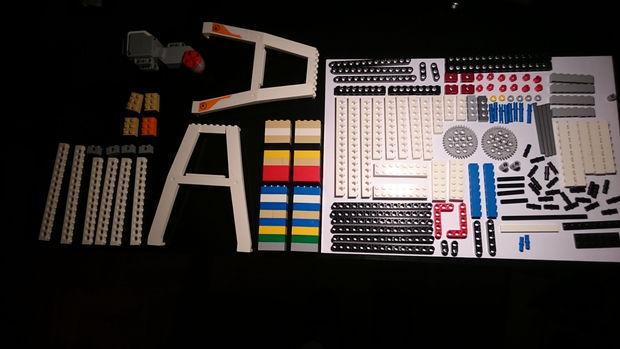
Supplies for Z axis
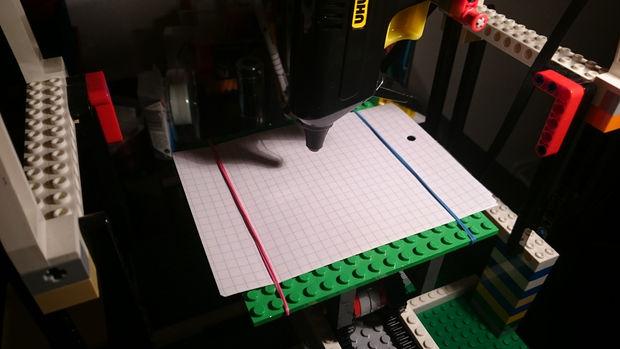
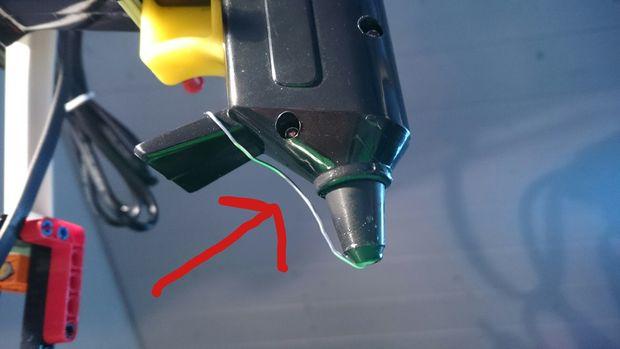
Be sure to come equipped with the integral pieces to the Lego 3D Printer–a glue gun and handy paperclip–as you get ready to put together quite the aesthetically pleasing glue extruder.
“Bend the paper clip in a way that it partially stuffs the hole of the gluegun nozzle,” states William. “This will allow for a more controlled extrusion process.”
Once you have that assembled, the last step is to integrate the software supplied by William. You–and everyone else–are going to be quite pleased not only with the 3D printing ahead of you–but just with the colorful and tidy results demonstrated in the appearance of this printer that also appears to be highly functioning–and indeed, with glue-if William’s posted test results are any indication. Let’s hear your thoughts on this new machine in the Lego 3D Printer 3.0 Forum thread on 3DPB.com. Check it out in action:
Subscribe to Our Email Newsletter
Stay up-to-date on all the latest news from the 3D printing industry and receive information and offers from third party vendors.
Print Services
Upload your 3D Models and get them printed quickly and efficiently.


You May Also Like
The Seminal Moment: Creality’s IPO Analysis & Possible Effects
Something super important happened just a few days ago, and too few people paid attention. Creality, a pioneer in low-cost desktop material extrusion printers, went public. Creality is now listed...
As Longevity Gains Momentum, Rem3dy Health Raises £14 Million for 3D Printed Nutrition
Longevity hack or healthcare trend? The answer may depend on who you ask, but investor interest in personalized nutrition is growing as consumers search for the next longevity hack. Now,...
3Dnatives to Present ADDITIV Metals 2026: Resolving Key Barriers to Scaling Metal Additive Manufacturing
As the metal additive manufacturing sector prepares for a massive leap—with market valuations expected to climb from $6.02 billion to $7.02 billion this year—the industry is shifting its focus from...
Stratasys Dental’s Negar Movahed Says They’re “Open for Partnerships”
According to “3D Printing for Dentistry 2025: Market Study and Forecast” by AM Research, the dental 3D printing market generated $5.2 billion in revenue in 2024—that’s nearly one third of...