Using 3D Printing to Make This Amazing Star Wars: The Force Awakens Kylo Ren Helmet

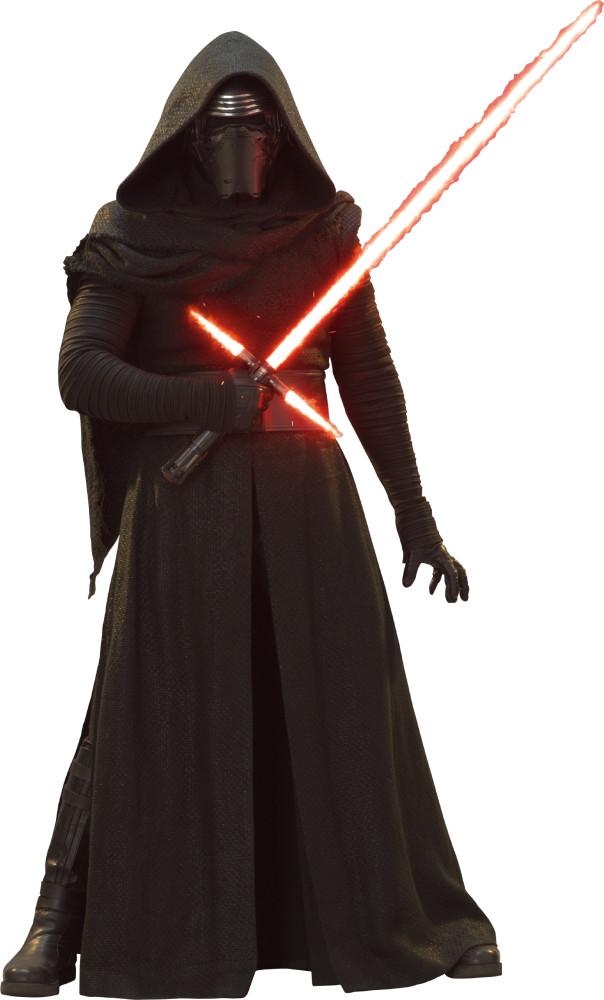 It is probably safe to say that the new Star Wars film, The Force Awakens, is one of the most anticipated movies in decades. Our entire generation has grown up on Star Wars, and everything that we’ve seen from the movie so far has exceeded expectations on almost every level. One of the stand out new characters that has a lot of Star Wars fans excited is the film’s primary antagonist, the mysterious Kylo Ren. We have only caught brief glimpses of him in the trailers and production art that has been released so far. But the sight of Kylo Ren with his Darth Vader-inspired helmet and ragged, self-built lightsaber (the one with the lightsaber hilt) already has fans and cosplayers excited and eager to dress up as him.
 For 28-year-old engineer Luke Daley, 3D printing and 3D design are hobbies that he uses to fill his free time at night, after coming home from his day job with Siemens. Currently he’s a member of several Star Wars costuming groups with his wife, and heavily involved with the 99th Garrison and the UKG ( part of the world wide 501st Garrison). So while Daley is heavily involved in the Star Wars cosplaying community, it turns out that this is actually the first helmet that he’s designed and built all on his own. However it certainly doesn’t show based on the finished product, which is only the first part of Kylo Ren’s costume that he’s going to be working on.
“I’m HUGELY involved in making the rest of the Kylo Ren costume to the extent I’ve designed and had manufactured 600 meters of fabric to match the screen fabric we see kylo wear, to help clothe over 55 Kylo hopefuls world wide. I’ve also designed his lightsaber clip and buckle for the costume as well as schematics for sewing the belt and overall costume dissection. You can follow my work with a community I helped start on facebook,” Daley told me via email.
 Daley started his project back in April 2015 after the Star Wars Celebration Anaheim showed off the complete Kylo Ren costume. Unfortunately he was unable to attend the event, but after seeing some of the pictures posted online, he knew exactly what his next costume project was going to be. Using every bit of reference material that he could lay his hands on, Daley spent almost 100 hours designing in Solidworks getting the helmet details just right. After posting the digital files on MyMiniFactory, where anyone can download them for free, Daley was kind enough to walk me through the entire process of designing, printing and the finishing of his fantastic prop helmet.
3DPrint: What make of 3D printer did you use for this project?
LUKE DALEY: I use a Lulzbot Taz 5, and had access additionally to a Formlabs Form 1+ SLA 3D printer.
3DP: Where did you find the reference materials for the helmet, I know there isn’t a lot from the new Star Wars movie online yet?
LD: In terms of reference, when I started I had a plethora of various angle shots from the front of the helmet, the dome I just had to go from the concept art that was leaked earlier this year. Now that we have the toys I’ll certainly make Version 2.0. My full reference album is here.
3DP: How many individual 3D printed parts is the helmet made of?
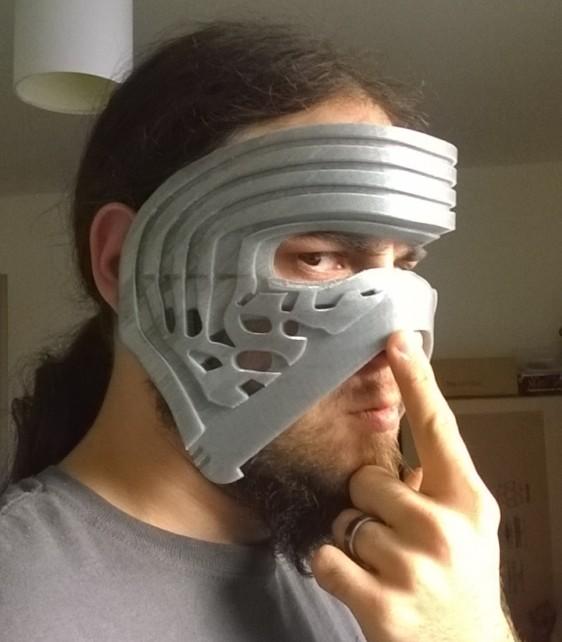
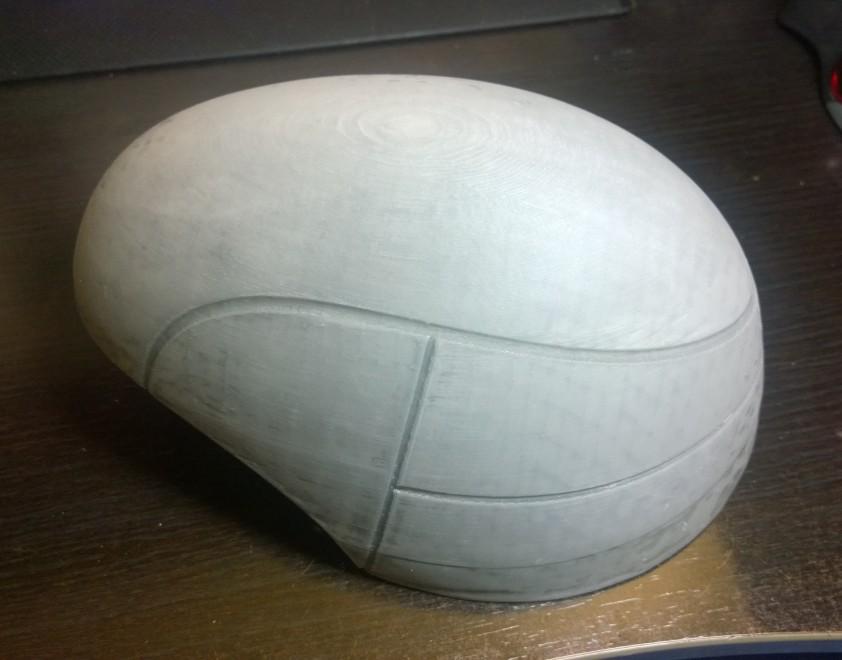
LD: Because I wanted to accurately capture the helmets design as much as it was going to be harder to cast I wanted to keep the separate layers we saw from the Anaheim photos. As a result the helmet is made from 11 Individual parts.
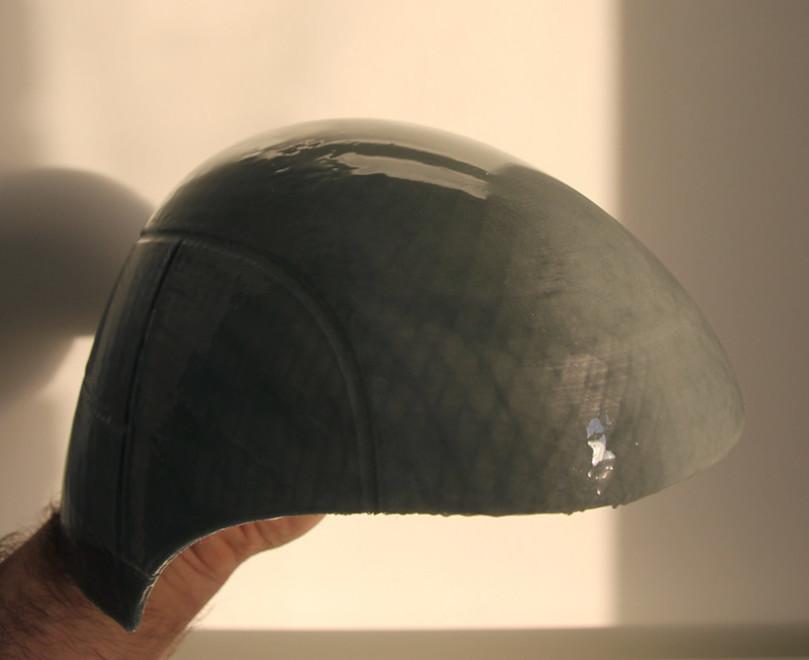
 The Upper Dome (#1)
The Lower Dome Flair (#2)
The Face Plate (#3)
X2 Dome to Face Plate Joints (#4)
The Inner Mouth Plate (#5)
The Outer Mouth Plate (#6)
X2 Upper Jaw Line Greeblies (#7)
X2 Jaw Line Greeblies (#8)
3DP: How long did it take you to 3D print all of those parts?
LD: My Aim with this helmet was always for the finished product to be a Polyurethane Cast, so my main focus was to get the items printed in as high a quality as possible to minimize finishing times, I actually printed Three Domes before I was reasonably happy with the shape (still today I’m not 100% but I’ll work on that for version 2.0). My first full FDM print took approximately 100 Hours, 56 for the dome and the rest on the face plates and mouth plates and greebles. In total before the final one was made I was into around 200 hours on the FDM Printer, including rejected prototypes and print failures and approximately 3KG of filament at 800G per Dome.
3DP: What 3D printing material did you use for the helmet?
LD: My Initial Prototype and final dome was in PLA. I like working with PLA as it’s very dimensionally stable and doesn’t require Heated enclosures or strange concoctions of dissolved plastics. Once I was happy with the overall design (after changing the dome a little) I began to diversify the process somewhat. As my aim was to cast, I needed the highest quality finish I could in a reasonable time frame, so the Master Faceplate was Printed in Nylon-12 using an SLS tech by Shapeways known more commonly as “Strong white & Flexible”.
The Master Mouth Plates were printed on the Form 1+ SLA Printer, it uses UV curing Resin and is really awesome as were the small jawline and connecting Greebs. What this did was give me very high quality parts to work with. They still required a little post processing but a drop in the ocean compared with FDM technologies. To me each technology has it’s benefits and drawbacks but all are equally valid in the 3D Printing Space
3DP: How long did post-processing take, including painting?
LD: Post processing on the Dome alone took me about 2 weeks at about an hour or two a day at the most, I kept the upper and lower dome flair separate during the finishing stage so they were easier to work with my finishing workflow goes like this:
Apply a layer of Zap PT-39, this I actually prefer to the popular XTC 3D, PT-39 is a 1:1 product very easy to mix and applies much smoother than XTC as well as having a longer working time and a faster curing time. Even though it’s not designed for 3D Prints, it’s a fantastic product to use. After it’s well cured I begin the wet sanding process using 600 Grit then 1200 Grit, I actually do this in my sink with water constantly running over the part as I sand. This keeps the part cool and keeps the PT-39 from lifting when it’s being sanded down to a thin layer thickness.
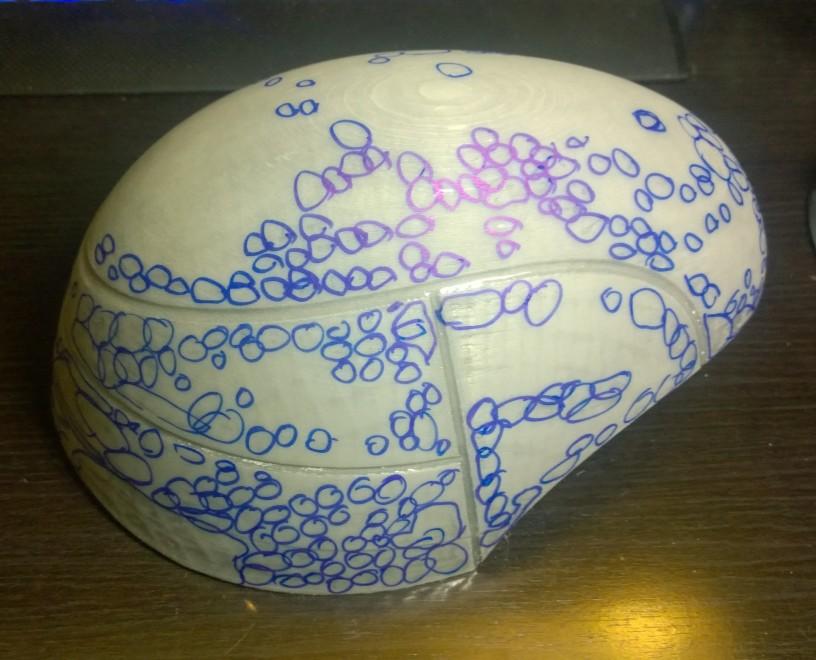
The next process I discovered was a fantastic side-effect of the epoxy being self levelling, any divots and deformities in the surface shot up really clearly under a light as they are still glossy whereas the surface I sanded is matt from sanding. I use a sharpie and circle any deformities I need to work on, I call this Golf-Ball filling as after you circle all the little deformities it often looks like the surface of a golf ball haha! I don’t know if this is a known process and has another name but I stumbled upon it so don’t know if it’s already known!
The next stage is to take Filler (I use Holts Knifing putty, because we can’t easily get Bondo 907 here in the UK which I imported once and is awesome!) and apply it over the surface covering all the sharpie marks and filling all the relevant areas and leaving it overnight. They next stage is to wet sand again and repeat the golf-ball process every day until all the deformities are filled and the surface is entirely uniform. It’s A LOT of work but it really makes a big difference here is a shot of the two dome parts primed up after being sanded and golf-ball filled
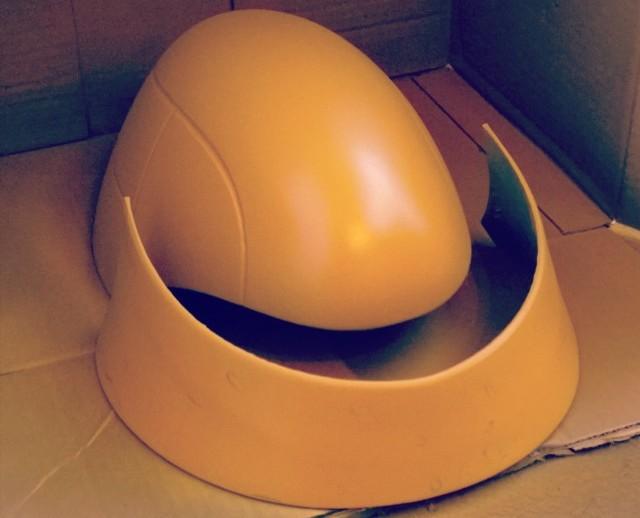 After this stage i was ready to bond the segments together to do this I used some fibreglass matting and more PT-39 with Pro-gaff on the outside seam to act as a stopper for any excess epoxy seeping through.

I then did a final pass of sanding at 800 grit, 1200 grit and finally 2000 grit. For the Mouth Plates (the SLA ones) I only had to do some very light wet and dry sanding as well as applying the screen damage marked on with a sharpie and dremel engraved into the surface. For the SLS Faceplate i wet sanded with 800 then 1200 grit, it’s tough going but overall very little work was needed as I just wanted to smooth out the tops of the ridges.


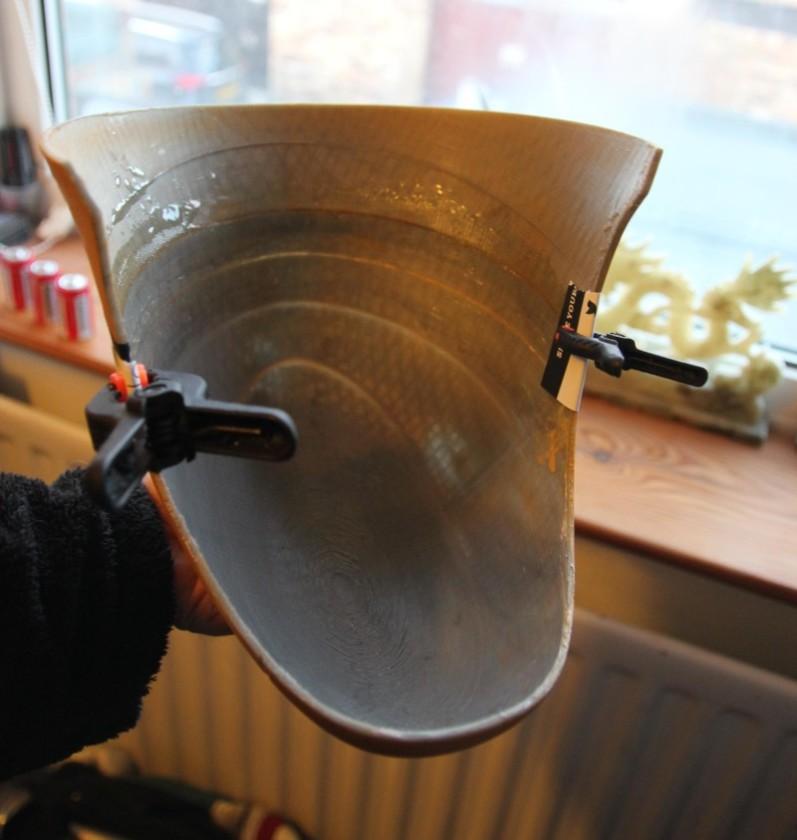
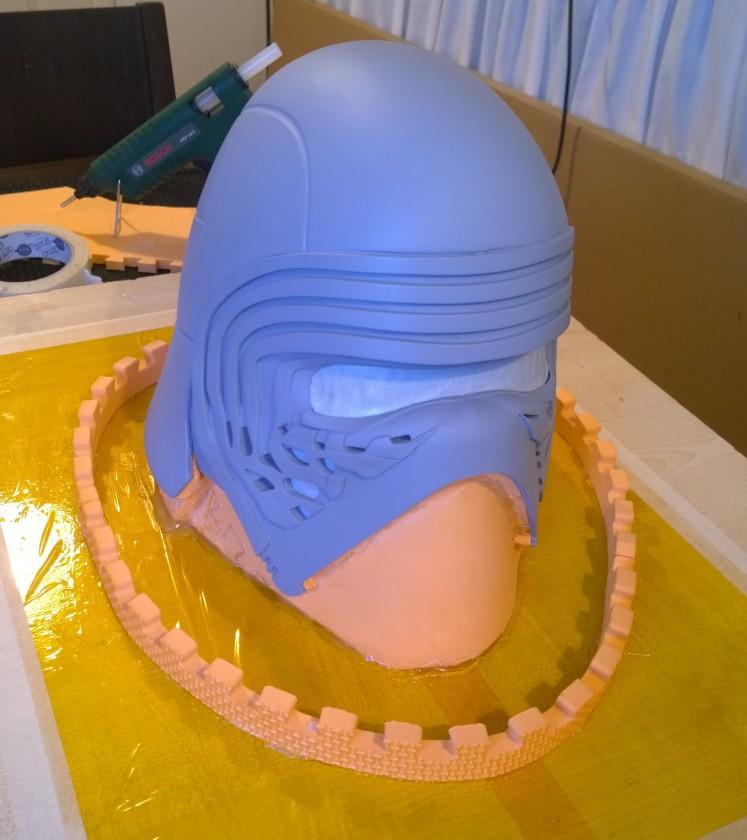
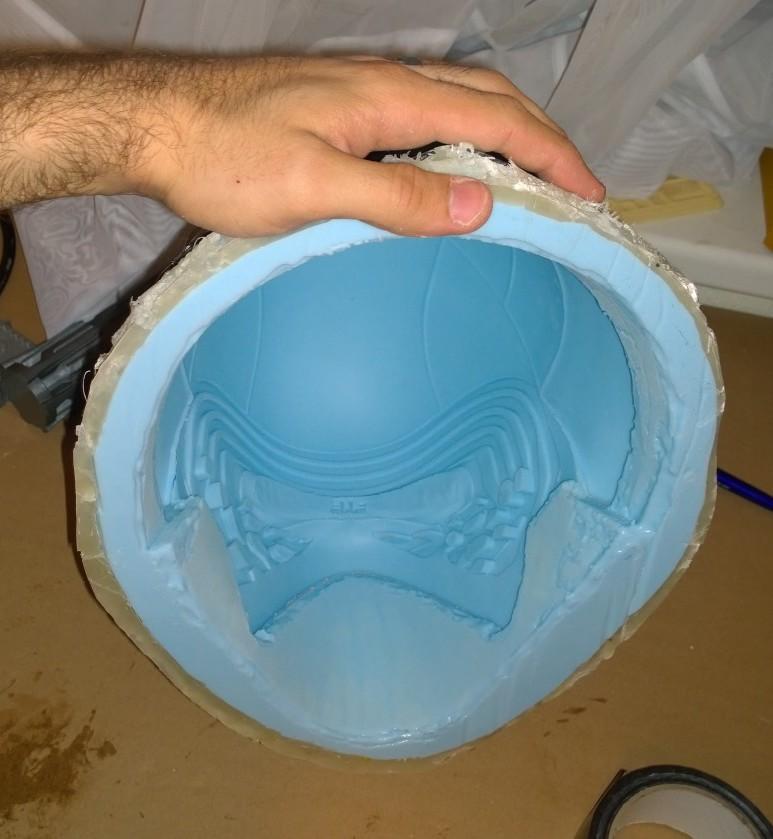
For casting I will bow down and pay homage to my good friend KP Lim, aka Heatshock, he is nothing short of a prop savant and guided me through my first castings as well as this complex endeavour of making the molds for this helmet. I won’t delve too deeply into the process but here are a few shots of the mold making process:

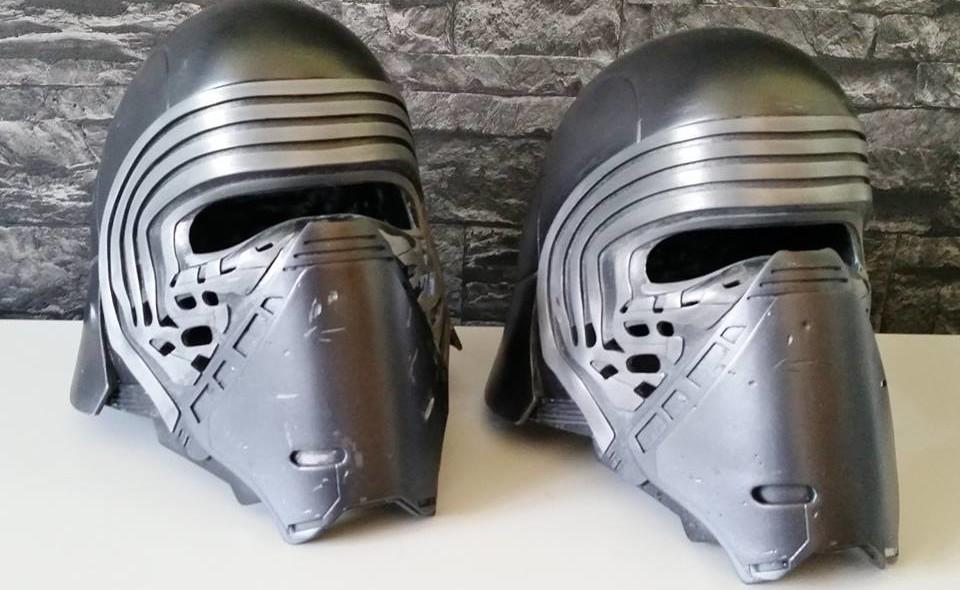
This is a finished shot of two Painted Polyurethane cold casts (metal particles in the resin) by one of my customers in Germany Dino (Sano Evolution Props). The first helmet was ready for sale on the 15th of July, and in total I made a run of 40 helmets.
 As you can see from the finished product Daley’s months of hard work and dedication has paid off with a fantastic replica of Kylo Ren. More and more we’ve seen incredibly creative cosplayers and designers turn 3D printers into a must have tool in their costume making arsenal. Make sure that you follow the rest of Daley’s Kylo Ren costume journey on his Facebook page Knights of Ren, and visit him on his cosplay prop making Facebook page JJ Industries. And of course feel free to download your own Kylo Ren Helmet for free from MyMiniFactory.
Let’s hear your thoughts on this helmet in the 3D Printed Kylo Ren Star Wars Helmet forum thread on 3DPB.com.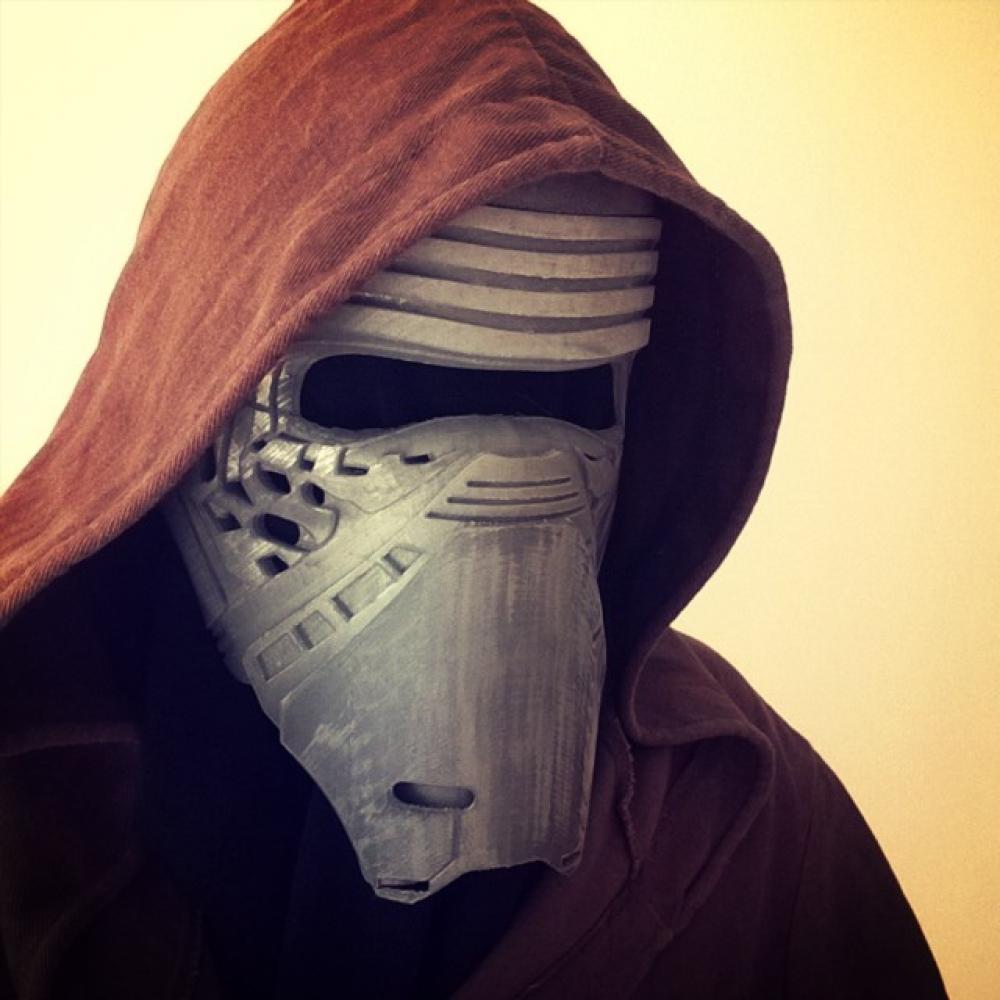
Subscribe to Our Email Newsletter
Stay up-to-date on all the latest news from the 3D printing industry and receive information and offers from third party vendors.
Print Services
Upload your 3D Models and get them printed quickly and efficiently.


You May Also Like
Amnovis Expands to the US
Belgian firm Amnovis is a scalable partner for orthopedic innovations. From design to production and regulatory, you can rely on them to take your innovation to market. Coupled with deep...
Scaling 3D Printing Takes More Than You Think; HP’s Webinar Looks at Making It Work Long Term
3D printing is no longer new. In fact, most manufacturers already know what it is, where it fits, and what it can do. But knowing the technology and actually scaling...
Astrobotic Tests Rocket Engine Made with Elementum 3D Materials
Astrobotic has completed a series of hot-fire tests for its Chakram rotating detonation rocket engine, with additive manufacturing (AM) playing an important role in how the engine was built. The...
The Additive Chicken Coop, Part I: Million Dollar Petri Dishes
After decades of tinkering with our individual technologies, billions were poured into speculative claims and optimism. Now the attention is gone, and sometimes it can seem like we’re surrounded by...