
This 3D-Printed Rotary Clock Project is Perfect for Aspiring Makers


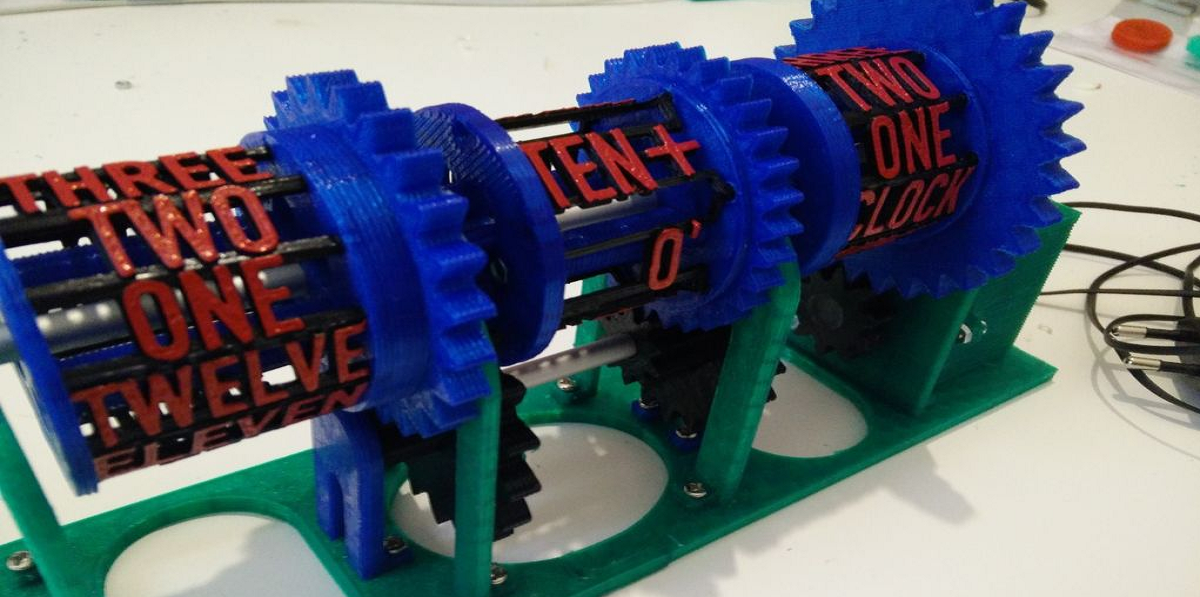
While Instructables contributor, NespLab, a.k.a. Matias Mamone, proclaimed in the introduction of his 3D-printed rotary clock project page that he was neither “a designer or an engineer,” it’s pretty clear that this humble maker is tech savvy. There’s a kind of steampunk aesthetic to his 3D-printed, triple-rotor clock and, for someone who claims to be something of a novice, Mamone’s detailed instructions and his process itself are reassuringly clear and easy to follow.
That said, this project requires some skill or at least a willingness to tackle some fairly complex steps. It also requires a fairly lengthy list of tools and supplies. Before undertaking this project, you will need to have the following tools on hand:
– Something with which to cut metal, like a rotary tool. If you have a handy friend, this might be something you want to borrow as you’ll only be using it a couple of times.
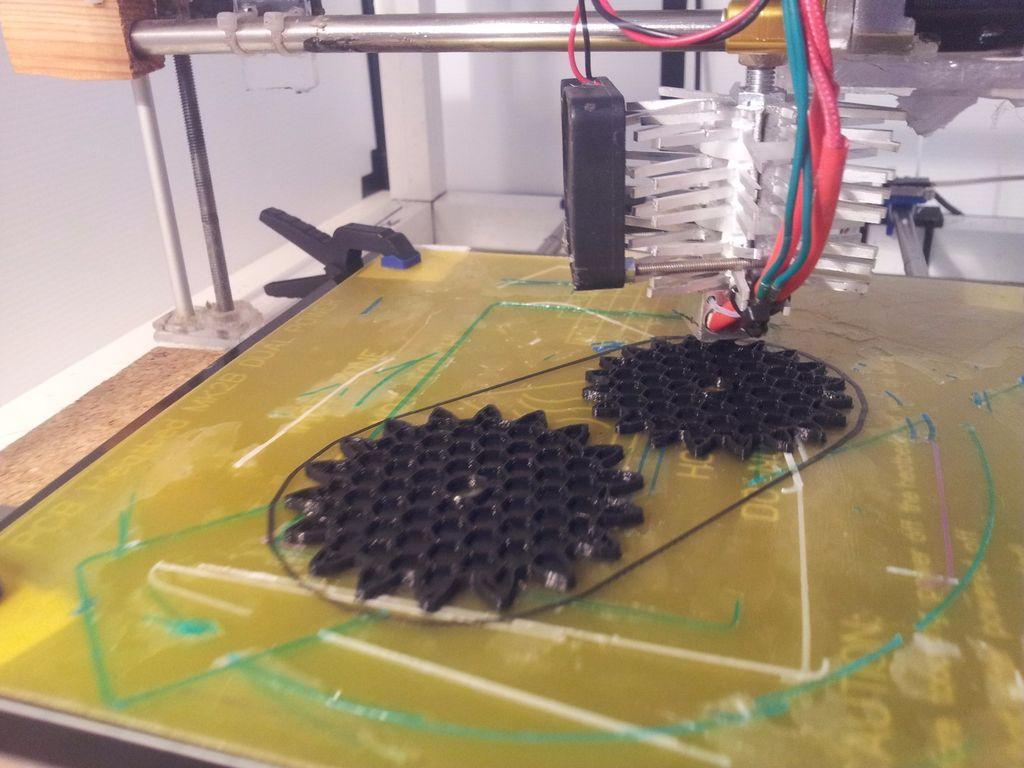
– A 3D printer. This isn’t an absolute necessity as you probably know you can use a web-based 3D printing service like i.materialise or Shapeways. To find a 3D printer near you, you can also use 3D Hubs.
– A computer. At this point, who doesn’t have one?
– Screwdrivers.
– A soldering iron. Why not purchase one? Chances are that if you enjoy this project, you’ll take on other projects that will require the use of a soldering gun. You can find inexpensive ones online.
You’ll also need to prepare by collecting the following supplies:
– All of the 3D-printed parts.
– A small stepper motor.
– An Arduino Mini (or Nano, or something similar).
– 1 EasyDriver (or other stepper motor driver).
– An RTC. Here’s one from our friends at Adafruit: DS1307 RTC.
– 280x6mm (at least) aluminum tube, 7”, 6mm diameter.
– 14 M3x8mm screws.
– 8 M3x10mm screws.
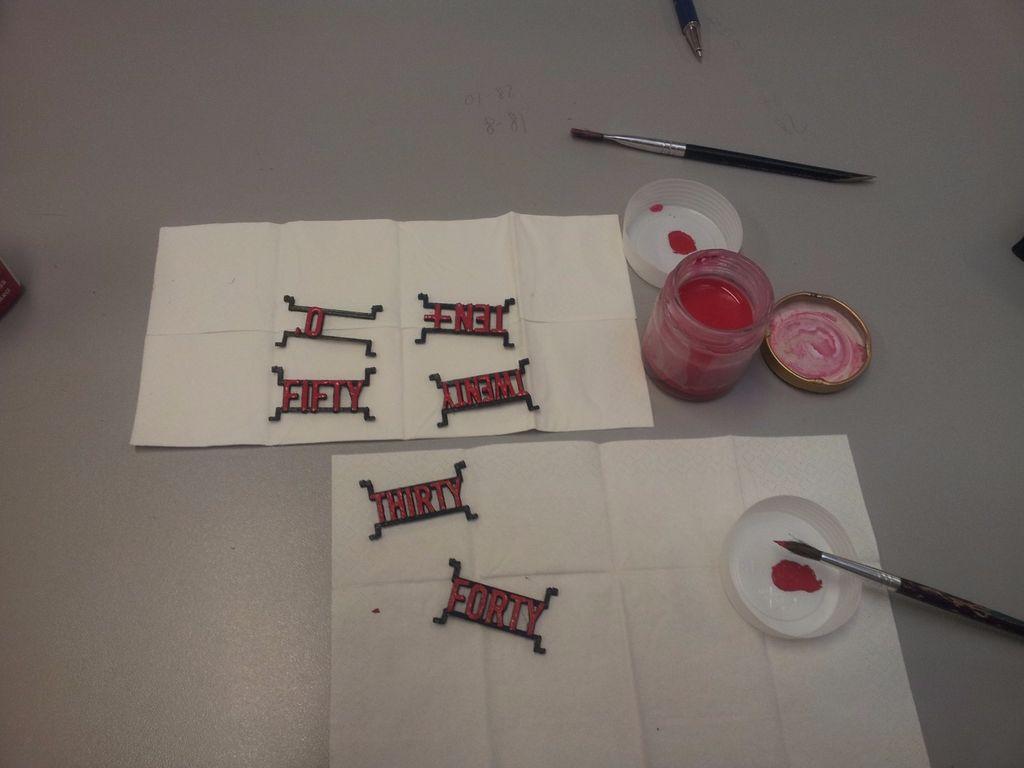
The final item on Mamone’s list you won’t find online. You’ll need, he quips “TONS of patience.” You also may want to have some acrylic paint 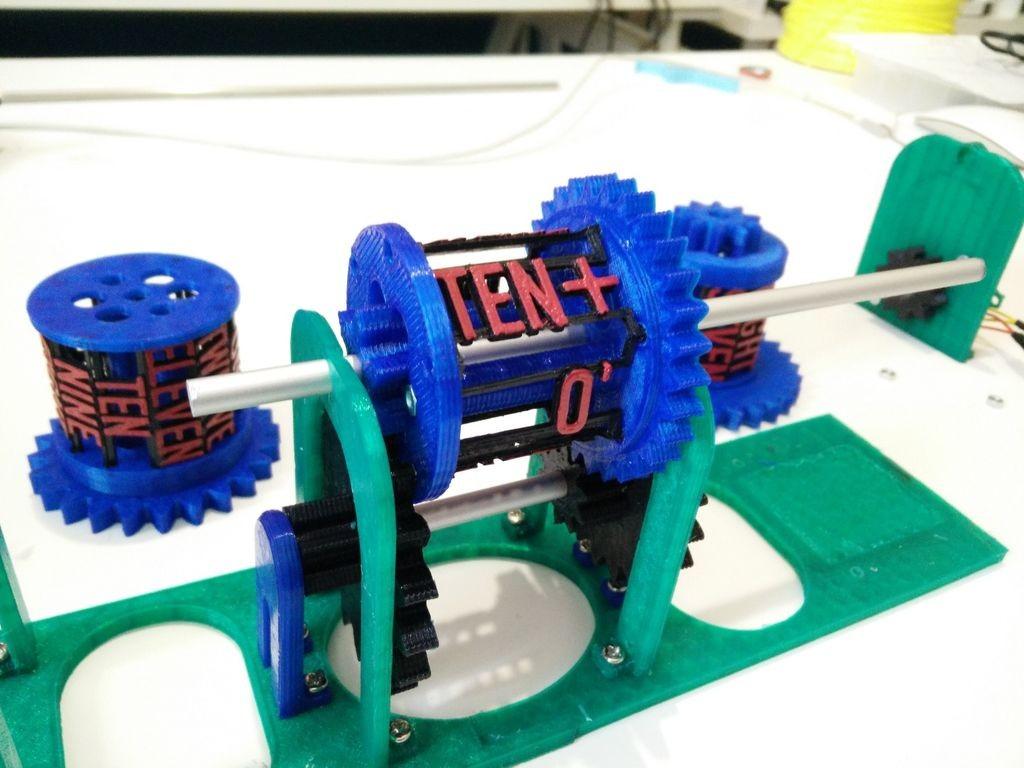 and a brush on hand in case you want to paint the letters of your clock. He used red acrylic paint on black PLA. Speaking of PLA, Mamone printed all of the 3D-printed parts for this clock using 230g PLA at 10 to 15% infill and 0.2mm height. Printing did not require a support or raft layers. He provide the .stl files for all of the 3D-printed parts. In his instructions for printing, he also notes which parts may either require extra measures, including enlarging holes that may not print cleanly.
With this project, you’ll also need to be prepared to, as we noted earlier, do some basic soldering and cutting of metal. Additionally, you’ll be wiring the electronics, programming the Arduino and, of course, assembling everything to create your rotary clock. If at some point you feel, if not despairing, frustrated, dig out that last item on the tools and supplies list: patience. Also know that until you complete the project, nobody is keeping track of how much time you invest in this cool little clock.
Let us know if you decide to take this DIY project on. Discuss in the 3D Printed Rotary Clock forum thread on 3DPB.com.
Subscribe to Our Email Newsletter
Stay up-to-date on all the latest news from the 3D printing industry and receive information and offers from third party vendors.
Print Services
Upload your 3D Models and get them printed quickly and efficiently.


You May Also Like
Beyond Thermoplastics: Why JuggerBot Is Betting on Hybrid AM
For years, thermoplastics have been the workhorse of additive manufacturing (AM). They are pretty easy to process, available, and compatible with many of today’s industrial 3D printers. From prototypes to...
RIC Robotics Collaborates with K4k Construction on 3D Printed ADU in Sacramento
In 2024, RIC Robotics, the additive construction (AC) firm based in Denver, completed the build of an accessory dwelling unit (ADU) in Walnut, California, which was apparently an industry first....
Printing Money Episode 40: 3DP/AM Deal Analysis and More with Matthias Schmidt-Lehr, AMPOWER
Welcome to Printing Money Episode 40. Matthias Schmidt-Lehr (AMPOWER, Executive Partner) joins Danny for this episode and we are very thankful to have him back. In Episode 40, Danny and...
Additive Manufacturing at a Crossroads
Additive manufacturing is at a crossroads. Simultaneously, we find ourselves between certain very different modalities, applications, and industries. Rather than being able to explore them all, companies will now have...


