Hands on with Formlabs’ New Form 4 3D Printer


Thanks to the incredible team over at Formlabs, I was given the chance to test out the new Form 4 and its accessories. To learn more about what sets it apart from Formlabs’ previous systems, check out our coverage of the product unveiling. I was a little nervous to use the Form 4 at first, since I am new to 3D printing with resins, but I found that the workflow is so simple and the slicer so intuitive, I doubt that there is anyone who couldn’t be trained to use one of these machines in about an hour.
Setting up the Form 4 3D Printer
The unboxing and assembly of the Form 4, Form Wash, and Form Cure was incredibly straight forward. Once the printer is plugged in, setup goes rather quickly. The touchscreen on the unit—one of the largest and clearest I’ve ever encountered on a printer—prompts you to insert a resin tank and a clean build platform into the unit. The resin tank, resin wiping arm, and print surface are trivially easy to install. All of them click into place without any resistance and are equally simple to remove. The resin cartridge slides into the back of the unit and dispenses into the printer’s tank via a rubber vent.
The printer also runs a self-check to make sure that the unit is located on a level surface. The system I tested required a minor adjustment to its feet. There is a tool included to assist with this, but I honestly did not find it helped the process. The rest of the setup is rather rote: connect to WiFi or ethernet and assign a resin to your inserted tank. It was a little over thirty minutes from unboxing to sending my first print to the printer.
The Form Wash station ended up being slightly more challenging to set up. It can hold a whopping 15 Liters of IPA (90% or higher required). I was only able to source about 4.5 liters, just enough so that small prints in the system would be fully submerged.
Slicing & Printing

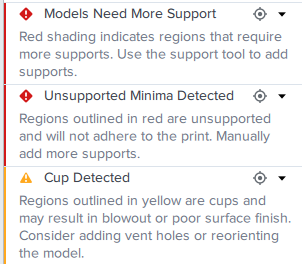
What you’re greeted with when you boot up PreForm for the first time
PreForm is an easy-to-navigate and simple-to-use slicing program. It integrates seamlessly with the Form 4 unit, and knows exactly which resin is loaded into the printer and how much is still inside the cartridge. There are settings to adjust the scale, layout, supports and orientation of any given model. The ‘One-Click Print’ option will automatically handle the layout, orientation, and supports for a model. For 99% of my print attempts, I didn’t need to do anything aside from clicking that button, sending the file off to the printer.
The right side work area in the slicer displays information such as how long a sliced file will take to print and how much resin it will use. It will also generate warnings if there is anything about the structure of a model that might cause issues during printing. These are generated when a file is uploaded into the program and they are usually corrected once the models have been oriented and supported. Occasionally, there might need to be an adjustment made to support settings, but the biggest pain I encountered was the dreaded “cup.”
Cups are hollow volumes or cavities present in a geometry. These can normally be corrected with proper model orientation, but for files with more cavities, this simple fix doesn’t work. PreForm advises adding a vent hole to a model to allow excess resin to drain, a procedure that the software doesn’t perform automatically. This is a feature present in most slicers for commercial desktop stereolithography printers, so it is odd to find it missing from a workflow that is otherwise seamless. Its absence will probably not impact businesses designing models to be printed on the Form 4, but it could potentially be an issue for businesses who aren’t designing their own 3D models.


When there isn’t a an issue during slicing, the printing process itself is painless. The printer will flash a prompt at the end of the print asking if it was successful and then log the file in the printer’s history. After this, it is on to the Wash and Cure stations. Each resin has its own set of recommended wash and cure settings. The Grey resin that I used for most of my prints benefitted from a 15 minute wash and a 20 minute cure at 60°C. Formlabs’ Elastic 50A resin, which I also tested, was strengthened with a two-part wash and a 30-minute cure at 70°C while submerged in a jar of water.

A set of earrings
The only truly challenging part of post-processing any of these prints was support removal. They come off easily, but no matter how gently I worked, every other snip of my flush cutters sent pieces of support flying randomly around my office.
The Form 4 and Your Business

Various prints from the Form 4
The Form 4 comes with a suite of features that would make it an attractive choice for a business. Web-based monitoring and control make it trivial to check in on prints or begin a print from the machine’s queue using any phone, tablet, or computer. The built-in camera can also be set to take a photo of your finished prints for quality control purposes. If it wasn’t clear from the previous sections, there really is no real learning curve to using this machine. It is as plug-and-play as they come and on-boarding employees unfamiliar with resin printing would be fairly simple.
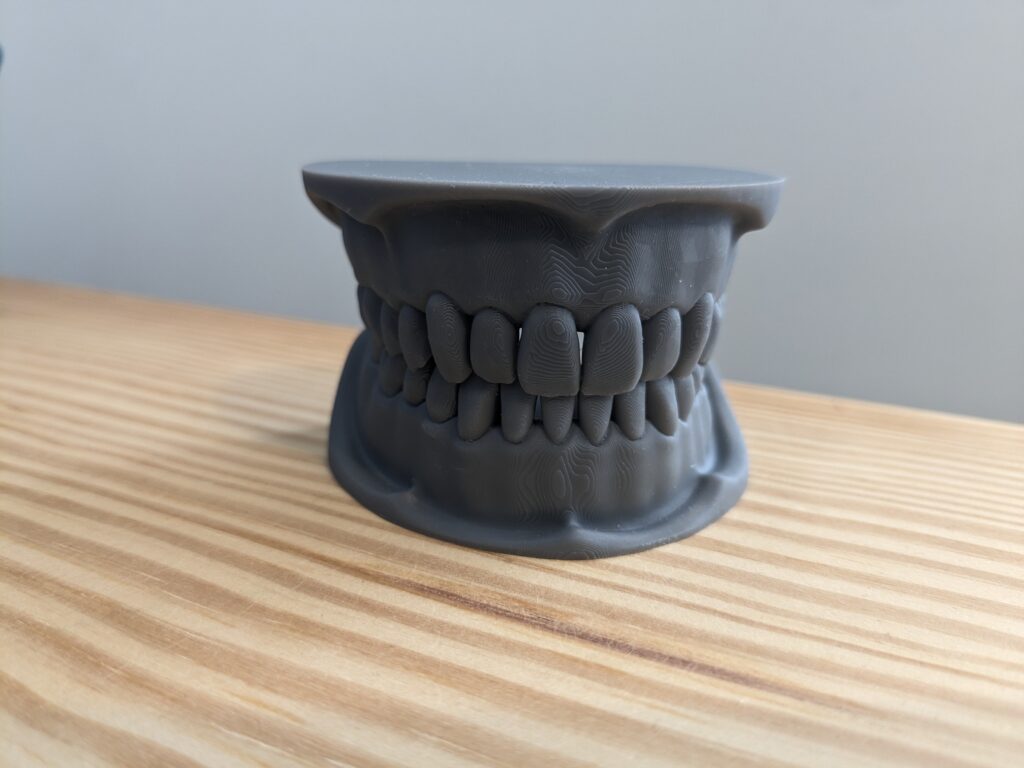
I limited my print tests to a few categories. Above you can see some shellfish models I printed and painted, a set of teeth, a pair of earrings and a fidget toy I made with a material extrusion 3D printed component as well. The crab is probably the most eye catching of the prints. The coat of paint makes it look fresh out of the pot. I showed the printed teeth off to my own dentist and he was impressed with the model quality. Any enterprise that requires highly detailed models produced quickly would easily get their money’s worth from this machine. Jewelry and wearables designers would also find the ability to quickly test new designs incredibly helpful.
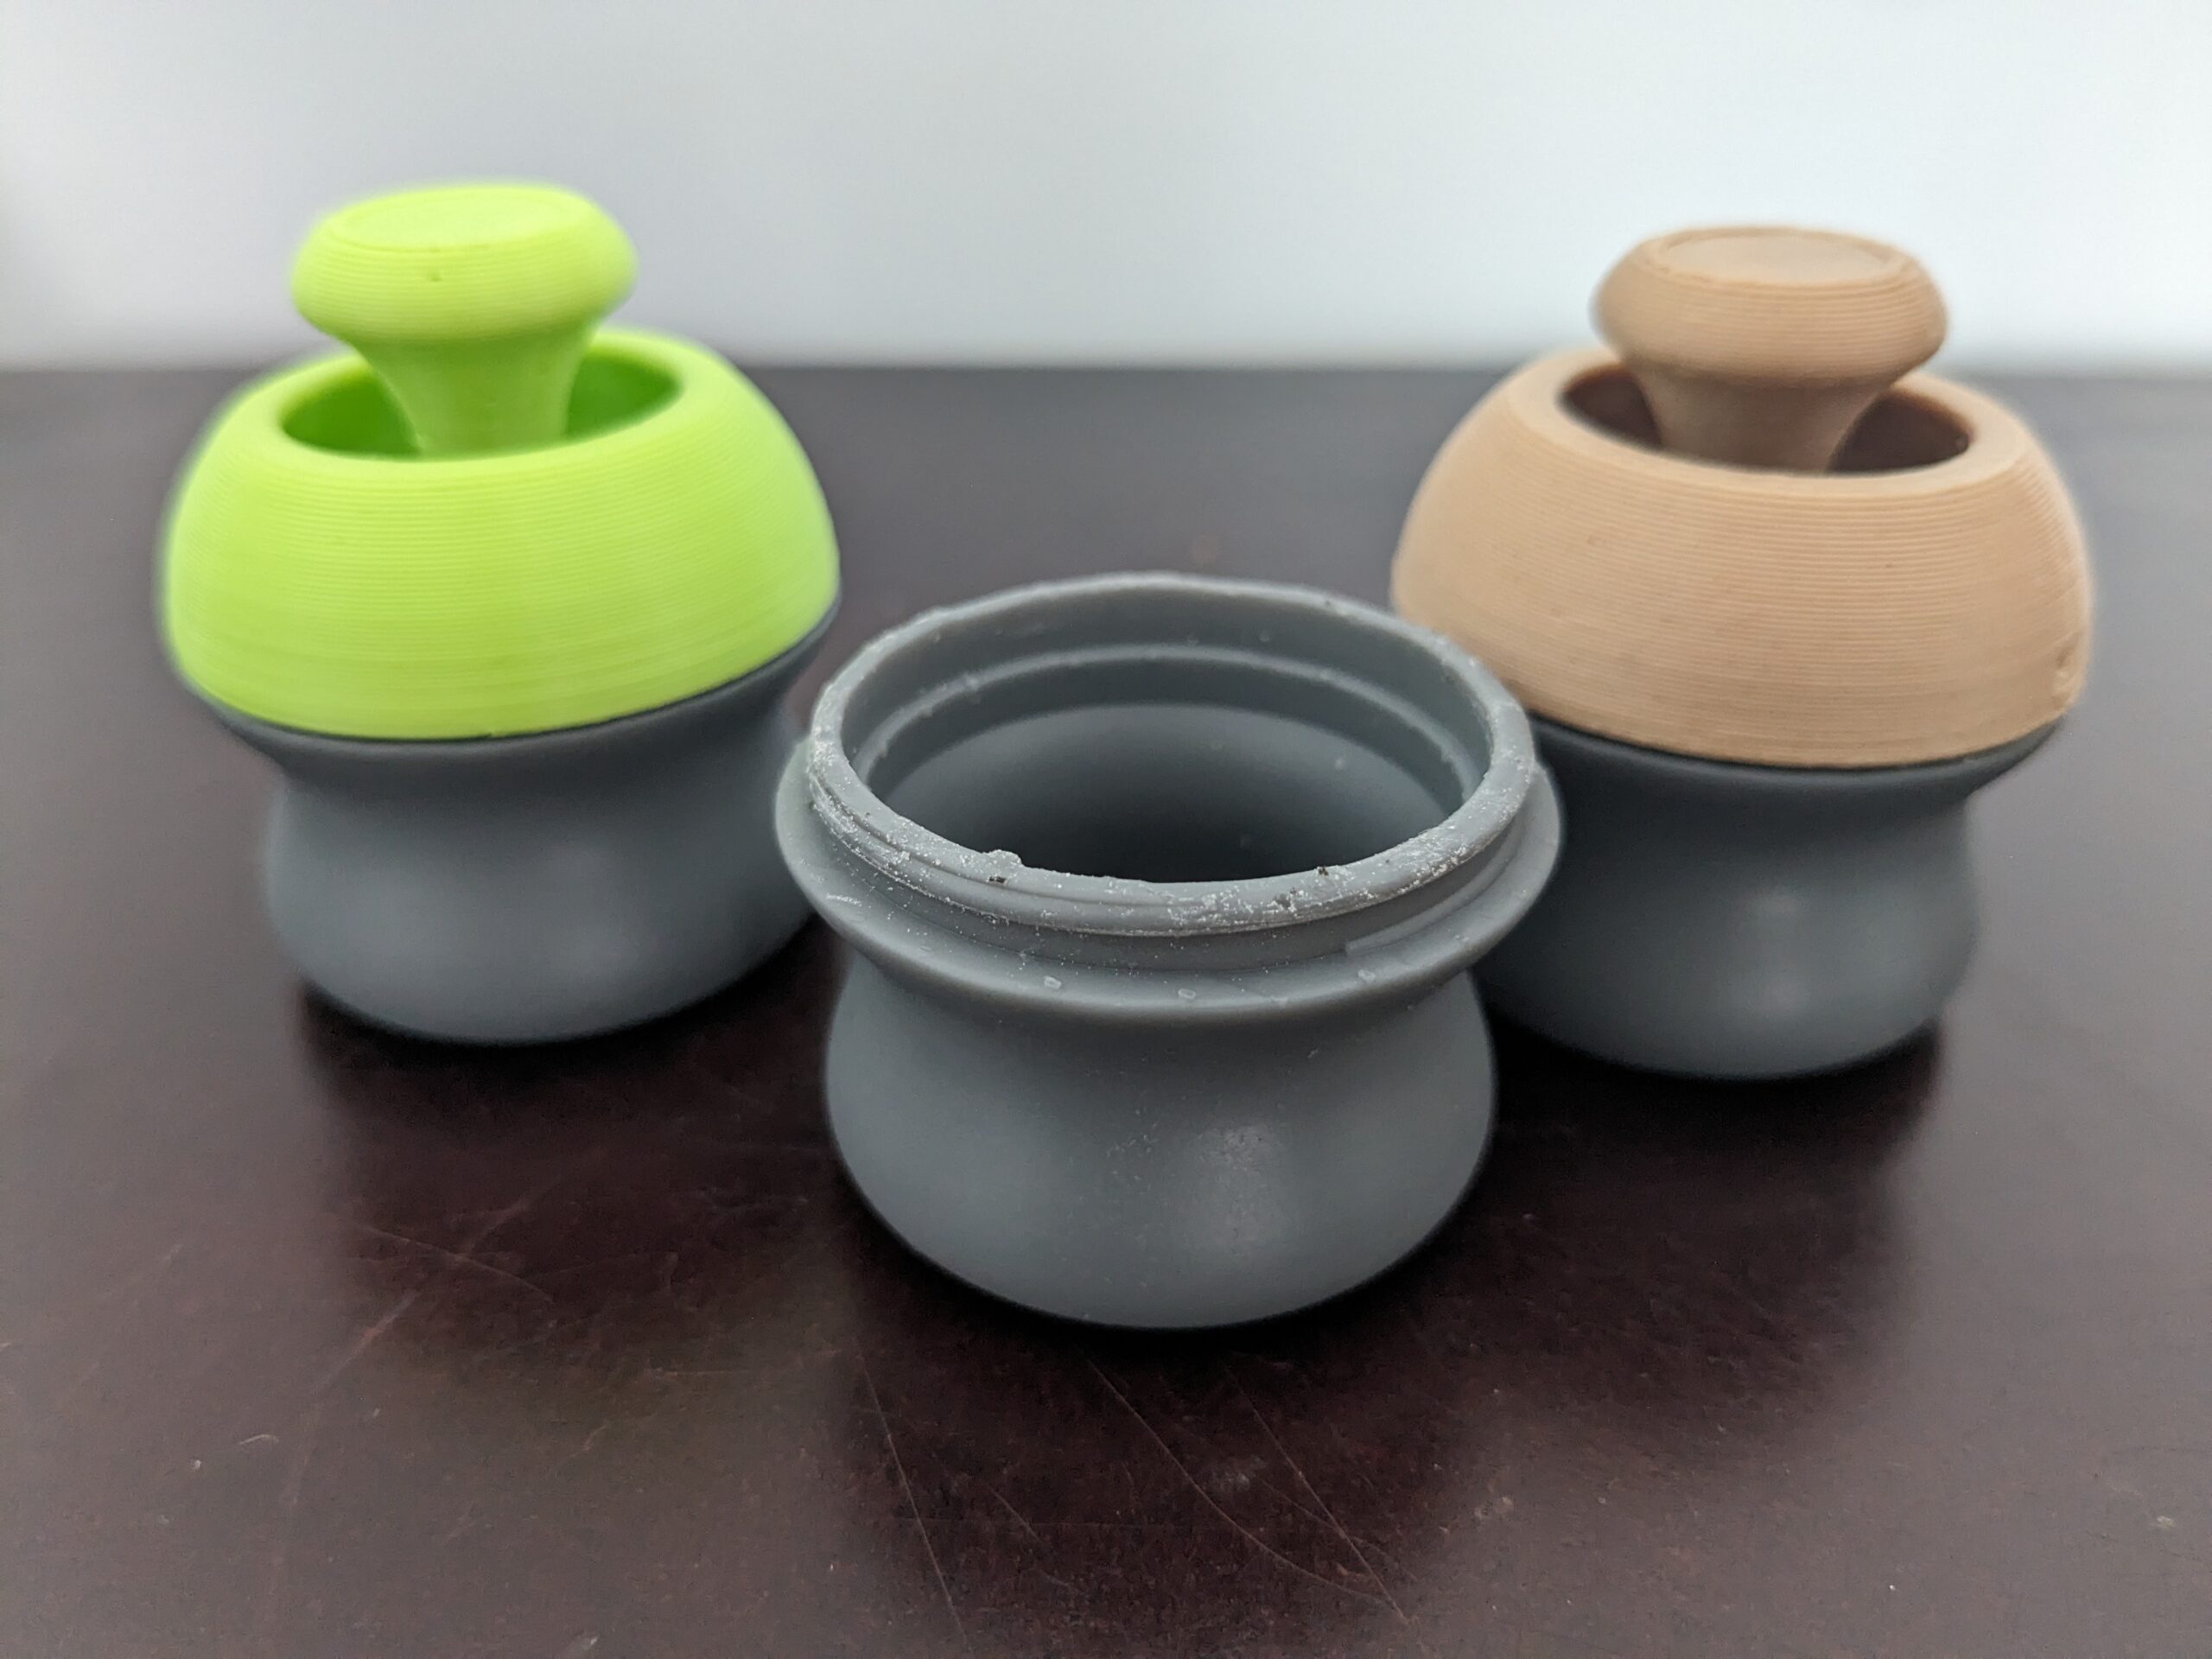
I’m personally very fond of the fidget toy. I was initially skeptical that the 3D printed component would easily thread onto the resin print, but it worked like a charm. I even tried with two more materials, just to make sure it wasn’t a fluke. Even with a poorly processed part like below, the printed component had no trouble coming on or off. The potential to combine the capabilities of the Form 4 with any already existing material extrusion resources at a business also expand the avenues for rapid prototyping and functional part creation.
Final Thoughts
I’ve often heard resin printing described as smelly, messy and hazardous. I’m sure that probably remains the case for the experience with many lower-end devices, but I found the complete opposite with the Form 4. The printing experience was largely smooth, effortless, and and consistent. Components I printed in multiples came out identical to one another. Swapping out resin cartridges, tanks and build plates was a breeze. And the wash station handled the dirtiest part of the job without issue. The basket rises up from the IPA and allows your parts to dry before curing. The Form 4, Form Wash and Form Cure make for a complete and ideal workflow. Any business looking to add high-speed SLA printing to its capabilities would be well advised to see if this machine fits their needs.
Subscribe to Our Email Newsletter
Stay up-to-date on all the latest news from the 3D printing industry and receive information and offers from third party vendors.
Print Services
Upload your 3D Models and get them printed quickly and efficiently.


You May Also Like
Product Market Fit: Nikon Advanced Manufacturing CEO Hamid Zarringhalam on How Defense Demand is Pushing Metal AM to Scale
After years in which the additive manufacturing (AM) industry gained a reputation for its hype outpacing its performance, an interesting development has emerged recently. In certain market segments, at least,...
Beyond Thermoplastics: Why JuggerBot Is Betting on Hybrid AM
For years, thermoplastics have been the workhorse of additive manufacturing (AM). They are pretty easy to process, available, and compatible with many of today’s industrial 3D printers. From prototypes to...
Beehive Industries Invests $70M in Ohio to Support Its Advanced Manufacturing Buildup for Propulsion
Beehive Industries and the state of Ohio have each been killing it in the metal 3D printing game. Naturally then, it was only logical for Beehive and Ohio to combine...
IperionX Raises $50 Million to Expand U.S. Titanium Production
IperionX has raised about $50 million through a public offering to speed up the commercial rollout of its U.S. titanium manufacturing business. The company sold 2.275 million shares at $21.98...