3D Printer Review: The Orange 4K LCD 3D Printer from Longer 3D

After learning about the Orange 4K from Longer 3D, I was excited to get my hands on one and take it for a test ride. What most intrigued me about the Kickstarter campaign for the Orange 4K was the 4K LCD screen of the system. Fortunately, I had the opportunity to review an Orange 4K while the Kickstarter while it was still ongoing.
Before breaking down my experience with the machine, I should clarify that, in most cases, LCD 3D printers on the market rely on a 5.5” 2K resolution screen. This allows them to achieve 47.25-micron resolution. As far as I know, the Orange 4K is the only LCD 3D printer with 4K resolution, making it possible it to reach 31.5-micron resolution and even finer. While I was able to review an Orange 4K color, the Kickstarter is also selling the Orange 4K mono, which leverages 4K resolution to utilize the sub-pixels of the screen to achieve what may be unprecedented resolution.
Subpixel rendering relies on the fact that each pixel on an LCD screen is made up of red, green and blue subpixels to anti-alias text, among other applications. Whereas both the color and mono are capable of reaching 31.5-micron resolution standard, the Orange 4K mono can hit 10.5 microns across the Y axis through the use of subpixels for curing the photopolymer resin. If I’m lucky, I may be able to review the Orange 4K mono, as well, but the I was very much pleased with the experience I had with the Orange 4K color as it was.
 The 3D printer box in various stages of unboxing.
Shipping from China, the printer arrived at my doorstep within about a week wrapped in plastic, protected by a box within a box. Finally stripping through the layers of wrap, I found the system standing pre-assembled. All I had to do was slide the print platform onto the machine and screw it on.
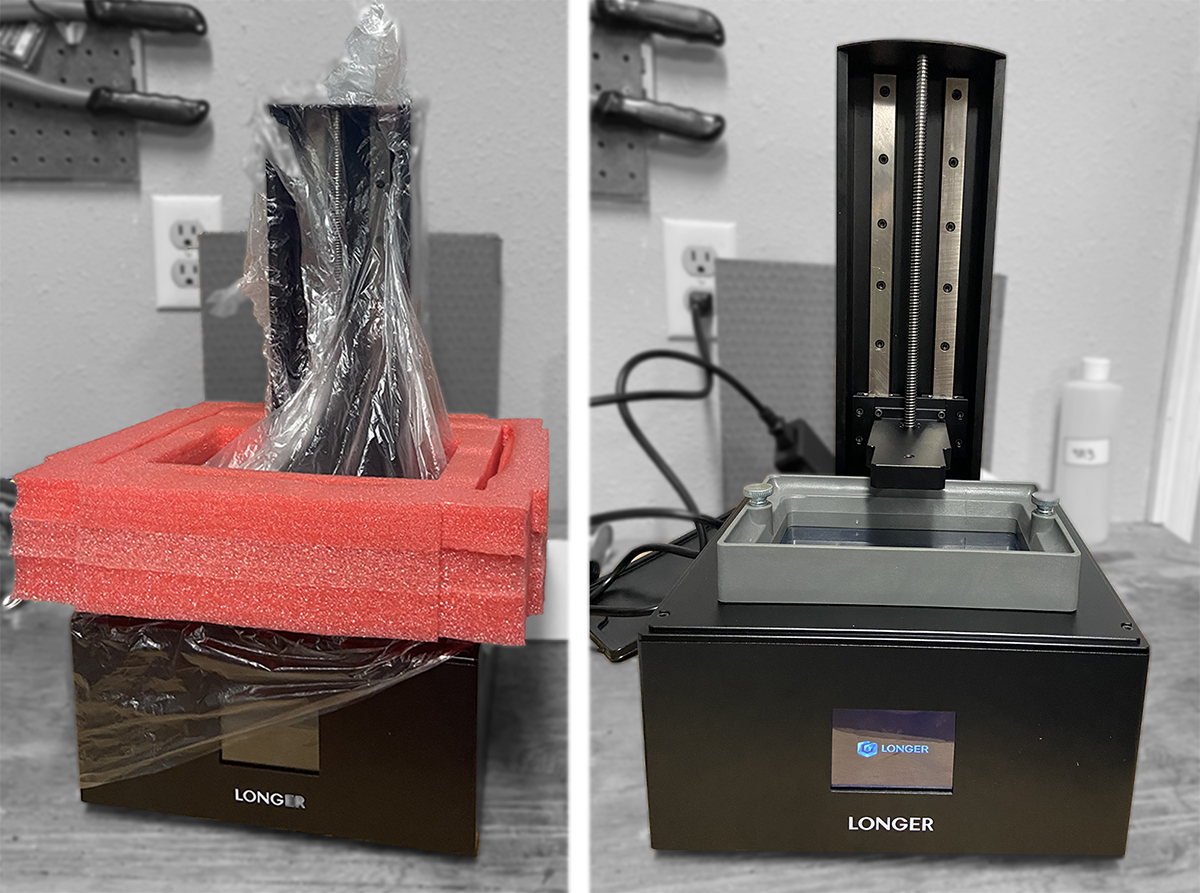 This is how the 3D printer comes out of the box. All that’s left is to screw on the platform.
Before printing, it’s necessary to ensure the bed is leveled, which is not as arduous as leveling a fused filament fabrication system. The only steps required are to loosen the build platform as it is attached to the machine and select the bed leveling option on the color LCD screen. The bed slowly descends until it is flat with the LCD projector beneath a sheet of glass. You tighten the build platform and are ready to print.
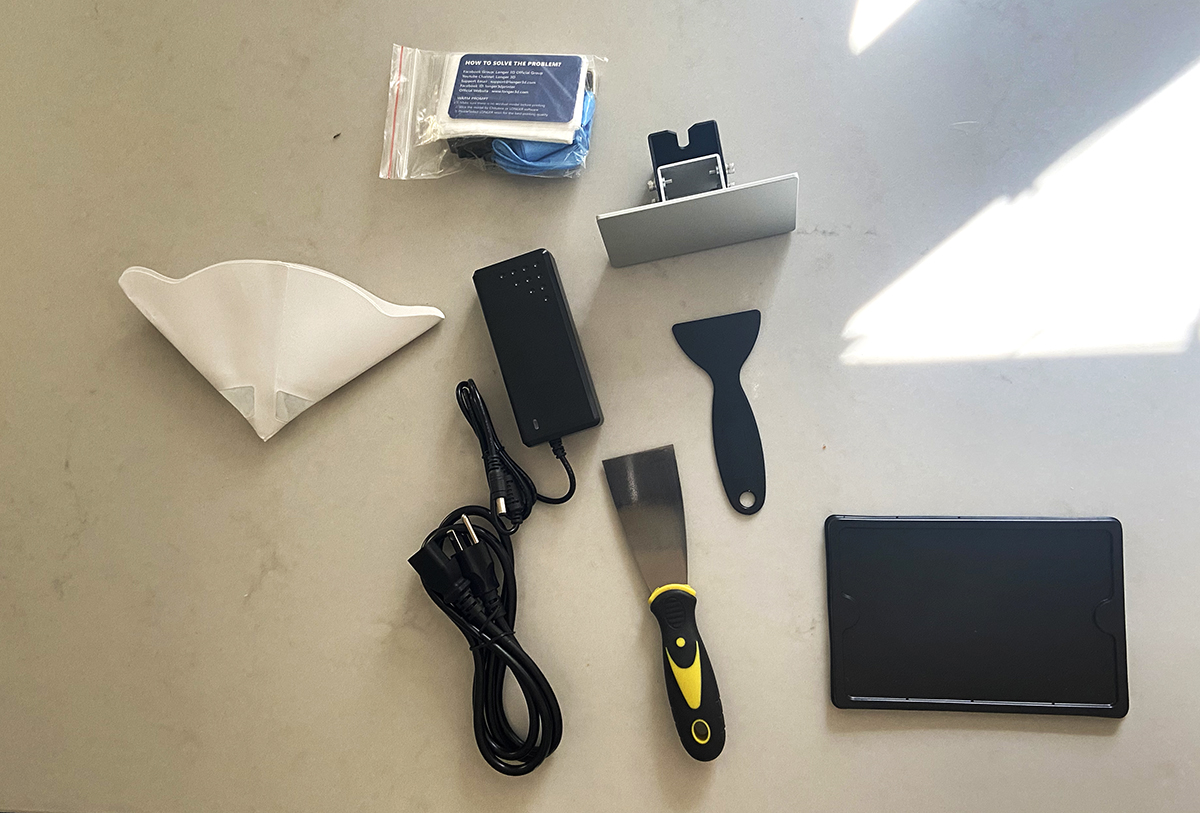 Items shipped with the printer: a metal spatula, a plastic spatula, some gloves, a black cover for the resin vat when not in use, two 3M filters for funneling excess resin into bottles, the 3D print platform and the power supply.
The system ships with a thumb drive for loading files, which also includes all of the necessary documentation for the printer, video tutorials, slicing software and some models that you can print. Compatible slicers include LongerWare, which is Longer 3D’s own software, and Chitubox. Given the time of year, the models happened to be Halloween-themed, so I printed a stack of skulls.
 A simple, easy to understand touchscreen interface.
To begin a print, you simply navigate to the file selection section of the menu, choose a file and tap on it. Before the print starts, you fill in the resin vat about two-thirds of the way. Several hours later, I had a skeleton sculpture dripping with spookiness and resin residue.
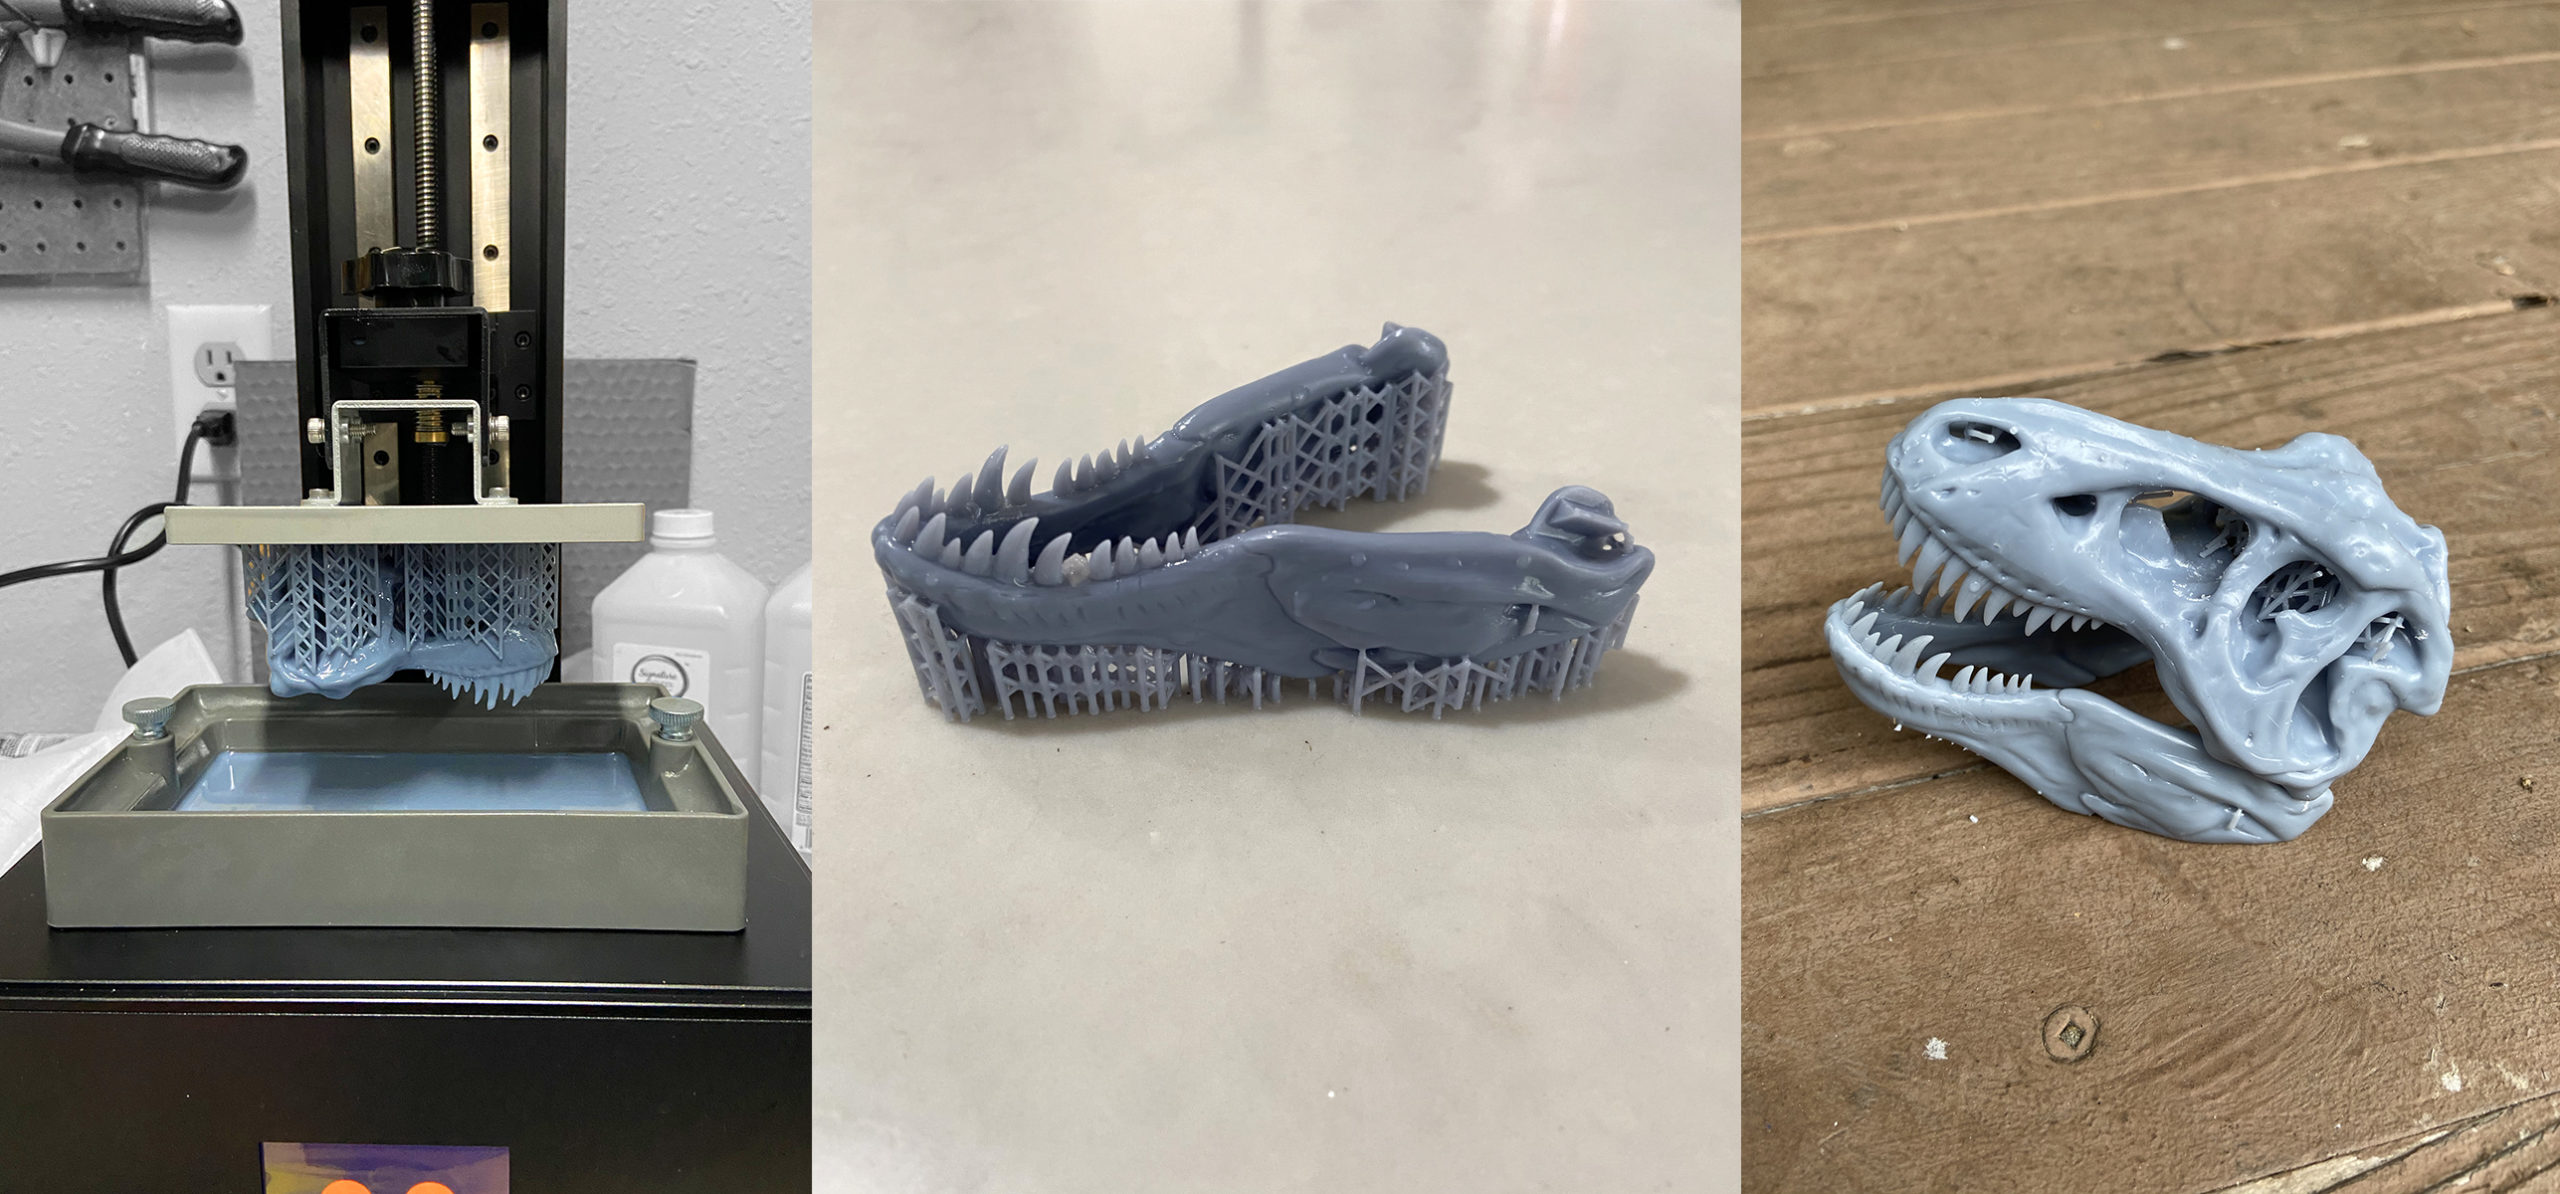
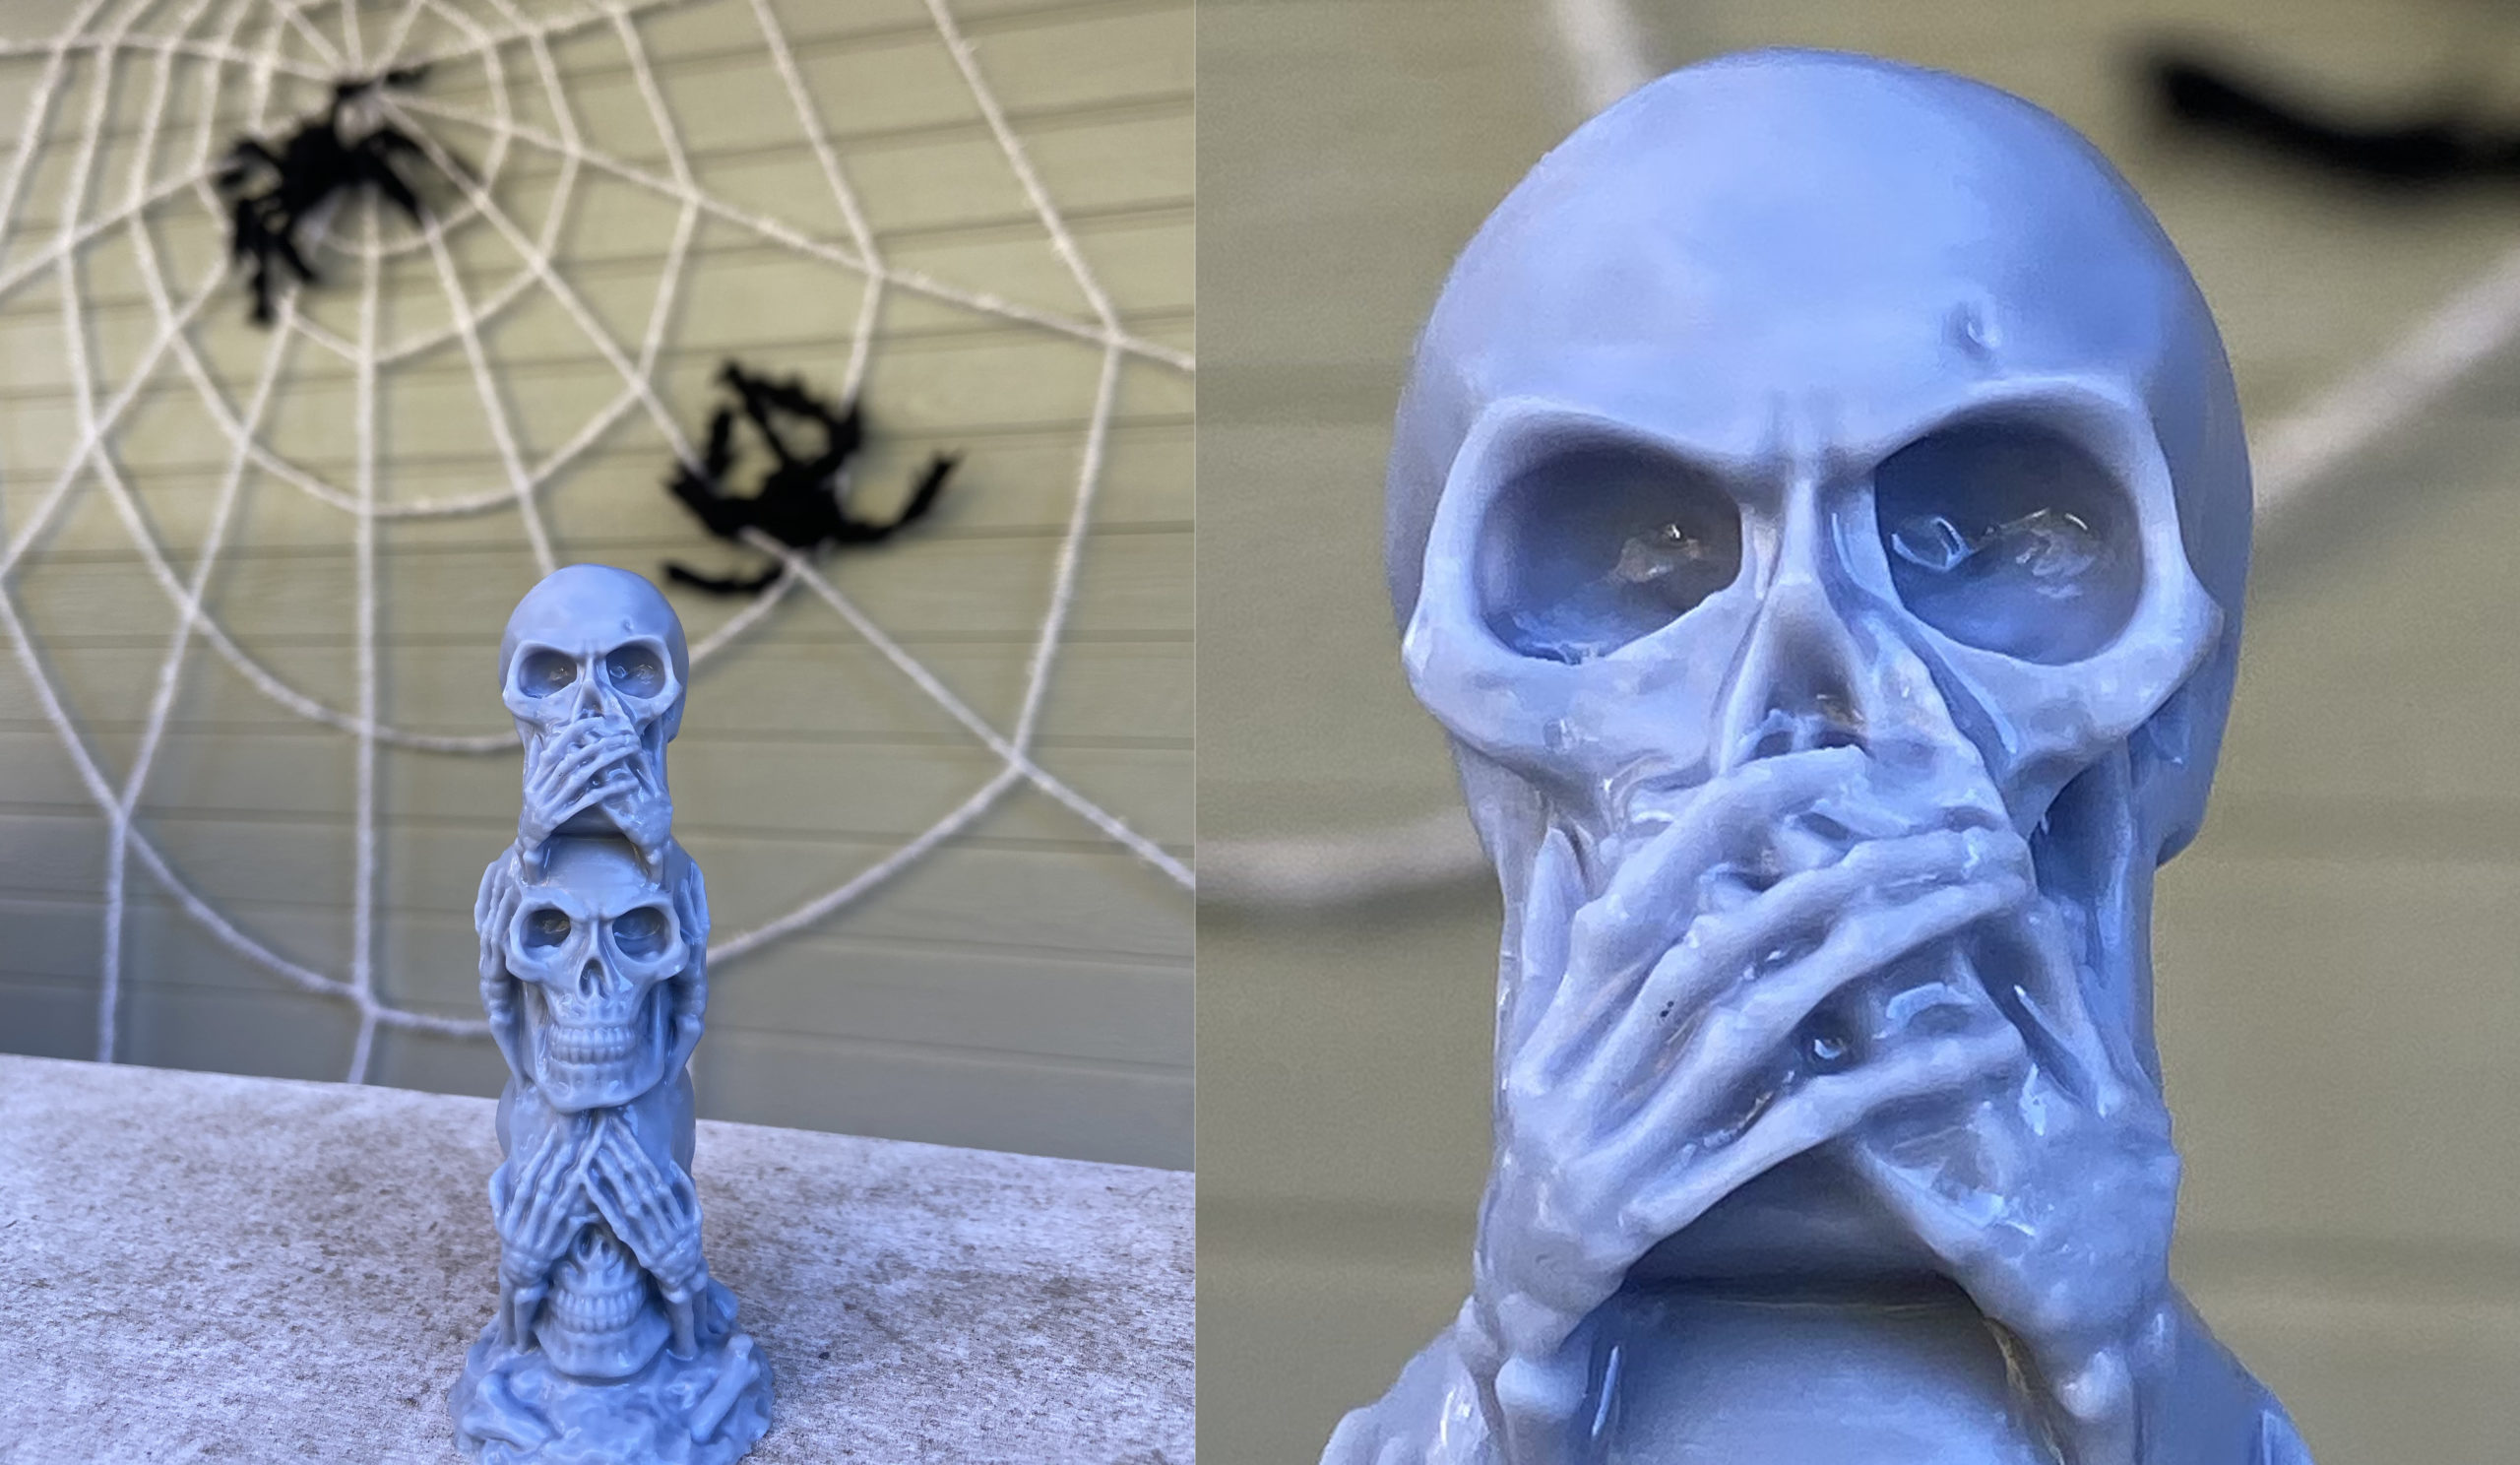 In the closeup on the right, you can see how fine the resolution is and a little bit of resin that still needs to be rinsed off in the skull’s eye socket.
Having left the figure to print overnight, it was quite difficult to remove from the print bed, even with the metal spatula. One solution discussed online was the use of keyboard cleaner, which can cause the print to lift off of the bed to do a reaction from the cold air. Because I didn’t have any canned air on hand, I tried WD-40, which seemed to have the same effect. Once the print started to become unstuck, I was able to pretty instantly detach the object from the bed. Fortunately, I didn’t have to use this trick again because all of the other prints came off pretty effortlessly.
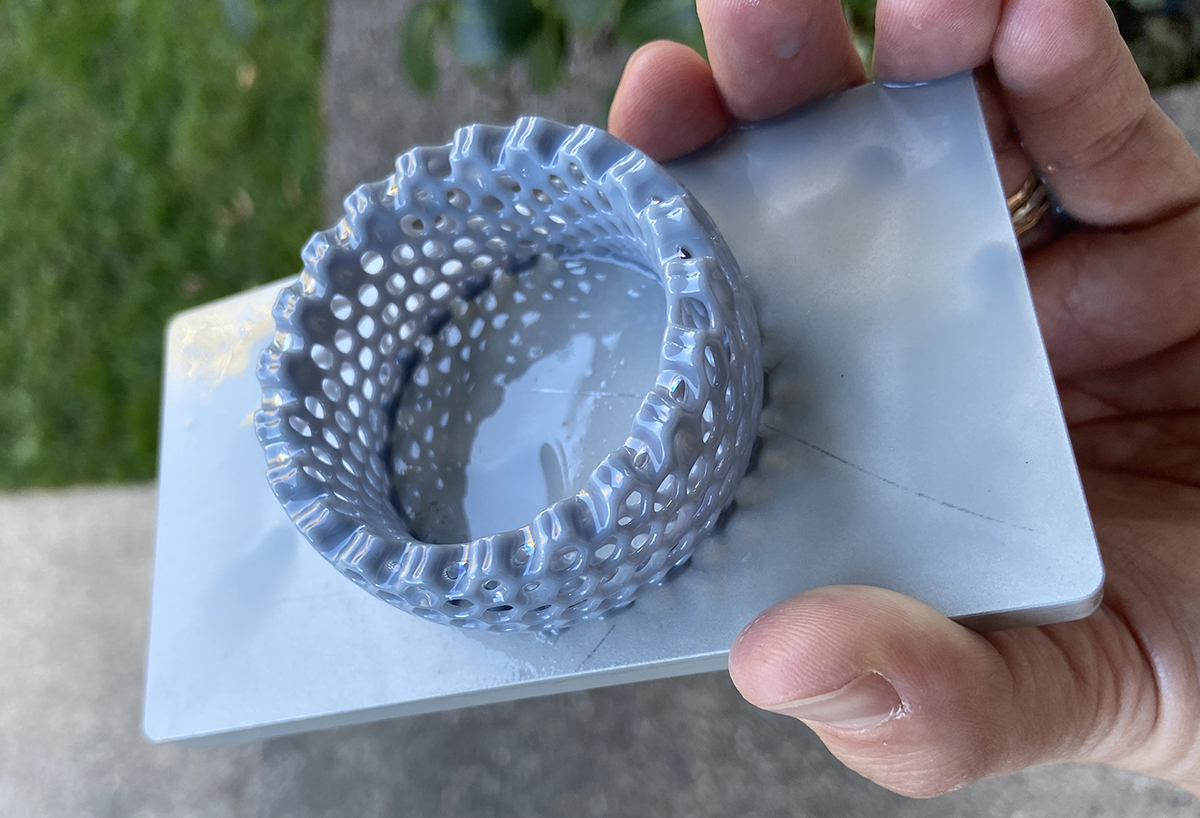 You can see that there is still a little resin residue on the platform, but not very much. The printer seems to conserve material pretty well. This bracelet was extremely easy to remove from the bed.
I lacked the industrial post-processing systems now widespread in the SLA/DLP 3D printing space, including automated washing and curing stations. Instead, I rinsed the prints in Isopropyl Alcohol (IPA) over a small glass vase. I happened to have a lot of IPA around from an ongoing pandemic. I then submerged the object in the alcohol for about 10 minutes, flipping it occasionally. Once it no longer felt sticky with uncured resin, I rinsed it under water and left it outside to receive further ultraviolet curing from the sun’s rays.
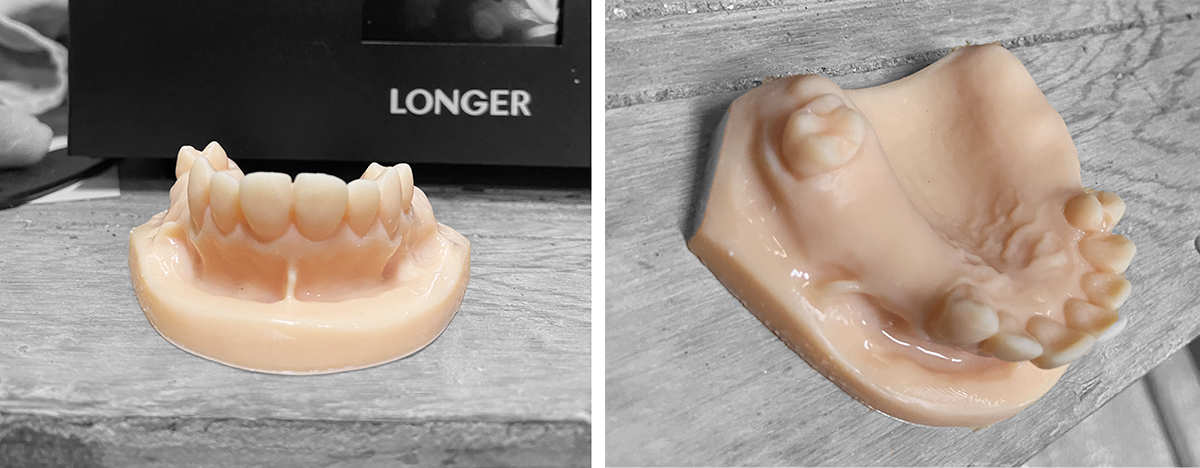 High resolution model of a dental patient’s teeth.
As many users of vat photopolymerization will tell you, the biggest issue with it has to be the noxious chemicals. While the printer itself doesn’t seem to be emit many fumes, like fused deposition modeling machines, the photopolymers themselves have a terrible odor that signifies the hazardous impacts of the chemicals from which they’re made.
It’s important to wear gloves while dealing with the resin at all, including dumping the material into the vat before printing, as well as removing and washing printed objects. Working in a cramped garage, I didn’t exactly have the space to handle the material in the safest way possible.
The issue became most apparent when pouring unused resin back into the bottles for storage. I tilted the vat into the 3M cone-shaped filters provided, which was meant to funnel decent resin into the bottle while filtering out any partially cured impurities. With this haphazard technique, I spilled photopolymer on the steps and floor of my garage as the resin dripped down the side of the bottle. Needless to say, 3D printing of any kind requires a dedicated space with the ability to vent the air.
I used the machine to seamlessly print a number of objects, in addition to the stack of skulls. Wanting to test out how the machine might be used outside of an article review, I fabricated a set of teeth generated from a patient scan, a bracelet, and a tyrannosaurus rex model, as the system could easily be used in dental lab, jewelry manufacturing, and education or model making. I also produced an aerospace bracket, demonstrating the printer’s possibilities for prototyping.
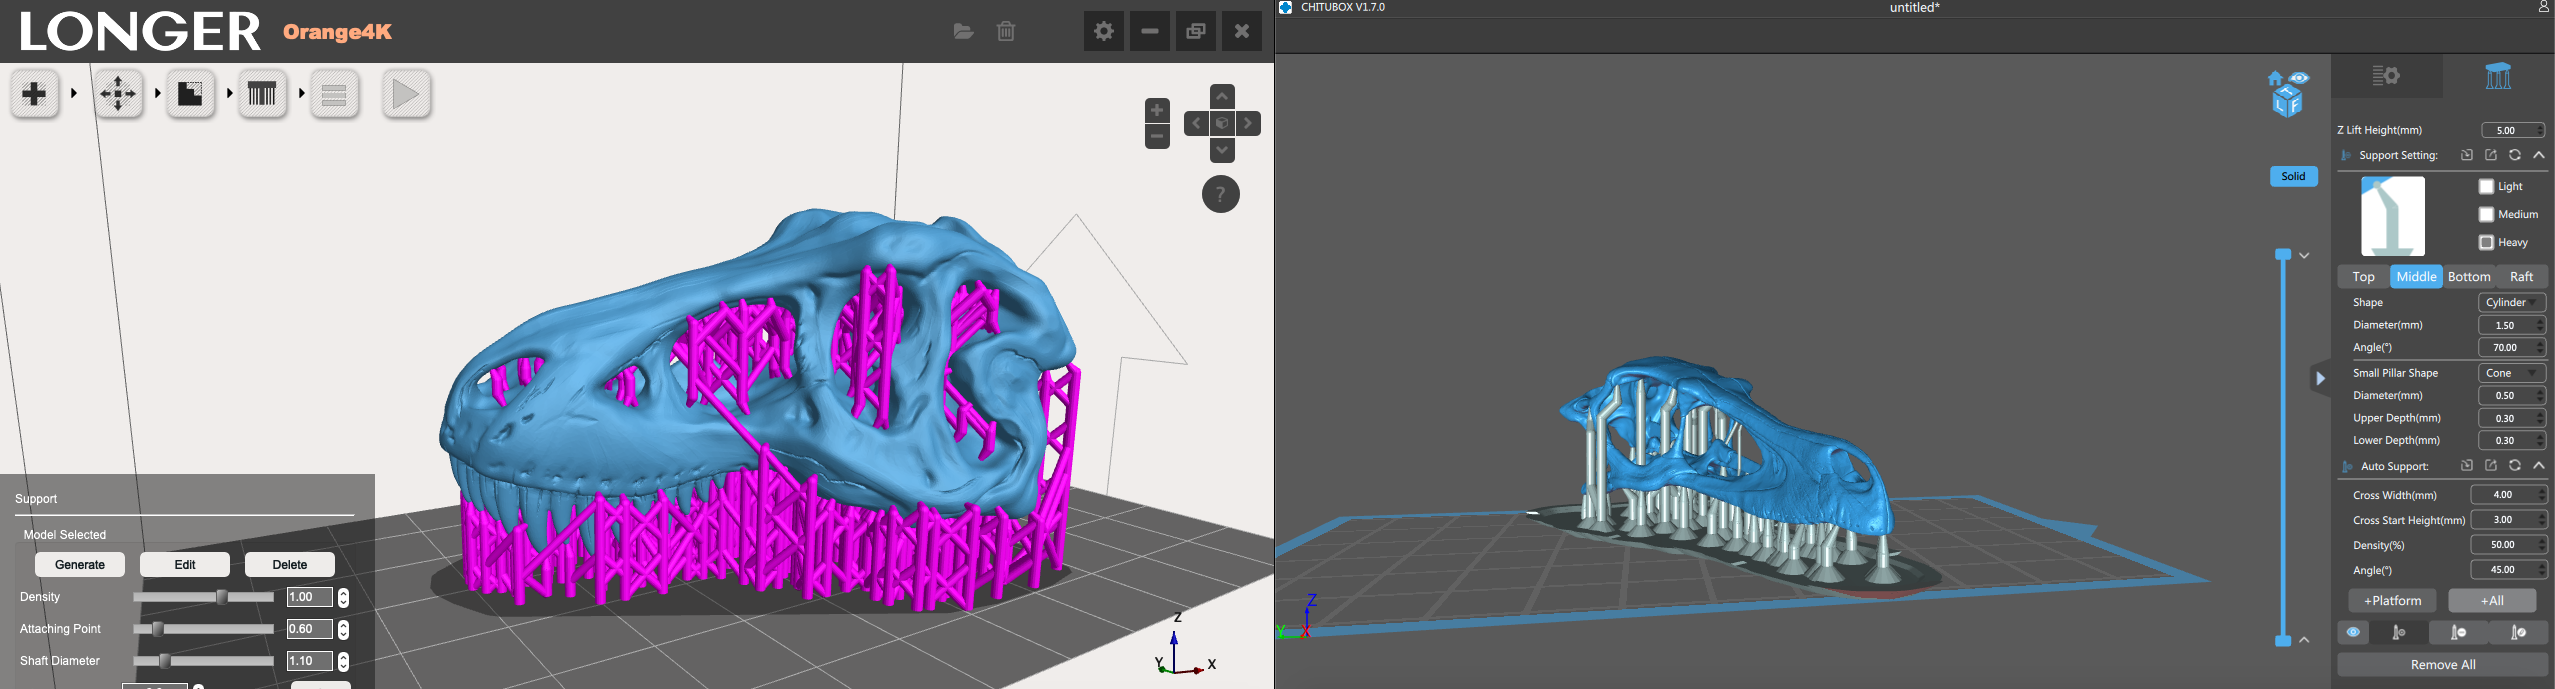 LongerWare on the left has a much simpler interface, while Chitubox enables a number of advanced options that might overwhelm novice users.
Removing support structures from objects that require them is much easier than removing them from FDM prints, from my experience, as they easily break-off. Both Chitubox and LongerWare allow you to vary your support strategy. With LongerWare, this is limited to varying the density of supports, but Chitubox makes it possible to change the shape of the interface point between the supports and the object, as well as a number of other options.
One issue I did come across was the fact that imperfect models may not print at all on the system. Unless the model has been made watertight and fixed, it may not make it onto the bed. This includes a model of myself that I made from a 3D scan and produced using binder jetting. Because it wasn’t designed to have support structures and may have had other issues, only the support structures wound up on the bed and not the model itself. I’d printed that model on open source FDM machines, which tend to struggle through any issues, leaving trails of spaghetti behind, but due to the forces of gravity and photopolymerization, cheating isn’t always allowed with DLP.
In total, the printer proved to be extremely user friendly, reliable and capable of producing very high-resolution prints. The fact that it is available for purchase at $449.99 is simply amazing to me, but there is a growing market of low-cost DLP 3D printers from companies like Longer 3D, so it should not be so surprising. Still, the resolution possible with the Orange 4K is astounding for such a low price. Visit the Orange 4K Kickstarter to back the project or to learn more about the subpixel technology available with the Orange 4K mono.
Subscribe to Our Email Newsletter
Stay up-to-date on all the latest news from the 3D printing industry and receive information and offers from third party vendors.
Print Services
Upload your 3D Models and get them printed quickly and efficiently.


You May Also Like
Flashforge Bets on Meshy AI as Desktop 3D Printing Battle Intensifies
Competition in desktop 3D printing is brutal. Whereas before, firms competed through value engineering, Prusa clones now have an integrated hardware, sensor, and software setup that is making all the...
Ford Uses Binder Jet 3D Printing to Make Boat Propellers for Sharrow Marine
Ford’s Advanced Industrial Technology and Platforms (ATP) group has helped Sharrow Marine make a boat propeller in two weeks rather than 130 days. Thanks to the Michigan Central program, Ford...
Skuld to Work on DARPA’s Rubble to Rockets (R2R) Program
Skuld will work on the Defense Advanced Research Projects Agency’s (DARPA) Rubble to Rockets (R2R) Program, which turns scrap metal into missile components. Skuld will help with alloy design, characterization, and...
From “Magic” to Metal: How Intrepid Automation Wants to Make 3D Printing Matter at Scale
Ben Wynne still talks about 3D printing the way people do when they’ve felt that “wow” moment up close. Back in the early 2000s, he was working at HP’s advanced...