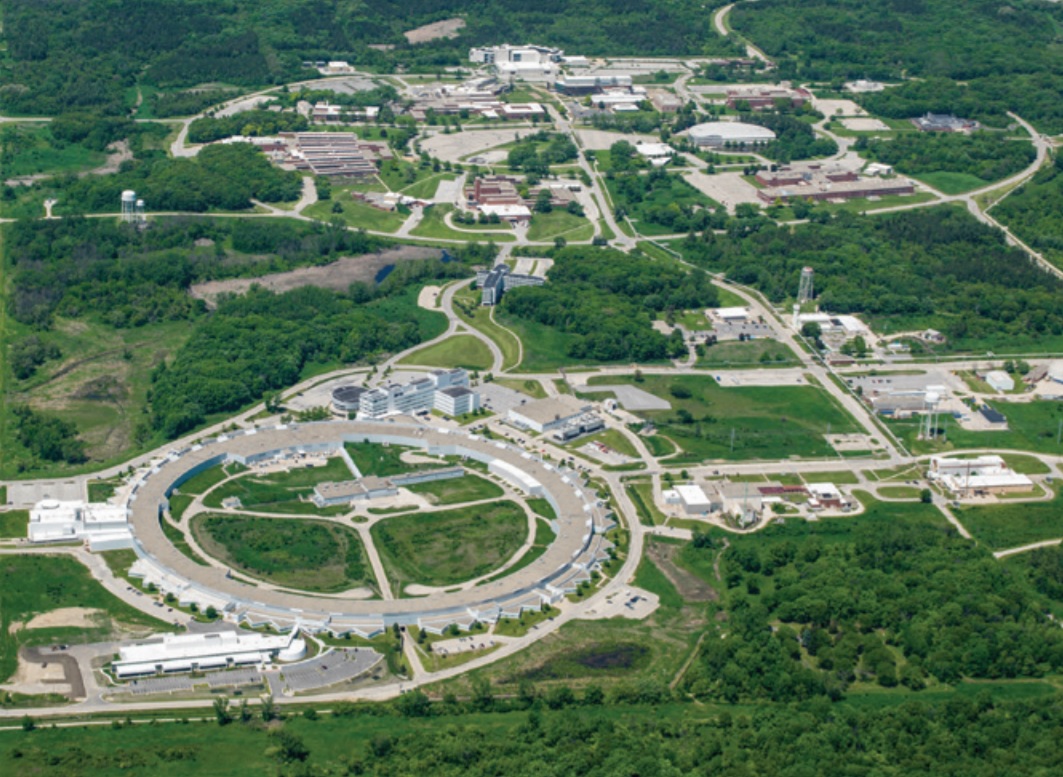
Scientists at Argonne National Laboratory have found a novel way to identify and prevent defects in metal parts using surface temperatures in laser powder bed fusion. Published in May in the Additive Manufacturing journal, the study used advanced X-ray technology at the Advanced Photon Source (APS) facility and machine learning algorithms to find a correlation between surface temperature/thermal profiles and porosity formation, a critical issue in powder bed fusion (PBF) processes. This allowed for the development of a way to predict subsurface defects.
One of the study authors, Aaron Greco, also Manager at the Argonne’s Interfacial Mechanics & Materials group in the Applied Materials Division (AMD) said of the issues facing metal PBF, “Right now, there is a risk associated with 3D printing errors, so that means there’s a cost. That cost is inhibiting the widespread adoption of this technology. To realize its full potential, we need to lower the risk to lower the cost….Ultimately you would be able to print something and collect temperature data at the source and you could see if there were some abnormalities, and then fix them or start over. That’s the big-picture goal.”
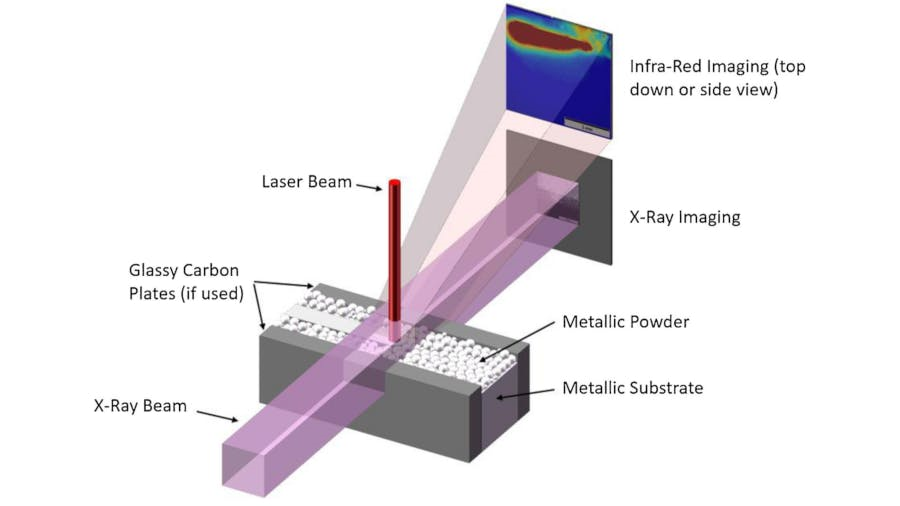
To demonstrate the correlation between surface temperature profiles and subsurface defect formation, researchers developed four statistical machine learning models and tested them using one of the most commonly known metal alloys in 3D printing, Ti6Al4V, a titanium powder material used largely in aeronautics and medical device applications. For the experiment, a special rig was set up that used infrared cameras to provide a top view of the printing process, while “high-powered and highly bright” X-rays were used to provide a side view, something only possible with the X-ray beam technology at APS. This side view allowed researchers to identify the formation of tiny holes or microscopic “voids” that can result in non-uniform density, defects or cracking of parts.
Noah Paulson, another of the study’s authors and a computational materials scientist at AMD said of the technology, “Having the top and side views at the same time is really powerful. With the side view, which is what is truly unique here with the APS setup, we could see that under certain processing conditions based on different time and temperature combinations porosity forms as the laser passes over.”
While traditional manufacturing processes need not inspect each metal part produced for defects due to the established consistency in manufacturing quality, additive manufacturing (AM) processes are not quite there yet. Part inspection, quality assurance and defect management add significant costs and time that prevent the widespread adoption of AM for large-scale production.
What is particularly interesting with the approach taken by the researchers at Argonne is that they were able to develop their statistical models using relatively limited data points and for use in commercially available 3D printers that only have infrared cameras integrated (and not the highly-specialized, expensive, high-speed imaging X-ray technology at APS). This allows existing 3D printer manufacturers to use their existing equipment and this novel methodology to detect and rectify flaws during the printing process.
As Ben Gould, a study author and materials scientist at AMD said, “By correlating the results from the APS with the less detailed results we can already get in actual printers using infrared technology, we can make claims about the quality of the printing without having to actually see below the surface. For machine learning, to build accurate models you need thousands and thousands of data points. For this experiment, we had 200. As we put in more data, the model will get more and more exact. But what we did find is very promising.”
In related research in metal 3D printing, Argonne researchers had developed a method to identify the cause and predict the formation of harmful gas pockets, or keyhole formation, which if prevented can improve consistency and quality significantly in metal 3D printing. Earlier in June, we had spoken with Peter Kozak at Argonne regarding work done in recycling nuclear fuel using 3D printing technologies in a process called the Actinide Lanthanide Separation Process (ALSEP). In 2018, we had reported on work Argonne was doing for the US Military in developing laser bed fusion processes for advanced military applications in the field.
Subscribe to Our Email Newsletter
Stay up-to-date on all the latest news from the 3D printing industry and receive information and offers from third party vendors.
Print Services
Upload your 3D Models and get them printed quickly and efficiently.
You May Also Like
Consolidation in AM: How 2025 Is Shaping the Industry’s New Normal
The first half of 2025 has been marked by a clear shift in the additive manufacturing (AM) industry. Companies are no longer just focused on developing new tech by themselves....
Etsy Design Rule Change Reduces Selection of 3D Printed Goods
Online marketplace Etsy has implemented a rule change requiring all 3D printed goods on the site to be original designs. The update to the site’s Creativity Standards states, ¨Items produced using...
U.S. Congress Calls Out 3D Printing in Proposal for Commercial Reserve Manufacturing Network
Last week, the U.S. House of Representatives’ Appropriations Committee moved the FY 2026 defense bill forward to the House floor. Included in the legislation is a $131 million proposal for...
Transforming From Tourist to Native: Duro CEO Michael Corr Explains Why the Company Rebuilt its PLM Software on AI
In these early innings of the AI boom, many market analysts have expressed concern that AI spend has gotten too far ahead of the technology’s proven ability to deliver significant...


