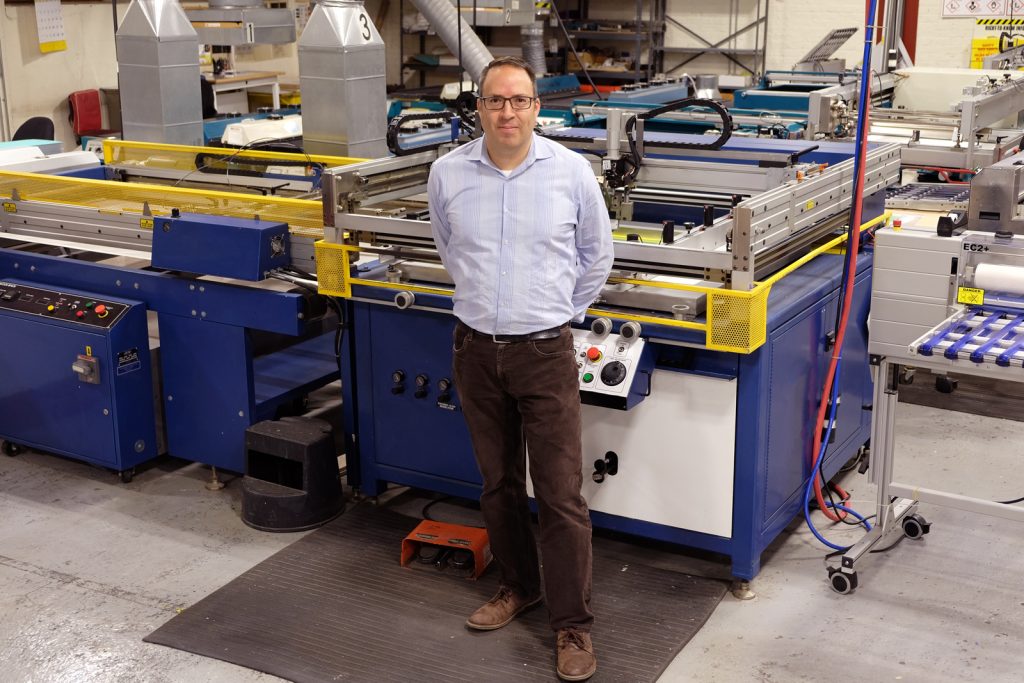
Interview with Mike Valentine on How BuildTak Was Invented


One of the biggest issues with desktop FDM 3D printers is layer adhesion. First layers are often deposited incorrectly and then the build fails. The part could deform, warp, fall over, become dislodged from the platform or become a leaning Tower of Pisa version of its intended self. Often you look back at your 3D printer with hope only to see the print head flailing about twirling filament like it is a marionette. Layer adhesion has been a problem since the very beginning of FDM printing. There are lots of causes that can be ameliorated by doing regular 3D printer maintenance and calibration but for many issues still remain. In that case are lots of different possible solutions depending on which materials you use and what platform you have. You could mix up gooey substances or use a spray to solve your problem. One of the most widely adopted solutions is to use BuildTak, a sheet that comfortably lets your build adhere to the platform. We noticed that BuildTak had opened European offices and was expanding into more products. So we thought it high time for 3DPrint.com to interview Mike Valentine a Co-Inventor of BuildTak about the company and the product.
What is BuildTak?
BuildTak is our flagship 3D print surface designed for desktop FDM 3D printers to provide stability in both 3D print adhesion and removal. It consists of a thin textured top surface and a high performing yet non-permanent adhesive on the lower surface. BuildTak is composed of high quality, heat-resistant raw materials that are designed to withstand the high temperatures of a typical FDM 3D printer. Following the global success of our BuildTak sheets and other ensuing products, the BuildTak brand has evolved into more of an ecosystem that prides itself on easing the overall process of 3D print adhesion and removal.
How does it work?
BuildTak adheres directly to the existing print bed of 3D printers and provides a stable printing surface for 3D prints by minimizing the chance of warping or shifting when printing, but still allowing for builds to be cleanly removed. There are 2 intentional features of our original BuildTak sheets that specifically contribute to the product’s success. First is the top surface texture that, when printing at the optimal nozzle height, allows for just the right amount of adhesion for the 3D prints, but still allowing for easy removal. The second is the high-quality adhesive we use, which performs extremely well on heated print beds. The best part is that when it’s time to remove and replace the BuildTak sheet, it will still come cleanly off the print bed leaving no residue behind, even after months of use.
How did you come to co-invent it?
While I wish I could say BuildTak was something we set out to achieve after years and years of R & D, it was not the case. Instead, like many inventions, our original BuildTak sheets were the indirect result of another experiment. I am the Vice President at Ideal Jacobs Corp in Maplewood, NJ, USA, where BuildTak sheets were developed and are still produced today. Our core business is commercial (2D) printing and manufacturing, serving many tech industries including telecom and now, of course, 3D printing. Back in April 2013, the company invested in a newly affordable desktop 3D printer for the office to use for prototyping. The company owner, Andrew Jacobs, runs the operation with a true entrepreneurial spirit and as a result is frequently looking to invent products that solve problems big and small. One of the many hats I wear for the company is to bring in new technology, and so I was tasked with the responsibility of learning how to use the 3D printer. The experience, as with many others who were new to 3D printing in 2013, was immediately frustrating.
The printer came with 5 sheets of polyimide tape, some ABS and several sample files to print. With a bit of tinkering (and some ABS slurries) I was able to get many of the easier sample parts to print, though they were still very difficult to remove from the print bed. And there was that infamous chain-link sample part that failed every time. One day, while tinkering, my boss brought me a collection of raw sheet material to experiment with to see what would happen if I 3D printed on top it. One of the goals he had in mind was to see if we could print Braille. Many of Ideal Jacobs’ products feature embossed Braille and the tooling can be quite expensive, making small runs and prototyping extremely inefficient from a cost standpoint. While experimenting with these new materials, I came to the realization that it was much easier to print on them than the polyimide. With a little more testing and fine-tuning I discovered that not only did the ABS prints adhere well to the material, they also removed from the new surface with very little fuss. The prints just peeled right off. It became clear that we were on to something, so I went back to that chainlink sample part – my nemesis – and gave it a shot on the new surface material. Sure enough, it printed successfully on the first try. Needless to say, I never went back to polyimide again and we now had a reliable office 3D printer.
With a little research, it did not take long to realize that our initial struggles with our 3D printer were not only common, but accepted as the norm. We saw an opportunity to present a new solution to the industry that could really help make the 3D printing experience a little more user friendly, and began testing/fine-tuning our material components for the best combination of texture and adhesive. By July 2013 we had the formula that is now our original BuildTak sheets. We manufactured some 11” x 11” samples and started circulating them at a 3D printing trade show in Chicago. Just about everyone we gave a sample to (including several major 3D printer manufacturers), came back to us within only a few weeks saying it was better than anything they were using and that they wanted more. Fast forward to 5 years later and I’m proud to say that our original BuildTak sheets are now an industry standard and sold all over the world.
What’s it been like to be in this business?
BuildTak has been going strong for 5+ years and I still find it extremely exciting and humbling. We feel very fortunate to have been able to come up with a much-needed solution at a time when the fast-growing 3D printing industry really needed it in order to take the market to the next level. Of course, working for a company like Ideal Jacobs Corp has everything to do with why and how we are able to achieve success in our BuildTak brand. The culture and vision that the owner has instituted in our company has taken us well into the 21st century. We love tinkering with new technologies and excel at solving problems on a day-to-day basis. With our resourceful team of 30+ employees at our NJ facility, we achieve a lot with a little. Even after 5 years of exponential growth, we are proud to say that BuildTak sheets are still produced 100% in the US.
Ideal Jacobs today has a global presence with various manufacturing locations in Asia and small sales offices in Belgium, Mexico, Canada and Thailand. In fact, Andrew’s daughter, Kayla Jacobs, now represents the 4th generation and for the last several years has been heavily involved in helping to expand the BuildTak brand to make it what it is today.
How long can I print with one BuildTak sheet?
Ah the million dollar question, to which I reply how long can you wear a pair of shoes? There are so many variables and exposure situations that could affect the wear and tear of the sheet, making this question nearly impossible to answer effectively. As with all 3D printing, the key to using our original BuildTak sheets is learning the optimal settings (nozzle height, printing temperatures, etc), which can be different from one material to the next and from printer to printer. I tell new BuildTak users all the time that the best thing they can do is to pretend they are using a 3D printer for the first time. Our happiest customers are the ones that use BuildTak on day one and learn how to use it the right way and just know that this is what works. Occasionally we will hear from a frustrated customer who undoubtedly went from printing directly on glass or polyimide to using BuildTak thinking all settings should stay the same and either printed the first layer too close and/or with too much smoosh resulting in an unpleasant first experience with BuildTak. While I cannot say for sure how long a BuildTak sheet will last for everyone, I can say that we do have power users out there who have achieved 1500+ hrs in printing on a single sheet.
For what materials is it suited?
PLA is by far the easiest material to print on our original BuildTak sheets, and people who print primarily with PLA tend to also get the most use of their BuildTak sheet. With that said, BuildTak often excels with materials that are known for warping. ABS and PC prints adhere extremely well to BuildTak – admittedly sometimes too well and the sheet wears out faster as a result. However, that’s a necessary trade-off with materials that would inevitably fail on any other bed surface. Other materials that work on BuildTak include: PVA, HIPS, PET+, Flexible (TPE) filaments.
You also have PEI sheets now?
Why yes we do! In the desktop 3D printing market today I would say most people are printing on either PEI or BuildTak (or one of our flattering imitators). You really don’t see blue tape or Kapton very much these days. PEI certainly has its place in this market, and many customers have been using PEI since they began printing. The problem we saw was that most PEI was being offered to consumers with a separate permanent adhesive sheet that users had to apply themselves. It works but if you’ve ever tried to remove a PEI sheet with with this adhesive then you know all about the residue it leaves behind and what a chore it can be to get that print bed clean again. We thought we could help by combining our tried-and-true BuildTak adhesive with a consistently high-quality PEI surface. Our users like to know that they are getting a top-quality product every time – not some mystery material they found though an internet search.
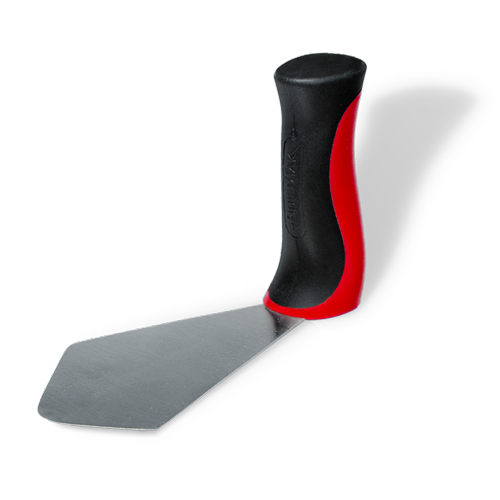
Did you make a spatula?
From the first day we started selling the original BuildTak sheets the same question kept popping up: what is the best tool for removing prints? In 2014 just about everyone was using a tool that was designed for some other purpose (putty knife, pallets knife, etc). Oftentimes the tools featured sharp corners which, if used improperly, could easily gouge the BuildTak sheet and wear it out faster. They were also dangerous for the users, and at that time you did not have to search very far to find a 3D printer owner who hadn’t at least once slipped with their removal tool and cut themselves. I started thinking about the problems with existing tools and came to the conclusion that the primary culprits were handle orientation and the angle at which the handle approached the finished print. I thought about a typical spatula and saw that the benefit of sliding a blade horizontally across the BuildTak sheet was much more effective at getting under the print in a way that did not dig into the BuildTak sheet. A typical spatula handle is not designed to push horizontally with adequate leverage – your hand would tend to slip off. So after many design concepts, which I prototyped with our in-house 3D printers, I finally concluded that an ergonomic vertical handle was the way to go. This design allowed the user to apply leverage under and across the bottom of a print with very little chance of one’s hand slipping off. The result is our BuildTak Spatula.
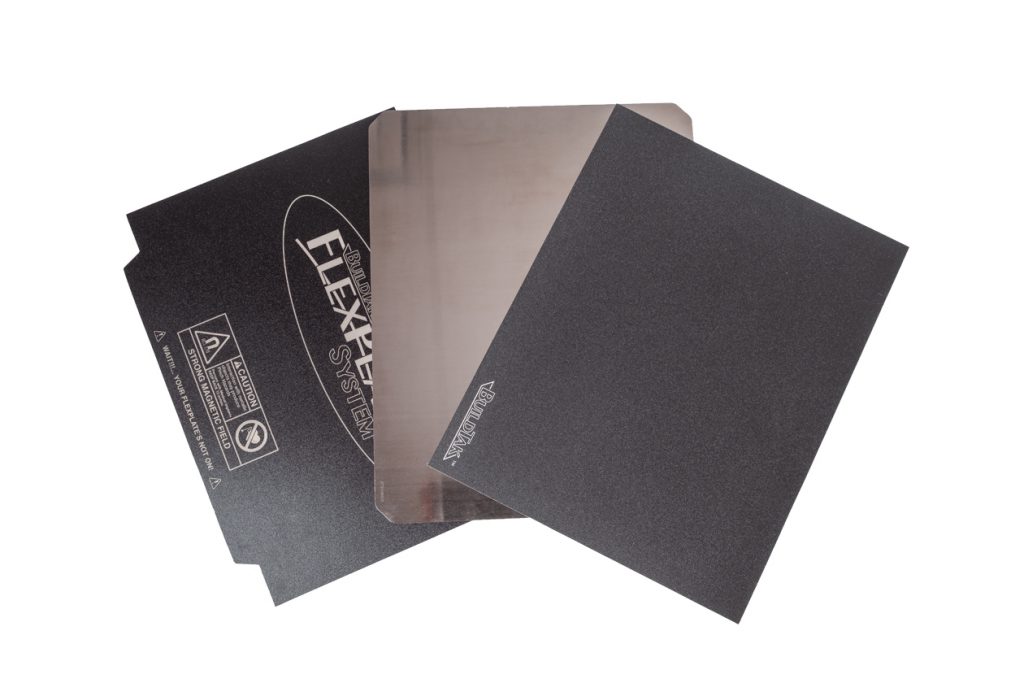
How does the Flex plate System work?
The BuildTak FlexPlate System enhances the existing print bed of a 3D printer. It features a magnetic mounting base and a specially-coated spring steel FlexPlate to be used with either BuildTak original, PEI, or your preferred printing surface. The magnetic base has an adhesive backing that permanently mounts to the existing print bed (usually glass or aluminum). Once the magnetic base is installed you just need to mount a sheet of your favorite print surface to the FlexPlate, adjust your nozzle height and start printing. Once your print is done you can remove the FlexPlate from its magnetic base and flex the plate. Assuming that the print is rigid, the flexed plate will force the print to separate from the print surface making the removal process much less of a hassle.
The clever use of a flexible steel plate with BuildTak was not originally our idea. One of the great things about the desktop 3D printing market is that it is fueled by its savvy maker community. Some of our early users brought this innovation to our attention – we had heard as far back as 2013 that people were adhering their BuildTak sheets to old road signs and using those as a print bed. After the successful release of the BuildTak Spatula I started to really focus on developing new innovations, and the steel plate concept was at the top of the list. The big challenge was finding a way to make the product universally compatible with and easy to install to the wide range of print beds out there. We could simply sell it with a handful of binder clips and hope for the best, but that felt like an unprofessional, half-developed product. We started testing magnetic options – “refrigerator magnet” sheets and some off-the-shelf rare earth magnets – but neither was sufficient in strength nor able to handle heated bed temps up to 110C without losing magnetism. So we had some high temperature magnets custom-made for our application and determined the optimal layout for each size of magnetic mounting base.
Will you solve other 3D printing problems?
We certainly hope so. Our goal is to continue to make the 3D experience more user-friendly and in turn more accessible to a broader community of users. It is my belief that someday 3D printers will become as common as inkjet printers. But in order for that to happen it really does need to become a ready-to-print solution, right out of the box. In the meantime, we will continue to come up with new ideas that help make existing 3D printers easy to use.
Our head of Business Development, Kayla Jacobs, has been working hard to ensure we never stay idle. As a result we have a few new tools and accessories in the final design stages and coming out in the next year. And as the market continues to expand the palette of printable materials we will look to stay at the forefront by offering new surface solutions.
What are your top 3D printing tips for beginners?
Never underestimate the need for a level print bed and find your printer’s optimal nozzle (Z) height for each material and bed surface you use. You will be surprised what a difference a fraction of a millimeter can make. Master the art of making precise incremental adjustments – your patience will pay dividends.
In many ways, successful 3D printing involves hitting a moving target. In other words, there are many fluctuating variables (material, room temperature, humidity, air flow, nozzle height, etc). Very few desktop 3D printers on the market today can 100% control all of these variables, so the best you can do is adopt solutions that help to minimize the fluctuations as best as possible and understand that the tweaking is never done.
Get your feet wet printing some vases and fidget spinners, but make it a point to learn 3D modeling. Only when you can design and model your own parts have you truly tapped into the power of 3D printing and what it can mean for the inventiveness and creativity in all of us. There are many free software programs available and plenty of online tutorials to go along with them. Before long you will be fixing things around the house or office with your newfound ability to manufacture custom solutions. Who knows, maybe your idea will become the next big thing.
Subscribe to Our Email Newsletter
Stay up-to-date on all the latest news from the 3D printing industry and receive information and offers from third party vendors.
Print Services
Upload your 3D Models and get them printed quickly and efficiently.


You May Also Like
3D Printing News Briefs, June 18, 2026: Reseller, Relocation, Metal Space Powder, & More
We’ll start with business news in today’s 3D Printing News Briefs, as XJet appointed a value-added reseller in Germany, BIO INX is expanding its presence in the Italian market, and...
Scientists Use BMF to 3D Print Seal Whiskers That Track Prey Long After It’s Gone
Seals use their whiskers to hunt. Not Navy Seals, although they may in some way also, but this article is about lowercase seals. Not Seal the musician either; as far...
Researchers Combine AI and Bioprinting to Create Tiny Blood Vessel Networks
If 2026 has a theme in bioprinting, it may be blood vessels. Researchers can already print incredibly sophisticated tissues. The harder part is keeping those tissues alive. Without a network...
University of Arkansas Researchers Test Metal 3D Printing in a Mars-Like Atmosphere
If humans eventually establish a long-term presence on Mars, they will face a major manufacturing challenge almost immediately. Tools will break. Parts will wear out. Equipment will need repairs. But...