

3D Printed Lithophane Tutorial from Stratasys Shows How to Turn Multiple Images into One Luminous Work of Art


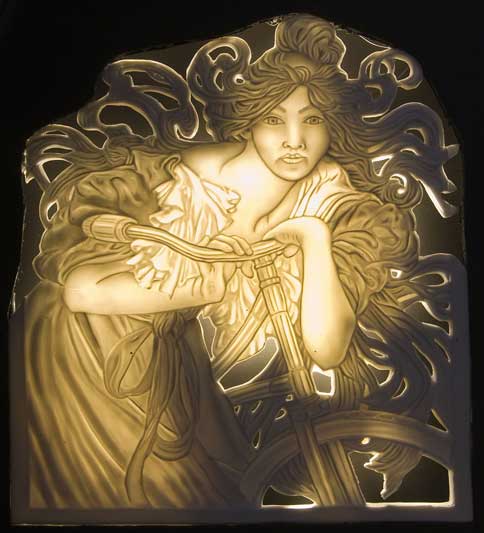
Lithophane by Hannah Blackwell [Image: Blair Museum of Lithophanes]
It’s a beautiful art form, and it hasn’t been completely abandoned over the years. It has, in fact, been adapted to the digital world, and now lithophanes are surprisingly easy to create. 3D printed lithophanes are becoming popular, and there are lots of resources out there to help you create one in mere minutes. It’s almost too easy, actually – I imagine the lithophane’s original creators are probably kicking themselves in frustration, on whichever plane of existence they happen to be residing now.
Stratasys recently released their own 3D printed lithophane tutorial as part of their Education Innovation Series, which includes lesson plans and fun projects for K-12 teachers to use to teach their students about 3D printing. For the tutorial, the Stratasys Education Advisory Board (eCAB) team made their own lithophane, incorporating multiple images to create a really neat final product that can easily be adapted by a school for a class photo project.
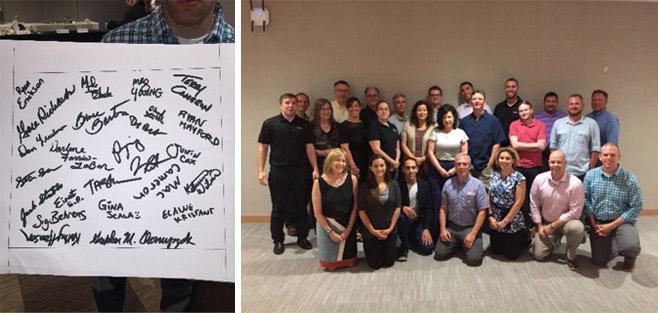
The team began with two separate images: a group photo and a photo of a piece of posterboard signed by the entire team. They then imported the group photo into 3DP Rocks’ popular Image to Lithophane tool, which converted the 2D image into an STL file. Next, they used Inkscape to convert the image of the signatures into an SVG file, which was then imported into Tinkercad, where it was turned into an STL file and overlaid onto the lithophane file.
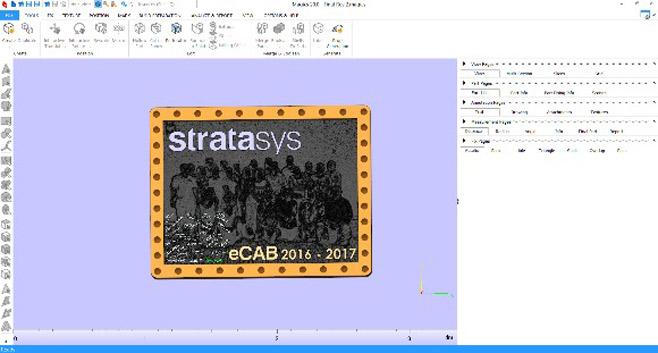 Then, the team used Onshape to design files of the Stratasys logo, the eCAB logo, and a nice frame to put around all of the images. Next, all files were imported into Materialise Magics, where they were arranged to fit nicely together – the signatures scaled down and overlaid onto the lower corner of the team photo, and the logos placed along the top and bottom borders.
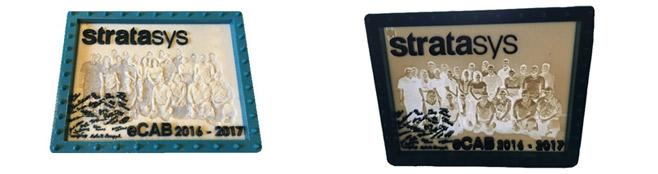
Finally, the completed file was uploaded to Objet Studio and 3D printed on the Objet Connex3, Stratasys’ multi-color, multi-material printer, which made quite a buzz when it was introduced nearly three years ago. The image was printed with a glossy surface, and while it isn’t porcelain, it still glows – in an almost eerie manner, to be honest, as a strange negative-image effect is created when held up to the light.
The process took about two and a half hours, and all of the software, except for Magics, was free. (It probably won’t be too hard to find a free workaround for the Magics step, if necessary.) This looks like a great classroom project; it’s simple enough for most age levels, and is a fun way to teach students about multiple kinds of 3D software. It can be done on any kind of 3D printer, and kids should love the personalized nature of it – plus, the weird glowing negative effect of the final product is perfect for Halloween. Read the full tutorial here. Have you tried a project like this? Discuss in the Lithophane Tutorial forum over at 3DPB.com.
Subscribe to Our Email Newsletter
Stay up-to-date on all the latest news from the 3D printing industry and receive information and offers from third party vendors.
Print Services
Upload your 3D Models and get them printed quickly and efficiently.


You May Also Like
6K Energy Wins $1.9M Defense Grant to Advance U.S.-Made Battery Materials
The U.S. Defense Logistics Agency (DLA) has awarded 6K Energy a $1.9 million research and development grant to support the domestic production of advanced lithium-ion battery materials. The funding, issued...
New 3D Printed Hydrogen Cell Factory Just Switched On in Catalonia
The Catalonia Institute for Energy Research (IREC) has opened a pilot plant that 3D prints advanced ceramic devices for renewable hydrogen systems. It’s described as the first facility on the...
Sakuu to Auction Off Surplus Equipment in August — Company Says It’s Part of Normal Operations
Sakuu, a company known for developing additive manufacturing (AM) systems for battery production, is holding an online auction to sell a wide range of equipment. The auction will run from...
3D Printing News Briefs, May 21, 2025: Medical Training Models, Connectors, Makerspace, & More
We’re starting with research and medical in today’s 3D Printing News Briefs, as a research team from Caltech is using sound to 3D print deep inside living tissue, and rural...


