Take to the Ceiling With Your Own Mini Blimp Supported by 3D Printed Parts

 Anyone closely following technology already knows that 3D printed drones are all the rage. It seems that everyone has to have one these days. If you want to stay ahead of the latest tech trend, perhaps you should set your sights for a moment on this Instructable for a Miniature Autonomous Blimp from “Aleator777,” or DJ. This designer of “electronic whatsits, 3D printed thingamabobs, and laser-cut kajiggers” has fashioned an excellent DIY (indoors only) blimp project together from latex, helium, an Intel Edison, and some 3D printed parts. Let’s get the rundown on how DJ made this most amusing device.
First off, you’ll need to check out the vast list of parts and materials that DJ makes available to us in Step 1 of the Instructable. The list includes an Intel Edison, motors, micro servos, a battery, sensor, converter, propeller, helium, nuts, screws, carbon fiber tube, a 3-foot latex balloon, some 3D printed parts, and a few more items not listed here. Get the idea? You’ll need to check this list out closely as it is quite a long one.
Once you have procured your purchased parts, it’s time to get a grasp on the basic design principles of the blimp. DJ explains:
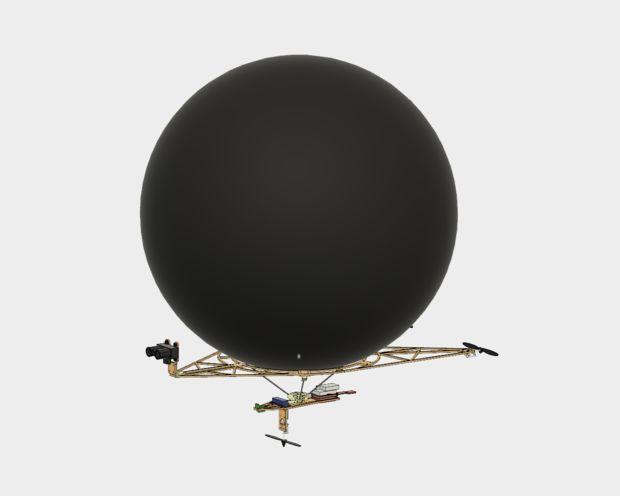
“Core to the concept of blimp-based flight is passive lift. The volume of helium is less dense than the surrounding air and makes it buoyant. Due to the weight of the balloon itself, the frame, and the electronics, we’ll need at least 7 ounces of lift. The amount of lift per cubic foot of helium is roughly 1 ounce, so we’ll need at least this much.”
DJ explains that a party balloon of 3 feet in diameter will work fine for this project, and he then goes on to explain more detail about the mechanical, electronic, and software elements of the blimp’s design. Take note: it is in Step 2 of the project that you will find the .STL files for the 3D printed parts, including 3 angle brackets, 2 brackets, and a base piece.
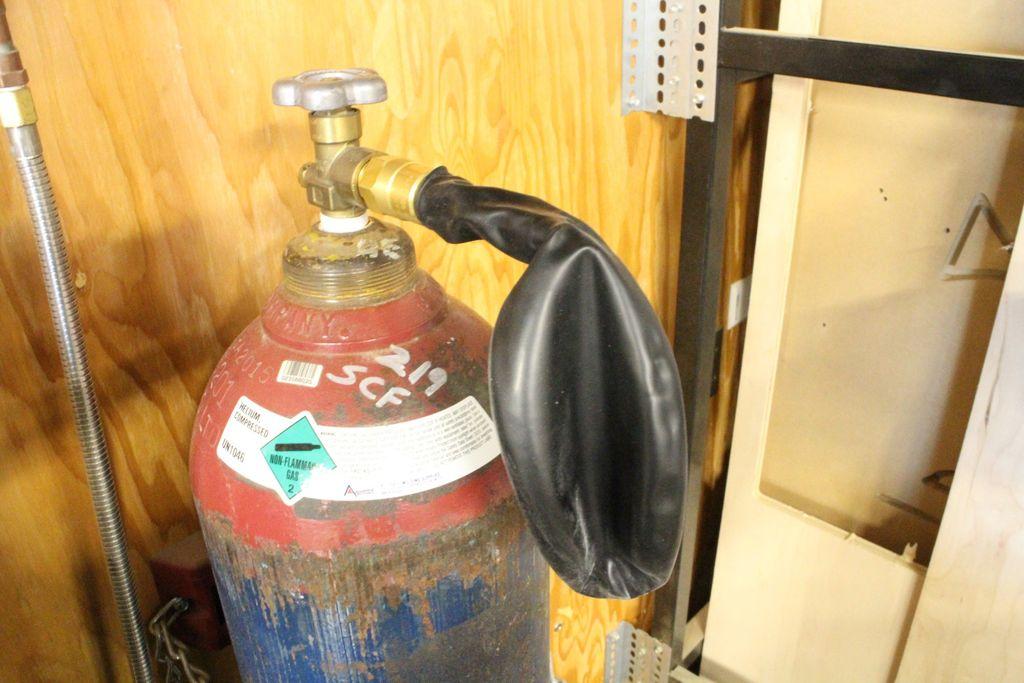 In Steps 3-5, DJ covers the Schematics, Air Frame, and Carbon Fiber Tubing features of the blimp. It’s in Step 6 of the Instructable that you are finally able to do the really fun stuff: fill your balloon up with helium. But if you are thinking “that’s so simple,” think again. You’ll want to have at least a few balloons on hand and extra helium, since you may over-fill a balloon, causing it to pop. The bottom line: accurate filling of the balloon with helium allows the project that exact lift it needs to be successful, so mind the filling process.
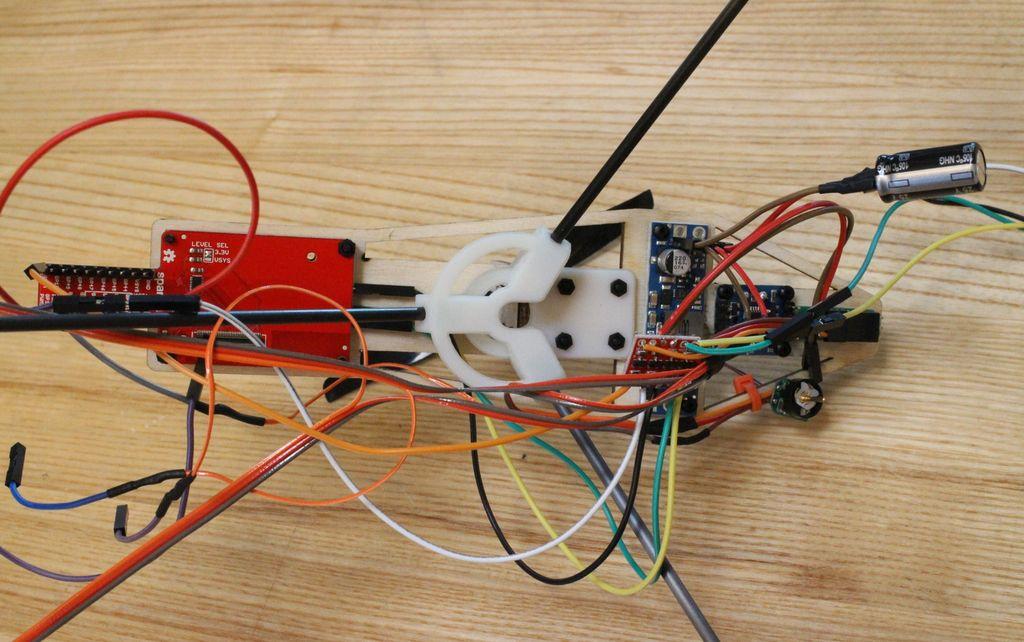
Steps 7-10 cover the Gondola section of the blimp, the Vertical Assembly, the Lidar Mount and the Servo Control Extraction–way too many details to explain here. Next, you will Modify your Rotors and Download Software. In order to download the software, you will need an Arduino IDE, which supports the Intel Edison.
Finally, in Step 13, you are ready to operate your blimp! Simply power on your blimp, wait for it to boot up (about 30 seconds), follow the instructions, and before you know it, you have your own indoor mini blimp, with 3D printed parts, floating around your home or office, capable of reading distance and randomly turning to “avoid obstacles as it floats along.” (You can watch the blimp in action in this awesome video below.) Are you thinking about taking on the challenge of this new design? Discuss in the 3D Printed Mini Blimp forum over at 3DPB.com.
Subscribe to Our Email Newsletter
Stay up-to-date on all the latest news from the 3D printing industry and receive information and offers from third party vendors.
You May Also Like
3D Printing Financials: Protolabs’ Q1 3D Printing Revenue is Flat, Company Advances in Technology Push
Protolabs (NYSE: PRLB) has kicked off 2024 with a mild boost in revenue, revealing how the Minnesota-based company manages to adapt and thrive even in uncertain market conditions. While the...
NASA Backs Project for 3D Printing Space Sensors
NASA granted $300,000 to Florida State University (FSU) and Florida Agricultural and Mechanical University (FAMU) to pioneer a project using 3D printing to develop cutting-edge sensors capable of withstanding the...
Further Understanding of 3D Printing Design at ADDITIV Design World
ADDITIV is back once again! This time, the virtual platform for additive manufacturing will be holding the first-ever edition of ADDITIV Design World on May 23rd from 9:00 AM –...
Daring AM: Rocket Lab Shoots for the Stars, Astrobotic Wants to 3D Print on the Moon
Once again, space exploration teams up with the 3D printing industry, launching projects that could change how we explore space. Pioneering space manufacturer Rocket Lab (Nasdaq: RKLB) secured a $14.49...