
Use This Instructable to 3D Print & Build Your Own Home Monitoring System


 While it used to be that home security systems took some serious dollars, effort, and planning to attain, today they have become much more common due to the wireless society we live in. It’s not out of the realm of possibilities to think that you could make your own either–especially if you follow the lead of Tyler Spadgenske, who decided to make the ED-E Home Automation and Monitoring System via 3D printing and DIY electronics.
The ED-E (EDison-Esp8266, pronounced Eddie) is composed of the WiFi unit and the base unit–which is the brains of the operation, built with an:
- Intel Edison with local MySQL database
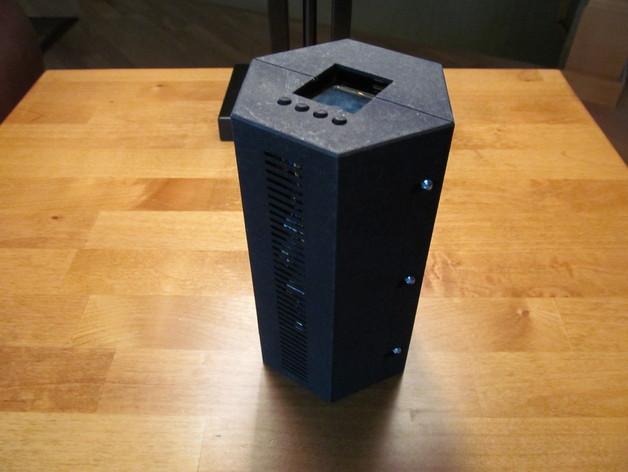
- OLED display
- Analytics dashboard with real-time graphs
- Six sensors
- Four push buttons for user input and output devices
- Emergency buzzer
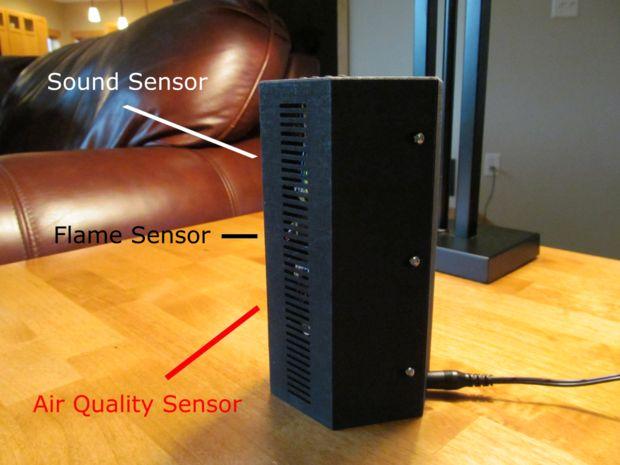
All of this is encompassed within a 3D printed console. Not only does the ED-E detect suspicious activity in your home, it also alerts you if there is a high level of gas or bad air. When that happens, a buzzer sounds from the base unit, as well as sending you an email. Six sensors alert you to: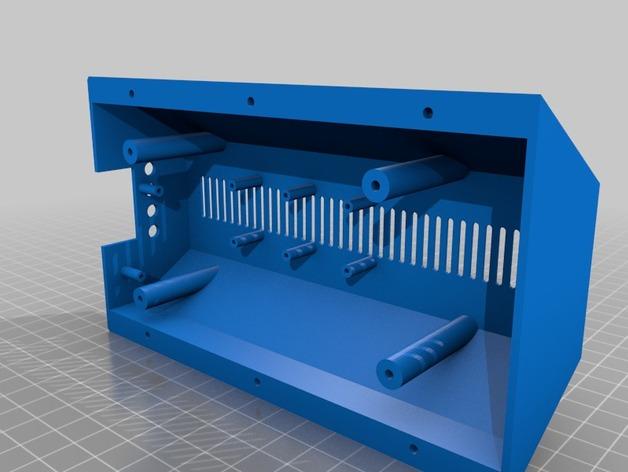
- Flame
- Gas (H2, LPG, CH4, CO, Alcohol, Smoke, Propane)
- Air Quality (carbon monoxide, alcohol, acetone, thinner, formaldehyde)
- Temperature
- Humidity
- Sound
The WiFi units are made up of small transmitters that communicate with you regarding your home. The ED-E supports WiFi sensors and WiFi actuators.
The sensors have a detention circuit that, when triggered, sends a transmission to the analytics cloud. As with a traditional system, these WiFi sensors can be placed on doors, windows, and even mailboxes.
The actuators are used to trigger events rather than respond to them. They can be used to turn your lights on, start the coffee, or even open the garage–from anywhere in the world. With nearly all WiFi units supported, Tyler states that ‘the possibilities are endless.’
 Tyler uses his Instructable specifically to show you how to build the wifi sensor button and the wifi actuator relay. The first thing you need to do, however, is 3D print the base unit, consisting of the left and right side, and the buttons. All of the files are found on Thingiverse.
For the base unit, you will need:
- Intel Edison with Arduino Breakout
- Adafruit Permaproto Half-sized breadboard
- Grove Air Quality Sensor
- Grove MQ2 Gas Sensor
- Grove DHT22 Temperature and Humidity Sensor
- Grove Sound Sensor
- Grove Flame Sensor
- Grove 96×96 OLED Display
- Grove Buzzer
- 0.1″ Male Headers
- DC Barrel Jack
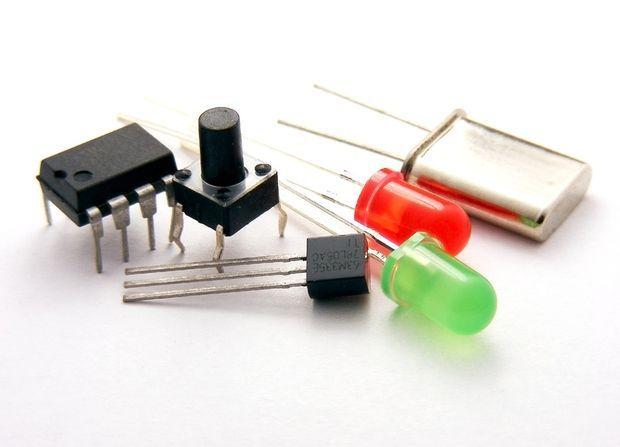
- 10K Resistors
- 6mm Tactile Pushbuttons
- Lots of wire
For the WiFi Sensors you will need:
- Adafruit HUZZAH Esp8266
- 500mah Battery
- JST connector breakout
- Micro Switch
For the WiFi Actuators you will need:
- Adafruit HUZZAH Esp8266
- Grove Relay (SPDT)
- 5V Power Supply (Like a phone charger)
- Short power strip
First, you’ll want to start with the base unit, connecting the sensors to the Intel board. All of the sensors use the same 4 wire connector, and as you’ll see from the Instructable, there is a wire for ground, power, and signal line. Read the instructions further for specific notes on what to cut and solder.
 Once you have finished that and have all the power lines and signal lines connected, you will want to begin connecting the OLED display. To add this to the base unit, all you need to do to get the OLED ready is:
- Connect the red power wire to 3.3v.
- Connect the black ground wire to ground.
- Connect the yellow signal wire (SCL) to A5.
- Connect the white signal wire to (SDA) A4.
Next, it’s time to add the buttons and the power jack to the base unit by reading the list of soldering and connecting instructions. After that you want to connect the DC barrel jack, carefully.
“Be extra careful nothing is shorted out, as you wouldn’t want 12 volts wandering into the Edison where it doesn’t belong,” warns Tyler.
Next, you need to install and also test the software. See here for the full instructions on installing dependencies, analytics, and running it ‘on boot.’
The last time is final assembly of the system, which includes gluing the button protoboard into place with the 3D printed button rig wedged between the model and board. After that, screw in the sensors, display, and Intel Edison + Arduino Breakout to the big standoffs. Follow the more detailed instructions to make sure you have everything correct and attached safely. Once you’ve finished with final assembly, you are ready to monitor and automate your home like a pro.
Will you be taking on this project? Let us know how it turns out in the 3D Printed Home Monitor forum thread on 3DPB.com.
Subscribe to Our Email Newsletter
Stay up-to-date on all the latest news from the 3D printing industry and receive information and offers from third party vendors.
Print Services
Upload your 3D Models and get them printed quickly and efficiently.


You May Also Like
How One Artist Is Using 3D Printing to Tell Stories About the Ocean
Artist Kimberly Callas sees something different when she looks at a 3D printer. Where others see a machine for making parts, she sees a way to tell stories about the...
Bambu Lab Wants Home 3D Printing to Feel Less Like a Workshop with PLA Pure
As desktop 3D printers become increasingly common in homes, Bambu Lab is focusing attention on something beyond print speed and hardware features. This week, the company launched a new filament,...
AM Asia Watch: China Exported 2.46 Million 3D Printers in Four Months
China’s consumer 3D printer industry seems to be reaching a new level of global dominance. According to Chinese state media outlet China Global Television Network (CGTN), China exported 2.46 million...
Bambu Launches A2L: What the New Printer Reveals About Its Strategy
Bambu Lab continues its relentless march for 3D printing domination with the launch of the A2L. The 330 × 320 × 325 mm printer will have a nozzle temperature of...


