Adafruit Shows Us How To 3D Print Customized Hat Graphics

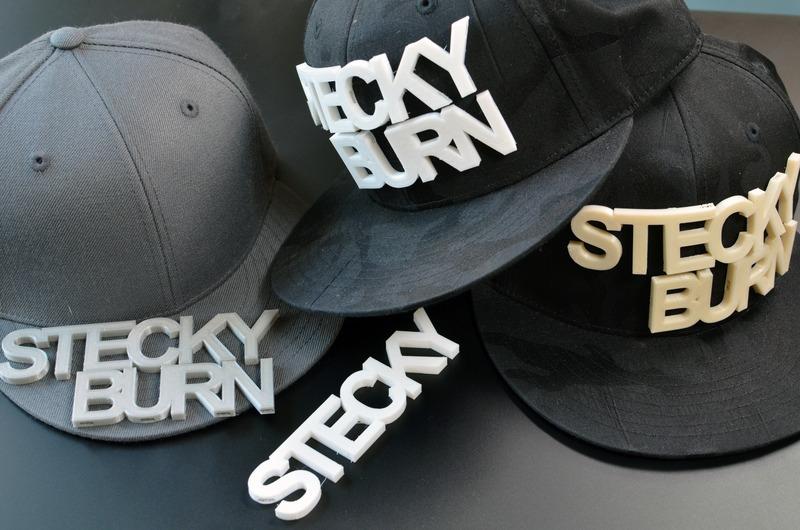
 Would you like to customize your accessories, like a cap, with graphic letters? Adafruit’s latest custom 3D hat graphics is an easy small-scale 3D printing project with large scale potential to advertise you, your company, or any other message you’d like to transmit. Adafruit’s Becky Stern and the Ruiz Brothers have created custom 3D hat graphics with sew tabs to attach to any piece of cloth and have presented easy step by step directions to do so. These are great for your baseball cap, sun hat, back jeans pocket, tote bag, back pack, or just about anywhere else where you can sew the letters on…
To get started you’ll need: one blank cap or other accessory; NinjaFlex or PLA filament plus a hot rod and a rotary; sewing needles and pins; thread and scissors; and, of course, a 3D printer. The idea is simple: you are using 123D to make your graphics or use available files (which include sewing tabs for letterforms) to then 3D print your letters and sew them directly onto whatever accessory you want to modify.
After you’ve gathered all of your materials, you can follow the videotape tutorial about using the text tool in 123D to design your own message. If you don’t want to do that, you can download the original solids including sew 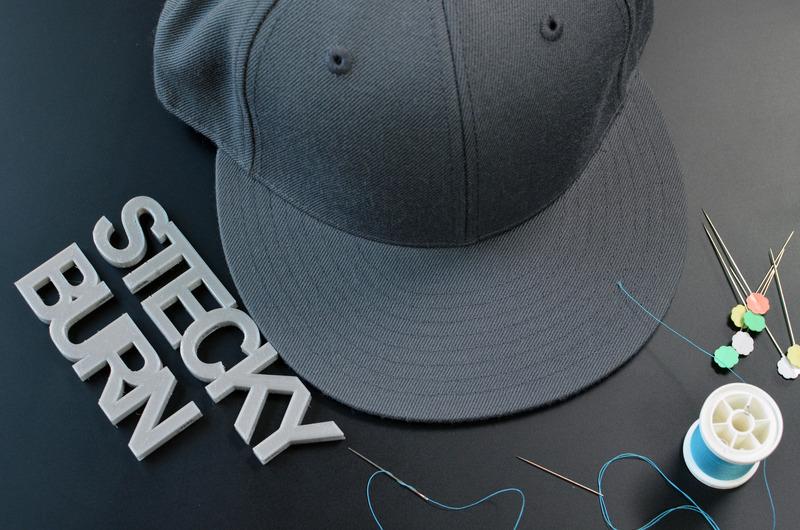 tabs here. As the directions say, “Use the existing sketch to change the text and extrude to make it yours.”
Once you’ve prepped your message in 123D or downloaded your original solids with the sew tabs, you are ready to print, and Adafruit recommends NinjaFlex’s Semi Flex. Ninjaflex is a very flexible filament that can be used on many 3D printers. But, as the website explains, NinjaFlex “performs best in printers with direct-drive extruders using settings similar to standard rigid ABS filament.” Adafruit recommends Semi Flex because it is slightly more rigid and glossier than the original Ninjaflex material.
For slicing, it is recommended you use the following printer settings: a 230 c 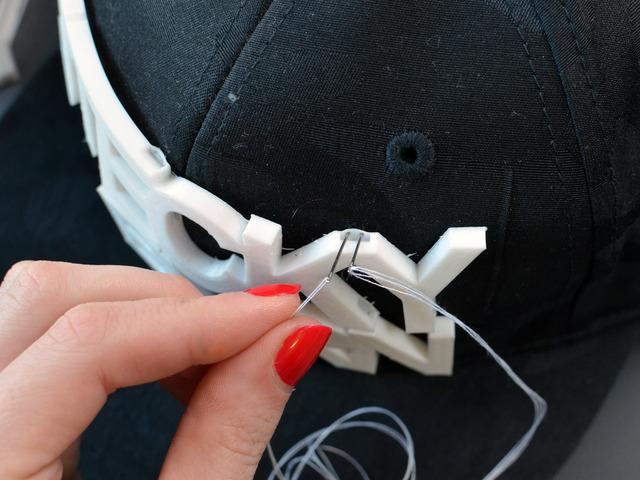 extruder temperature; a 30 mm/sec print speed; 4 top & bottom layers; 10% infill; and 2 shells.
If you only have PLA for this project, you can dip the printed letterforms in just-off-the-boil water for a few seconds and then lay the part on your hat –remembering that parts heat unevenly. Also, there’s a possibility you may have to use a small bit and rotary tool to drill out sew holes so that the needle can pass through and attach the letter to your hat.
The last step is to affix the letters to your hat. Here, it is highly advisable to use pins to determine the correct placement of your letters. Then thread two needles onto your thread, one on each end (or you can double the thread at the center while threading the other needle onto both tails). Next, use both of the needles to pierce through the sew tabs, bringing the ends to the inside and leaving a clean loop securing the part to the hat’s outside. Finally, you need to tie off at each tab and snip the thread tails short.
And voila! A custom graphic letter accessory! The good news about a project like this is that it is pretty straightforward, so if you don’t like how it turned out, you can always snip the threads attaching the letters and start fresh again to place your letters where you want them. Let us know if you have decided to try this project for yourself. Discuss in the 3D Printed Hat Graphic forum thread on 3DPB.com.
Subscribe to Our Email Newsletter
Stay up-to-date on all the latest news from the 3D printing industry and receive information and offers from third party vendors.
You May Also Like
Will There Be 3D Printed Autophage Missiles?
First publicly unveiled at the University of Glasgow a year ago, advancements in “autophage” rocket engines promise significant efficiency gains. These polymer-based rocket motors are designed to consume themselves in...
Solukon’s New Two-Ton Cleaner Lands First Customer in AMCM
A new system is pushing the boundaries of what’s possible in depowdering for metal 3D printing, tackling components that weigh over two tons and have intricate designs. Unveiled at Formnext...
3D Printing Industry Grows 9% YoY in Q3 2024, Despite Hardware Sales Slowdown
According to its most recent “3DP/AM Market Insights: Q3 2024” report, Additive Manufacturing Research (AM Research) estimates that the third quarter of 2024 saw the 3D printing market reach $3.47...
Raytheon Taps Ursa Major for 3D Printed Solid Rocket Motors
Ursa Major, a Colorado-based company specializing in leveraging additive manufacturing (AM) for rocket propulsion, announced a successful missile flight test conducted with Raytheon, an RTX company, as part of a...