New Instructable Demonstrates How To Create Replaceable 3D Print Bed for Under $5

 If makers are building out their own 3D printers left and right, surely it shouldn’t be much of a challenge to make your own print bed. And one that is reusable and practically disposable, costing under $1 per print bed, is surely a motivator. So, the question is, who is looking for a fun, inexpensive, easy project — and needs a new print bed?
We ran across a great Instructable by akdrama, which is entertaining, clearly outlined, and could give you cool and affordable new materials to rely on for your 3D printing adventures.
The print bed, the flat surface that objects are printed on, is obviously one of the most crucial elements to 3D printing and to the machine itself. Obviously, you want the best surface possible for your 3D print, and there are a lot of different schools of thought on how to achieve that. Andy/akdrama allows us to consider a new take on the print bed.
Warning: This print bed is not for you if you use a heated print bed.
For this project (which makes four print beds), you will need only the barest list of materials, as follows:
- Four dollars (that’s right!).
- One placemat by Mainstays (UPC 0 28332 52351 6), which sells for under $3, usually purchased at Wal-Mart.
- One gluestick.
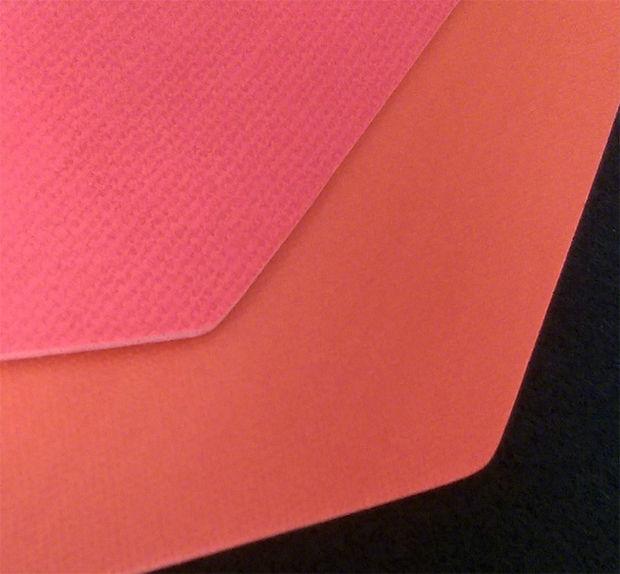 The placemat is vinyl and by printing on the non-glossy side, the 3D printed product is easily removed. Akdrama points out that he did try printing on the glossy side, but with disastrous results. You could try your hand at it as well, but will most likely experience lots of messy melting issues, with both the extruder tip and the object you are printing.
By using the matte side of the vinyl placemat, you will have quite the strong material for a print bed, adhered with the glue stick and providing ease in removing it for later replacement. The one placemat should provide four print beds, and you will want to cut them into pieces allowing for excess size around what you are printing.
Next:
- Verify that your Z-axis is properly set up, and that the probe tip can get as close to the bed as possible. Note: this is vital as the probe needs to sense the bed through your new print bed.
- Apply a coat of glue to the glossy side of the print bed and press it down on the print surface.
- Modify your printer’s firmware setting for the Z-axis offset, using the M212 command, using command M501 to see your current setting, which is probably a negative value. (Akdrama noted that in lowering his Z probe a bit and adding the print bed he ended up with a Z axis offset of +0.05. Before with just masking tape he was at -0.78.)
It’s that easy–and you are ready to print. What type of print bed do you currently use? Share your thoughts with us in the Instructable Print Bed forum at 3DPB.com.
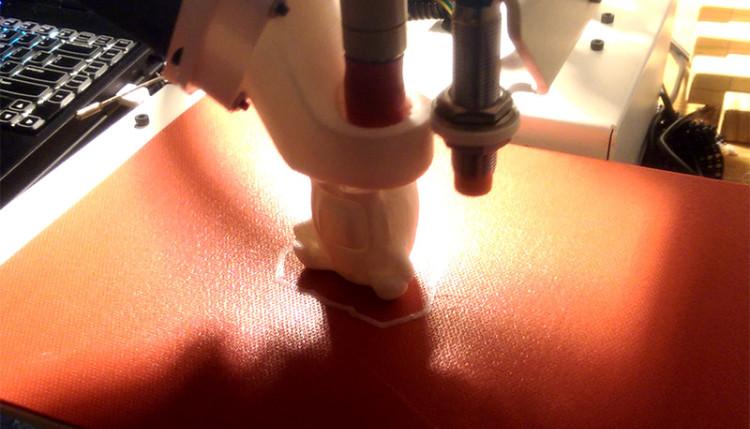
Print bed in use
Subscribe to Our Email Newsletter
Stay up-to-date on all the latest news from the 3D printing industry and receive information and offers from third party vendors.
Print Services
Upload your 3D Models and get them printed quickly and efficiently.


You May Also Like
3D Printed Bone Grafts From Georgetown Researchers Could Replace Traditional Implants
Researchers at Georgetown University are developing a new type of 3D printed bone graft designed to work more like real human bone. Instead of relying on metal implants or donor...
TV’s Scarpetta Suggests We Can 3D Print Full Human Organs. Reality Is… Not Yet
Having spent a good part of my journalistic career covering crime stories, it’s hard for me to stay away from any crime or medical forensic drama. So when Scarpetta premiered...
At RAPID + TCT 2026, Executive Keynotes Break Down What’s Next for AM
While AI is expected to be a major focus at RAPID + TCT 2026, the event is also putting the spotlight on something just as important: leadership. This year’s Executive...
3D Printing Moves Deeper Into Production as Parts Near $110B by 2034
A new report takes a closer look at how much 3D printing is actually being used in real production. The numbers point to a market that is already growing at...