Shapeways Shows You How to Create Your Best Self in 3D Print


 While the 3D printed selfie is still a novelty for most, we’ve seen it emerging in many forms lately from that of candy to superheroes to selfie action footage—just to name a few. Now, Shapeways takes the selfie right down to the user level with ease and affordability. Brigitte and Astrid from Shapeways explain how to produce the perfect selfie in 3D, following recent information explaining how to fine-tune your scans with the Skanect Structure Sensor. Now you can bring it all together in tangible form.
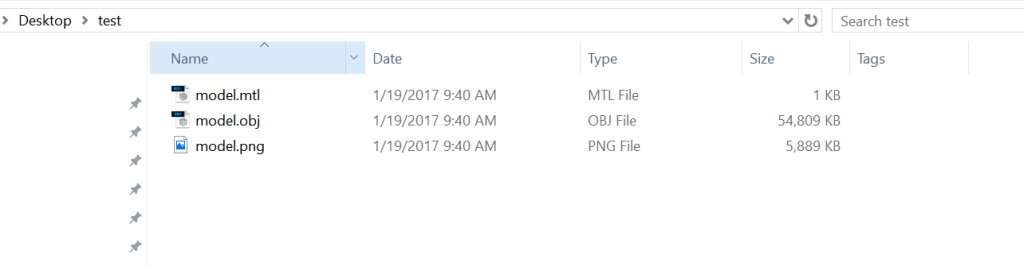
The first thing you’ll need to do is export those Skanect scans you created, converting them into .obj files, which provide the actual mesh.
“By exporting your scans as .obj files, you will get both a texture file AND a mesh file, as well as a file containing all data,” states the Shapeway team. “This will help you better edit specific parts of your scan’s shape and appearance.”
Skanect then also generates both .mtl (containing data) and .png (providing texture) files for you too.
Next, you can begin editing the textures.
“Just like any form of photography we may need to do some image manipulation to make the colors look the best possible,” say Brigitte and Astrid.
While the Shapeways team favors Lightroom for this process, you can also use Photoshop. For Lightroom, they use the following settings:
- exposure +1.4
- contrast +40
- highlights +20
- shadows +10
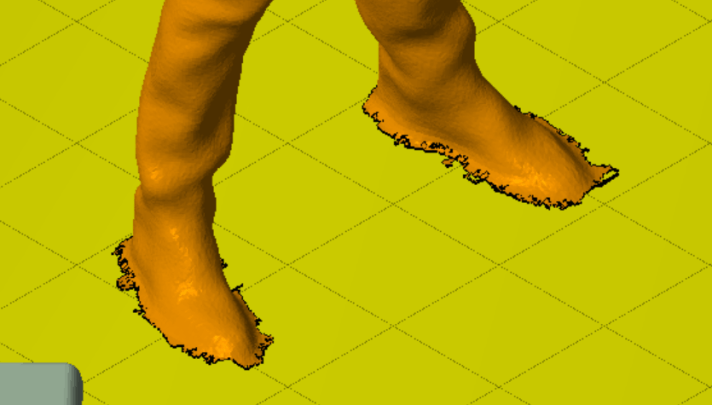
Once you’ve finished with that, it’s time to move on to editing mesh and texture.
“When you scan with a hand scanner (like the Structure Sensor from Occipital that we use), you sometimes end up with a file that is not as sharp, complete, or accurate as you would like,” states the Shapeways team. “You might have holes in the model that shouldn’t be there, or the texture might have flaws that need to be edited.”
Shapeways offers a good list of tutorial suggestions on mesh and texture editing at the end of the blog post.
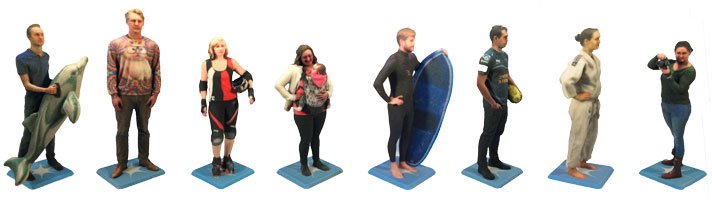
 If this is your first 3D printed selfie, you might be wondering how it will stand up dependably; usually, this is achieved with a small platform.
“We generally remove the original base from the scan (which is either the ground, the floor, or a temporary platform the person was on) and replace it with a nice, freshly modeled platform because it will look much cleaner and stand upright.”
Export the edited file as a .vrml file, and then you can begin to create a platform using your favorite 3D modeling software. For this project, Brigitte and Astrid used SOLIDWORKS, and then exported their work as an .stl file. They then recommend merging the two files together using Netfabb. There, you can scale your model to preference.
“Place the platform underneath the model file (be sure they overlap, because if they don’t the finished file will end up as two separate parts and won’t merge during printing),” advise Brigitte and Astrid.
Merge the files together and then export the one file in .vrml form. Your last step is to make a zip file for the .png and .vrml files—and then upload to Shapeways for 3D printing.
Shapeways, headquartered in New York, was founded in 2007, and as they point out themselves, they’ve been busy defining the 3D industry since then. While many may profess to have been doing the same, Shapeways is undeniably the real thing.
Today, the selfie is redefining the quick snapshot. Just as 3D printing allows us the latitude in doing so much on our own without having to wait for the help of a middleman or permission from somebody else, the selfie means we can capture an image of ourselves in time without having to catch someone else’s attention and ask them to walk over and take a picture. Although the selfie also takes plenty of heat today in some circles, the simple truth is that it allows for fun, photojournalism, and plenty of sharing—which companies like Shapeways allow you to take one step further. Discuss in the 3D Printed Selfie forum at 3DPB.com.
[Source / Images: Shapeways]
Subscribe to Our Email Newsletter
Stay up-to-date on all the latest news from the 3D printing industry and receive information and offers from third party vendors.
Print Services
Upload your 3D Models and get them printed quickly and efficiently.


You May Also Like
Printing Money Episode 39: Q1 2026 Public Markets 3D Printing Earnings Analysis with Troy Jensen, Cantor Fitzgerald
Welcome to Printing Money Episode 39, (or, “The one where they all went to market”). It’s that quarterly time, so Troy Jensen (Managing Director, Cantor Fitzgerald) joins Danny for a review...
Goldilocks’ Flywheel: Refractory Complex Concentrated Alloys (RCCAs) & The Race for the Future
Recently, Metalysis, Skyrora, and Thermo-Calc Solutions started to try to commercialize Tanbium. This alloy has been created for use in combustion chambers and rocket nozzles. Tanbium is a Refractory Complex...
Printing Money Episode 35: Notable VC and M&A Deals, with Arno Held and Alex Kingsbury
Welcome to Printing Money Episode 35 and let us be the last to wish you a happy new year. For this episode Danny is joined by Arno Held (Managing Partner,...
Snapmaker Secures Series B Backed by Xiaomi Founder’s Network and China’s Investment Elite
Desktop 3D printer manufacturer Snapmaker has gotten a series B round. The round is led by Hillhouse Ventures and Meituan. Cowin Capital and Orient Securities Capital dipped in for another round,...