Essential Instruction on 3D Printing Over-Sized Objects

 When I first started researching and writing about 3D printing, I kept making the same mistake. I would review a series of prints from a company like Shapeways, and then I would realize that the objects were much smaller than they appeared on screen. I would mull over the stated sizes, kind of scratching my head, because the thing I was imagining was much larger than what was being presented on the screen. Well, I have definitely adjusted my sense of size, but sometimes I still feel that there should be a sign hanging over my computer screen that reads: “Warning: 3D Printed Objects on Screen Are Much Smaller Than They Appear.”
Of course, by no means is it impossible to 3D print larger objects. In many cases, if you are using an average desktop 3D printer, you simply have to do it in parts. There are limitations on the build envelope of the 3D printing machine, which is the length x breadth x height of the machine’s space where objects are actually printed. The most common way people usually 3D print large models is to do it in parts and then glue/acetone them together. For that, it’s all about software tricks, initially. (Then it’s about gluing tricks!)

Sound like too much? Never fear: “SudoICE” has posted some nice instructions on LulzBot for doing exactly this, using ABS for “functional parts,” and acetone and dovetail joints to align the parts. All of this was done in Autodesk Fusion 360’s free software, and here is a brief summary of the instructions SudoICE was nice enough to post on the Lulzbot forum.
“This weekend I needed to print an upper_z plate for my TAZ 6 project I am starting and the Mini I have will not print that large,” the designer explained.
There are six steps posted that are all software-based steps. I will cover some steps in detail and some more generally to give you an idea if you want to try this yourself. Step 1 is simple enough. You download Autodesk Fusion 360 and then upload your part. In Step 2, you will convert the shapefile to a solid. Open the part, then change the workspace to Model. Click Modify -> Mesh -> Mesh to BRep.
Next you select the object and click OK to create a new body. There. Now you should have a solid.
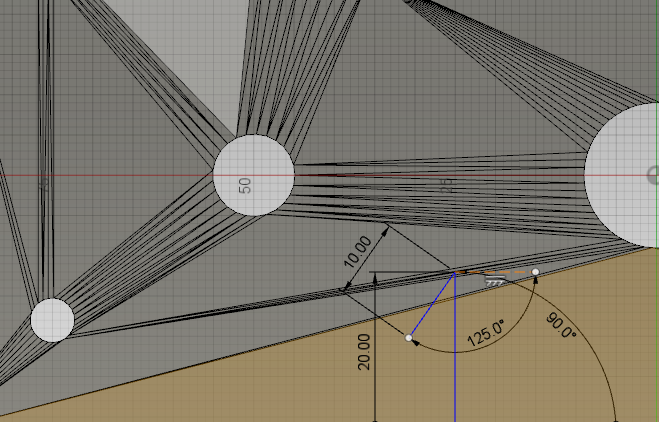 In Step 3 you will draw a dovetail where you want parts to be split. Create a sketch on the surface by clicking Sketch -> Create Sketch. Then select the surface/plane you will be drawing on. Then draw lines by selecting Sketch -> Line. The dimensions SudoICE used are 20mm out, 10mm back @ a 125-degree angle (see left.)
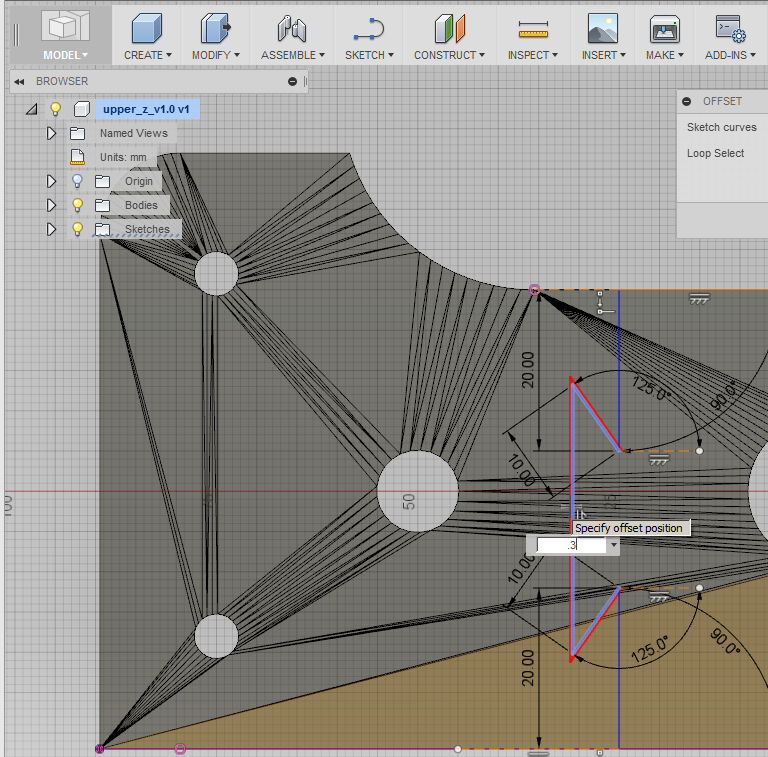
Now you want to draw the same pattern on the other side and connect the segments together. You should have the dovetail shape now, and Step 4 is to extrude a 0.3 mm gap through the parts. You do this by selecting Sketch -> Offset. Then select the middle section and drag it to the left. (See right.) Type in 0.3, press enter, and repeat for the other two lines.
Now zoom in on the corners and trim up extra segments by clicking on Sketch -> Trim. At this point, I will refer you to SudoICE’s instructions because there are several more steps here before you finally get to click Create and then Extrude.
In the next step (you’re almost done, so hang in there), you are exporting your parts for printing and assembly by clicking on Make and selecting one part. Then Repeat to export the second part. There! You are ready to print and assemble your parts. Just open in the slicer of choice (SudoICE uses Cura) and print your parts.
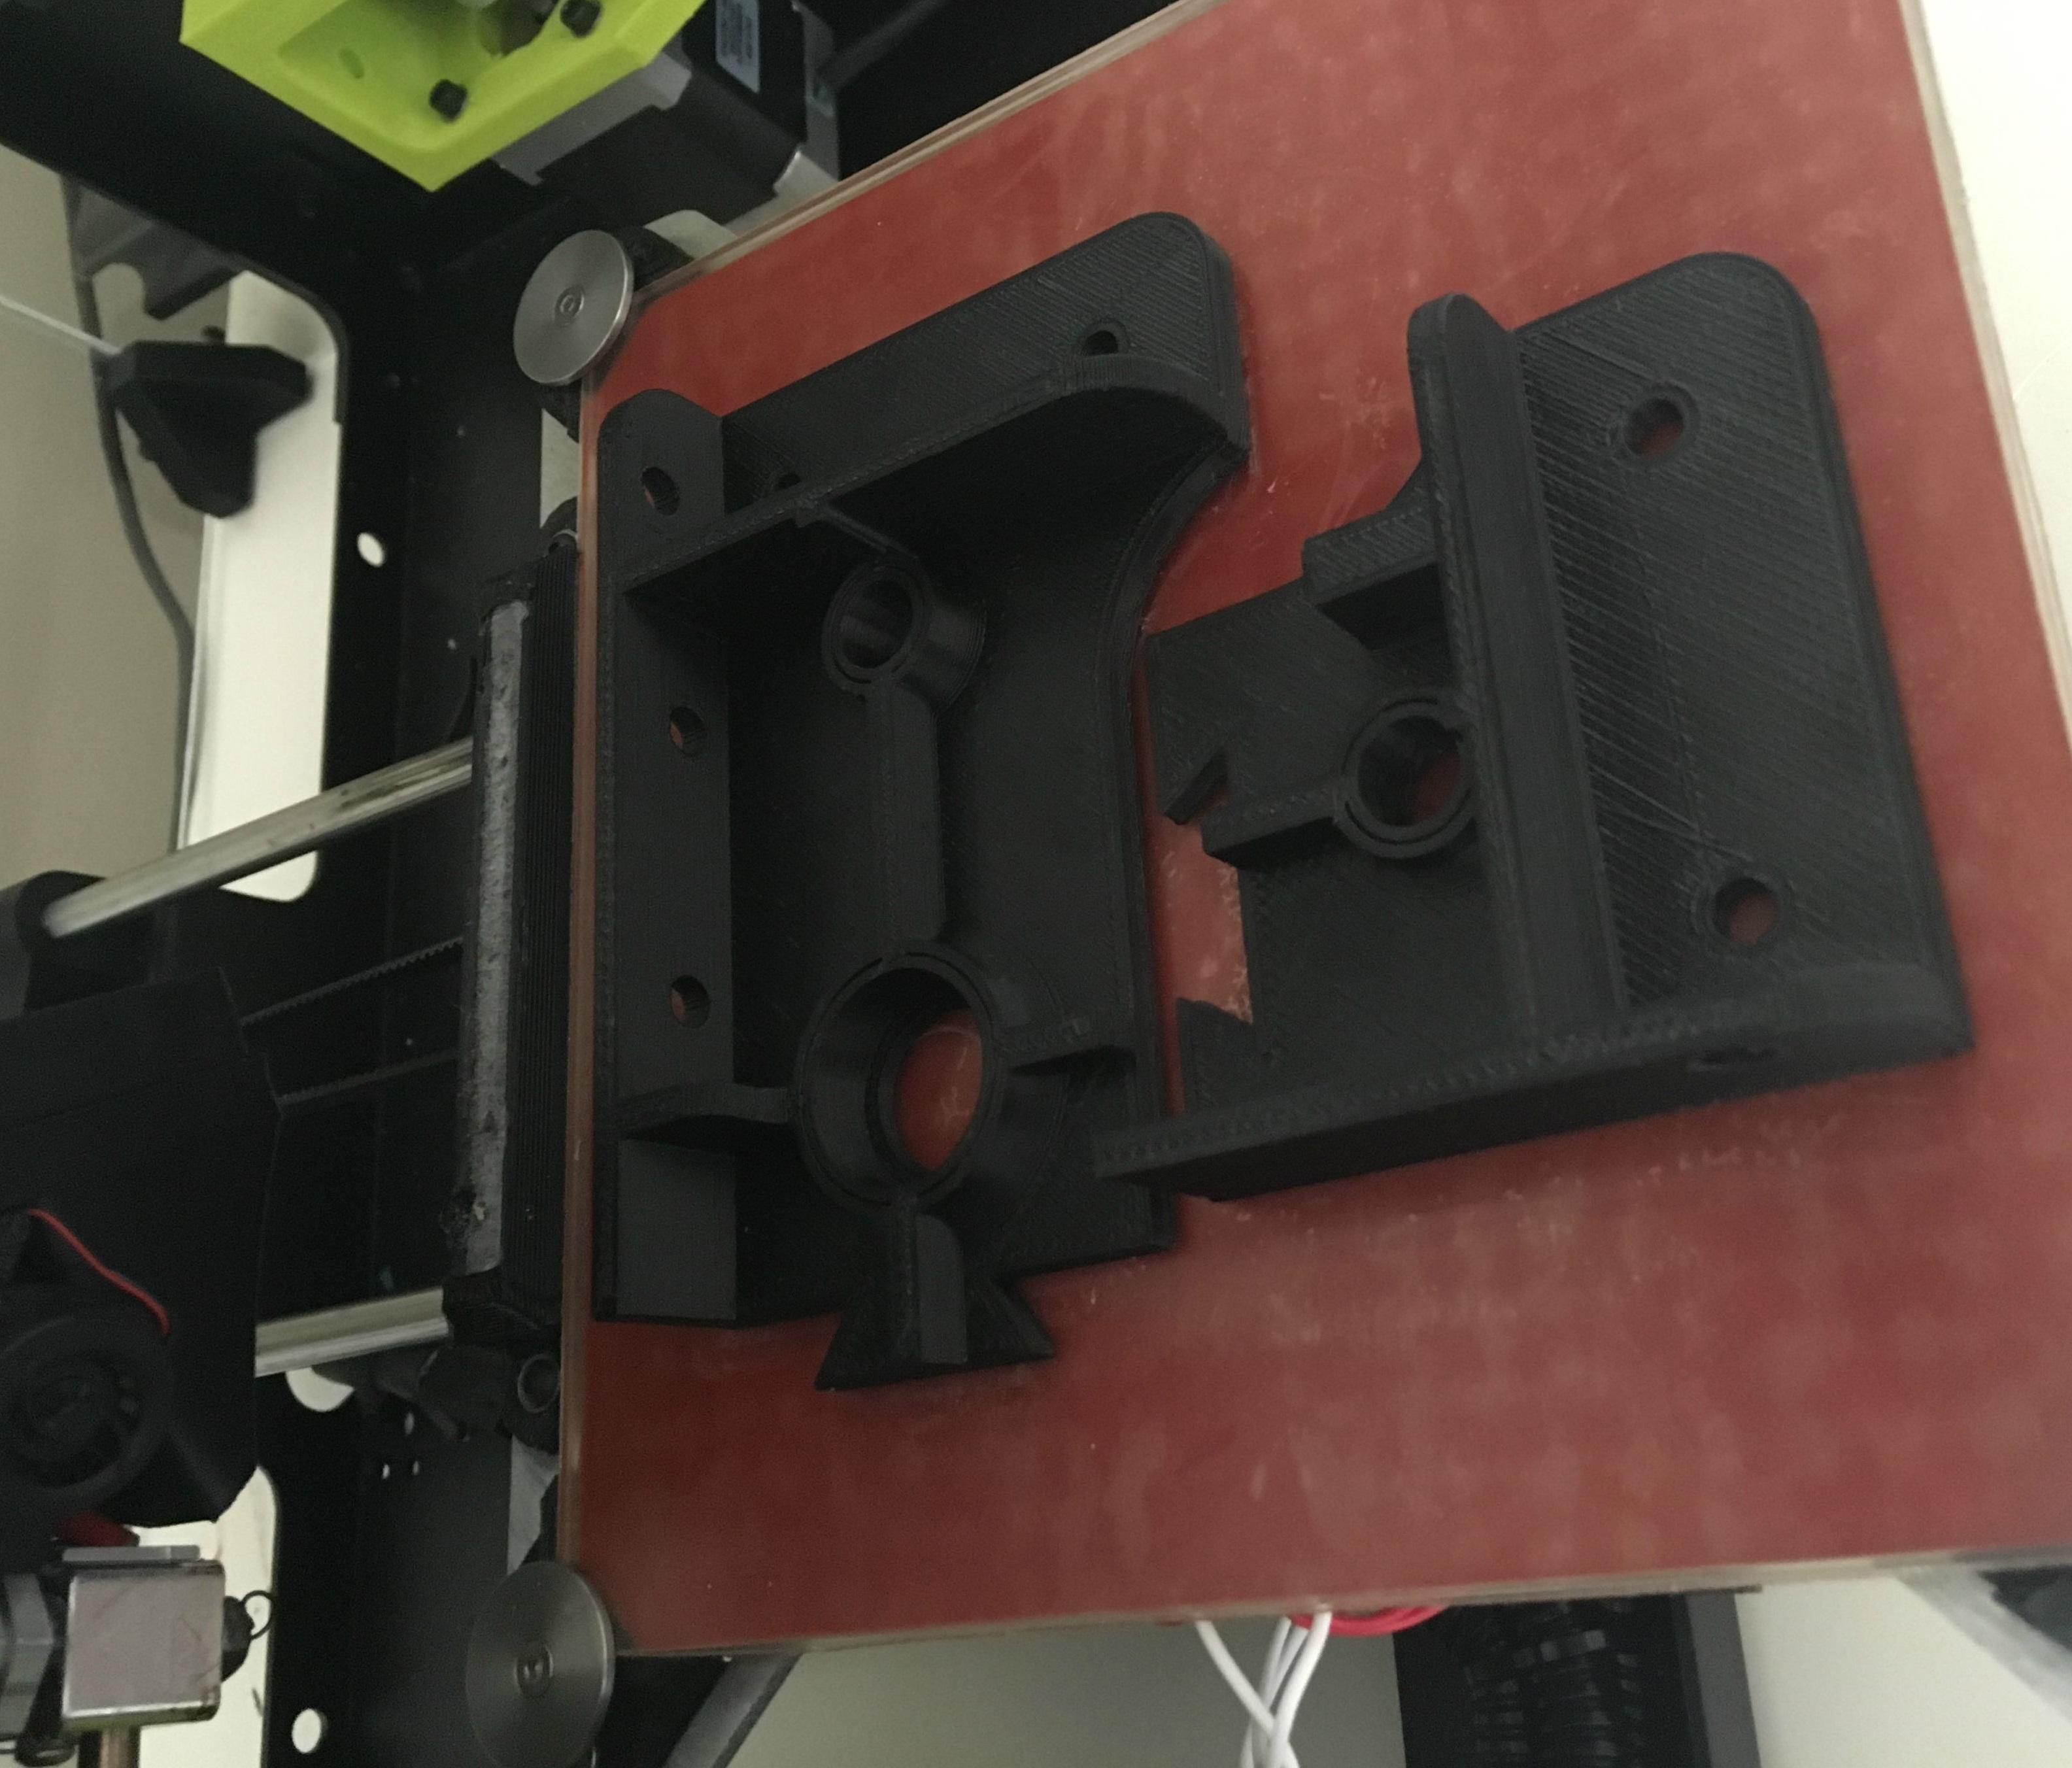
SudoICE’s assembly instructions in Step 6 are fairly straightforward. After you print your parts, trim them and snap them together. One gluing trick is to take the blade of a knife and dip it into acetone, hold it over the seam you want to weld and let the acetone drip onto the seam one drop at a time. Make sure you let the acetone dry for about half and hour. To see the finished product for inspiration, take a look at the photo below.
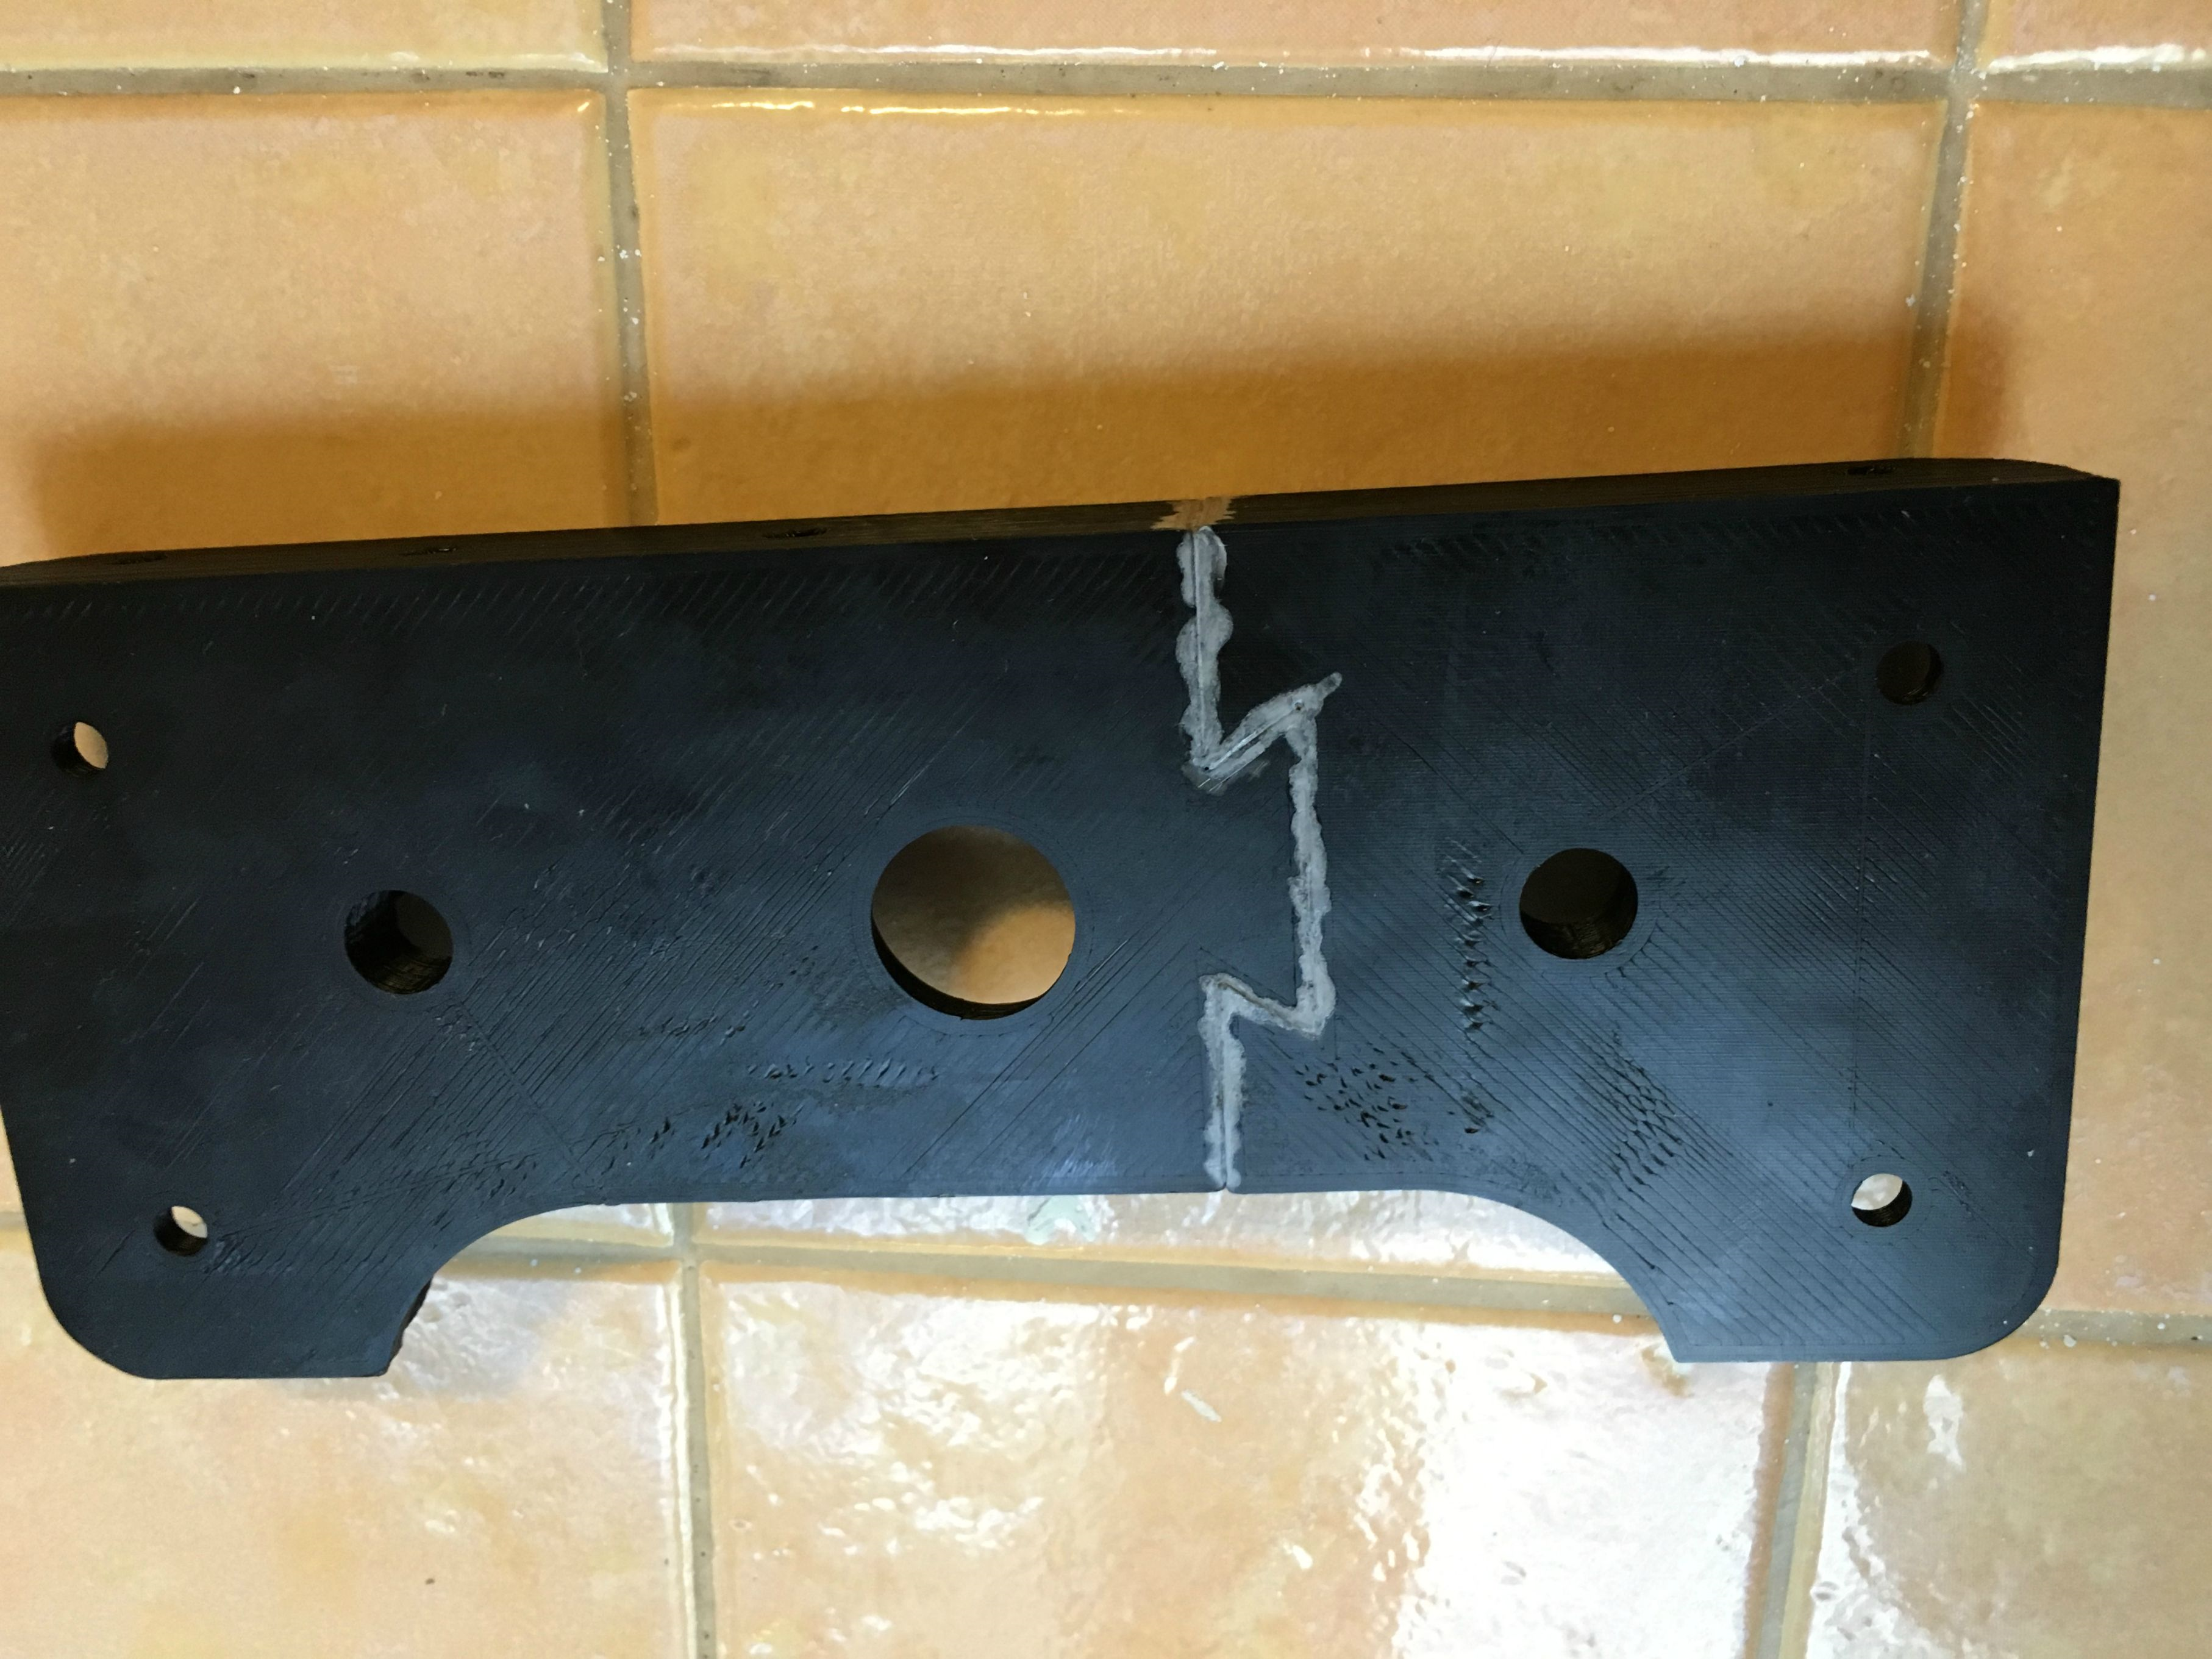
Now that looks like an over-sized 3D printed part seamlessly welded together, doesn’t it? Great job, SudoICE! What are your thoughts on these techniques? Discuss in the 3D Printing Large Objects forum on 3DPB.com.
Subscribe to Our Email Newsletter
Stay up-to-date on all the latest news from the 3D printing industry and receive information and offers from third party vendors.
You May Also Like
3D Printing Financials: Fathom Struggles in Financial Quicksand During Critical Transition
Facing a year of key transitions and financial pressures, Fathom (Nasdaq: FTHM) has filed its annual report for 2023 with the U.S. Securities and Exchange Commission (SEC). The document outlines...
Latest Earnings Overview for Australian 3D Printing Firms Titomic and AML3D
Australian 3D printing manufacturing firms Titomic (ASX: TTT) and AML3D (ASX: AL3) reported their financial results for the period from July to December 2023, marking the first half of their...
3D Printing Webinar and Event Roundup: April 7, 2024
Webinars and events in the 3D printing industry are picking back up this week! Sea-Air-Space is coming to Maryland, and SAE International is sponsoring a 3D Systems webinar about 3D...
3D Printing Financials: Unpacking Farsoon and BLT’s 2023 Performance
In the Chinese 3D printing industry, two companies, Farsoon (SHA: 688433) and Bright Laser Technologies, or BLT (SHA: 688333), have recently unveiled their full-year earnings for 2023. Farsoon reported increases...