
You Can Fake a Color 3D Print Using Paper in this Instructable


Usually we cover Instructables that involve use of a 3D printer, but what about making something that only looks like it’s been 3D printed? This Instructable from “mkhoele” or Michael Koehleart, who has a background in engineering and art, is instructing us on how to “fake a color 3D print.” That’s right. You can print an image on paper and stack it to get a 3D effect without actually 3D printing anything at all!
To begin, you’ll need a few essential items: an STL format model; a projection image; an ink printer; paper; and a laser printer, craft cutter printer, or scissors; some assembly supports and some programming chops. In step one, you use your modeling software to create a projection image that already has texture mapped into it. (If you don’t have this, then you can project onto the model using the instructions given.) The image is cropped to fit your model.
In Step Two you will slice the model. Koehleart includes the code for the slicing program he made to do this, which is set up for one slice per paper.
Next, you slice the image, using code also provided by the designer who explains:
“At every slice thickness, we are going to take a row of pixels from the projection image, and smear that some distance over the page. How far back is up to you. If you extend it over the entire length of page, you will get a mirror image on the projection image on the back side of the model.”
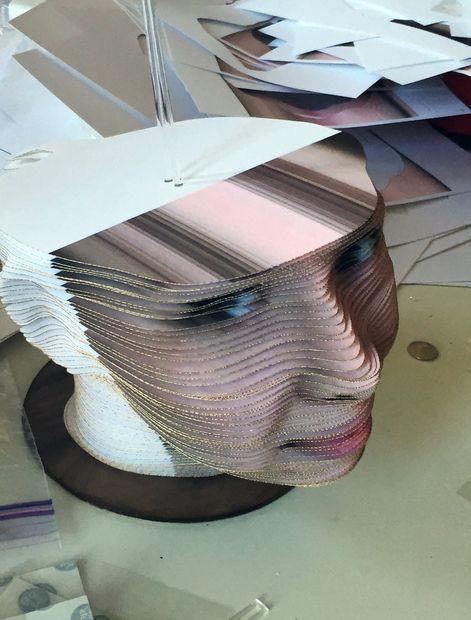 Step Four has us printing and assembling your fake color 3D print. First you should print your images to the center of the paper without scaling and make sure the pages are numbered. Next, cut the printed images using a laser/craft printer or scissors (if you have the patience). Finally, you put it together by feeding “a slice over the guide rod(s), add a washer (if used), and then add the next slice.”
Koehleart makes detailed instructions about each step available, and includes the code, which is for Octave. The instructions are to put these files in the same folder as your STL model and projection image. Then “edit the script to input this path, the STL file name, the image name, guide hole locations, layer thickness, and page size.” The code’s output will be jpg files for each slice’s image and svg files for each slice’s shape.
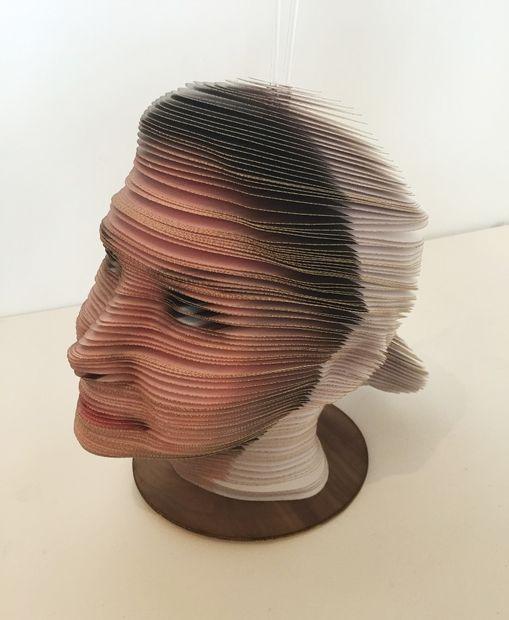
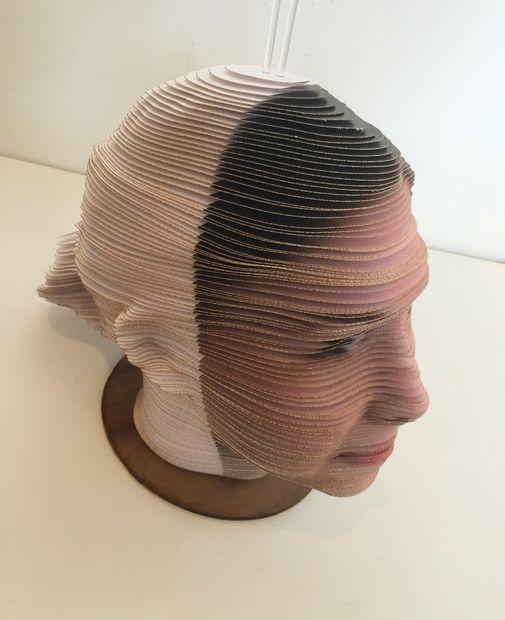
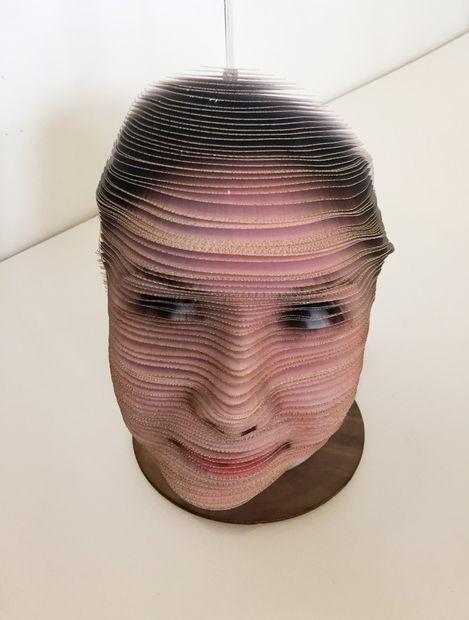
How does the finished product look? It’s pretty wild. And you can see how you could project images onto all sides of the print so that it is completely covered in colored ink.
If you are in the mood for a new kind of selfie sculpture that looks 3D printed in color, but is only modeled that way — then this is the Instructable for you! Did you take on this Instructable? Let us know in the Fake a Print forum thread on 3DPB.com.
Subscribe to Our Email Newsletter
Stay up-to-date on all the latest news from the 3D printing industry and receive information and offers from third party vendors.
Print Services
Upload your 3D Models and get them printed quickly and efficiently.


You May Also Like
How One Artist Is Using 3D Printing to Tell Stories About the Ocean
Artist Kimberly Callas sees something different when she looks at a 3D printer. Where others see a machine for making parts, she sees a way to tell stories about the...
Bambu Lab Wants Home 3D Printing to Feel Less Like a Workshop with PLA Pure
As desktop 3D printers become increasingly common in homes, Bambu Lab is focusing attention on something beyond print speed and hardware features. This week, the company launched a new filament,...
AM Asia Watch: China Exported 2.46 Million 3D Printers in Four Months
China’s consumer 3D printer industry seems to be reaching a new level of global dominance. According to Chinese state media outlet China Global Television Network (CGTN), China exported 2.46 million...
Bambu Launches A2L: What the New Printer Reveals About Its Strategy
Bambu Lab continues its relentless march for 3D printing domination with the launch of the A2L. The 330 × 320 × 325 mm printer will have a nozzle temperature of...


