Hack of the Day: Build Your Own UV Cure Box for Under $30, Courtesy of Formlabs

 Stereolithography printers are lovely, aren’t they? They’re fast, they’re smooth, and they create great detail. Post-processing can be a bit of a bother, though. SLA pieces tend to need additional curing after they’ve finished printing, as most of them don’t completely harden; there’s usually some sticky resin that hasn’t fully cured while printing. There are many ways of curing the print after it’s taken off the printer: water and sunlight, UV lamps, etc. Some printer manufacturers sell devices for post-print curing, but a quick look online will show you that there are plenty of ways to make your own curing devices.
I never really thought about it before, but the tacky surface of an uncured print is similar to nail polish that just won’t dry. SLA printer manufacturer Formlabs noticed this, though, and it gave them an idea – why not hack a nail dryer to make a UV cure box? Instead of using the idea to build a new product to sell, the company helpfully created a video to teach you to build one yourself for under $30.
Required supplies include:
 Tinfoil
- Box cutter
- Scotch tape
- Box tape
- Pencil
- UV nail lamp
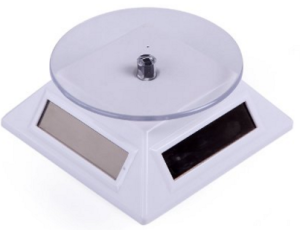
- Solar powered rotating mini display
- Cardboard box
- Most importantly – googly eyes
Most of those supplies can be found at your local hardware or office supply store, obviously, and you can buy a rotating mini display stand and a UV nail dryer inexpensively on Amazon. Make sure your box is large enough, because, according to Formlabs, thin parts could warp if they are too close to the UV bulbs.
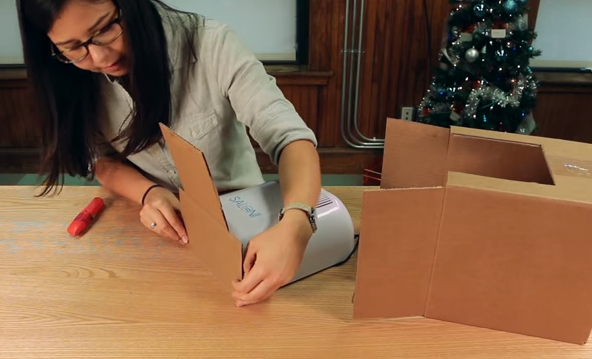 First, remove the base of the nail dryer and trace around it on the side of the box, then cut out the part you’ve just traced – this will be where the nail dryer is mounted. To make sure your eyes are protected from the UV light, take the excess piece of cardboard, wrap it in tinfoil, and use it to cover the front of the nail dryer; the light will be reflected back into the box instead of in your eyes.
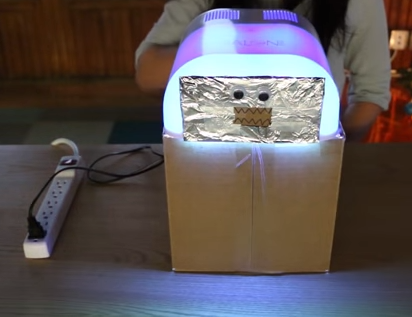
Next, cover the entire inside of the box in tinfoil, making sure that the shinier side of the foil is facing inward. Tape it securely. Then, remove the turntable of the solar powered display stand and cover that in tinfoil before reattaching it. Place the rotating display inside the box – this is where your printed part will sit – and place the nail dryer over the opening you cut out of the box. Last, but not least, draw a monster face on the nail dryer and add googly eyes – important for keeping your curing print from trying to escape. When you’re ready to use your cure box, just place your part inside, turn on the nail dryer, and you’re in business. Let us know if you take on this project in the $30 DIY Cure Box forum on 3DPB.com. For a more thorough, visual instruction, take a look at the video below:
https://youtu.be/mahcMOpeZkM
Subscribe to Our Email Newsletter
Stay up-to-date on all the latest news from the 3D printing industry and receive information and offers from third party vendors.
You May Also Like
Printing Money Episode 17: Recent 3D Printing Deals, with Alex Kingsbury
Printing Money is back with Episode 17! Our host, NewCap Partners‘ Danny Piper, is joined by Alex Kingsbury for this episode, so you can prepare yourself for smart coverage laced...
Insights from Cantor Fitzgerald on AM’s Q1 2024 Landscape
A recent survey by Cantor Fitzgerald sheds light on the persistent challenges within the additive manufacturing (AM) industry in the first quarter of 2024. Based on responses from 38 industry...
3D Printing Financials: Xometry’s Scaling up and Strong Start to 2024
Xometry (Nasdaq: XMTR) kicked off 2024 with strong results, boosting its marketplace and technology to new heights. Both revenue and gross margin soared, fueled by an expanding global network of...
3D Printing Financials: Desktop Metal Targets Recovery Amid Net Losses and Revenue Downturn
Despite facing a decline in revenue and the persistent challenges of a tight economic climate, Desktop Metal (NYSE: DM) is making strides toward operational efficiency. The first quarter of 2024...