Reviewing the Anycubic Photon Mono X 3D Printer: Bigger, Stronger, Faster!

The golden age of resin printing is finally upon us! With the announcement of the Elegoo Saturn in 2020, large-volume resin printers have been all the rage. Anycubic announced its own addition to the space in September, the Anycubic Photon Mono X. I’m a big fan of Anycubic and have probably logged several hundred printing hours on my original Anycubic Photon. So, I didn’t hesitate when I found a good deal on the Mono X. This is my review and guide on getting started for anyone interested in the Anycubic Photon Mono X. In short: The Mono X is an excellent printer, both bigger and faster than its predecessors, and also boasts a few interesting new features. There are potential issues to be aware of, but overall, the Mono X is a great printer and a welcome addition to my collection!
Specs
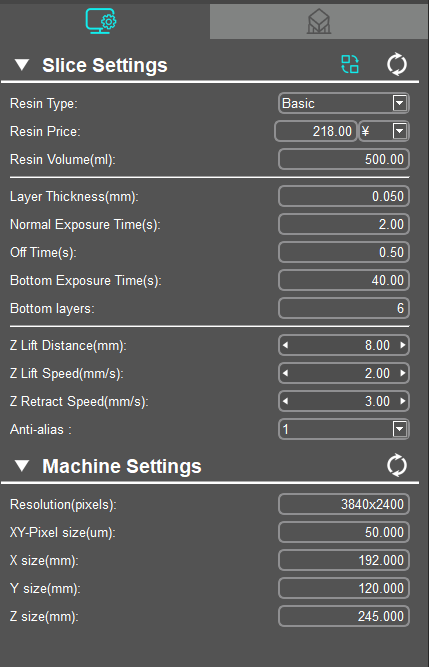
Build Volume: 192 x 120 x 245 mm
Minimum Layer Height: 10 microns
XY Resolution: 50 microns (3840 x 2400 pixels)
Z Axis: Dual Linear Rails
Leveling: Semi-Automatic
LCD Screen: Monochrome
Wi-fi: Print monitoring
The most noticeable feature of the Mono X is the larger build volume. The build plate is wider than the length of my original Photon. The size increase alone was enough to justify picking up a Mono X. However, there are a few other improvements that took me by surprise.
The monochrome LCD screen is a welcome upgrade. Monochrome screens not only last longer (allowing up to several thousand hours of printing before needing to be replaced), but also enable much shorter cure times than the RGB LCD screens on older models. The increase in print speed is actually very noticeable, and I originally thought my slicer had made a mistake when I saw the estimated time on my first print.
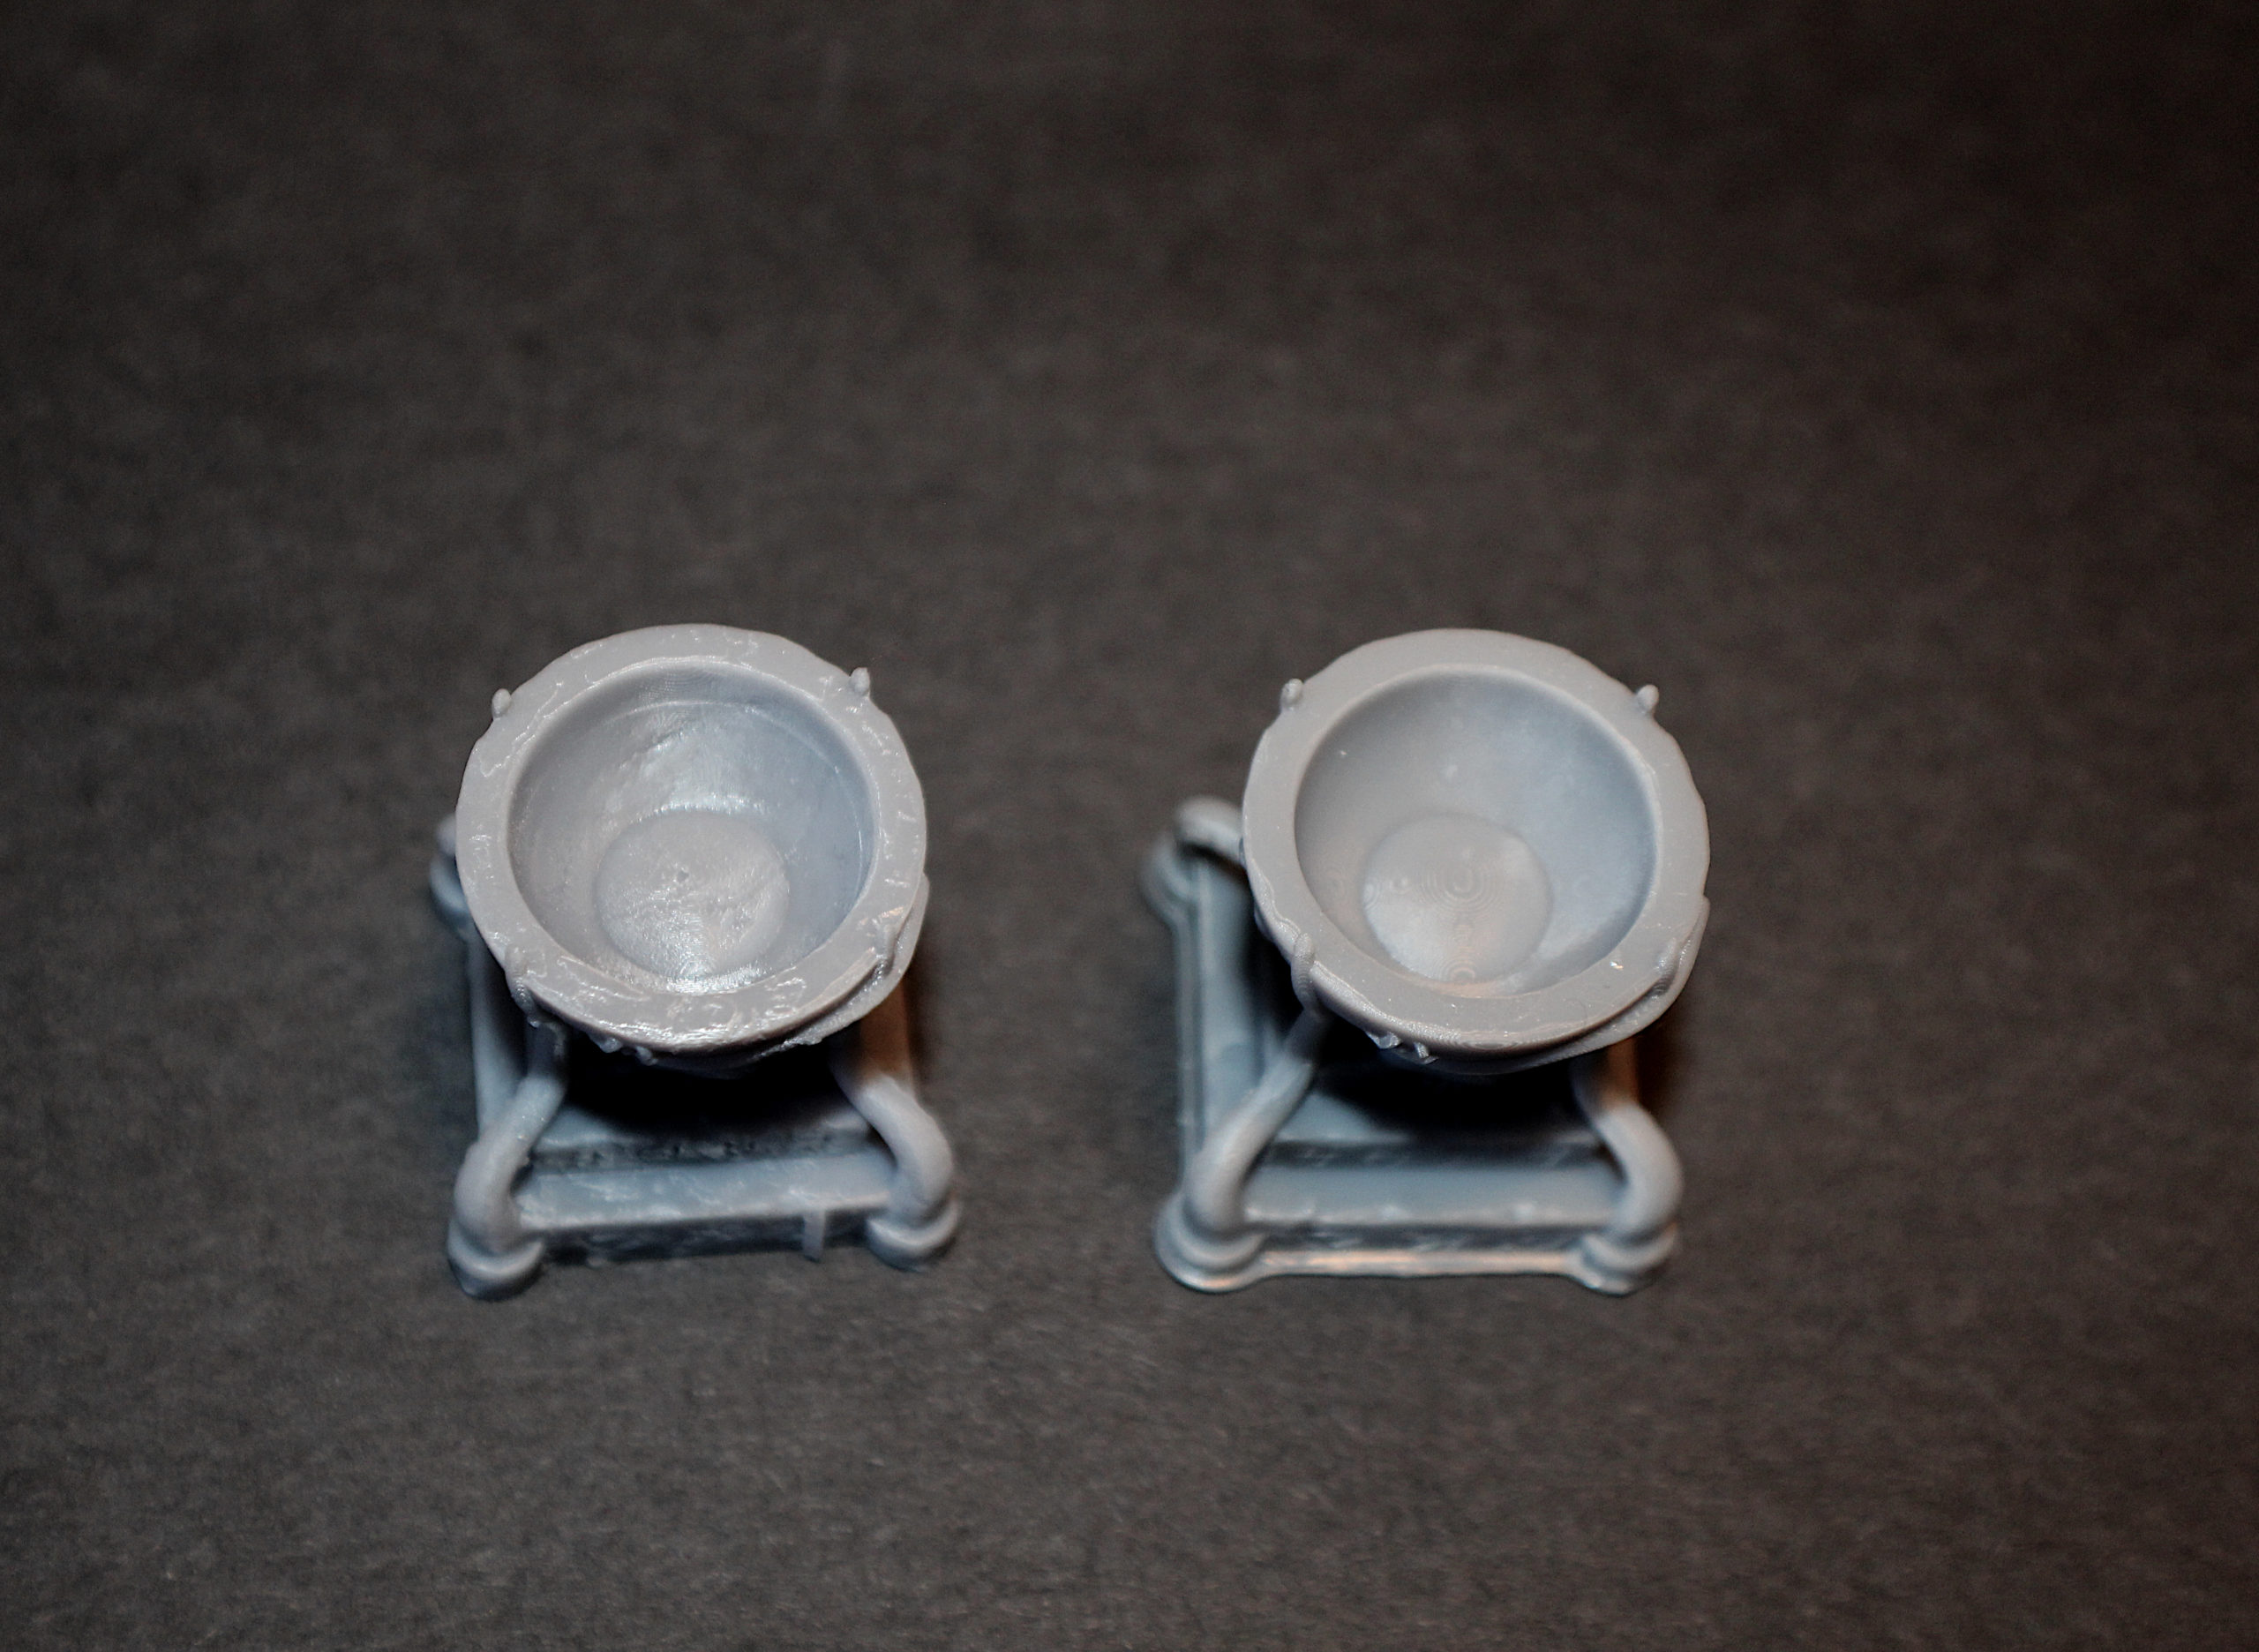
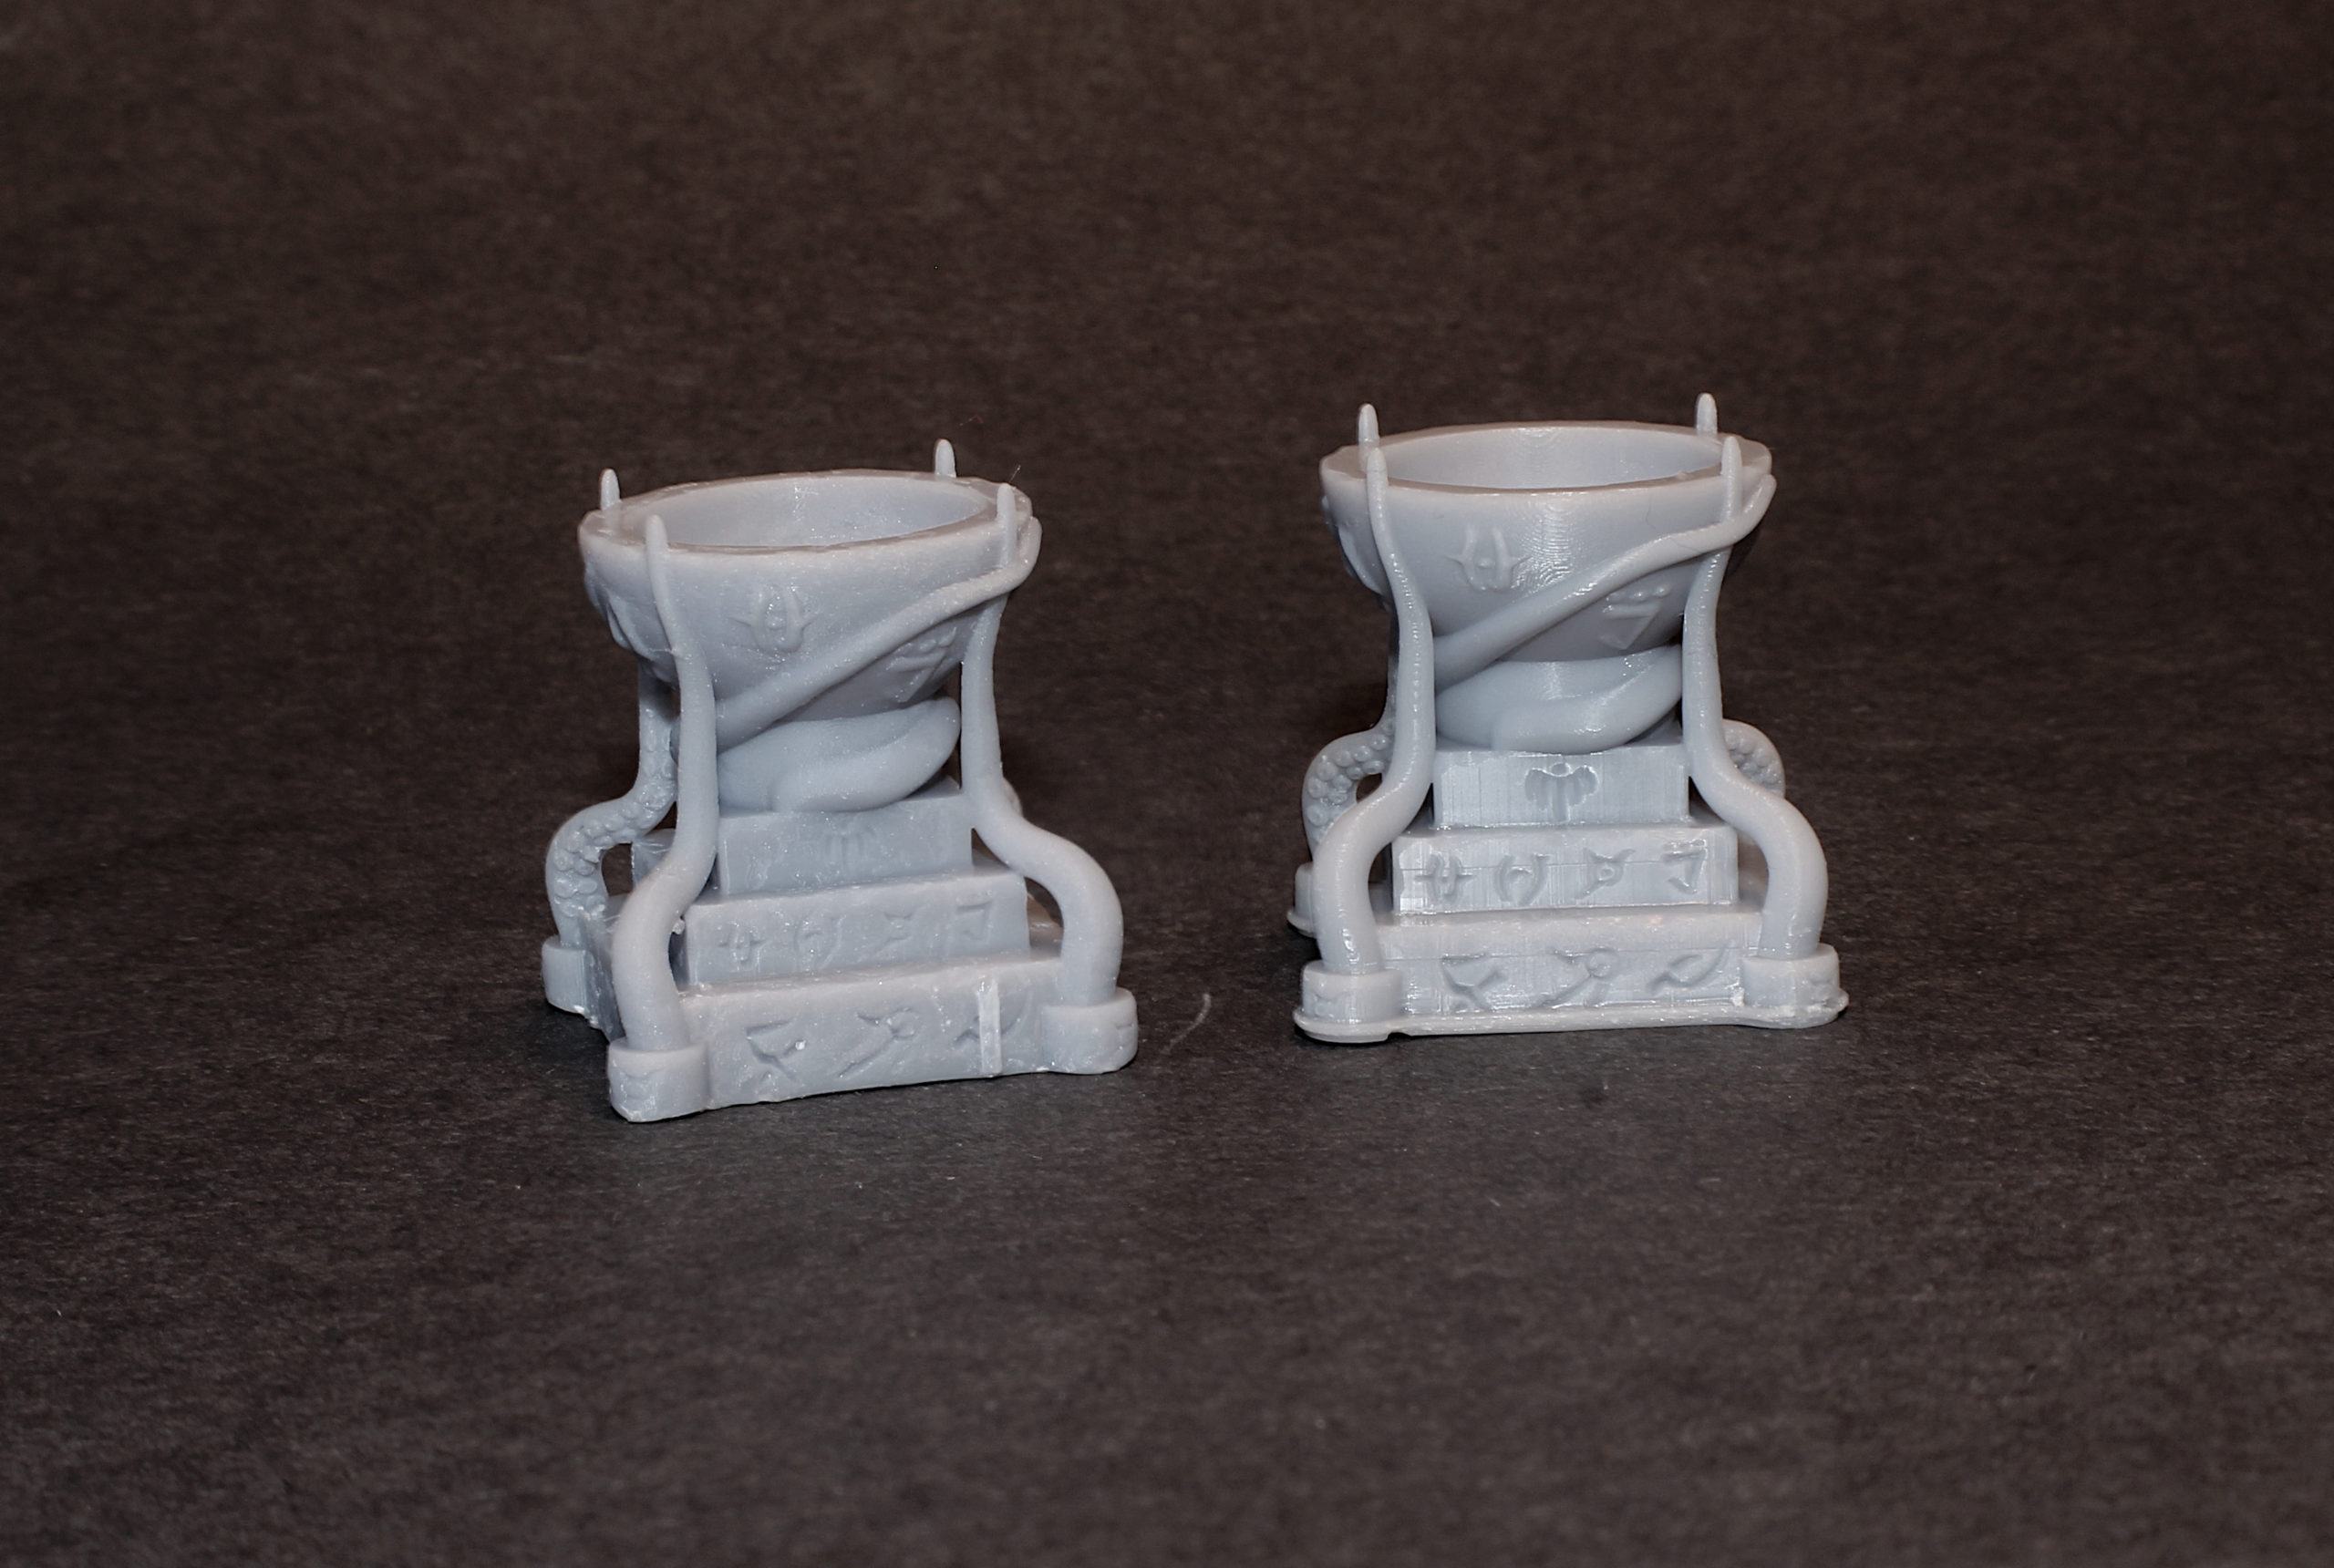
Here’s a cool little shrine model I made for a Kickstarter campaign I did last year. It printed in just over 5 hours on the Mono X, at a layer height of .05 mm. The same print would have taken over 8 hours on my original Photon!

In addition to the faster curing times and longer lifespan, Monochrome LCD screens use less energy.
The dual linear rails on the Z-axis offer added stability compared with older resin printers like the original Photon or Elegoo Mars.
Levelling has also been made a little easier and will definitely save some hobbyists time and frustration.
The Mono X also comes with Wi-Fi connectivity, though it’s not a feature I use. You will still have to save your prints to USB, as the sliced files can’t be sent directly to the printer over Wi-Fi. However, you can monitor prints using the Anycubic app to see when a print is finished. For some, this might be a welcome improvement, especially if you keep your printer in a separate room.
The Mono X is also substantially quieter than my original Photon. The noise never bothered me but it’s still a nice improvement.
The slope of the top of the build plate is flatter than on older models. As a result, more resin builds up and stays on the bed, whereas most of it would eventually drip off on my original Photon. This is a minor annoyance, but just takes a few swipes with the plastic spatula included with the printer.
Additionally, prints stick to the build plate more firmly than on other models. I suppose it’s better to have too much adhesion than too little, but prints can sometimes be challenging to remove. This also just requires a little extra spatula work, but if it becomes too much, I will go over one potential solution in a bit.
One thing I miss about the original Photon was the moveable door, which allowed for much easier access when removing the build plate. The Mono X comes with a clear enclosure that needs to be removed and set aside. This adds a few extra steps after a print is finished but isn’t a big deal.
There are two potential issues that are definitely worth noting. The LCD screen does not come with the same level of protection as previous models. As a result, punctures in the FEP that cause a resin leak can cause serious issues. Cured resin on the screen that could be easily scraped off on the original Photon could lead to serious damage on the Mono X.
Additionally, a number of people (myself included) received a warped build plate, which can (and did, in my case) lead to a frustrating number of failed prints. I’m not sure how common this issue is, but based on what I’ve seen on Facebook groups and subreddits, it’s common enough to warrant some discussion.
I will go over how to address those issues shortly.
The only other complaint I have about the Mono X is Anycubic’s slicer software. I was fairly content using the older version (1.3.6) on my original Photon. It was basic, but intuitive and always got the job done. Version 2.1.2, which is compatible with the Mono X, does add a few useful features, but is not nearly as easy to work with. While the auto-support function on the older version worked flawlessly, you have to manually raise the model on the new version before automatically adding supports. Additionally, I constantly find myself adding supports to overhangs missed by the slicer. It’s annoying, but definitely not a deal-breaker. Lychee seems to be a highly recommended slicer alternative and the Chitubox version 1.8 Beta is compatible with the Mono X; however I haven’t tried either of them personally.
Cosmetics
I’ll keep it short: the Mono X is a very good looking printer. The design is simple and elegant and the amber enclosure adds a nice touch of color. Additionally, the touchscreen and UI are both a little nicer than on previous models.
Initial Setup
Assembly was very easy. Screw in the Wi-Fi antenna, attach the build plate and connect the power chords.
Bed Leveling
Leveling the Mono X is also straightforward.
- Loosen the four screws on the build plate
- Place a sheet of paper over the build surface
- Select “Tools” on the touchscreen
- Select “Move Z Axis”
- Click the “Home” icon. The build plate should lower until it reaches the surface
- Hold the build plate steady with one hand while tightening the four screws with the other
- Select “Z=0” and hit “Enter”
Printer and Slicer Settings:
The standard default settings in the Anycubic Workshop seem to work pretty well. I usually print at .05mm. I would lower the exposure time a bit if printing at lower layer heights.
One other setting you may need to change is the UV power, which can only be changed on the printer itself, not in the slicer. Anycubic recommends 80%. For some reason, my default was set at 50%. My prints were much more consistent after I changed that.
The old Anycubic slicer would automatically raise the model when automatically adding supports. In the new version, I usually have to raise the model up a few millimeters, before navigating to the supports environment. You will need to play around with the support settings to see what works best for you. I still can’t say I’ve found the “perfect” support settings. And when automatically adding supports, double check the model to make sure there aren’t any major overhangs that weren’t supported.
Often, the supports include a raft that intersects with the models and are difficult to remove from the print without leaving some damage.

A few of the rafts for supports under the overhangs on this print left some marks behind, but the print still turned out nicely for what it needs to be: An Arduino holder for an electronics project I’m working on.
Once you’re happy with the supports, export the model, insert the USB, screw in the vat, add resin and add the enclosure. Then select “Print” on the touchscreen, select the right file and click “Play”.
Raft and support removal left a few marks on these prints, but they still turned out pretty nice. This was also before I had replaced my warped build plate.
Anti-Aliasing
The Mono X also offers anti-aliasing functionality in the settings. This wasn’t an option on my original Photon, and I’d heard mixed reviews. But I thought I’d give it a try. Anti-aliasing is meant to make the print surface smoother and more consistent and lessen the wavy layer lines that sometimes show up on prints. The drawback is that it might remove some finer details. It’s hard to tell in these pictures, but the print on the left was printed with standard settings, the print on the left used an anti-aliasing value of 4. They’re pretty similar (aside from some poor support removal on my part), but the one on the right does have a bit smoother surface. Some of the details do seem a bit softer though. I’m no expert, so you should play around with the settings and see what works for you.
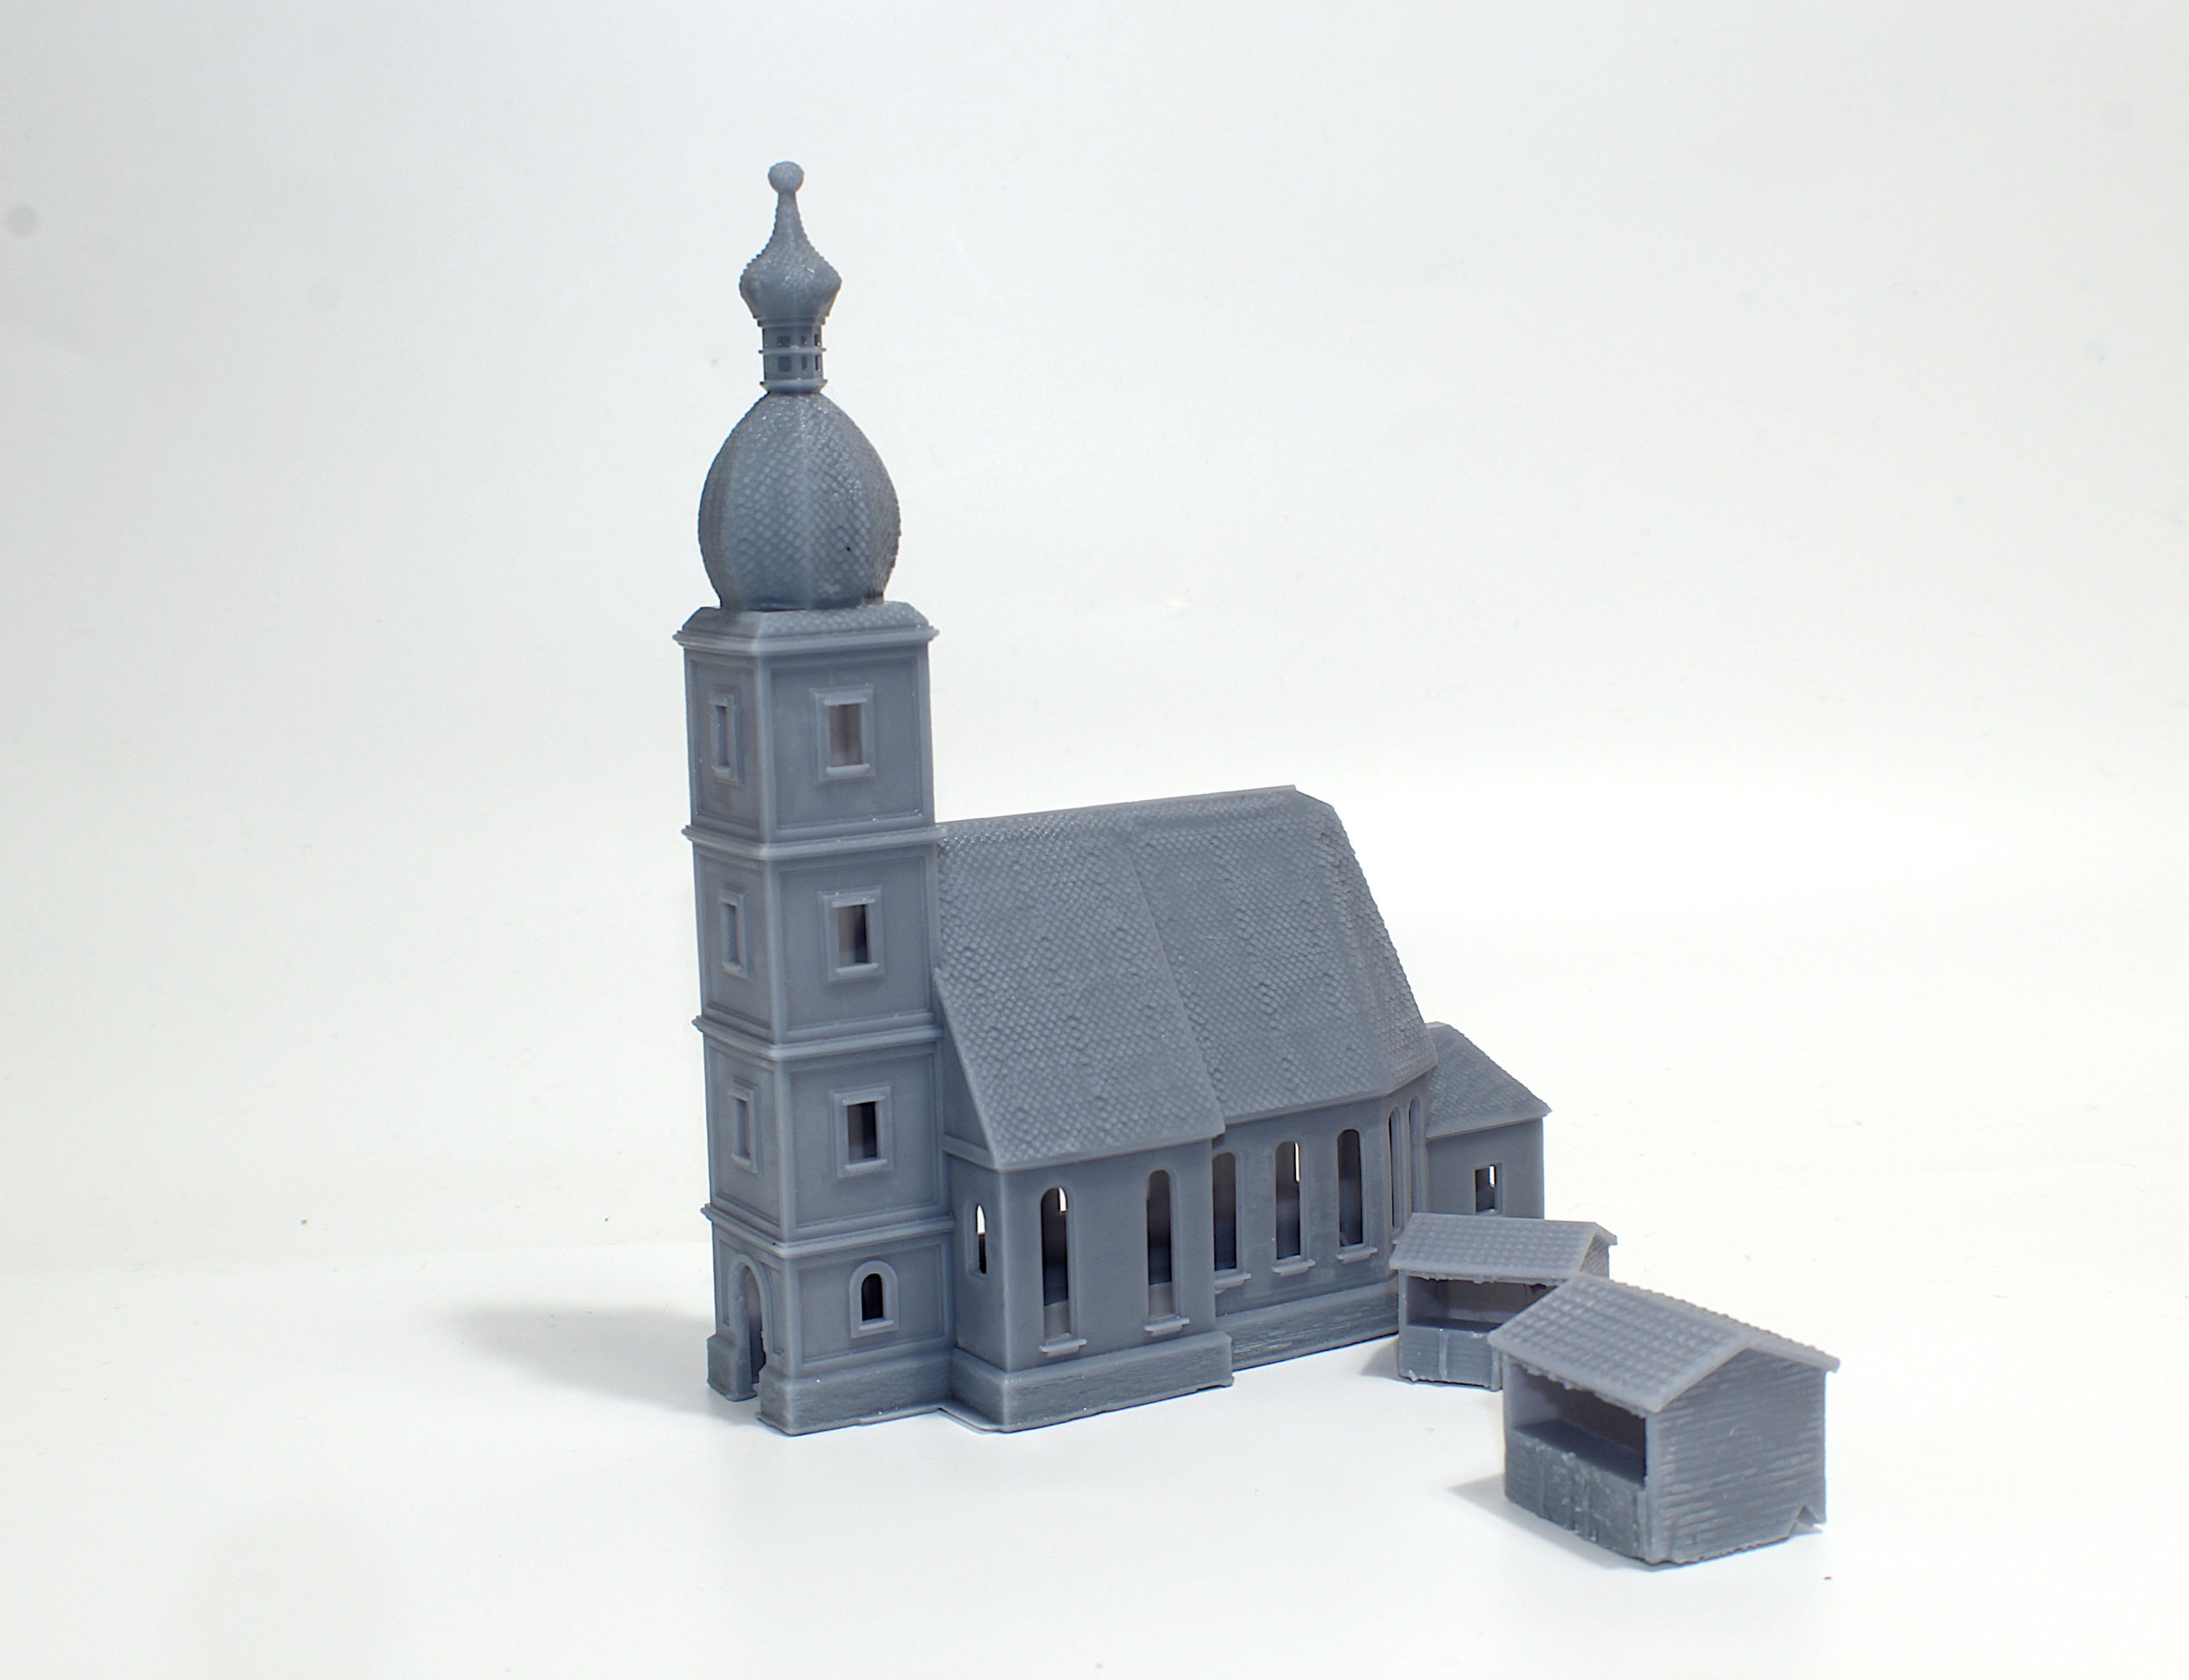
Here are a few more prints on my Mono X:
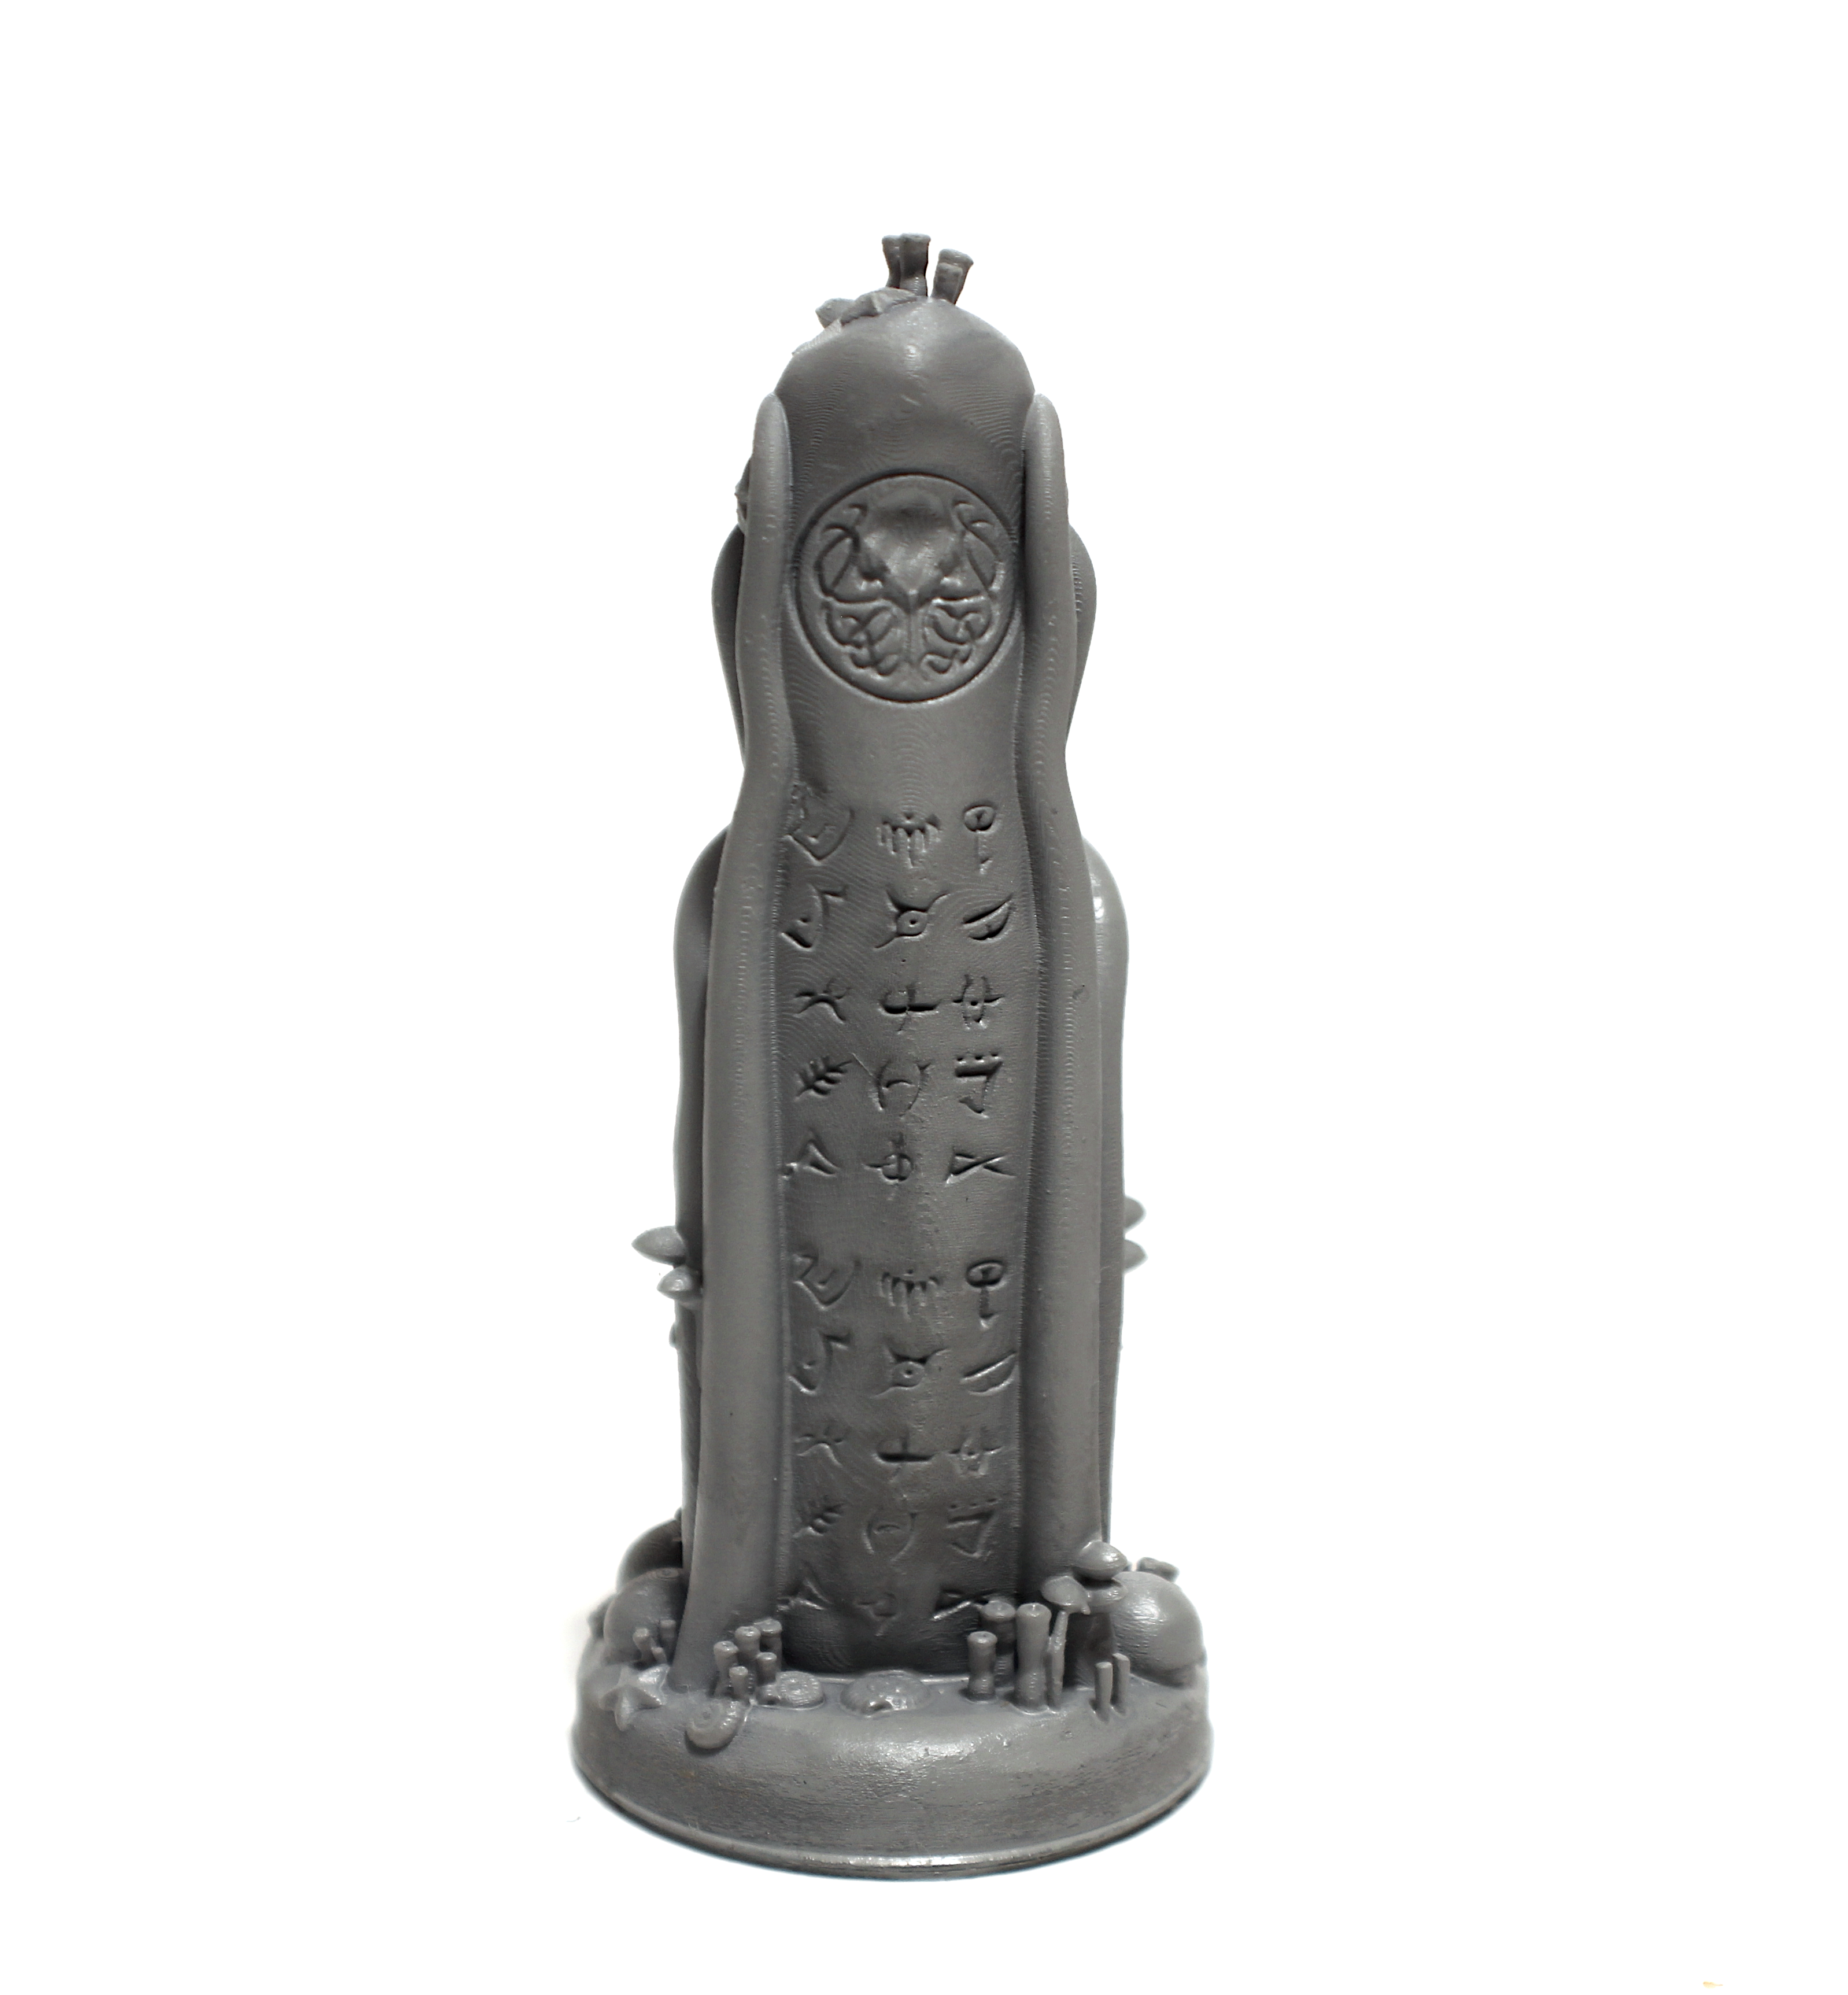
A closeup of another one of my models, after some priming.
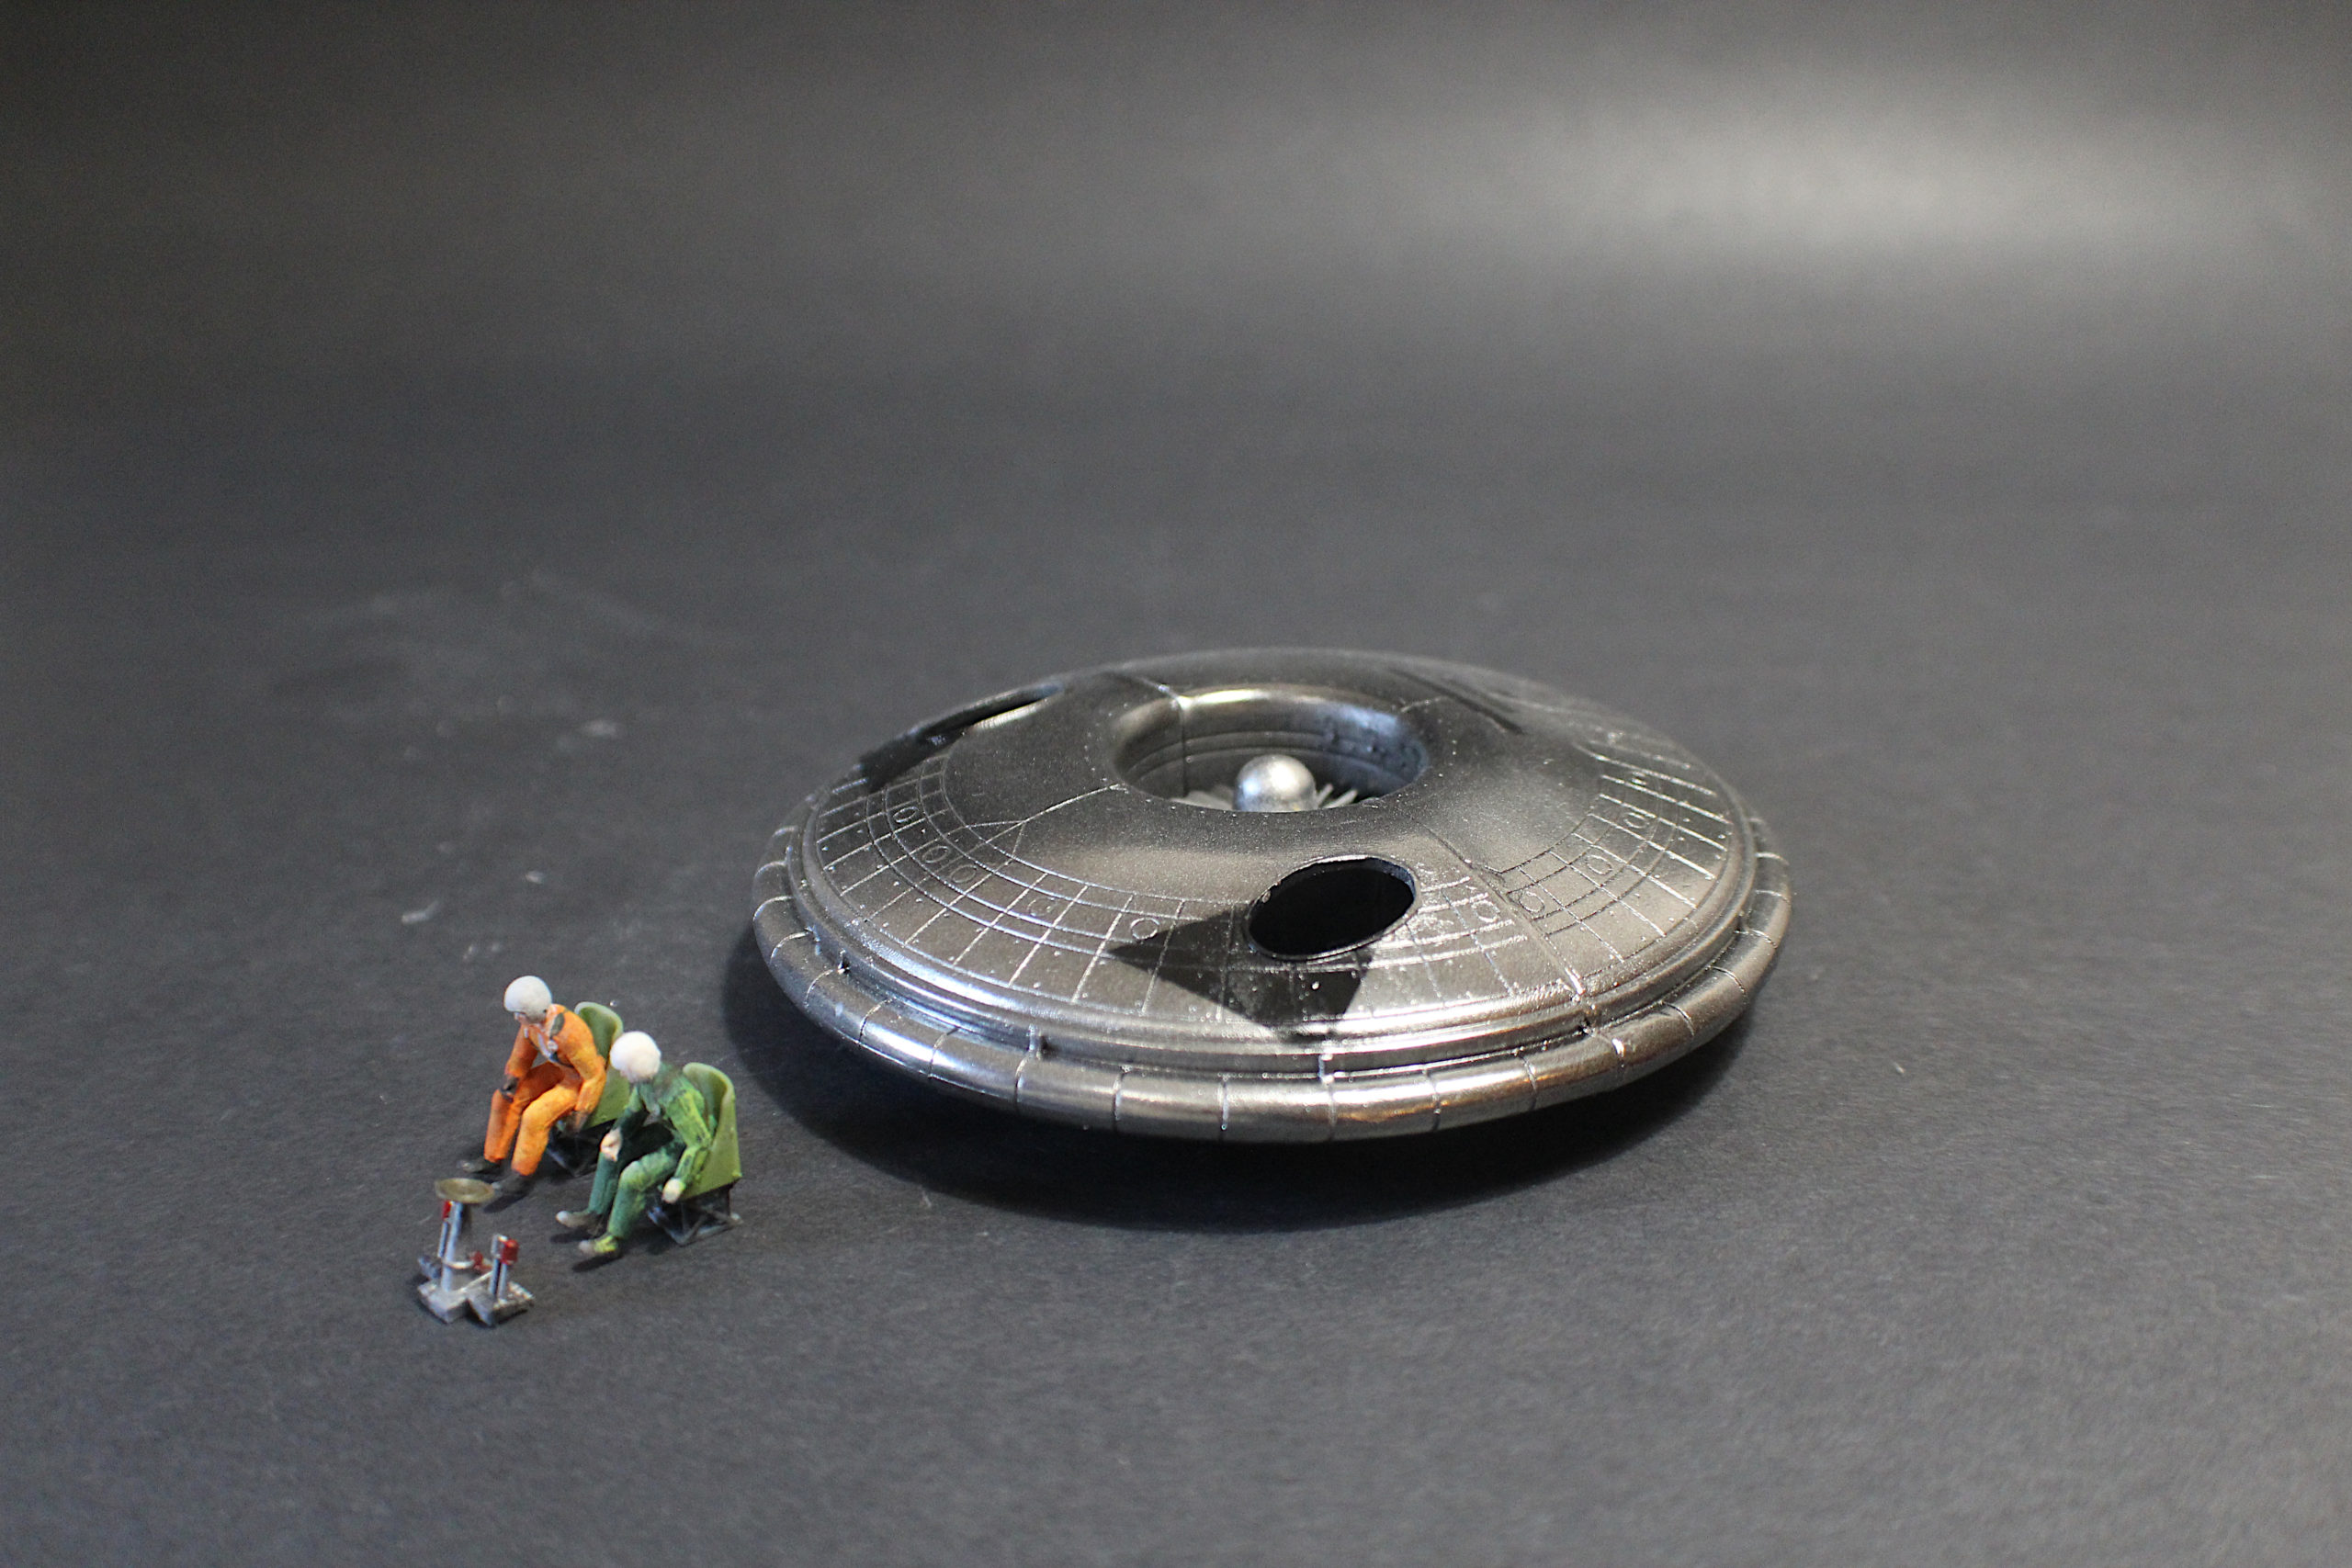
A little UFO model I’m working on, after some painting.
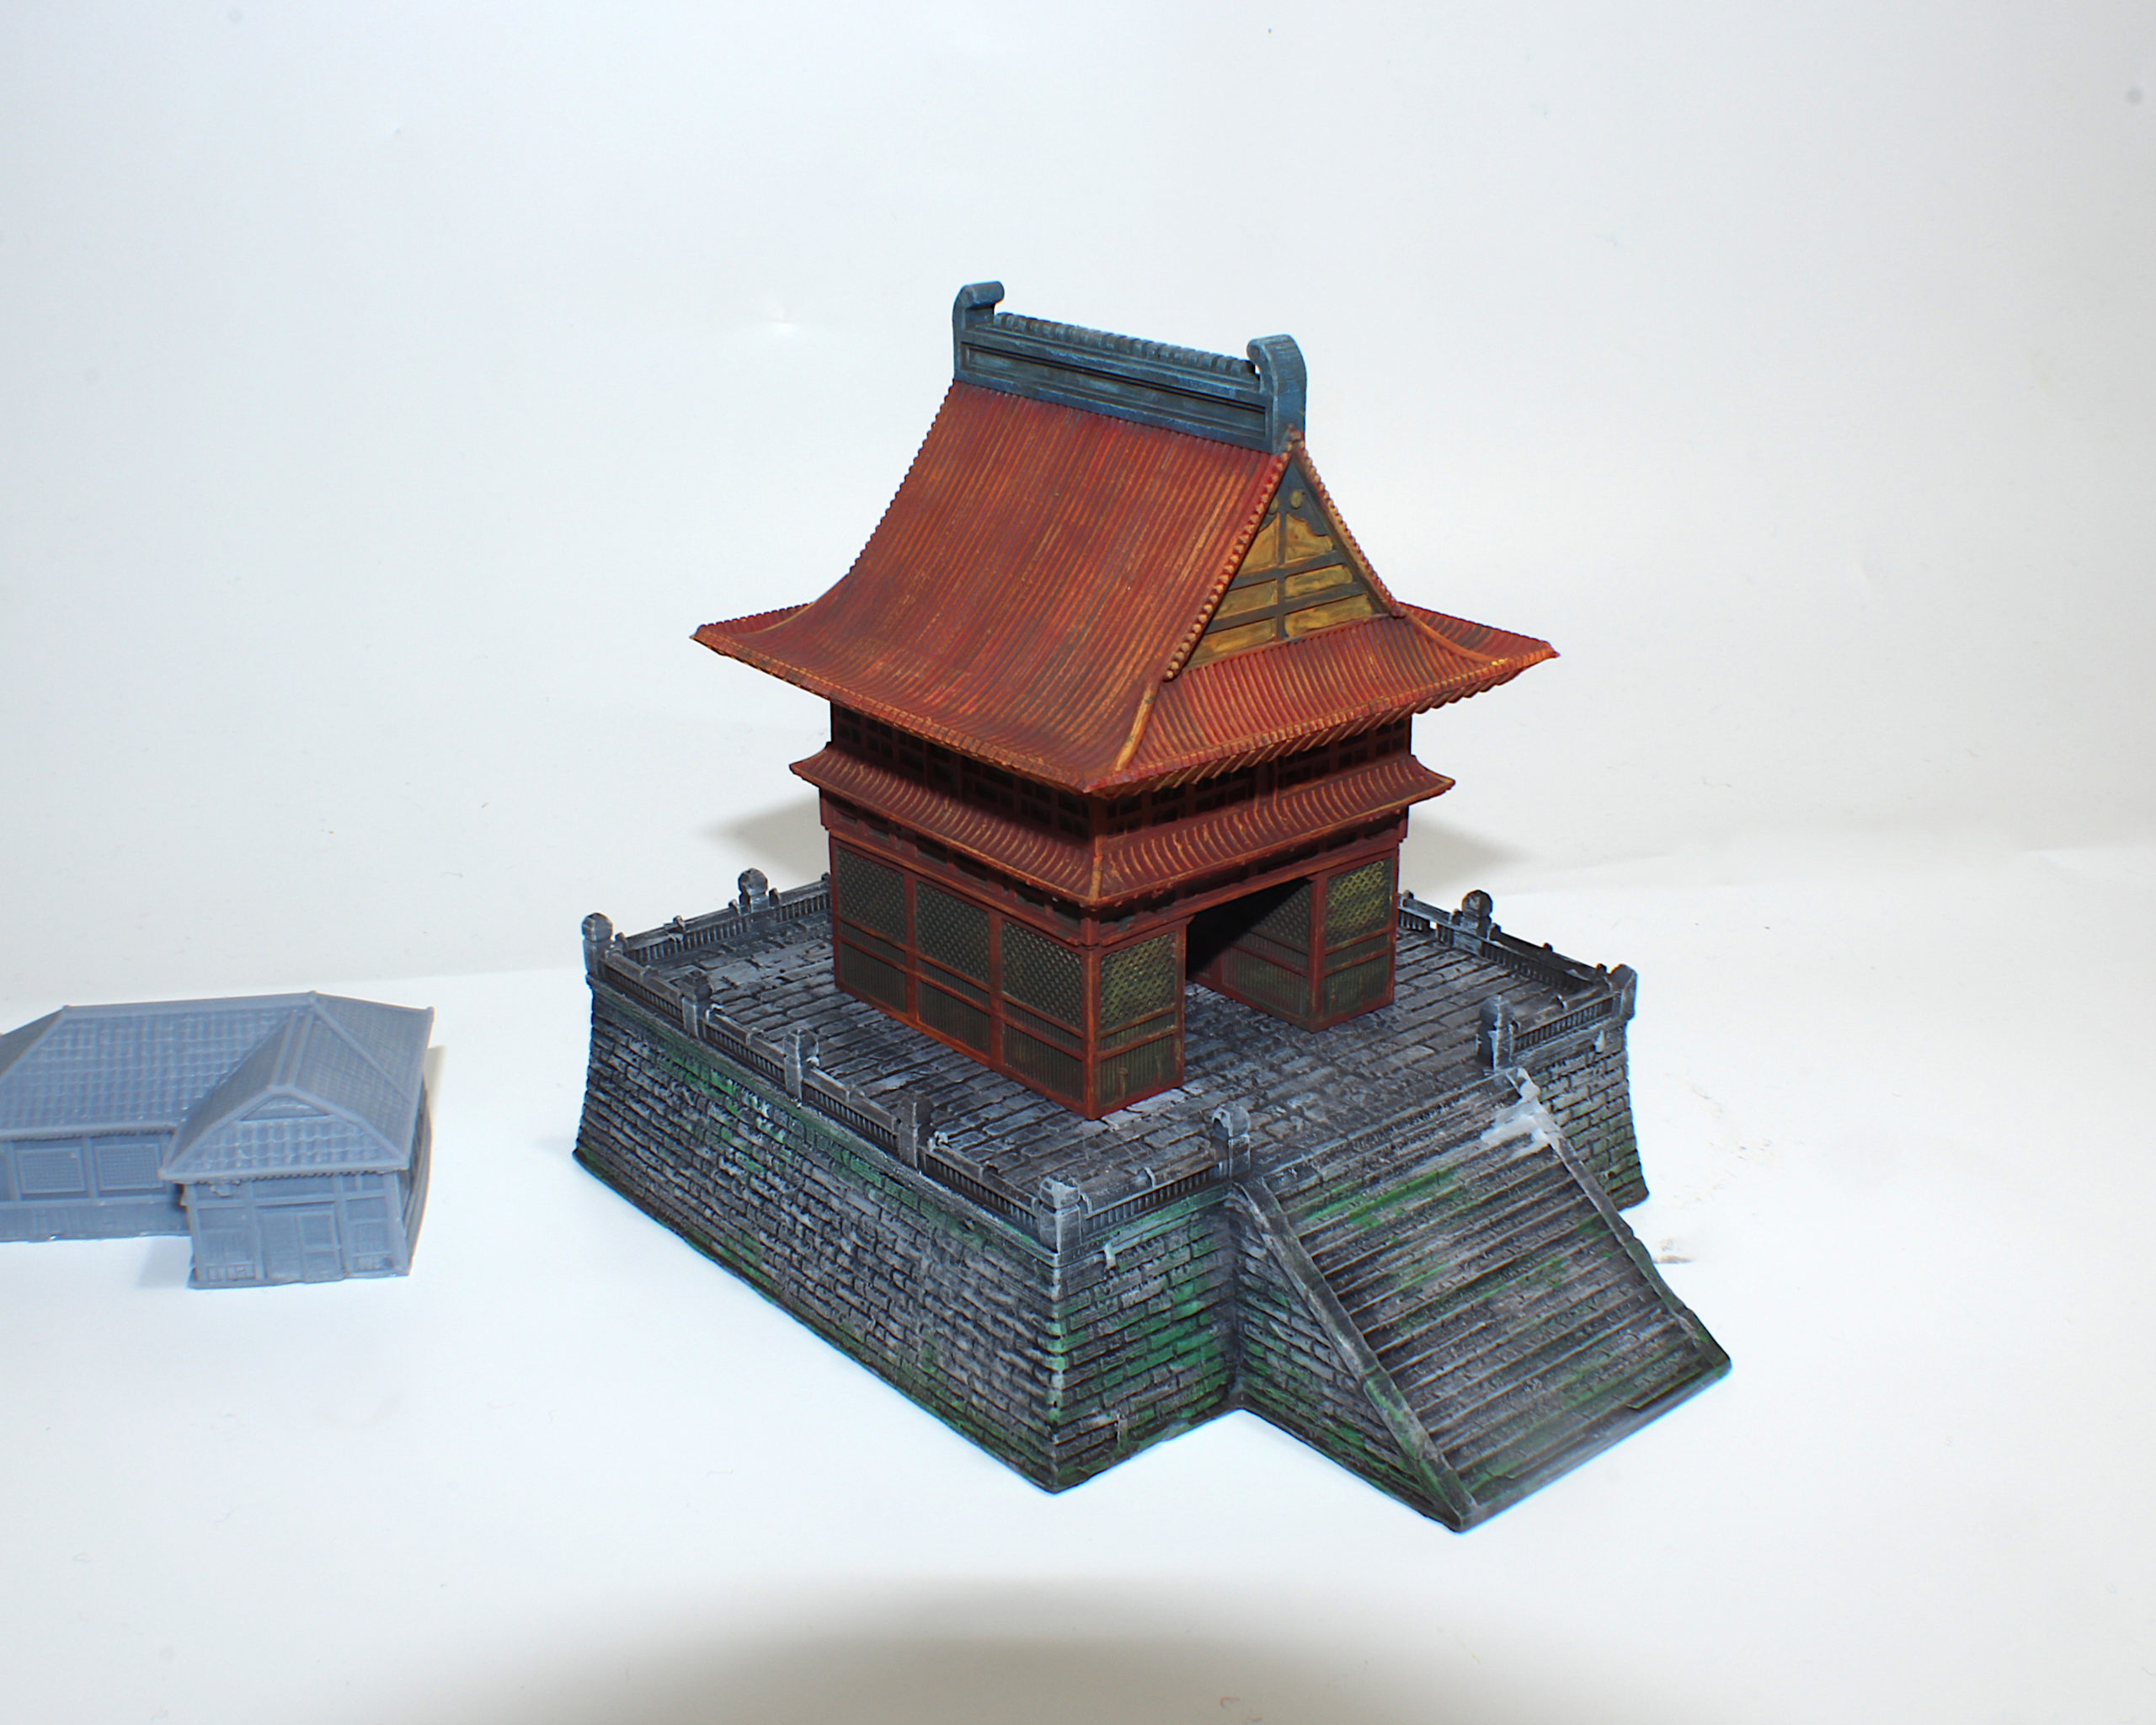
A little Japanese temple I made for a Christmas gift, after most of the painting was done.
Issues, Upgrades, Maintenance, etc.
Now for the not-so-fun stuff. I don’t know how common the warped build plate issue is. I reached out to Anycubic for comment and was told to use this link to submit a support ticket. If you purchased your printer from a third party seller, as I did, I would reach out to them and request a replacement. I’m not seeing many warped build plate-related posts anymore, so it seems the issue either wasn’t that common or people are now getting their replacements.
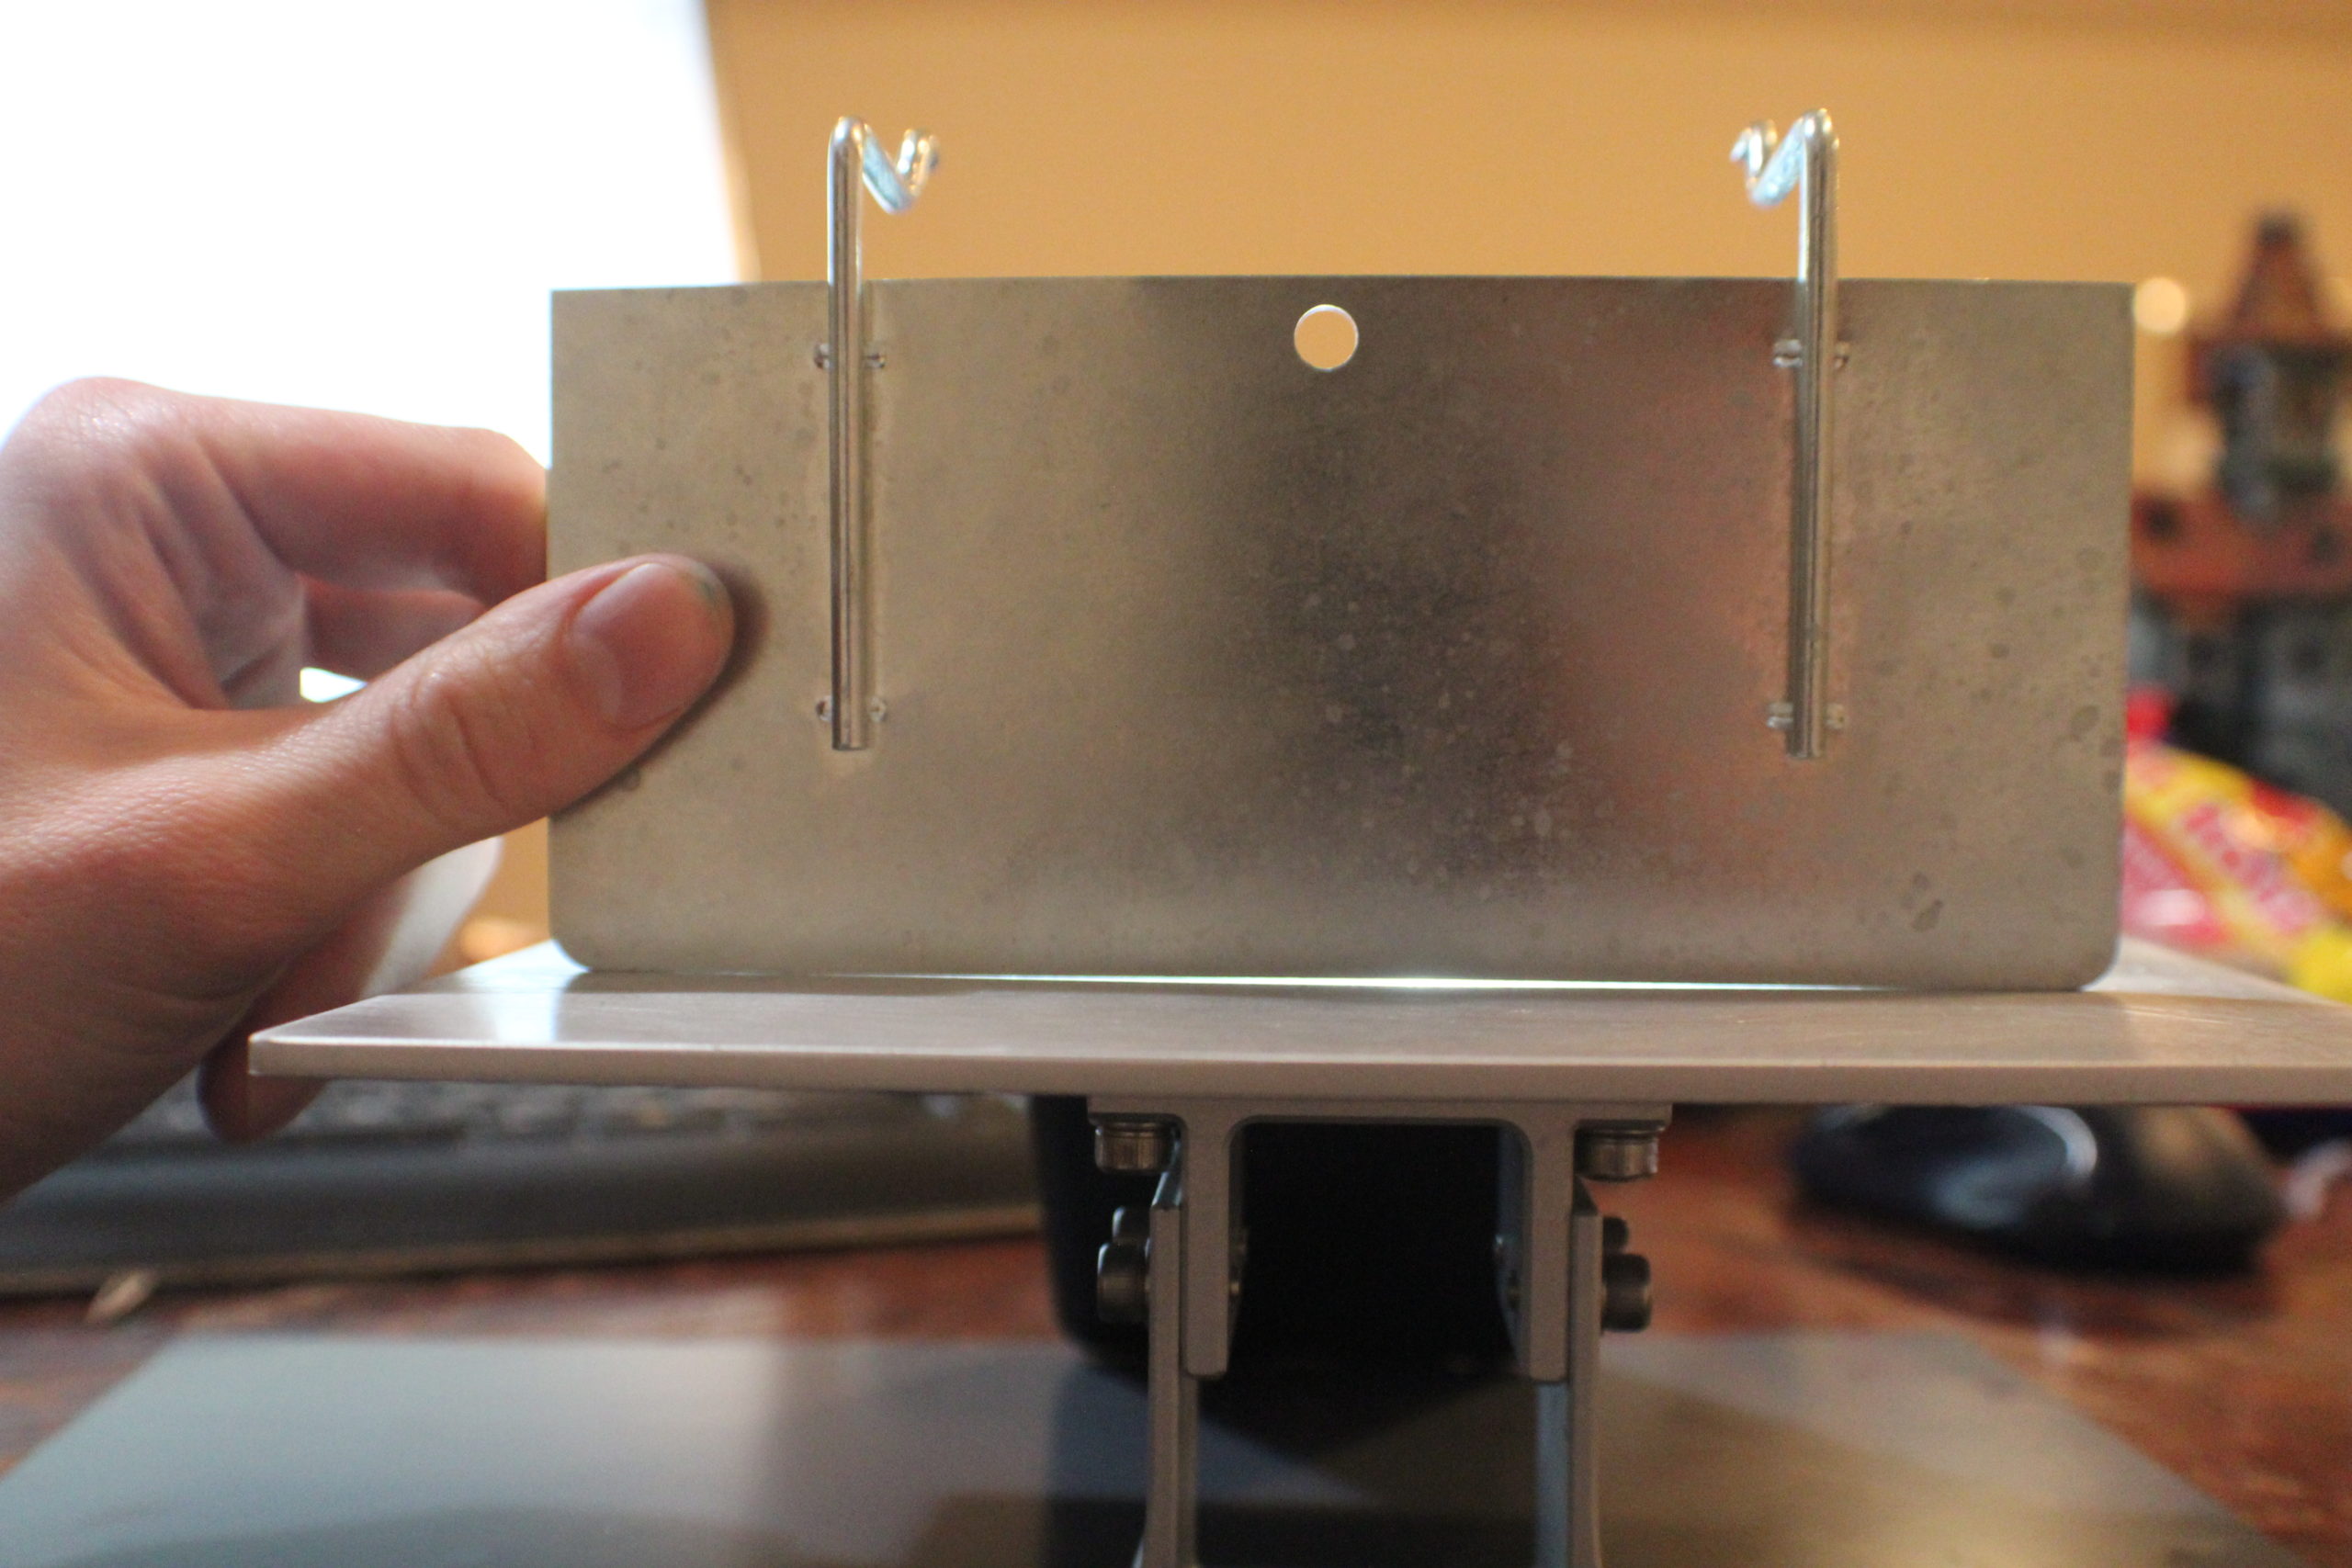
If you’re getting failed prints, double check to make sure a warped build plate is the issue, and not your settings. Place a straight edge against the build plate. If you can see light shine through the middle, or if you can slide a piece of paper between them, you’ve probably got a warped build plate. I’ve seen people claim it doesn’t affect their prints and, yes, you will probably be able to get a few prints off without issues, but it’s going to be inconsistent.
I tried sanding my warped plate, which helped a little. I placed a sheet of low grit sandpaper (100-300 grit) against a flat, glass mirror, then wet sanded the build plate against it, sanding in a circular motion. This took a fair amount of time, but it did help a little. I also saw a video that recommended spray painting the surface of the build plate before sanding so you could see where the warping is, based on where paint is left over after some sanding. While sanding did help a bit, I would highly recommend reaching out to Anycubic for a replacement. Even though I didn’t buy from them directly, mine was still replaced free of cost and now it prints perfectly!
The only potentially disastrous issue is the lack of screen protection on the Mono LCD. Every once in a while I would get punctures in my original Photon and resin would leak onto the screen and cure during a print. This could be scraped off easily with the edge of an Exacto knife. Due to the build size on the Mono X, I suspect the FEP has more room to lift during printing, which can cause far more resin to leak in the event of a puncture. Additionally, cured resin is supposedly much more difficult to remove without damaging the screen.
If you’re extremely careful and rarely get failed prints, this won’t matter to you. But if you want to be safe, you can always add a screen protector. I ordered this Super Shieldz protector from Amazon, which is cheap and works very well. There are several good YouTube videos detailing how to add a protector. I didn’t cut mine to size, I just place directly over the screen and added some scotch tape on the sides. I certainly could have applied it more carefully, and had a few air bubbles, but it does not seem to affect print quality.

I did notice a slight puncture in my FEP, but decided to see just how bad the resin leaking issue was for myself before my replacement FEPs arrived. This was after adding a screen protector, of course. As you can see, a tiny hole resulted in a pretty substantial leak, but the screen protector did its job. So, I would highly recommend adding one to be safe.

I knew what would happen, but I did it anyway…for science!
Finally, if you’re having issues removing prints form the build plate there are a number of magnetic, flexible build plates available that come highly recommended. I haven’t had the chance to try any yet, but from what I’ve seen Wham Bam appears to be a very popular option and I will probably pick one up at some point.
Luckily, the good far outweighs the bad when it comes to the Mono X. And most of the issues I’ve seen can be easily avoided.
Overall, the Mono X prints really well, which is what I’ve come to expect from Anycubic. It’s also much faster. Now that I’ve replaced my warped build plate and gotten my settings mostly dialed in, I would give this printer a 9/10. It’s easy to use and a solid option for anyone looking to get into resin printing or interested in printing much bigger models.
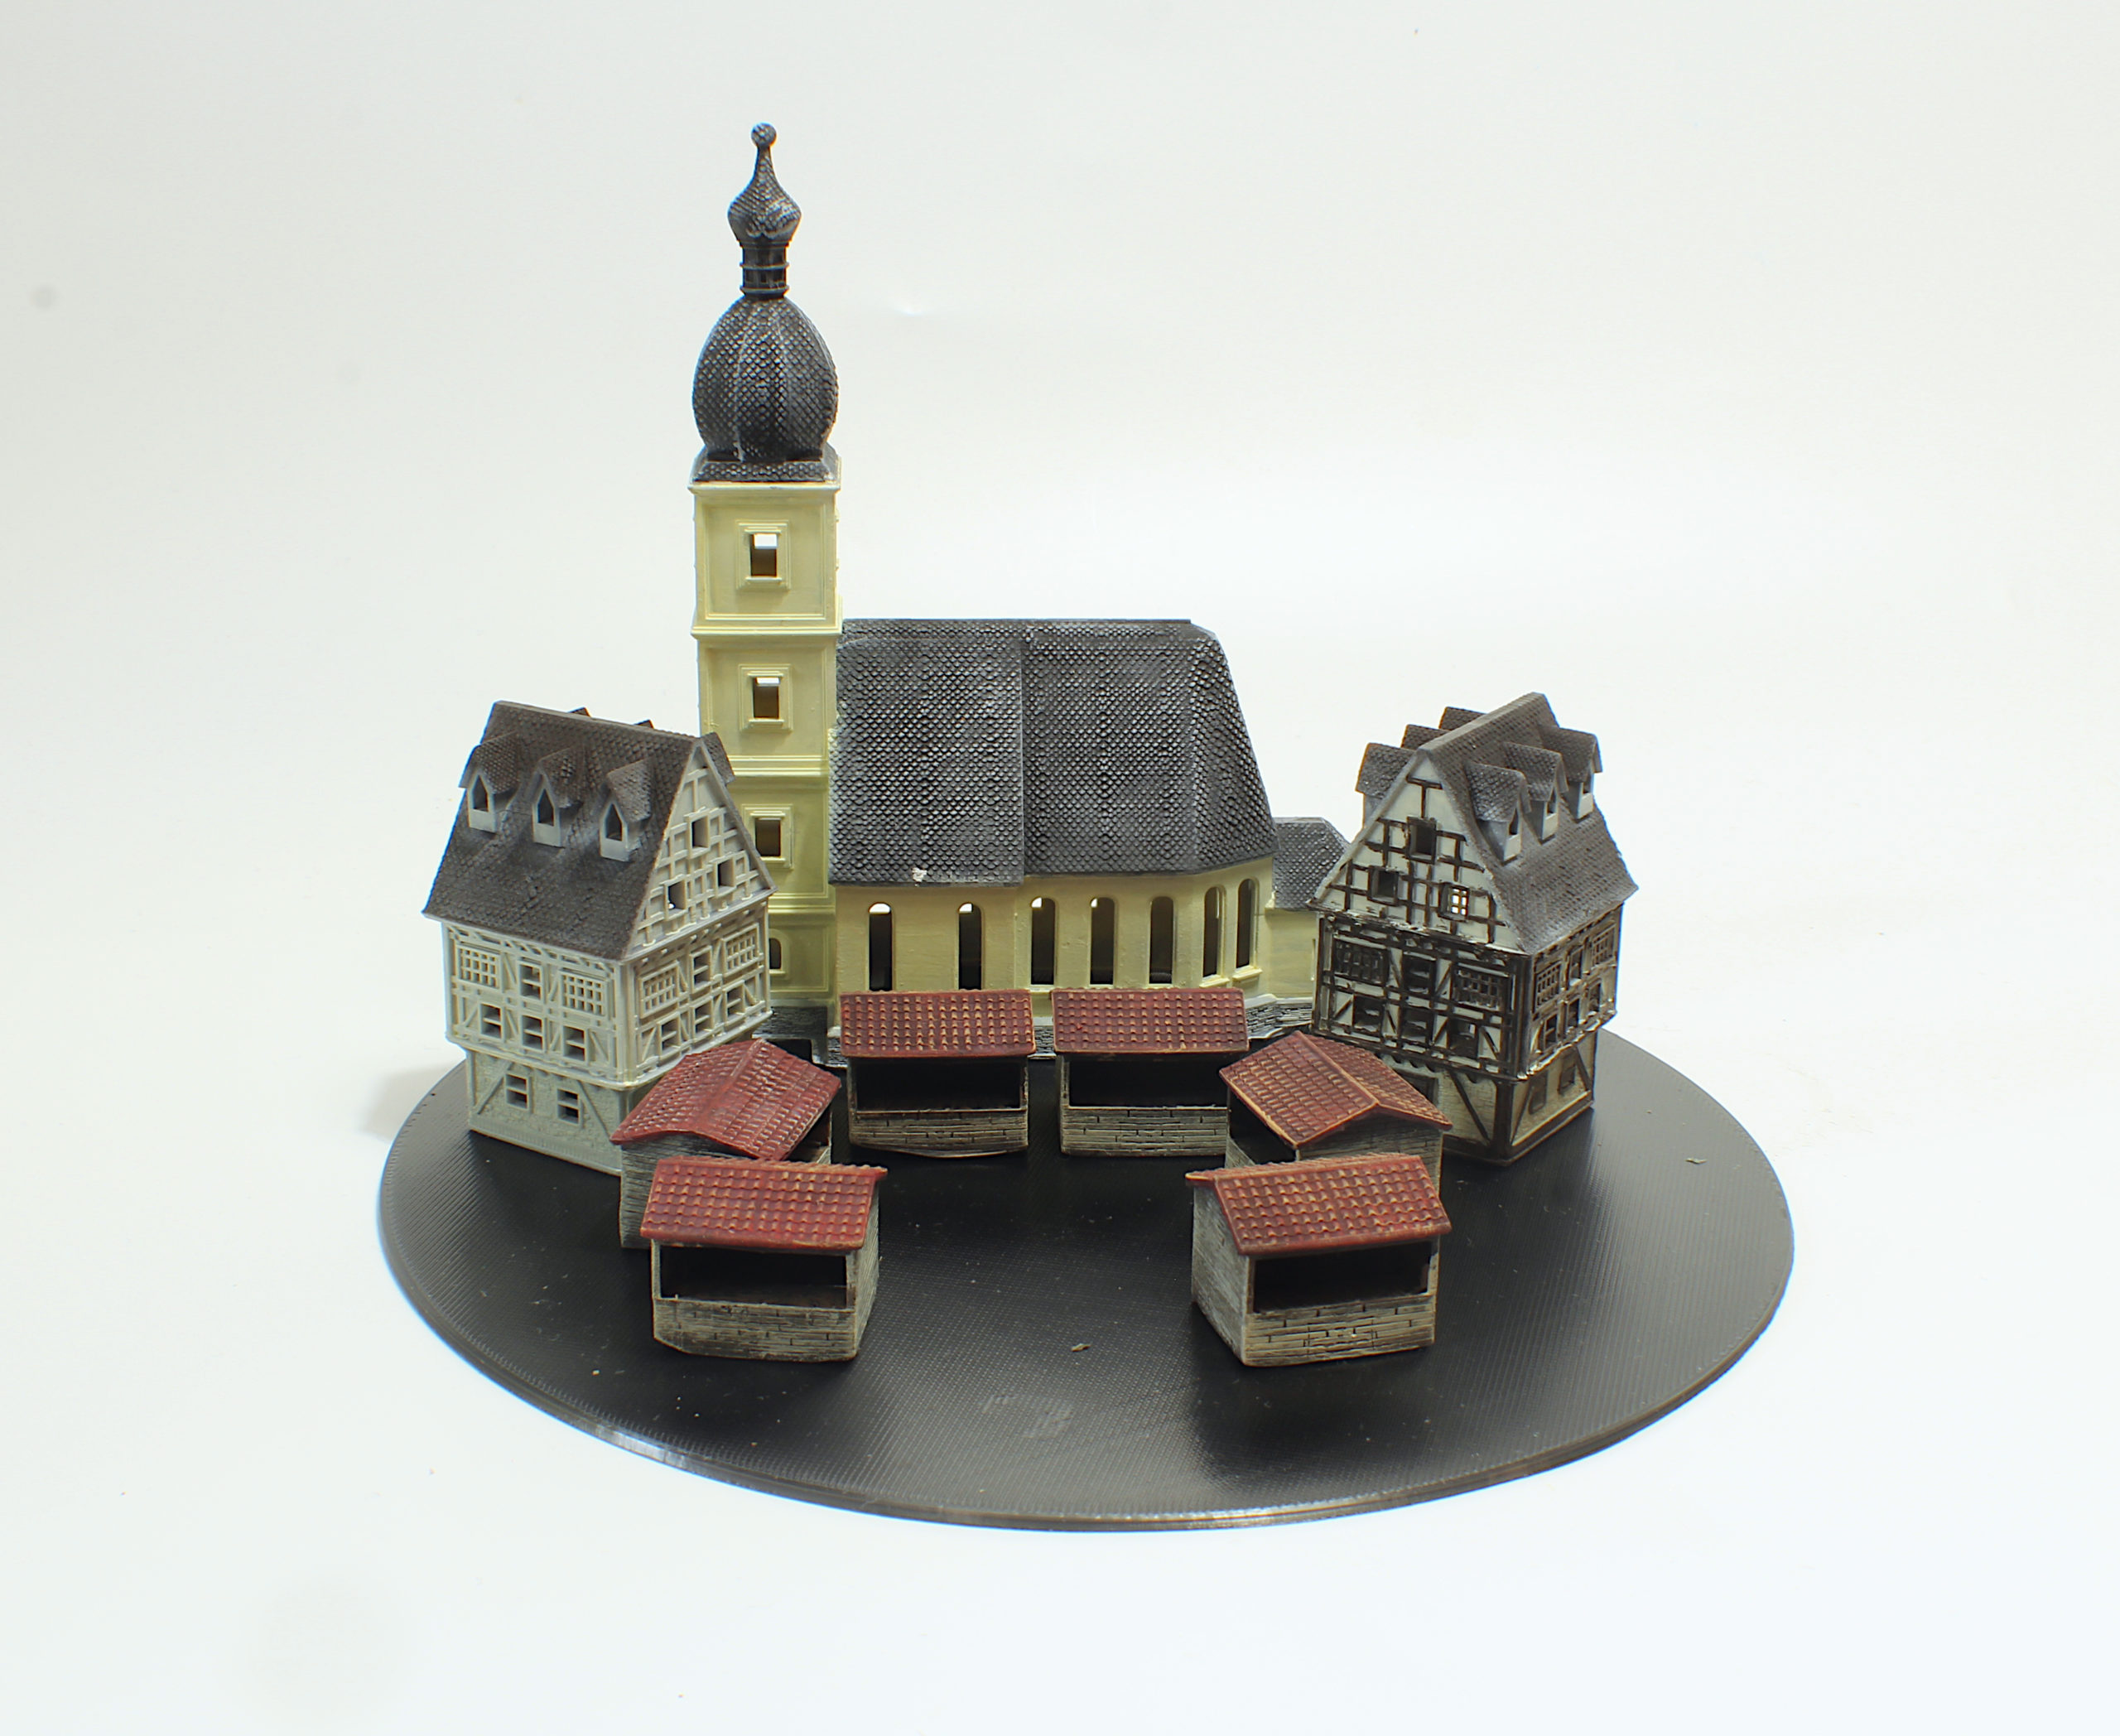
Some of my prints after some painting.
If you want to see more pictures of cool things I 3D printed, check out my Instagram.
Subscribe to Our Email Newsletter
Stay up-to-date on all the latest news from the 3D printing industry and receive information and offers from third party vendors.
Print Services
Upload your 3D Models and get them printed quickly and efficiently.


You May Also Like
AMPulse Asia: Creality IPO Headlines APAC 3D Printing Market Roundup
Asia’s additive manufacturing sector spent the back half of May moving capital and capacity, not just demos. Chinese desktop and consumer printer makers pushed onto public markets, metal powder producers...
Blue Origin’s New Glenn Explosion Comes During Major Manufacturing Push
Blue Origin‘s orbital New Glenn rocket exploded during a hot-fire test at Launch Complex 36 in Cape Canaveral on May 29, setting back the company’s launch ambitions at a time...
Aibuild Says New FETS Simulation Tool Is 10,000x Faster for AM
Aibuild has launched FETS for Additive Manufacturing, a Finite Element Thermomechanical Simulation tool that lets you simulate stress, distortion, thermal effects, and thermomechanical effects. The solution has been optimized for...
AI CAD Tools for 3D Printing: An Overview
There is a bevy of AI-to-CAD tools coming out. Some are finding users; some are raising millions in funding. Many new ones are coming out all the time, so we...