
Low-Cost SLA 3D Printing Democratizes Scale Modeling


With the advent of affordable stereolithography (SLA) and digital light processing (DLP) printers like the Anycubic Photon and Elegoo Mars, the average consumer now has access to technology that, up until a few years ago, was prohibitively expensive. The availability of affordable, high resolution printers, as well as access to free or inexpensive modellng software, has helped 3D printing find an exciting and active niche: scale modeling.

Model planes made on my Anycubic Photon DLP 3D printer.
Large communities of hobbyists eager to share pictures of their builds exist across forums and social media platforms. Popular models can range anywhere from 1/72-scale model aircraft and 1/35-scale tanks and armored vehicles to highly-detailed model train layouts—complete with heavily weathered, graffiti covered boxcars. Regardless of subject matter or scale preference, hobbyists have one thing in common: an almost obsessive attention to detail and accuracy. This has made SLA printing a welcome addition to the hobby.
One of many, popular Facebook groups dedicated to 3D printed scale modeling.

Models by HeroForge, which offers customized STLs for tabletop gaming.
3D printing-related posts are now a common sight on many hobby forums, as well as entire Facebook groups dedicated to modelers interested in creating their own models from scratch. A number of inventive creators are now making a living off Patreons dedicated to sharing STLs with their patrons for a small subscription fee. Hobbyists are no longer limited by the availability of injection molded kits, but can now customize store-bought models in fun and interesting ways, or even create their own models of rare or hard-to-find vehicles from scratch.
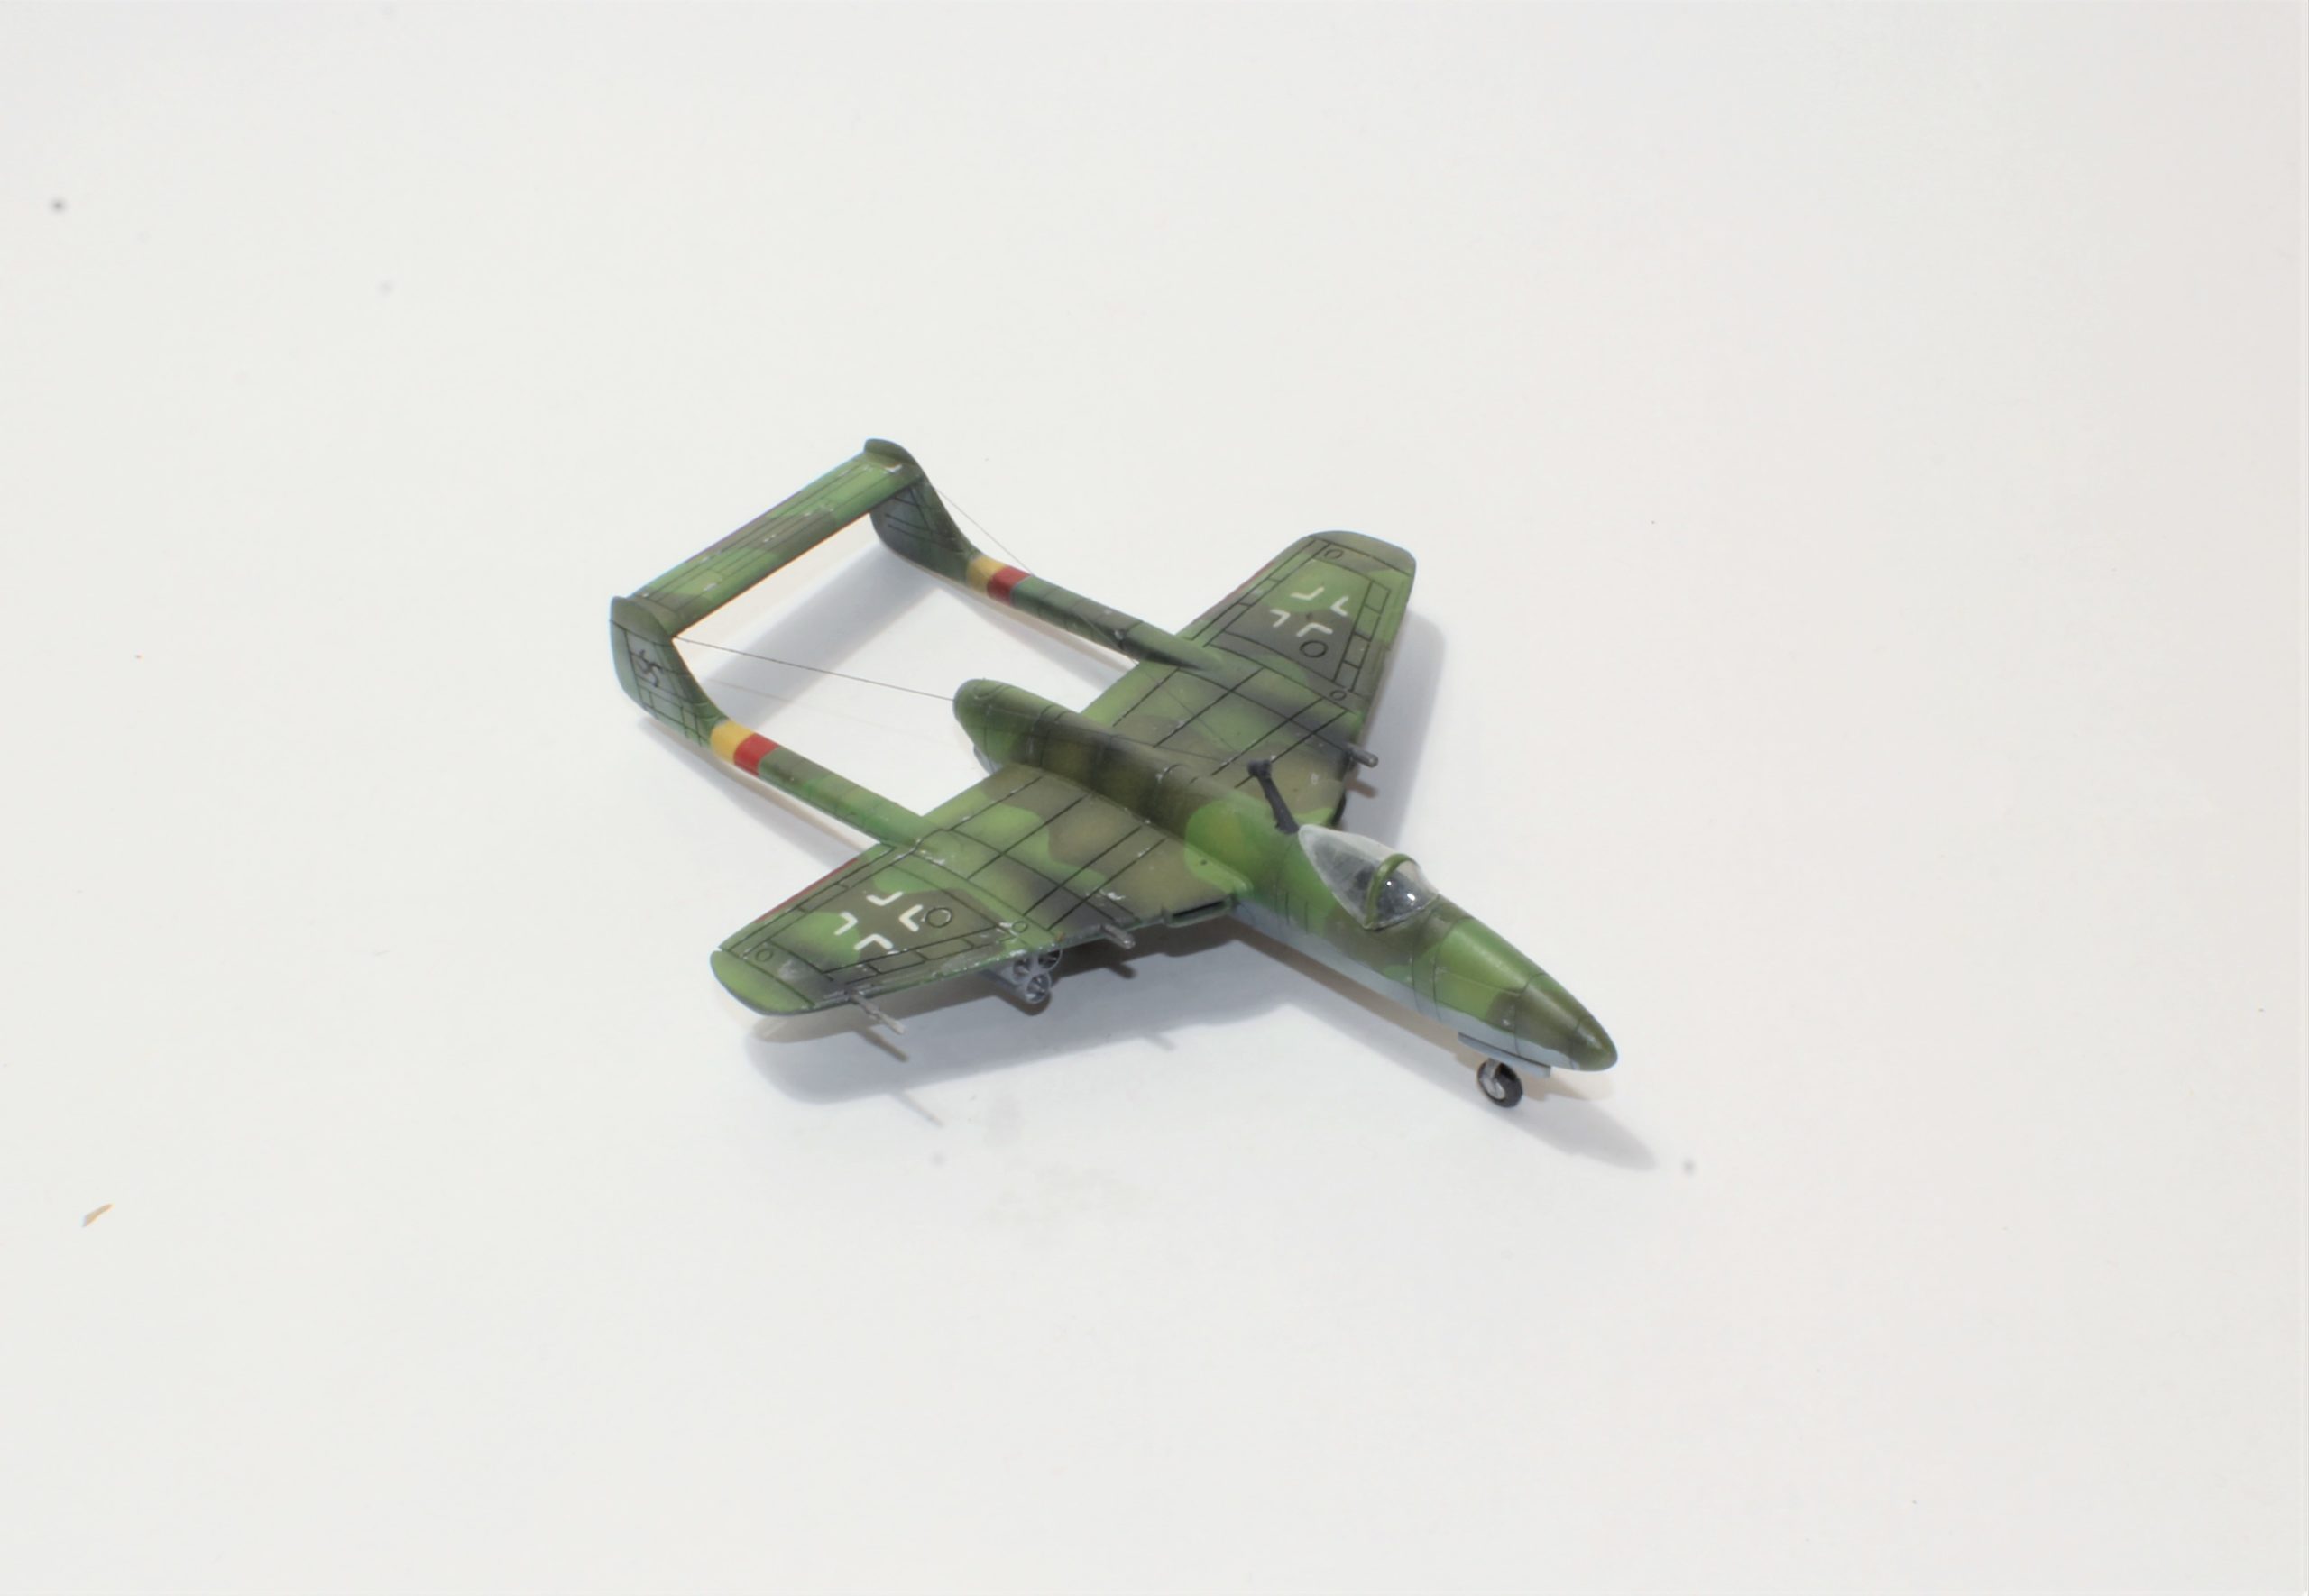
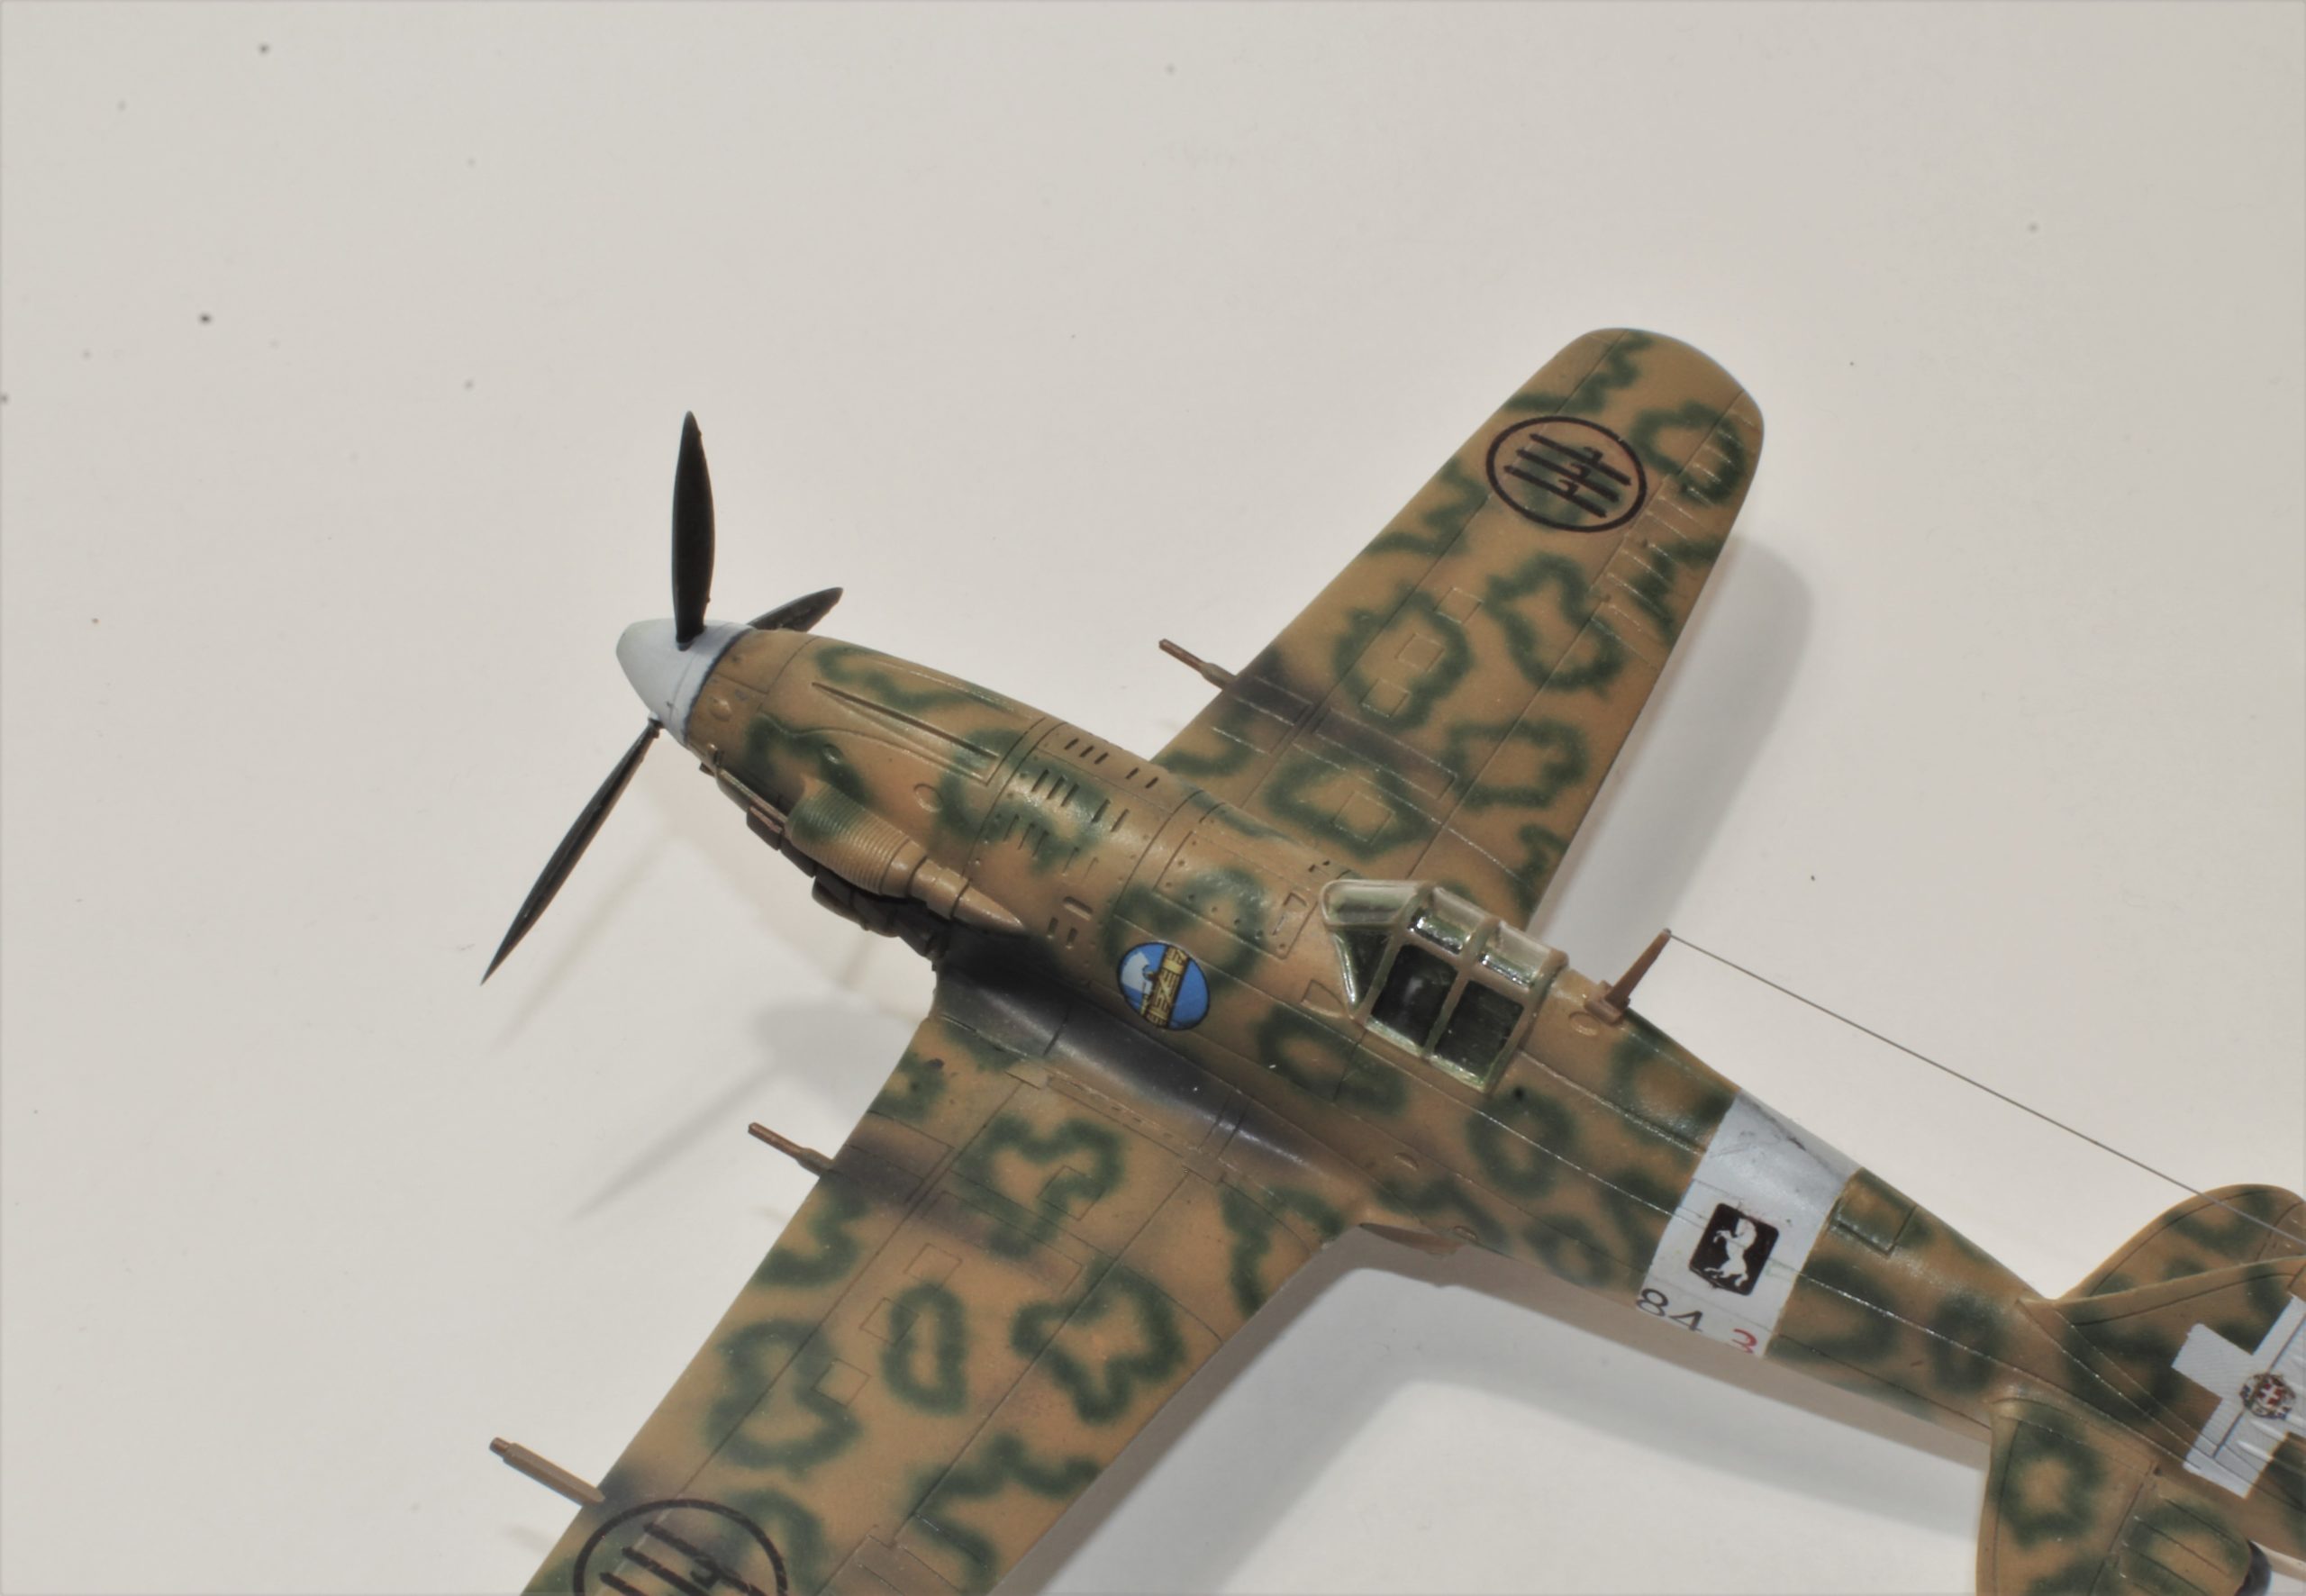
3D printed Focke-Wulf Flitzer, an experimental, World War Two-era jet fighter of which model kits are hard to find and often expensive.
I am one of the many modelers that have made the jump to 3D printing and would like to share my experience with this exciting commingling of hobbies.
I’ve loved making model airplanes ever since my dad got me my first 1/72-scale Spitfire model. My favorite models are World War Two aircraft, but I build a little bit of everything. My modeling skills improved gradually over the years and, once I learned to use an airbrush, I could make some decently presentable models.
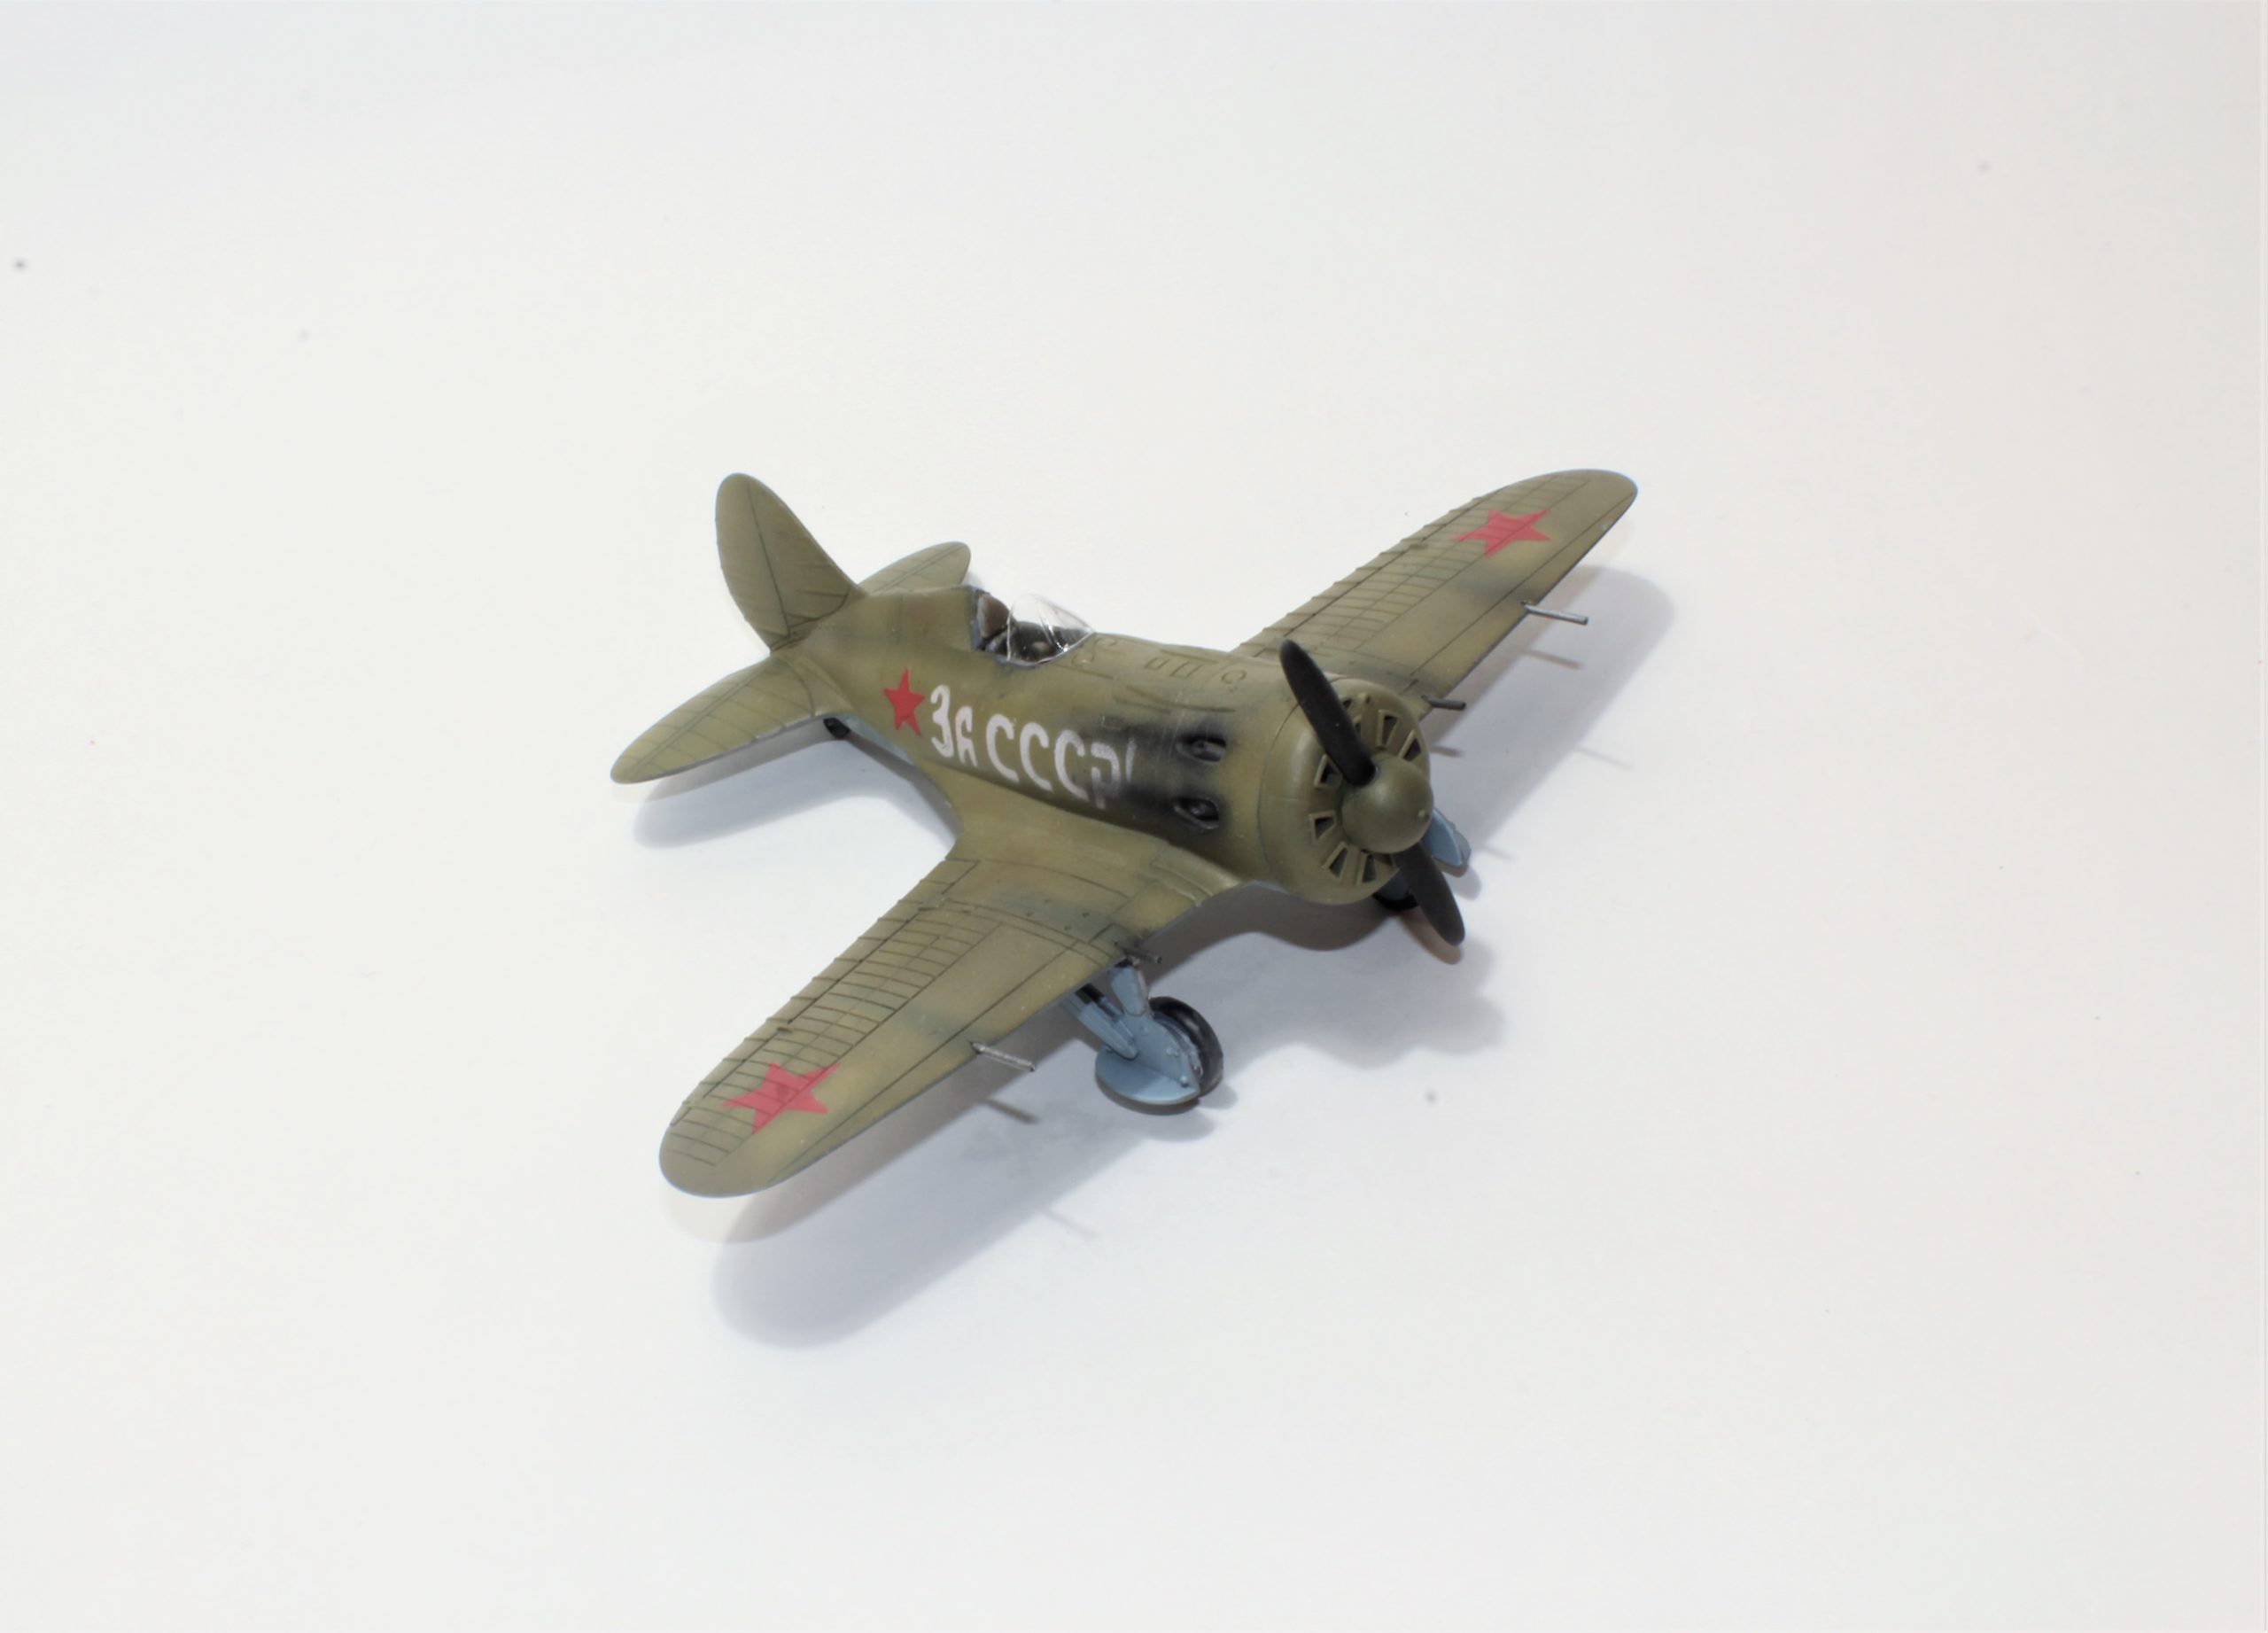
3D printed Polikarpov I-16, a World War Two-era, Soviet fighter plane.
Eventually, I started seeing posts about 3D printing and, after going down several YouTube rabbit holes, decided to buy my first fused deposition modeling (FDM) printer. The idea of making my own models was always appealing and I started developing my 3D modeling skills. I taught myself the basics using free CAD and sculpting programs. With the help of online tutorials, I learned to make some decent models and was instantly hooked. I could achieve fairly good looking results, with a little sanding and priming, but even at layer heights of .1mm, the level of detail was a little lacking.
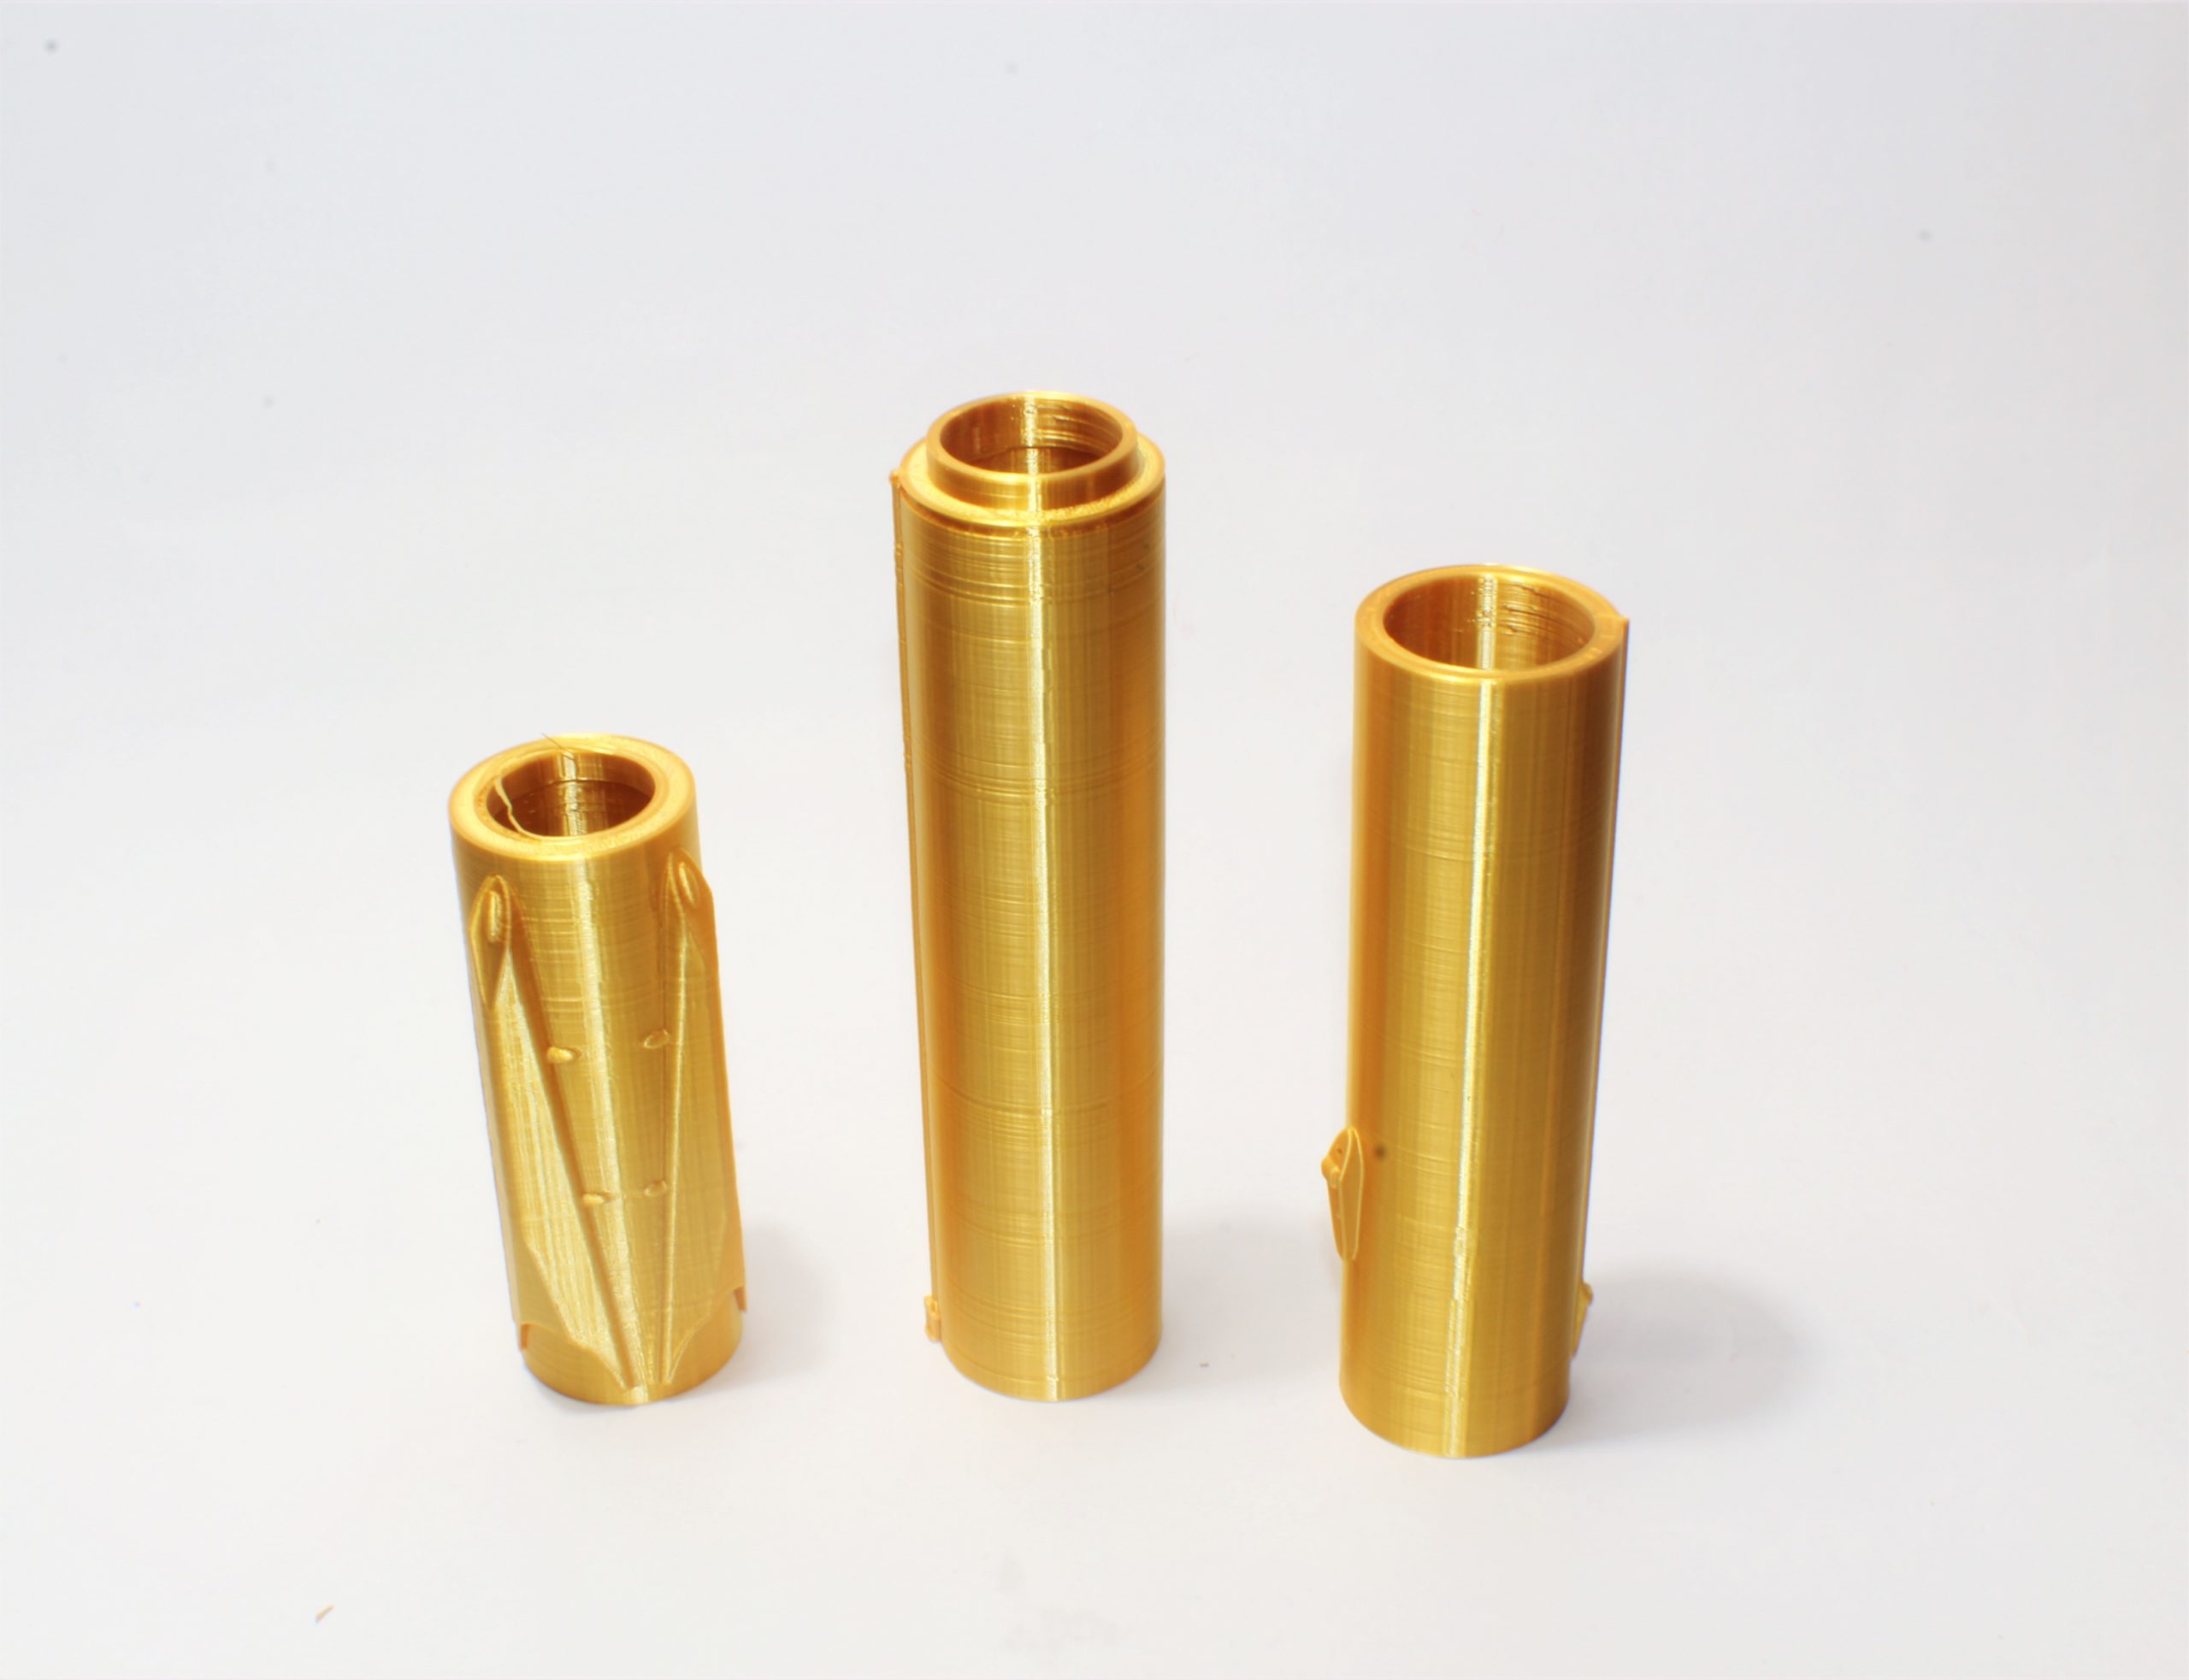
Model rocket parts, printed on my Creality Cr-10 FDM 3D printer.
Then, I ordered my first resin printer and everything changed. The first test print alone blew me away and I was excited to push my modelling skills to the limit. I’ve gotten to the point where I can produce prints that come close in quality to most store-bought models. No consumer printer can match the quality and detail of an injected molded model kit, but I—and a growing number of hobbyists—have gotten pretty close. So, I’d like to share my process for creating high quality, detailed models.
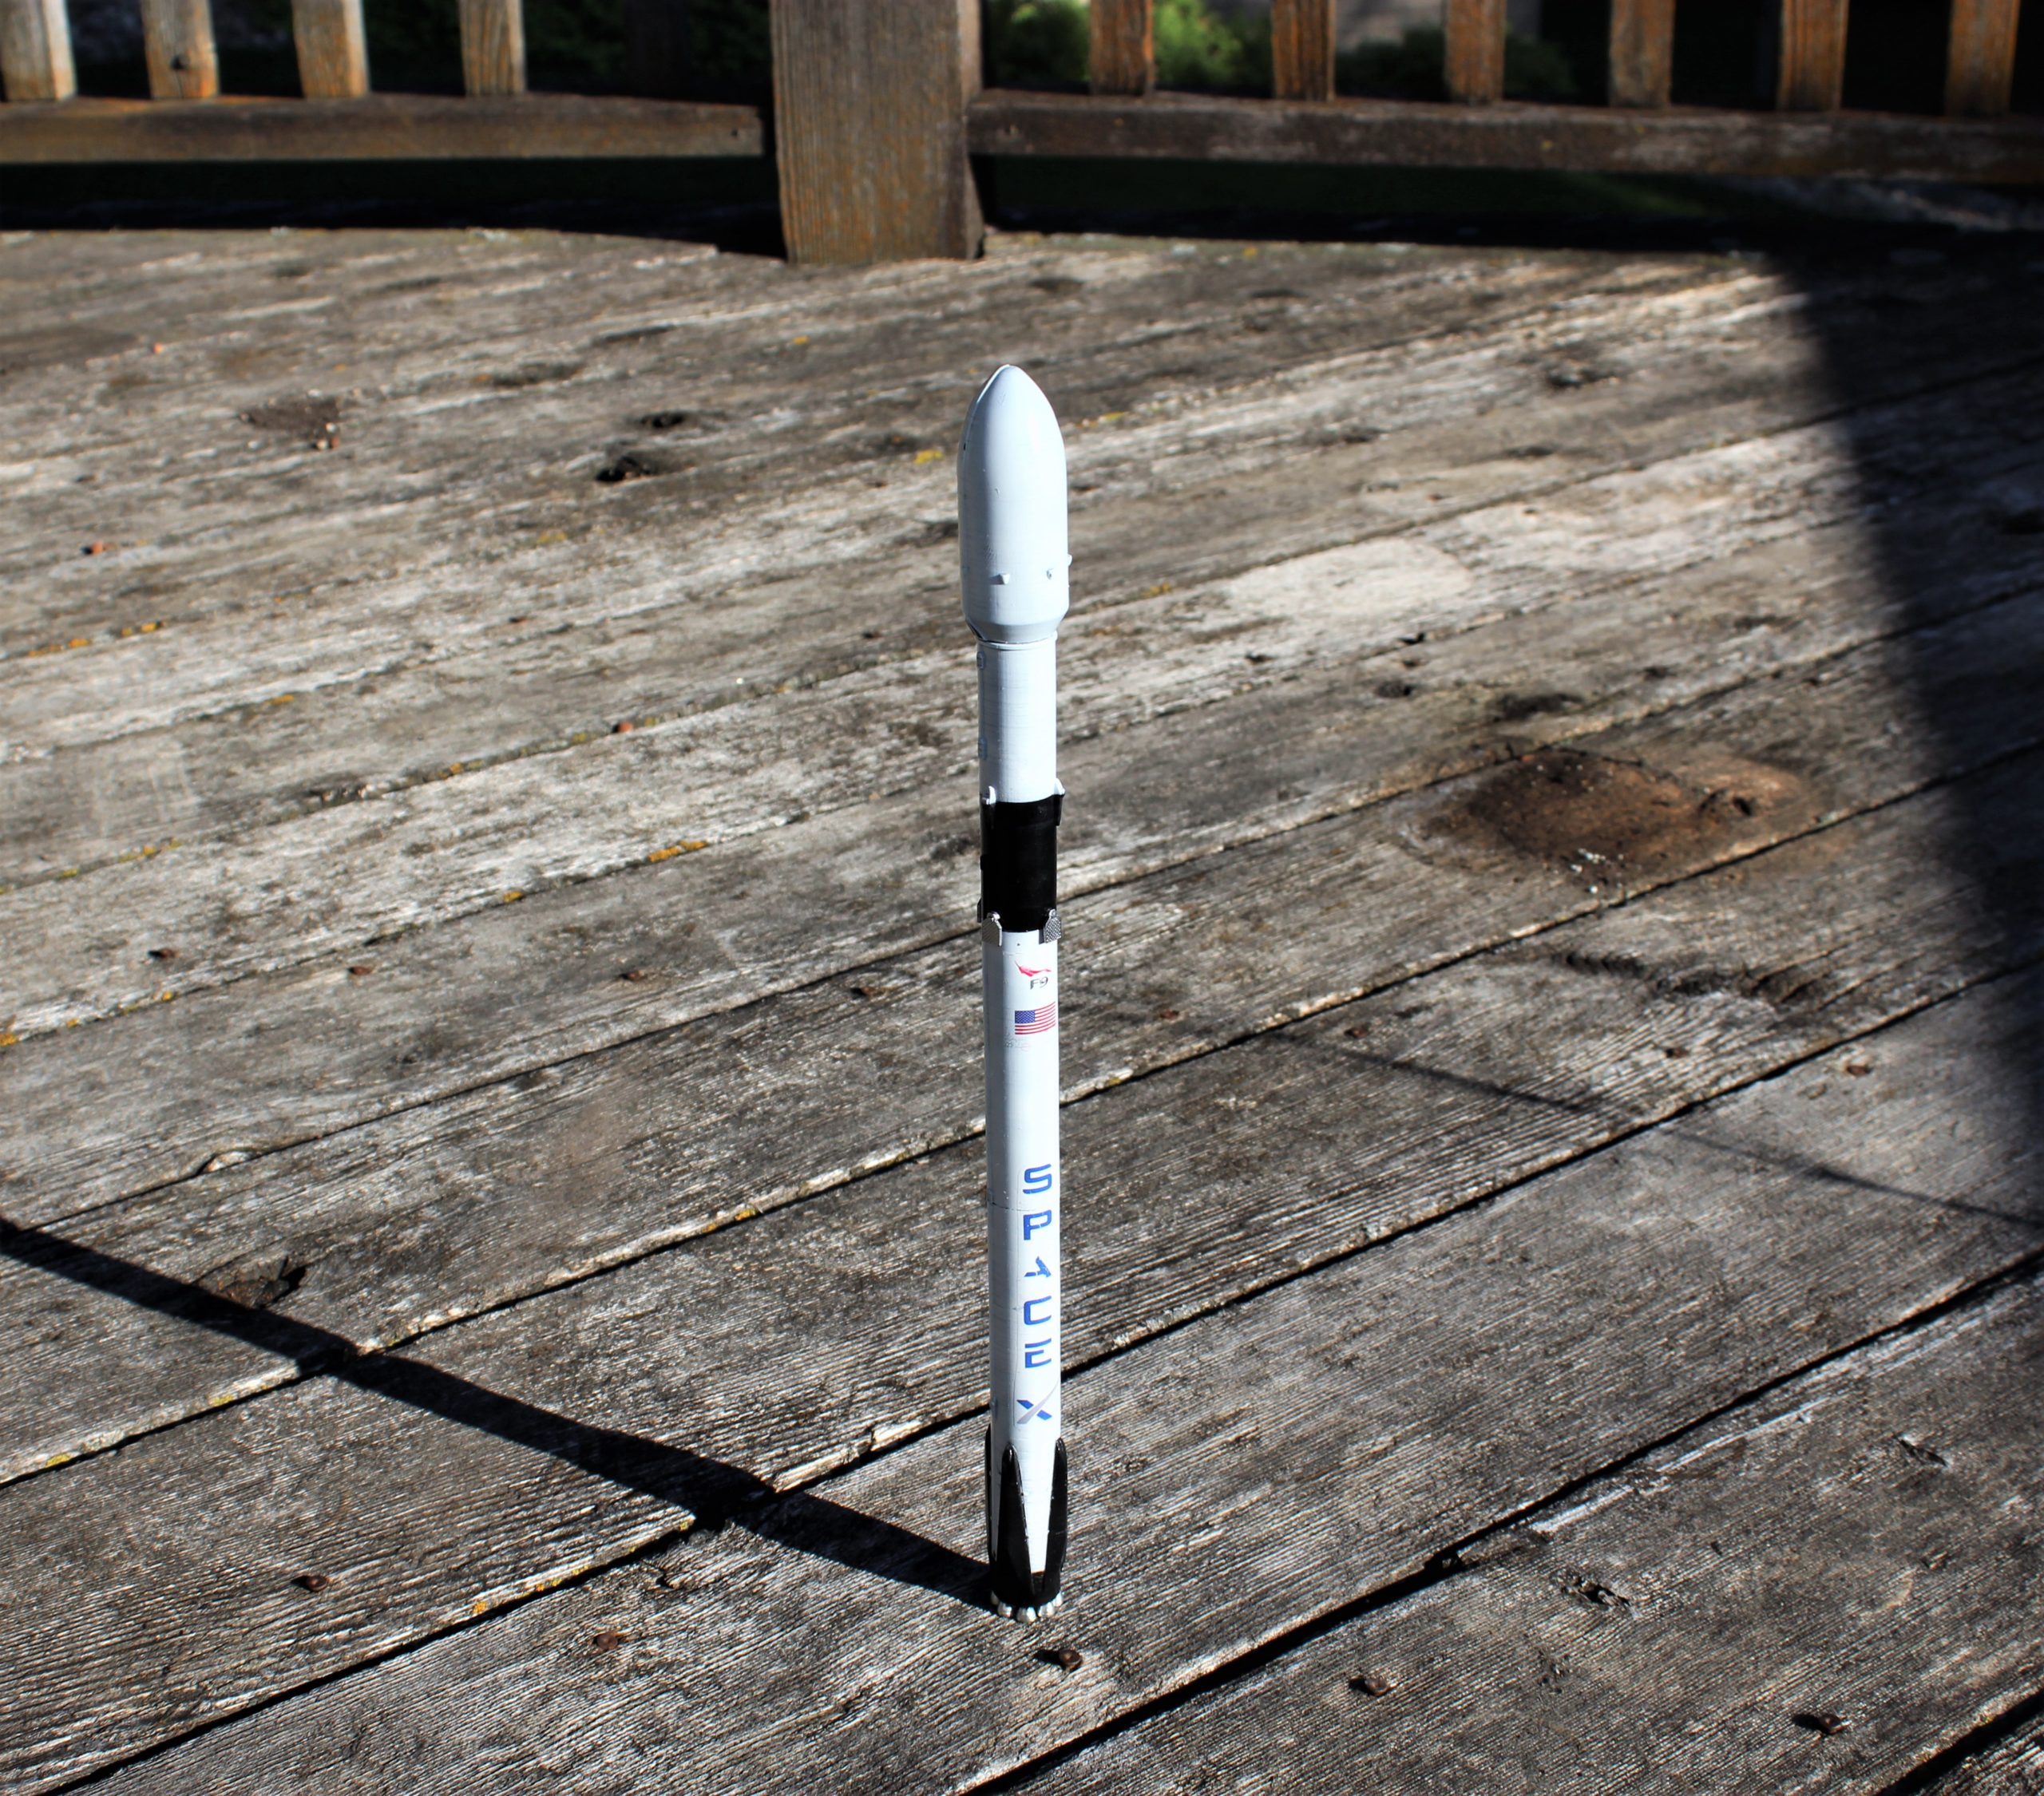
3D printed Spacex Falcon 9.
The Design:
I usually create my models in Fusion 360 or Blender. Both options are perfect for price-conscious hobbyists and offer a ton of features. Paid options, like Zbrush or Maya, are available, but I like Fusion 360, especially when creating technical models, like vehicles. With a little practice, a skilled hobbyist can create, not only the basic shape of the plane, but fine details, like panel lines or a cockpit interior. A little trial and error is also necessary to get interlocking parts to fit just right.
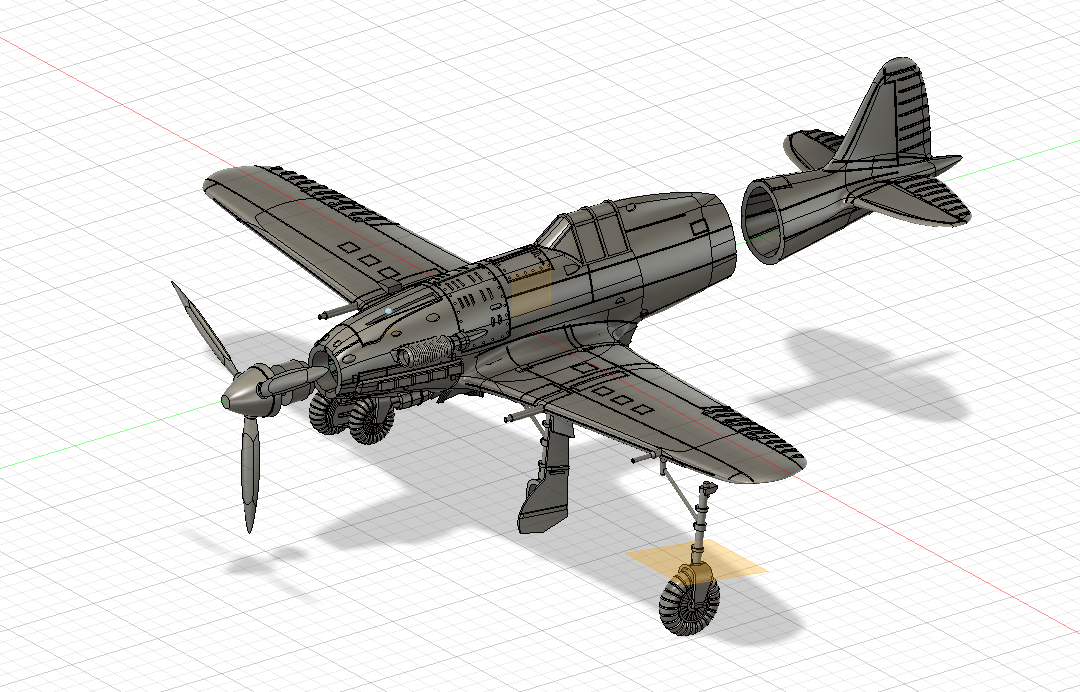
Model of a Macchi 205 Veltro in Fusion 360.
Exporting:
I print models on my trusty Anycubic Photon. Anycubic’s slicing software is basic, but gets the job done.
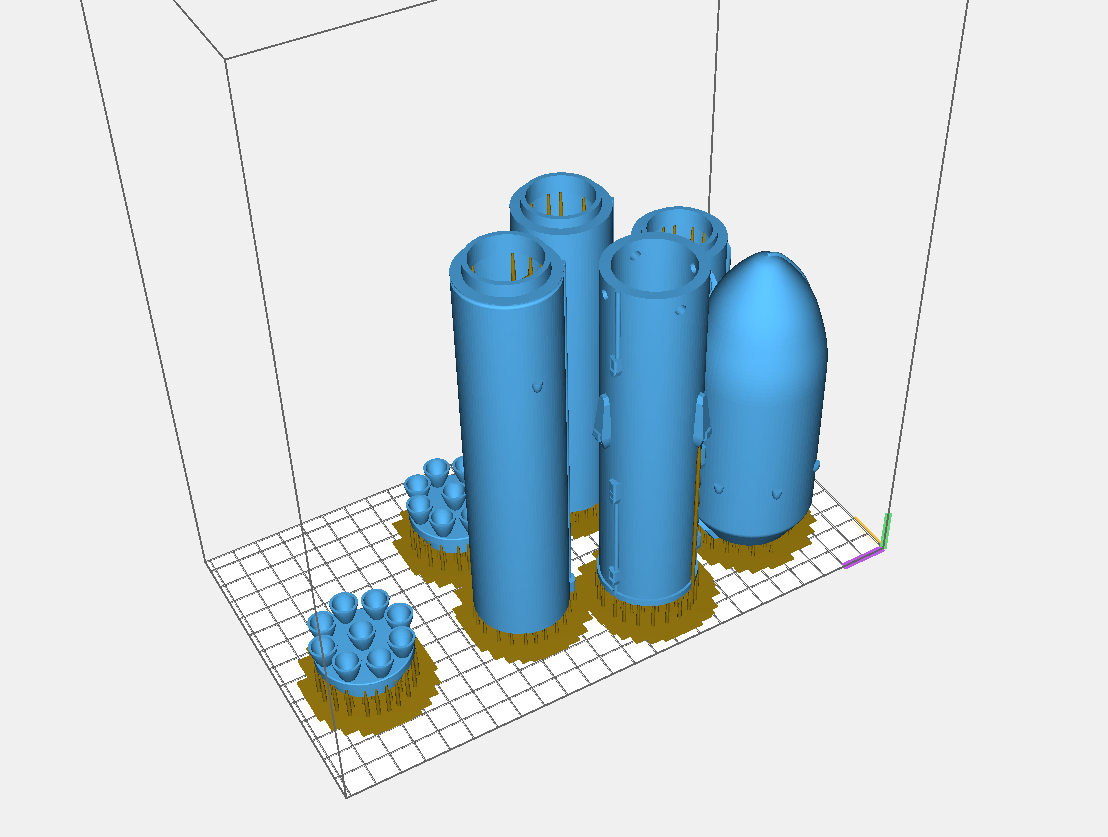
Rocket parts, sliced and ready to print.
Printing:
I generally print my models at a layer height of .05mm, but will lower that to .025mm for more detailed parts, like engines or cockpit details.
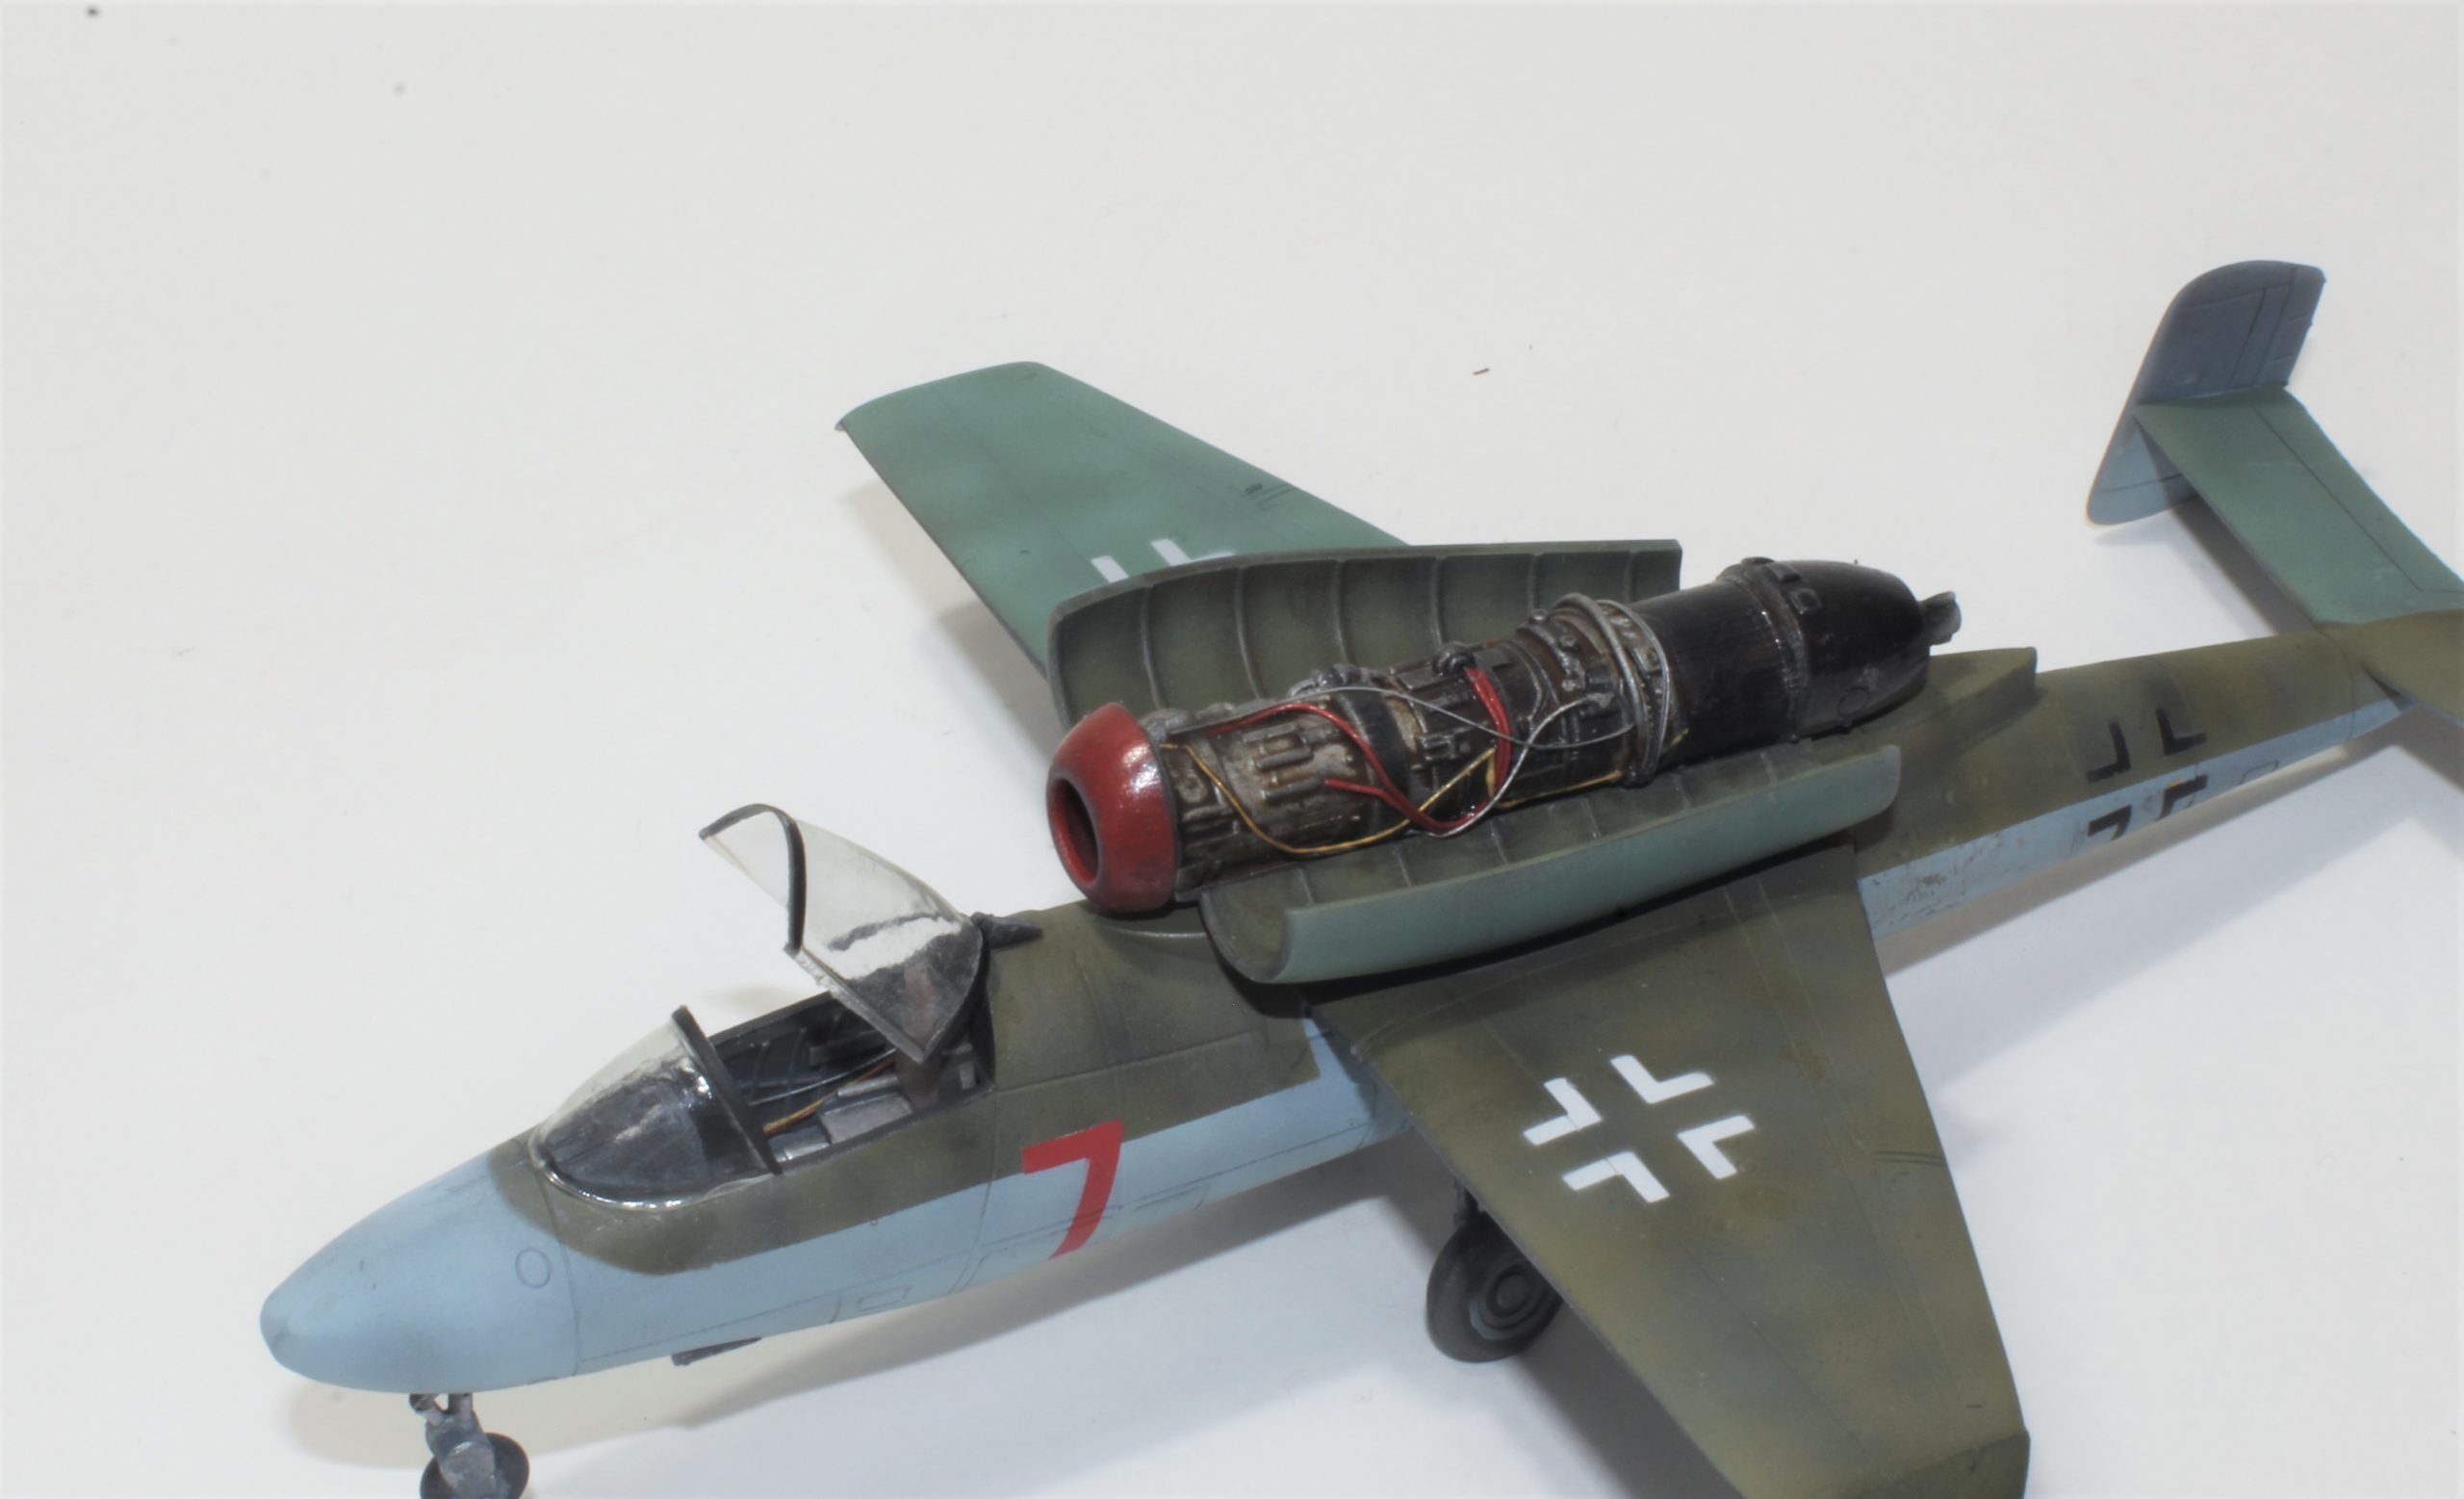
A Heinkel He 162. The jet engine was printed at a layer height of .025 mm.
Finishing:
Most experienced SLA users are very familiar with the process, but I wash my models in isopropyl alcohol, cure them under a UV light, then glue them together using super glue. If any layers are noticeable, I will often sand the model with fine grit sand paper. Sometimes I will prime my models, but cured resin generally takes enamel hobby paints very well
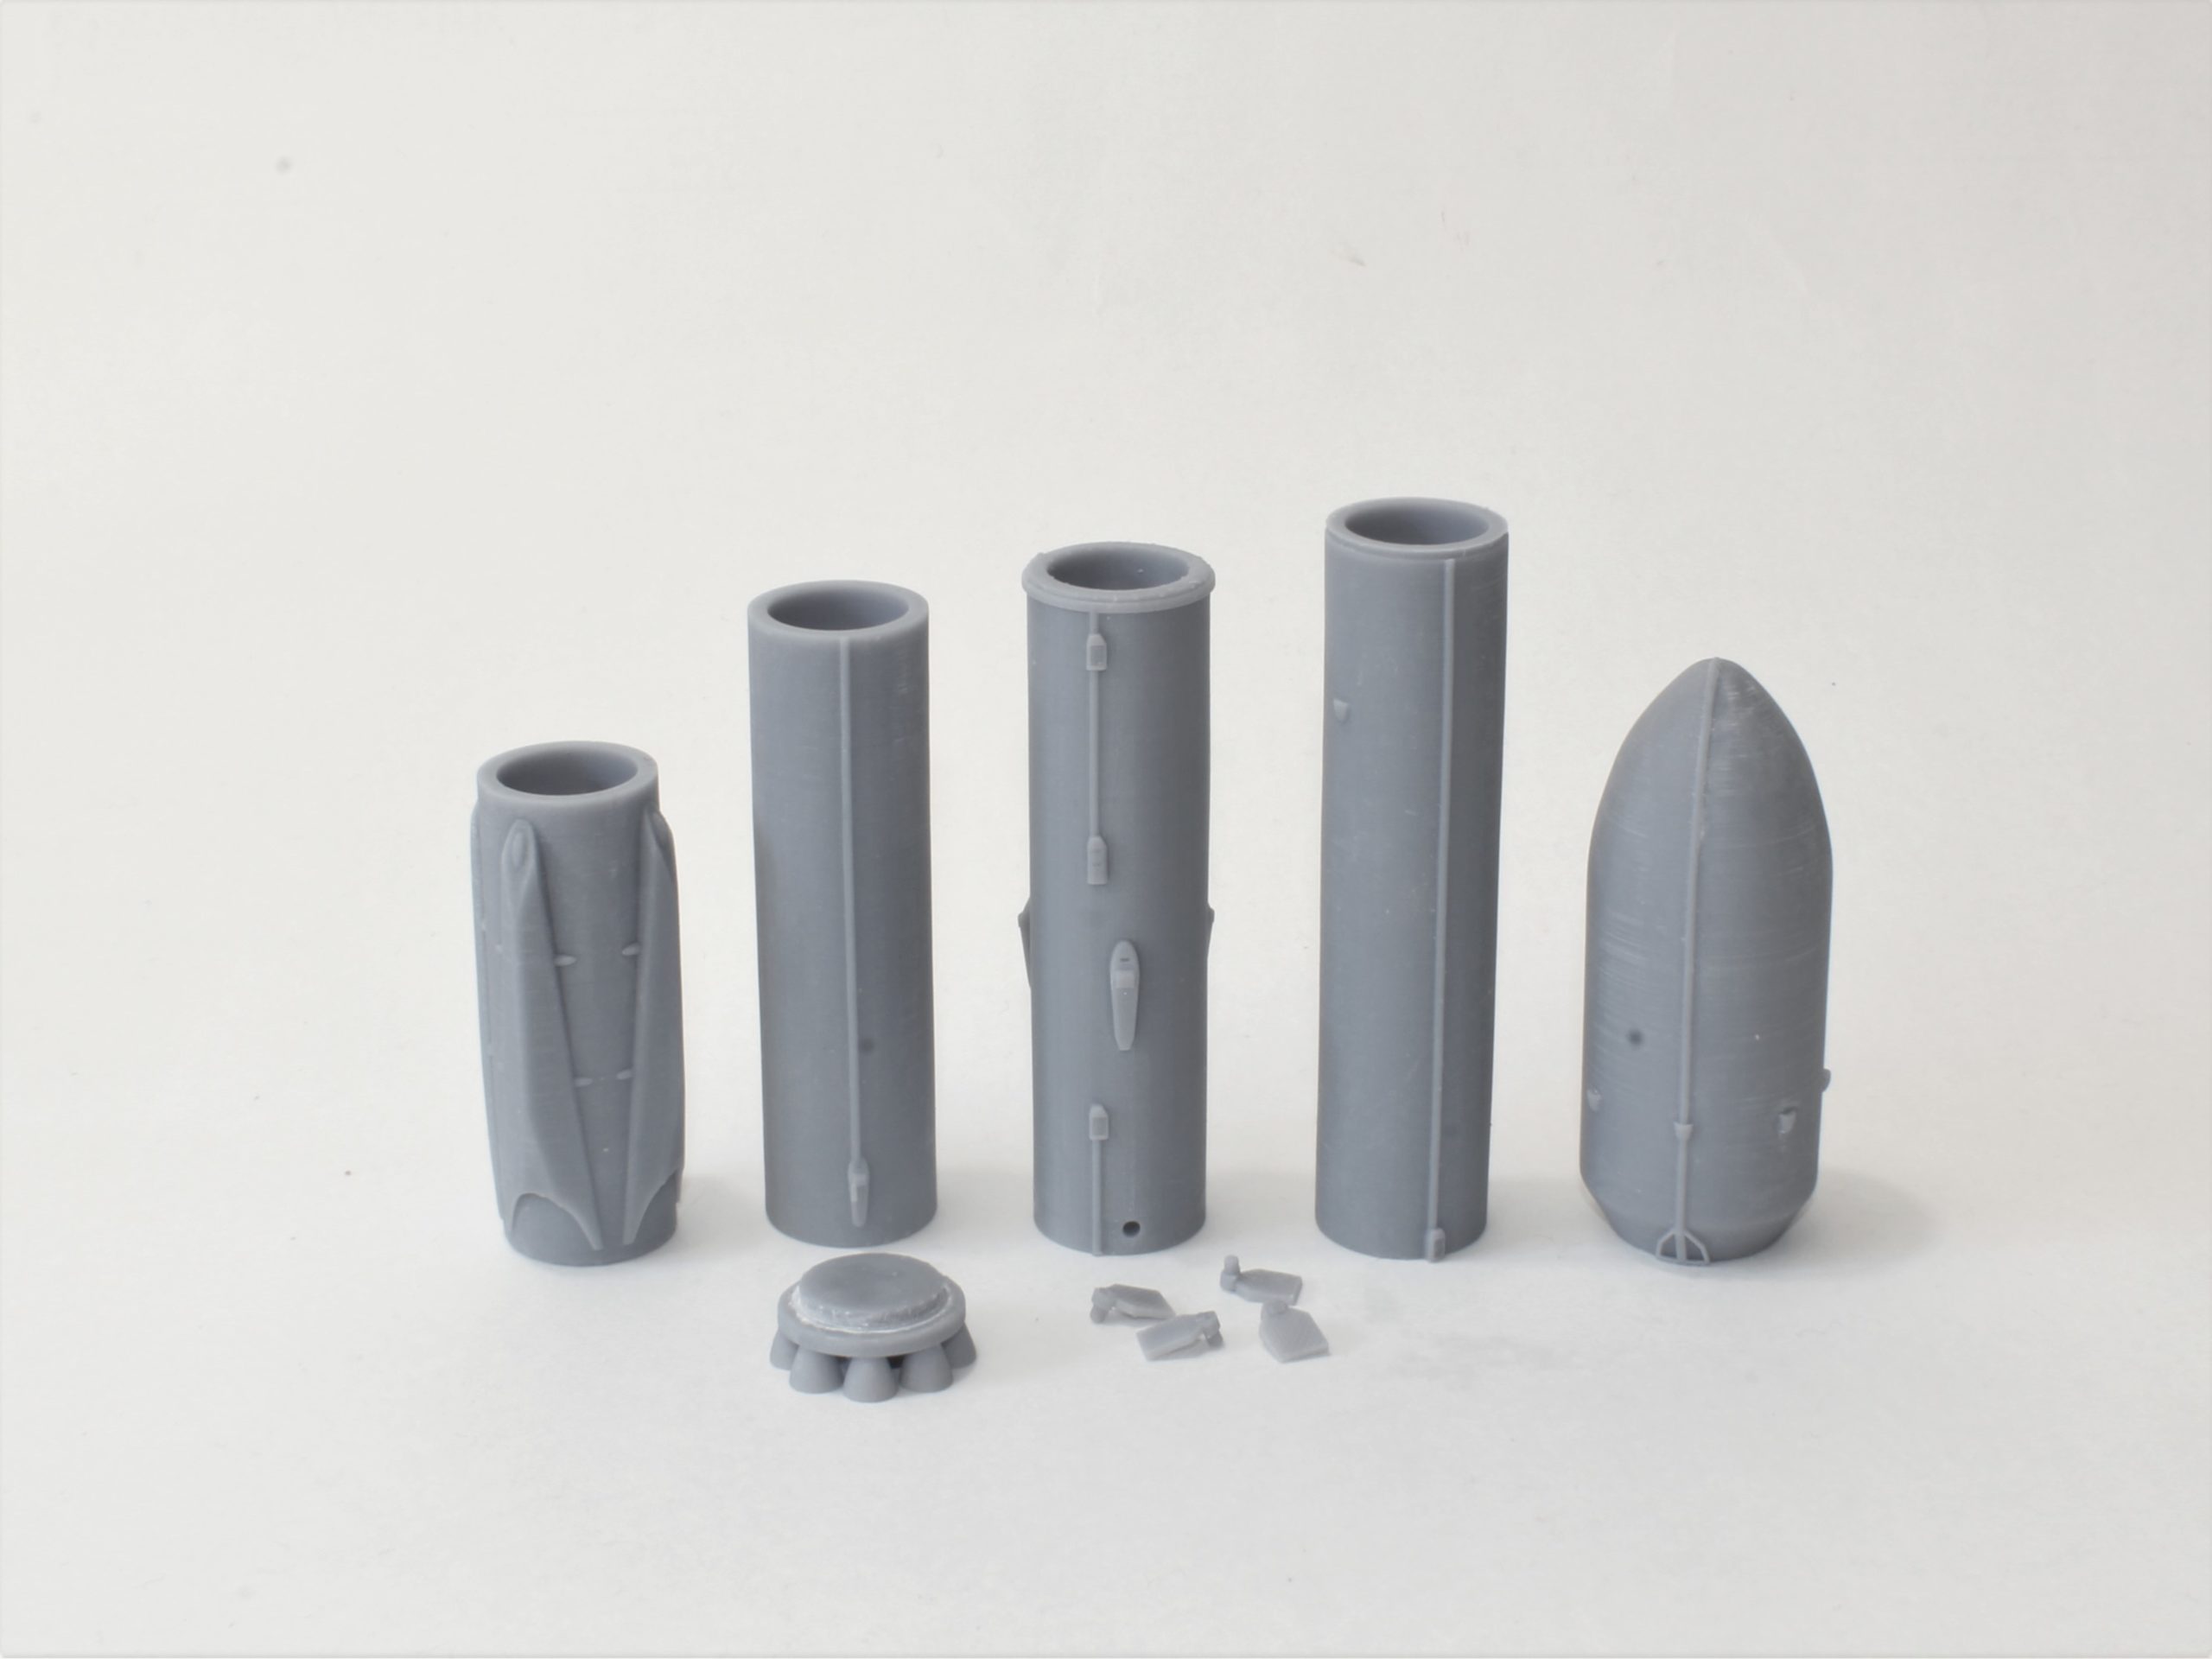
Rocket parts, printed, cured and lightly sanded.
Painting:
I use an Iwata airbrush to paint my models and get very good results using cheap paints from the hobby store.
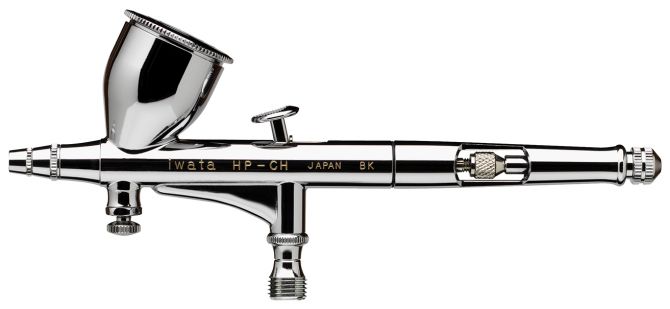
An airbrush, every modeler’s best friend.
Final Touches:
If I really want to make my planes to look great I will apply a gloss coat and add some decals to the model. On the other hand, 3D printers are also great at printing stencils used to paint marking directly onto the model. I like to make very thin stencils, often printed directly onto the build plate, without any supports. When done right, this can create very realistic effect and, if printed thinly enough, can even bend slightly and conform to the model.
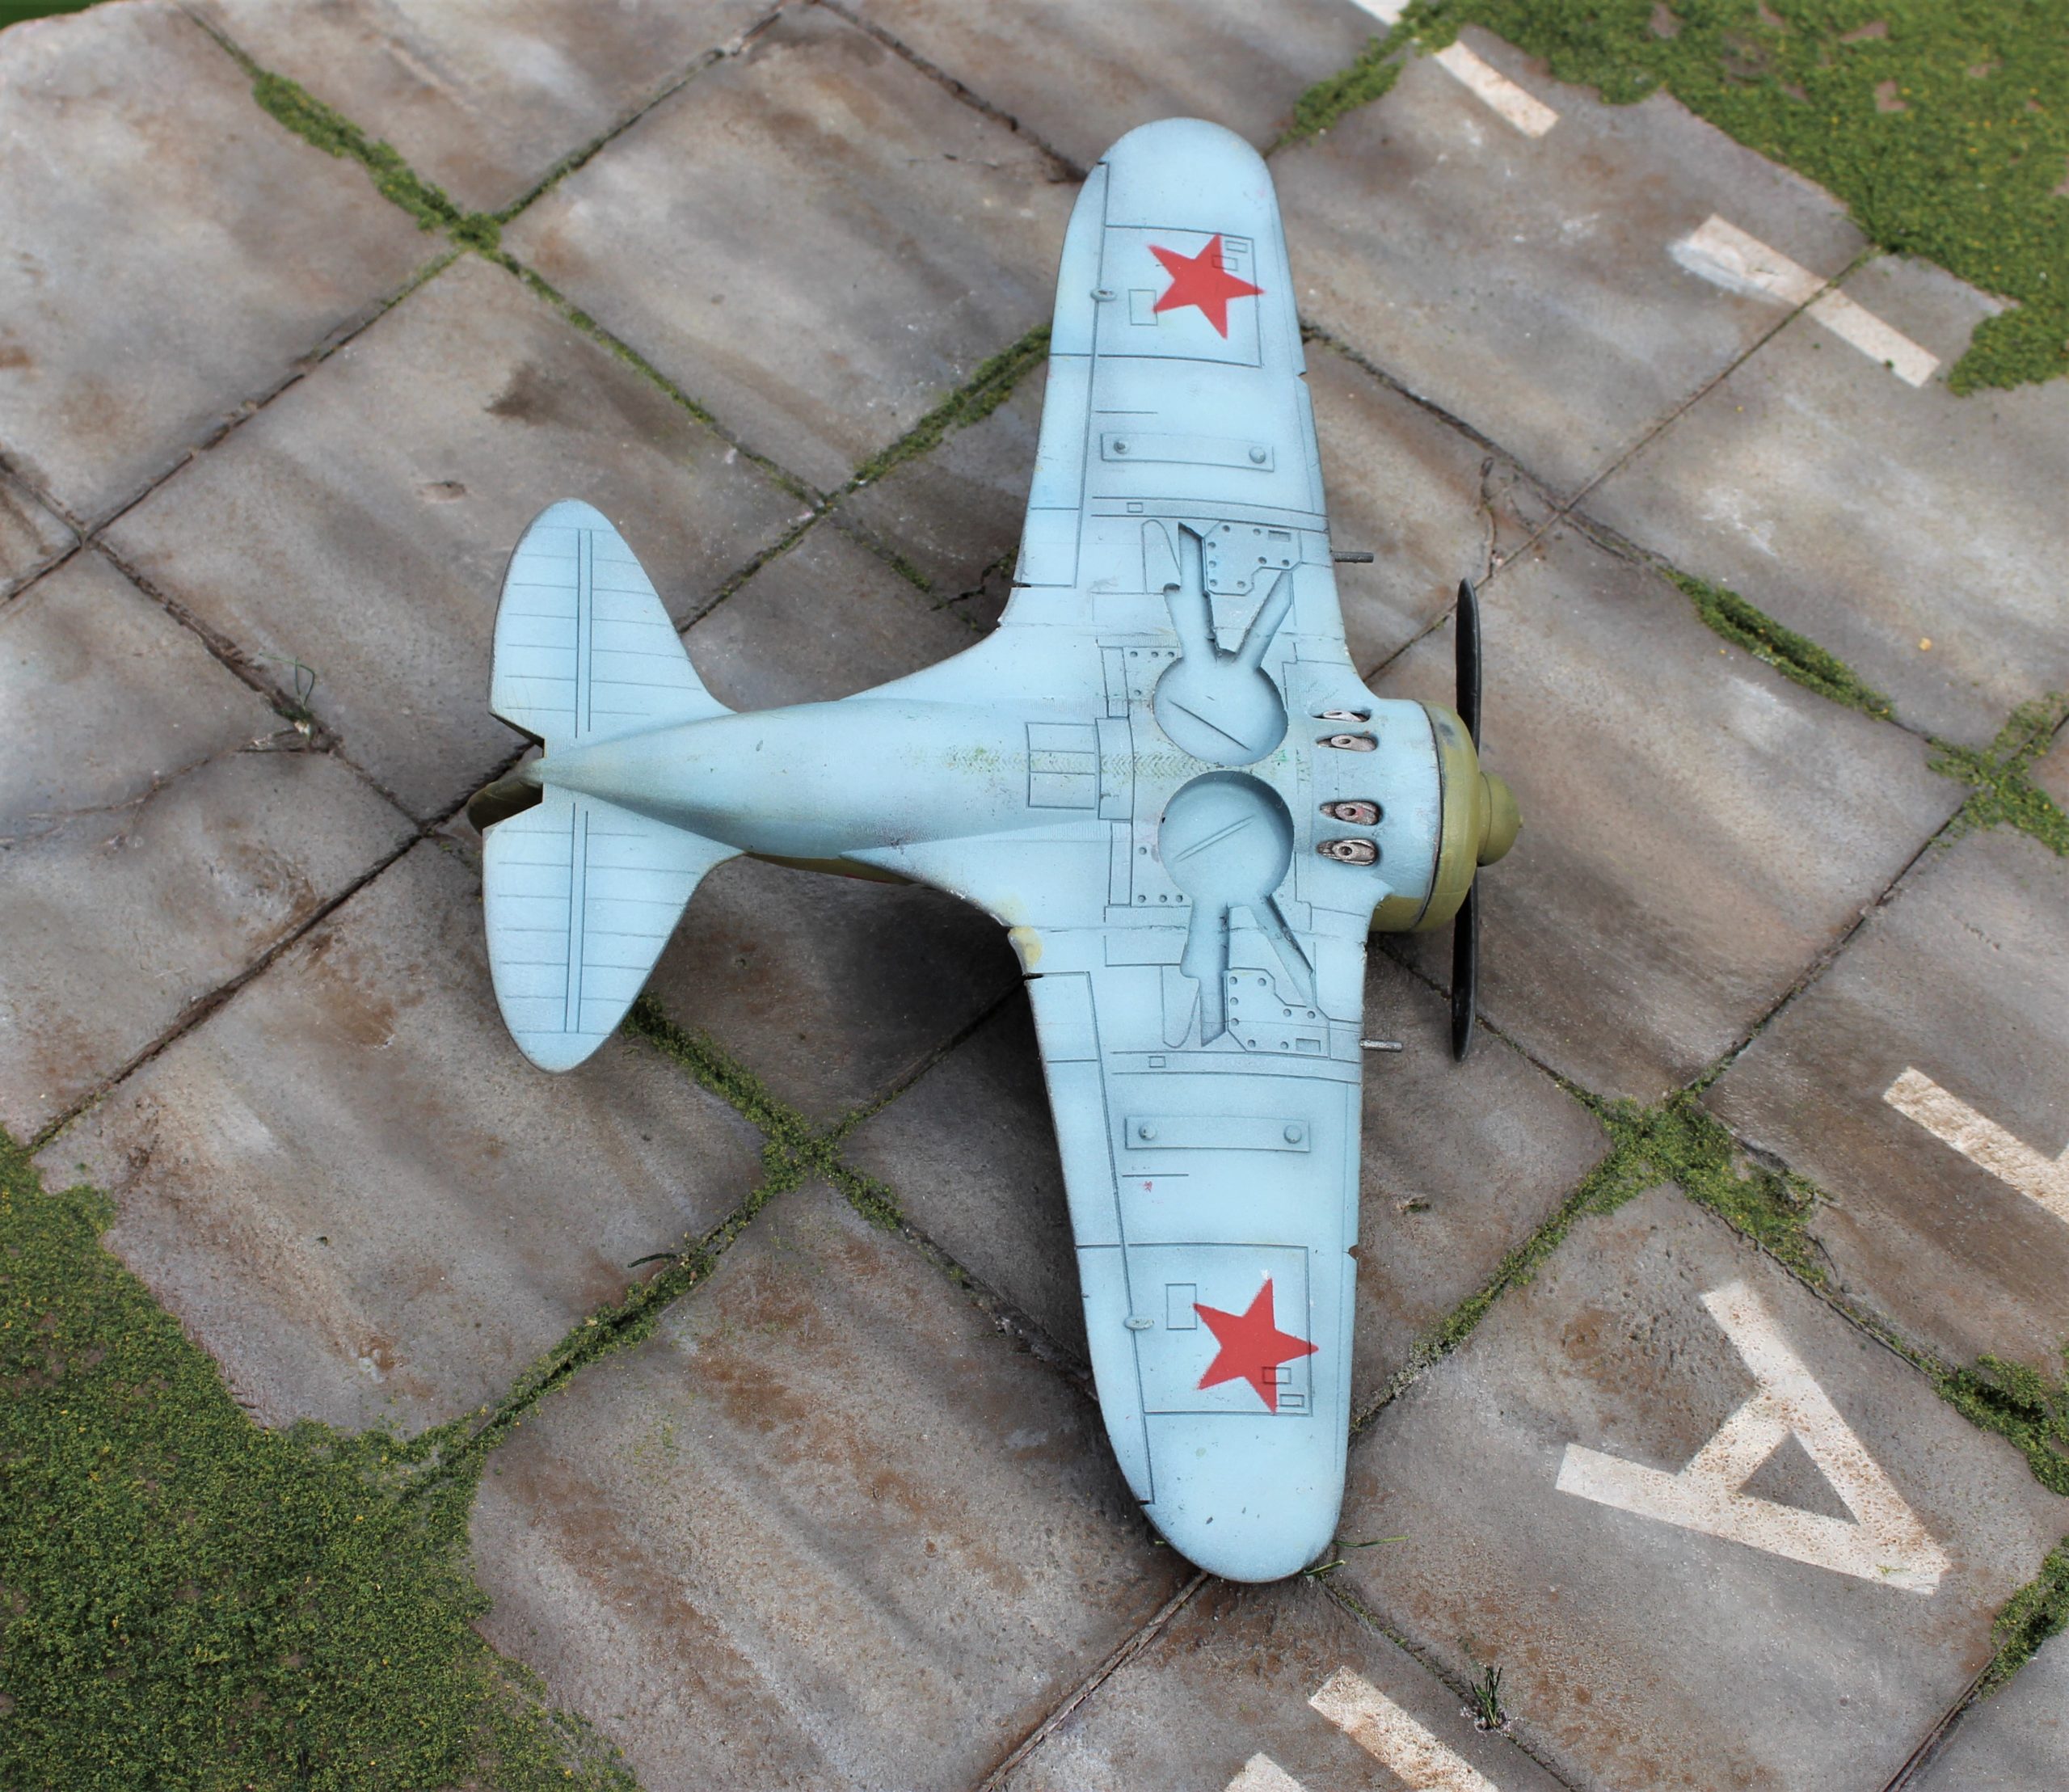
Red stars, painted on the Polikarpov I-16 using 3D printed stencils.
Extras (for the Serious Hobbyist):
The only items I couldn’t print for my planes were the clear canopy pieces. They never turn out perfectly clear when printed. A great solution is vacuforming (or thermoforming), a process in which a heated sheet of styrene or polycarbonate is pressed over a mold resting on a vacuum box (basically a platform with tin holes, attached to some form of vacuum). The vacuum pulls the heated plastic over the mold, creating a perfect, clear copy. 3D printed molds, and even small vacuum boxes, can be used to great effect!
A clear, plastic canopy, vacuformed over a 3D printed mold.
As many hobbyists are finding out, 3D printing and scale modeling are the perfect marriage of technology and art and I for one am very excited to see what the next generation of printers will bring to the hobby world! To see my creations, follow me on Instagram @modelsbytony.
Subscribe to Our Email Newsletter
Stay up-to-date on all the latest news from the 3D printing industry and receive information and offers from third party vendors.
Print Services
Upload your 3D Models and get them printed quickly and efficiently.


You May Also Like
Excellent Desktop Injection Molding, Made in Italy by Robot Factory
I was captivated when I saw my first Robot Factory 3D printer. The robust, precise machine was built to last. And this was in an era of very flimsy, disposable,...
Pogačar & Fairlight Cycles Show Us Low Cost 3D Printed Components for Bikes
There has been a lot going on in 3D printing for bicycles over the years. The most successful implementation so far is in bicycle seats. Carbon 3D printed seats are...
3D Printing News Briefs, June 18, 2026: Reseller, Relocation, Metal Space Powder, & More
We’ll start with business news in today’s 3D Printing News Briefs, as XJet appointed a value-added reseller in Germany, BIO INX is expanding its presence in the Italian market, and...
Researchers Combine AI and Bioprinting to Create Tiny Blood Vessel Networks
If 2026 has a theme in bioprinting, it may be blood vessels. Researchers can already print incredibly sophisticated tissues. The harder part is keeping those tissues alive. Without a network...


