
Make Your Own Arduino-Enhanced, 3D Printed Paddle Ball Game


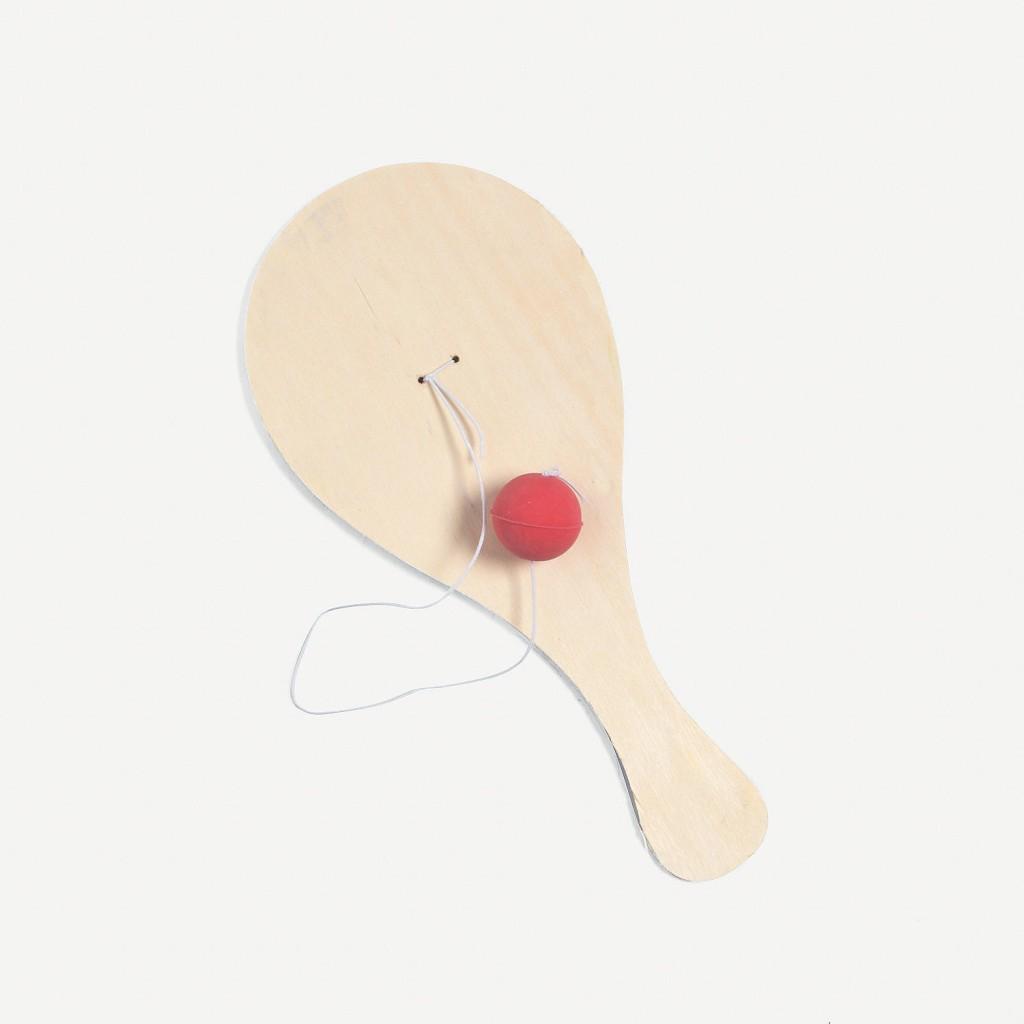 Have you ever known anyone who was actually good at paddle ball? You know–the wooden paddle with a rubber ball attached to it by a string? It’s a toy that no child I’ve ever known (myself included) has mastered but grandfathers the world over prove themselves paddleball champs. Maybe it just takes years to acquire the necessary skill or possibly we’ve all just needed a little extra help. Who would have thought that little, added finesse would be provided by 3D printing and Arduino?
Apparently, maker and 3D printing expert Mike Rigsby wasn’t much good at paddle ball either. He also seems not to have been willing to accept defeat, so he designed a 3D printed, Arduino-enhanced paddle ball rig that actually doesn’t make you want to fling the toy, throw up your hands, and vow never to attempt such folly again.
Rigsby, who is a frequent contributor to Instructables and goes by “MikeTheMaker” on the site, provided instructions, .stl files, and, most importantly, positive reinforcement for all of you would-be paddle ball champions (I’ve long since given up hope).
This project requires a servo motor, an Arduino Uno, four AA batteries, some hardware, a bit of glue, a soldering iron, a few 3D printed parts, and, of course, a paddle ball set-up. You begin by printing the base of the enhanced paddleball game. The base slides onto the end of a table, so it’s held in place when the fun begins. You’ll print the two other 3D printed parts, a rod and the bracket for the servo motor.
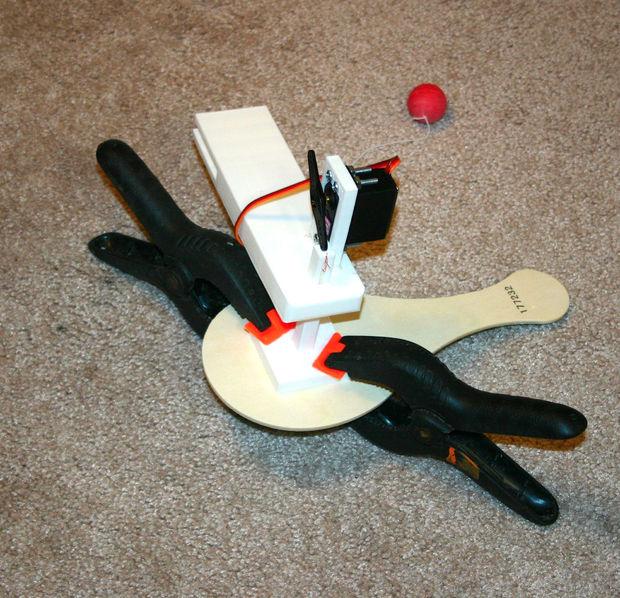 Assembling the various parts is pretty easy. First mount the motor to the bracket and then mount them to the base. Rigsby, who has published a book, A Beginners Guide to 3D Printing: 14 Simple Toy Designs to Get You Started, shared a helpful technique for joining 3D printed parts: He “welded” the PLA pieces using a low-wattage soldering iron, which basically melts them together. Be sure you’re working in a well-ventilated room if you do this.
Next, Rigsby affixed the rod to the servo motor horn using magnet wire, although he suggests that fishing line would be just as effective. Glue the paddle to the rod assembly using super glue (he used the gel form).
Rigsby has also written an app, “How to Make a Science Fair Project,” and has written a number of articles on electronics, DIY, and 3D printing, so it’s clear he has plenty of experience using electronics, including Arduino. He used pin 7 of his Arduino Uno as the control pin for the servo motor and installed the sketch “servo.ino” to make it run. The servo itself is powered by the four AA batteries, with the negative from the batteries tied to the negative on the Arudino. He powered the Arduino with a 9 volt battery.
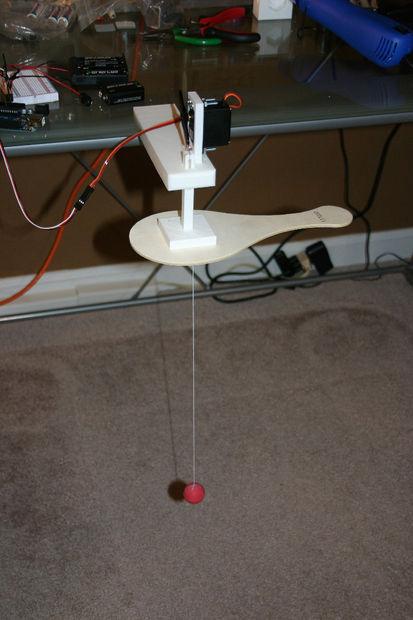
And that’s basically it, aside from sliding the device onto a glass table and turning it on. As far as the whole skill issue is concerned, Rigsby remarked, “If you don’t expect to hit the ball, you won’t be disappointed.” That’s encouraging advice. In its own way.
What do you think about this kind of Arduino-based project? Would it make you feel better about your skills with paddle ball? Let us know in the 3D Printing, Arduino, and Paddle Ball forum thread over at 3DPB.com. Check out a video of the results below.
Subscribe to Our Email Newsletter
Stay up-to-date on all the latest news from the 3D printing industry and receive information and offers from third party vendors.
Print Services
Upload your 3D Models and get them printed quickly and efficiently.


You May Also Like
AM Asia Watch: Chinese Company Claims Advances in Titanium Powder Beyond 700C
They’re a familiar sight at trade shows: Chinese powder companies with barren stands lacking parts. There’s maybe some glass vessel with powder in it and a semi-complete data sheet, but...
Aires Tide Designed with AI, Supercomputers, and 3D Printing
The Department of Energy‘s National Nuclear Security Administration (DOE/NNSA) is part of the US government that manages the US nuclear stockpile, helping to upgrade, improve, and maintain nuclear weapons, and...
Largest Publicly Announced, Single Order in EOS History: Beehive Industries Spends $50M on M4 ONYX 3D Printers
Earlier this year, Beehive Industries received a $29.7 million contract to produce its Frenzy 6 and Frenzy 8 engines for the US Air Force. The metal additive manufacturing (AM) user...
Blue Origin’s New Glenn Explosion Comes During Major Manufacturing Push
Blue Origin‘s orbital New Glenn rocket exploded during a hot-fire test at Launch Complex 36 in Cape Canaveral on May 29, setting back the company’s launch ambitions at a time...


