
Long Term Home Review of Ultimaker’s New S5 Professional 3D Printer


 At Hannover Messe this past April, desktop 3D printing leader Ultimaker introduced its first new 3D printer in two years – the S5, an expansion to its professional 3D printer portfolio. Ultimaker reseller Dynamism showcased the new S5 at RAPID + TCT that same month, as did Ultimaker itself. The desktop system, with a 330 x 240 x 300 mm build volume, has all kinds of great features, including dual extrusion, an intuitive touchscreen integrated into the front panel, and an enclosed front with tinted glass doors…so imagine my excitement when I learned that Dynamism would be shipping me a review unit!
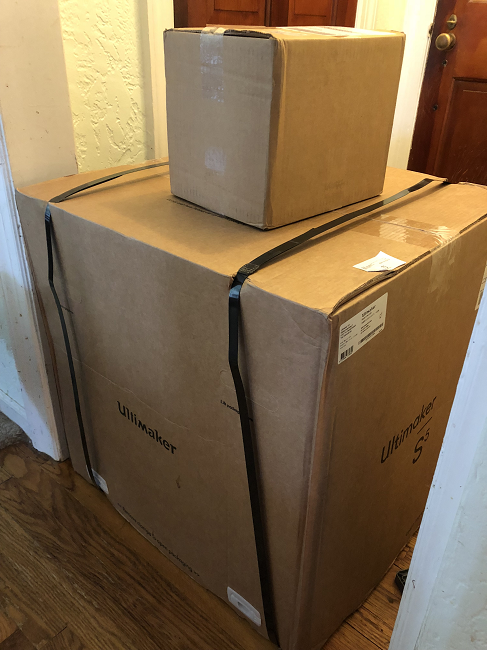
Full disclosure – while I’ve completed 3D prints before at Dayton’s 3D printing bar, this would be my first time setting up and operating a 3D printer all on my own. So when the gigantic box, and a smaller one of extra filament, arrived on my porch, I was a little…okay, a lot…intimidated. In fact, I was so concerned about not having anything pull focus from the unboxing and set-up process that the gigantic carton just sat in my dining room for a few days until the opportune moment. At 3DPrint.com we do not charge money for reviews. This is my own experience and my own opinion.
I’ll say this – the S5 was extremely well packaged. I was amazed at the sheer amount of used packing material I had at the end of the process, but also not surprised; I was dealing with precious cargo, after all. Another thing I will say, with complete honesty, is that while I write about technology all day every day, handling it is not my personal forte. So the fact that I was able to get this machine out of the box and set up with relatively few hiccups means that anyone can. The provided instructions were easy to follow, and if I needed more information, I just checked out the Ultimaker Resources.


The S5 came with a test print and a box of hardware accessories and tools, including two print cores, several nozzle covers, the glass build plate, a 2 mm Hex screwdriver, a glue stick, spool holder with a material guide, XY calibration sheets, a power cable, and a USB drive. The 3D printer also came with Tough PLA and PVA support material, the latter of which I am in love with…but more on that later.
Keeping my cats and dogs away!
I found it fairly straightforward to set up most of the hardware, but I had a bit of trouble using the clips to secure the Bowden tubes; however, I think that was more user error than anything else. I had no issues installing the Cura software, or updating the firmware once the 3D printer was fully up and running, though it took me a couple of tries to get the 3D printer to connect to my WiFi. While there were no problems loading the materials, I had a harder time installing the BB 0.4 print core. I think this was mainly due to the fact that I was so insanely aware of just how expensive this machine was and was treating it with kid gloves, and a firmer hand is sometimes required when installing hardware. Luckily, the more I used the 3D printer, the more comfortable I became.
Speaking of actually using the 3D printer, when the time finally came to test it out, I got a little too excited and forgot about a very important step: calibration. I very quickly realized that there was a problem, as the print was stringing and not adhering to the build plate, even though I’d applied a thin layer of glue, and stopped the job about three minutes in. While I was sad that my first print was far from a resounding success, I resolved to make it right.
 I again waited a bit to try calibrating the S5, partly because I was busy but mainly because I was intimidated by it all over again. But once I took the time to sit down and figure it out, the calibration sheet that came with the 3D printer was a breeze to use, and I was on my way once again, ready to try 3D printing something that wasn’t just the calibration grid of straight lines.
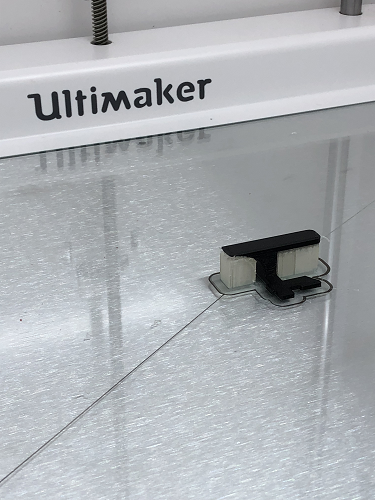
My first successful attempt was one of the two sample prints that came on the included USB drive, which printed very quickly. I love the intuitive touchscreen on the front of the S5 – it’s very user-friendly, and I quickly figured out how to pull up a rough image of what the print would look like once it was complete, so I’d know that it was printing correctly. Once I pried the tiny print off of the plate (a very easy task thanks to a layer of glue underneath), I put it in a small container of water and let it sit overnight, so I could see how long it took to dissolve the PVA support structures.
I loved the Ultimaker water soluble PVA. It was just so easy – pop the print in water and let the material work its magic. It’s possible to simply crunch and pull the supports off by hand as well, but the immediate effect wasn’t as clean. Obviously, the larger and more complicated the prints were, the longer I had to let them sit in water, and I learned that unless I felt like getting gummy residue stuck to my fingers, it was best to just wait until the supports had 100% completely dissolved. It was also a little tough cleaning the build plate, as the PVA sort of bonded with the glue and became hard to scrub off. But I followed the advice of the Dynamism team and got a soft, non-abrasive sponge to help with this task.
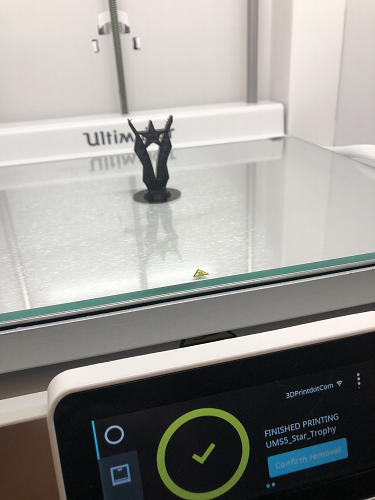
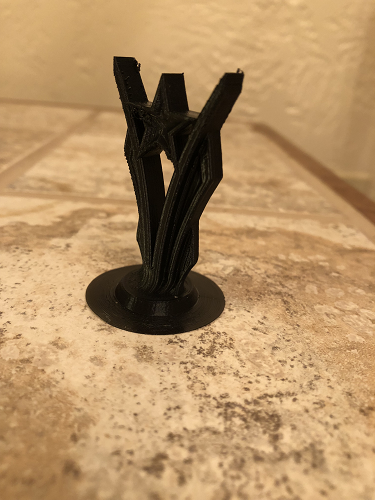
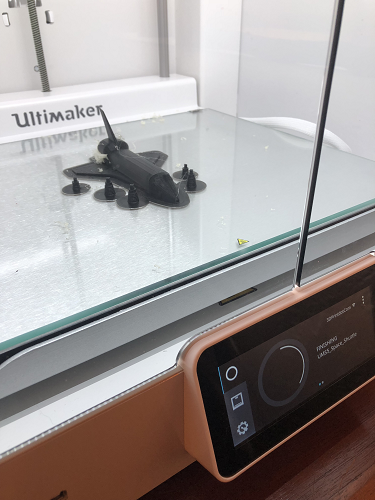
My next two prints were included Cura files: a star trophy and a rocket ship. Both of these were fairly straightforward prints, and gave me a chance to try out an extra form of bed adhesion with the addition of a brim; I can tell you now I much prefer a skirt, but I figured I would just give it a shot.
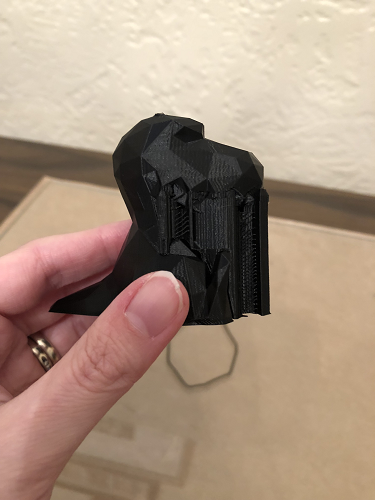
 The first print I completed that wasn’t already included in Cura or the USB drive was a Harry Potter Logo by Cults3D user 3DNaow, which turned out great. It’s definitely my favorite 3D print from this review, mostly because I love Harry Potter. Because I majorly scaled it down, the print took a lot less time to complete as well.
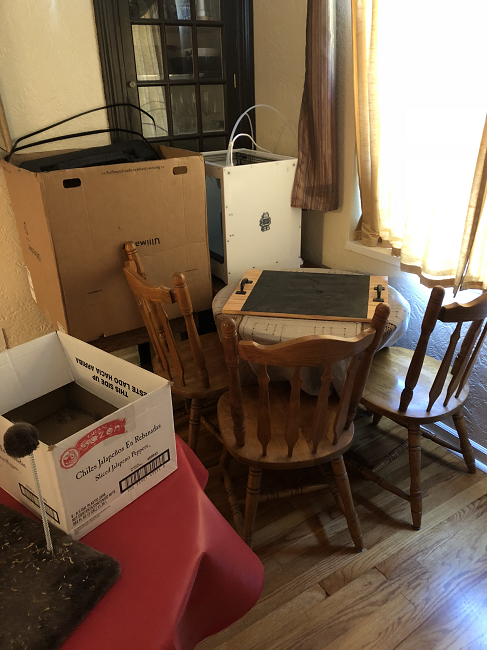
I’m going to take a moment here to rave about the remote monitoring. I didn’t download the app, but I did not have the S5 set up in my office. I live in an older Cape Cod house, and my office is in the half story upstairs, which doesn’t have great ventilation. So I decided it would be better to put the 3D printer on a table in my dining room, which is in a much more open part of the house. But this meant that I couldn’t keep my eye on it during the day. Having the option to monitor my print jobs from upstairs, thanks to Cura and the camera located above the auto-leveling bed, provided me with peace of mind.
I would have called this adorable Low Poly T-rex by Thingiverse user slavikk my favorite, had I not screwed it up so badly. I had been messing around in the custom settings in Cura, just to try and put the system through its paces by changing up things like the infill and layer height, and I somehow managed to change the support material from Extruder 2 – the Natural PVA – to Extruder 1 – the Tough PLA. It took me about a quarter of the way into the print to realize my mistake, and by then it was too late. So this dino is still pretty cute, but I think he will be much better-looking when I take the time to get an X-Acto knife and cut away the black supports from the front.
![]()
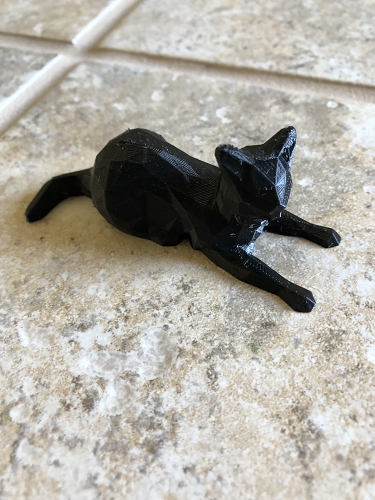
In completing my small collection of low poly animals from Thingiverse, I chose to 3D print a Low Poly Cat – another print by slavikk – and a Low Poly Stanford Bunny by johnny6. I put both the cat and the bunny on the build plate at the same time for a 7.5 hour print. This is where things started to get a little rocky.

About four hours in, an error message popped up on the touchscreen: “One material appears to be empty. Please change it to a new material to continue printing.” I wasn’t home (this became the only time I left the house during a print job) and my husband texted me about it, but said that it didn’t appear that the filament was empty. Once I got home and took a look, it was definitely very obvious that neither filament was empty, so I just took a shot in the dark and pressed ‘Ok’ below the error message to confirm that I had changed to a new material, even though I hadn’t, just to see if it would start up again.
I got lucky and the prints resumed…for about 20 minutes. Then, the same thing happened again, I tried the same fix, and things continued on, though the support material was looking pretty stringy. About an hour later, the connection went out and I lost the monitor view upstairs, but the S5 just kept rolling along.
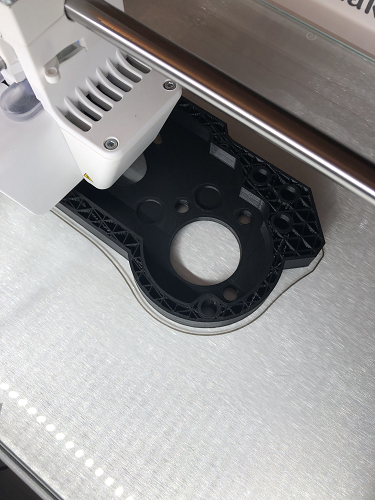


My next print was an STL file that the Dynamism team had sent me of a generic sample spare part, which took about 15 hours to print, with no supports, when scaled to 100%. It was a good illustration of just how important professional 3D printers, like the S5, can be for businesses in need of prototypes or models. The level of quality and accuracy of the prints produced on the S5 is just stellar, in my opinion. Maybe you should take my opinion with a grain of salt, because as I noted earlier, I’m not an expert on using 3D printers, but that’s up to you.
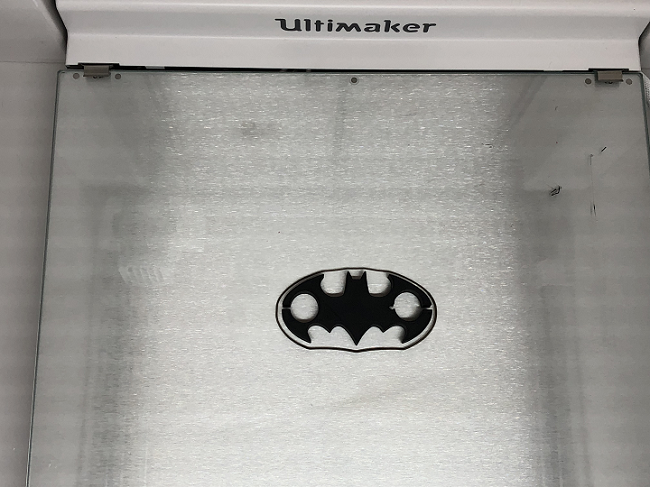 Realizing that not a single one of the items I’d 3D printed so far were at all useful, I went back to Thingiverse and found this batman earphones holder by itlaor, which quickly printed without any supports and is now being used by my husband, with great appreciation, to keep his earbuds from getting tangled up all the time.
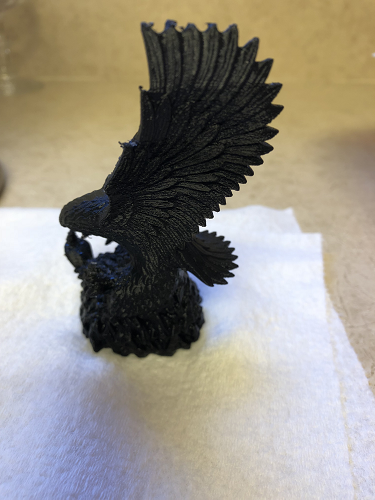
I also decided to 3D print this very detailed Eagle Sculpture by Thingiverse user 3DWP for my husband, who is an Eagle Scout and has a small collection of eagle figurines and sculptures. With this one, I couldn’t get my computer upstairs to connect to the 3D printer downstairs. I turned the WiFi off on both the computer and the printer and then immediately back on, and still nothing. So in the interest of saving time, I simply saved the STL file to the USB drive and printed it that way. About 10 hours in to the 16.5 hour print, I got the same error message I’d received with the low poly animals, and “fixed” it the same way. It seemed to only occur on prints with PVA supports for some reason.
I enjoyed trying out the Ultimaker S5 3D printer from Dynamism. I had it for far longer than I planned, but thoroughly enjoyed using it. What I knew already from writing about this technology daily, and have now had the chance to truly experience for myself, is that 3D printing takes time, which is something I don’t always have in the evenings – I do a decent amount of church and theatre volunteer work. So I kept searching for quick print jobs to try with the S5 because I just do not often have 15-24 hours where I am at my house the entire time. But as for the quality and ease of use – that was top notch.
The Ultimaker S5 is available for purchase on the Dynamism website starting at $5,995.
Discuss this and other 3D printing topics at 3DPrintBoard.com or share your thoughts below.
[Images taken by Sarah Saunders for 3DPrint.com]Subscribe to Our Email Newsletter
Stay up-to-date on all the latest news from the 3D printing industry and receive information and offers from third party vendors.
Print Services
Upload your 3D Models and get them printed quickly and efficiently.


You May Also Like
Phillips Corporation Rebrands Additive Hybrid Division, Now Called Phillips Advanced Manufacturing
Phillips Corporation announced that it will rebrand its Additive Hybrid division to become Phillips Advanced Manufacturing. The focus will now be on advanced manufacturing in the broadest sense. Brian Kristaponis...
Arridex Opens Additive Manufacturing Omnifactory in Lagos for MRO & Spare Parts
Arridex, formerly known as the RusselSmith Group, has been building additive manufacturing competence and capacity in Africa for years. Previously, the company got approval to use a Roboze 3D printed...
DREAMing in Dayton: DREAM Symposium Covers AM, AI, Supply Chain, & More
This month, I attended a manufacturing industry event, like I often do. But instead of getting on a plane to New York City, or driving four hours to Youngstown, I...
ORNL Origami Creates Large Foldable Structures
Oak Ridge National Laboratory (ORNL) is using a hybrid 3D printing method to make foldable panels. At the Department of Energy’s (DOE) Manufacturing Demonstration Facility (MDF) at ORNL, researchers turned...


