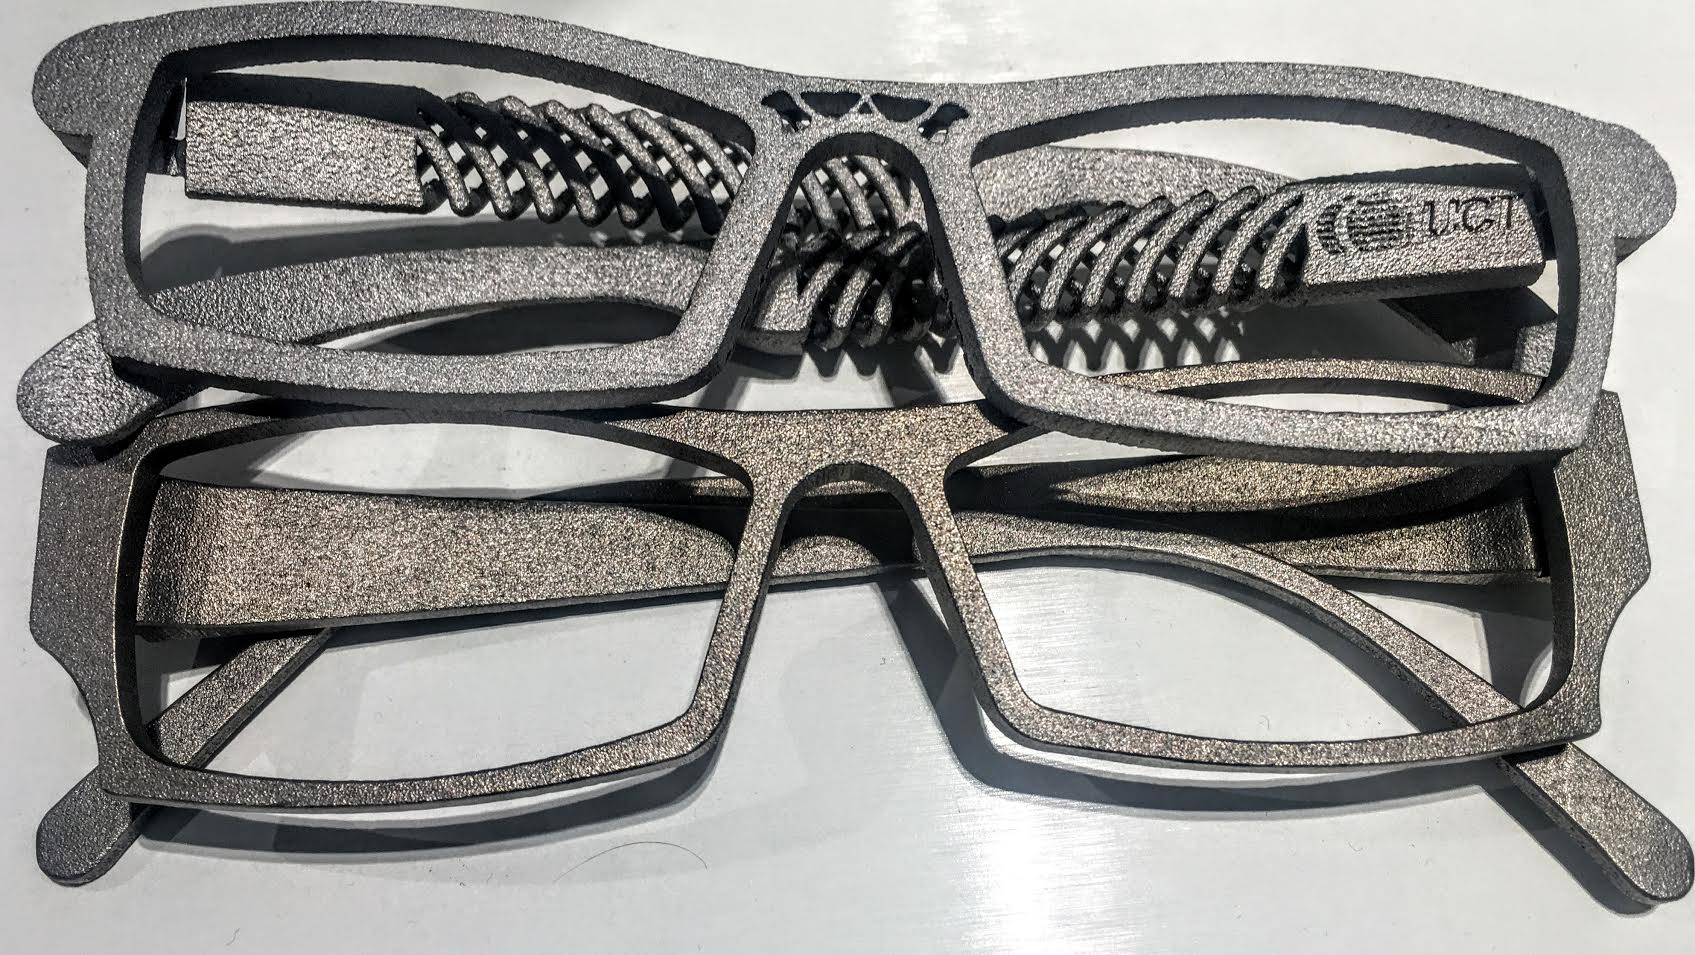
Printed Glasses frames in Aluminum (top) and Titanium
My first 3D printed project was a little bit disappointing. My new innovation looked rough and weak and the 3D model was not functioning well. Obviously, in 2006 we had fewer options for a 3D printed prototype, but the path was similar to what we have today. Therefore, my first experience was very similar to what I saw over the years with many customers and thousands of projects. In many cases, the first impression is that the 3D printed parts are stunning. It is such a great feeling to see the design come to life in a real 3D model but then, when you go into details, something is missing; The materials, the details, the color or even the mechanical properties.
In order to help you to succeed from the first 3D printed project, I’m posting those simple rules based on my experiences with more than a million 3D printed parts in more than 7 different printing technologies and different materials.
1. Know Your 3D CAD Software
We can’t print in 3D without a 3D CAD model. Also, the print results rely on the suitability of the 3D file and the 3D printing method we intend to use. The standard file we use in 3D printing is the STL file format. Almost all the 3D software can export to STL format, but not all at the same quality.
When it comes to 3D printing, there are two groups of software, 3D Solid and Non-Solid software (see table below).
- 3D solid software makes our life easier. For better results, just learn how to control the STL export property and, in most of the cases, the file is ready to print.
- For Non-Solid 3D software, a simple geometry can produce good results but, when the model is complex and the shape is curvy, printing from the exported STL file could be challenging.
- A professional 3D printing service bureau will prefer to receive the 3D file in a solid neutral format (Step, XT and so on,) rather than in STL format and to do the conversion to STL using their own tools.
- When exporting a 3D CAD file, avoid multi body and open surfaces. It is most often recommended to save the file to a neutral format and reopen it again to check for multi body, open surface, sketch, and suppress parts.
| Popular Solid Modeling Software | Popular NON-Solid Software | |||||||||||||||
| SolidWorks | Blender | |||||||||||||||
| Inventor | Rhino | |||||||||||||||
| Solid-Edge | 3ds Max | |||||||||||||||
| Fusion 360 | SketchUp | |||||||||||||||
| Creo | Tinkercad | |||||||||||||||
| Onshape | Maya | |||||||||||||||
| 123D | Sculptris | |||||||||||||||
| FreeCAD | ||||||||||||||||
| SpaceClaim | ||||||||||||||||
2. Chose the Right Materials and Printing Method
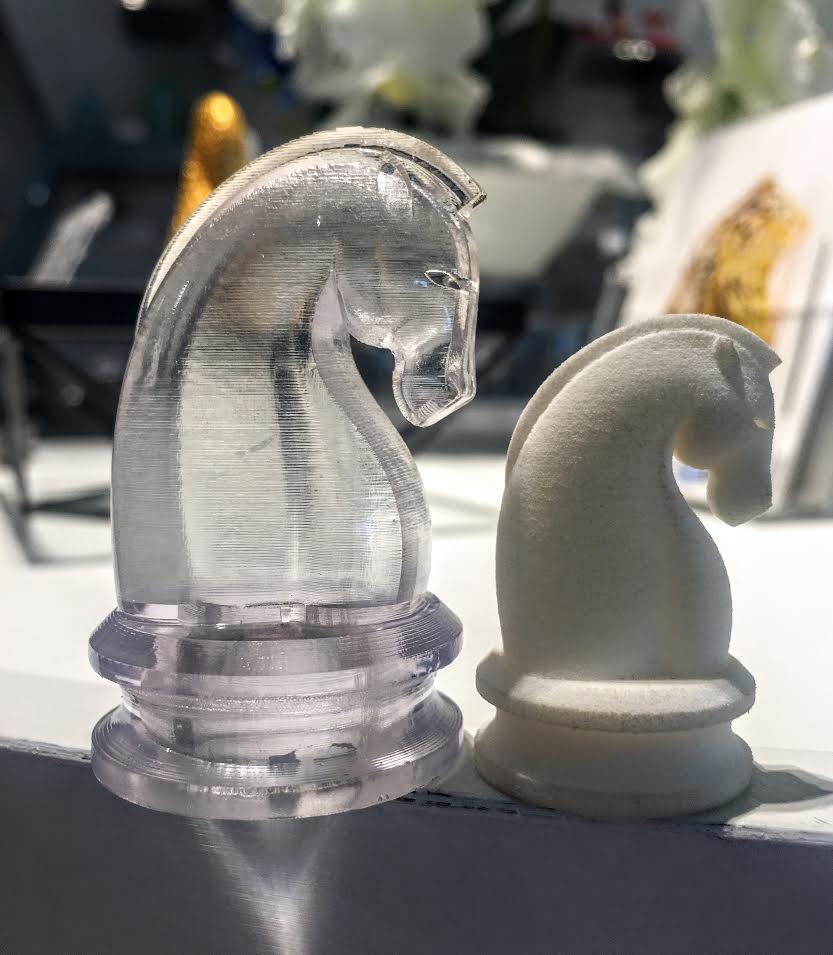
Transparent SLA part near opaque SLS
Each and every 3D printing method comes with a limited selection of materials which can be used for printing. The key factor to a successful 3D printed project is to understand what the available materials are and what the difference between each material is. Then, you have to choose the right material for the mission. For a prototype, don’t assume that the material that was used with traditional fabrication will give you the same result using 3D printing. For example, plastic ABS is a very popular material, mostly when using injection molding, but, for a 3D printed prototype, Nylon 12 from an SLS printer can give better results than ABS filament from FDM printer or ABS-like materials from a jetting printer. Glass filled Nylon is a very popular material with SLS printers, but the results using injection molded Nylon parts filed with short glass fiber would be better by far. The same goes with metal printing. Laser sintering (SLM, DMLS) 3D aluminum parts fall short when you compare them to Aluminum machining parts, but 3D printed titanium parts have a very good mechanical property that are close to forging.
If you need clear plastic transparent parts, SLA method is the only good option. For flexible parts, rubber or silicon like materials are not a good substitution for traditional methods.
3. Adjust Size, Scale and Tolerances
Each 3D printing technology comes with its limitations. You must learn the volume size, tolerances and minimal thickness limitations and adjust the 3D designed part to meet those limitations. Remember, parts manufacturing is done by sending your 3D file to the printer As It Is, and the printer operator has limited access to manipulate the 3D file geometry.
A scaled down project like architectural structure, an airplane or a vehicle model needs special care. Small details like railings, bars or windows need extra care and Transparent SLA part near opaque SLS different scaling ratio in order to meet the printer limitations. If you miss that part and print the file without fixing, you may get very bad results.
4. The Art of Post Processing

Hand painted SLS model near a plain one
With most of the printing methods, you will end up with a nice part in plain color and rough surface. For best results, post processing is needed. However, those processes require knowledge and the right equipment to get good results. For example, for metal printing, the most common post process is polishing and machining that can be done only by an expert with special tools. For plastic parts, dyeing and polishing are the most common. Polishing and dyeing printed plastic parts is more challenging than it may look, especially for high quality results.
The lovely thing about 3D printing is that it is the simplest way to fabricate parts. A fast and cheap way to have a ready to use part without the need to invest in expensive molds or special tools. However, as long as you remember that 3D printing has its limitations, and that there are many people in the industry who can help you work around those limitations, you will always have a successful 3D printing project.

Managing Director of UCT Additive Manufacturing Center Singapore. Prior to joining UCT, Gal was the Additive Manufacturing Manager at the largest 3D printing service bureau in Israel. With over 20 years of diverse experience in business development, engineering, designing and innovation, he has vast knowledge in the 3D CAD market.