
His latest project is a Cartridge Extruder to help users transform their interaction with food by merging food with technology.
“Our main focus relys on developing digital cooking tech that is easy to use for everybody,” Alcalde says. “We strongly believe that the best way to pursue our vision is through sharing everything with the community. Therefore 3DC commits to promote, connect and share with anybody involved in the field with a great project, idea or suggestion.”
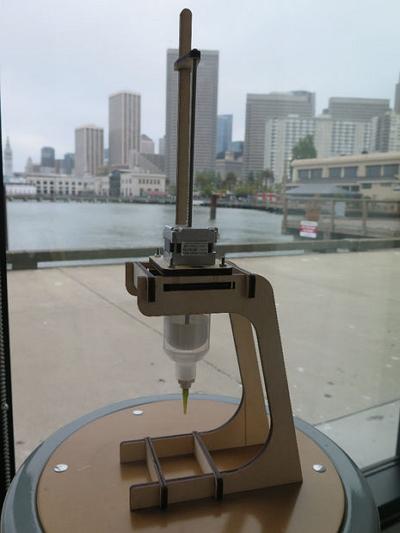
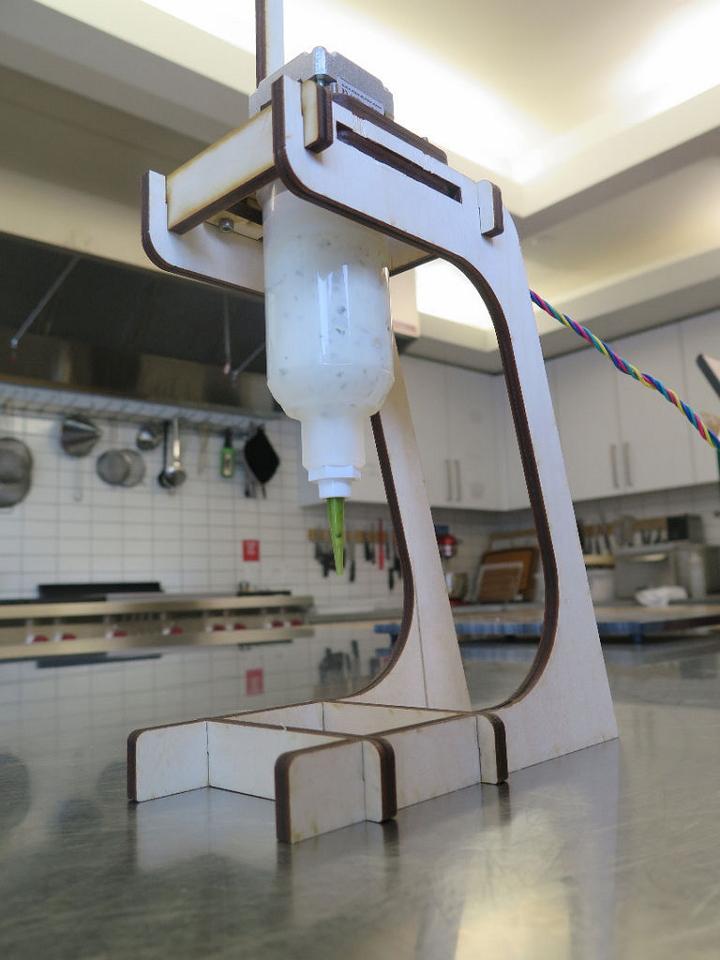
The project is, not surprisingly given Alcalde’s love of food, a 3D food printing tool he developed while studying at Pier 9. He also built a stand to hold the extruder, and the parts for that were laser cut as well.
The machine features the above mentioned laser cut parts, a Nordson optimum cartridge and piston, a Nema 17 non-captive linear stepper motor with a shaft longer than seven inches and a handful of M3 and M4 bolts and nuts.
Once the device was complete and assembled, Alcalde says he decided to test it with a mixture of cream cheese chives and onions, but that proved a bit inappropriate for the extruder.
“It was too thick, even if the motor could at some point extrude it, eventually it started skipping steps,” he says.
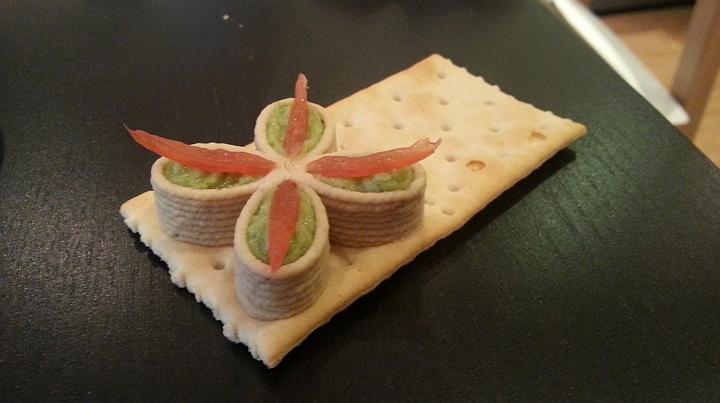
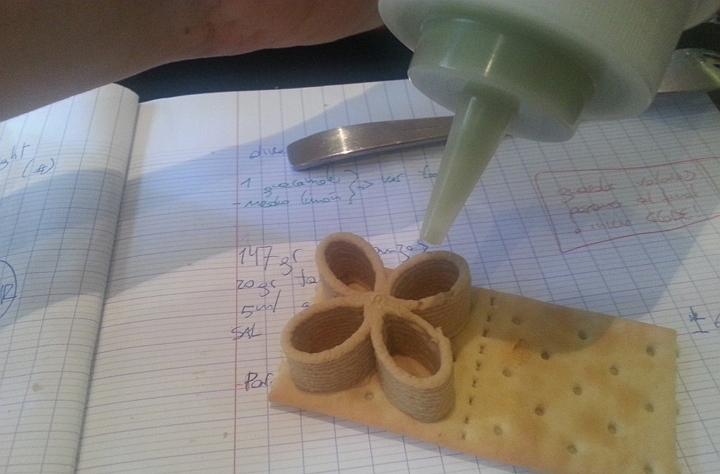
For the second go-round, he decided to use one of his recipes for an artichoke spinach hummus. While it was much thinner and easier to extrude, he says it did suffer as there were still “some chunks that clog the nozzle.” As the hummus was easier to extrude, he decided to “have some fun doing some ‘manual’ test prints.”
To solve that issue, he constructed a single box to control the speed and direction of the motor without the need for a computer.
That box included the laser cut parts, an Arduino Uno, a pair of arcade buttons, a linear potentiometer, an Adafruit motor shield and some more nuts and bolts to strap it all together.
The finished controller has two buttons and one slider. The buttons control the direction of the extruder – one click on the left button one extrudes and one click on the right one retracts the extruder. Clicking both at the same time stops the extruder entirely, and the slider allows the operator to adjust the shaft speed.
“The extruder itself is super simple to design, modify, build or use,” he says of the finished product. “A big drawback is that it’s not really strong. It isn’t able to extrude thicker pastes or dough, but it’s great for thin consistencies such as mashed potato or meringue. I have the feeling is gonna be a great tool to rapidly test different materials.”
You can see the entire project and review the documentation he wrote on the Food Extruder build here on Instructables, and you can see some of Alcalde’s other 3D printed food creations on the 3DigitalCooks.com website here.
Will you build this simple paste extruder from Luis Rodriguez Alcalde, the founder of 3DigitalCooks? Let us know in the DIY Food Extruder forum thread on 3DPB.com.
