This was a new type of project for Suvansh–as it may be for others out there also–as he usually draws his designs out on blueprint. Wanting to try out 3D modeling, Suvansh took the plunge with his RC Hovercraft, which turned out to be a highly functioning, durable hovercraft that anyone could while away many hours with in both tinkering and using outside for grand adventure.

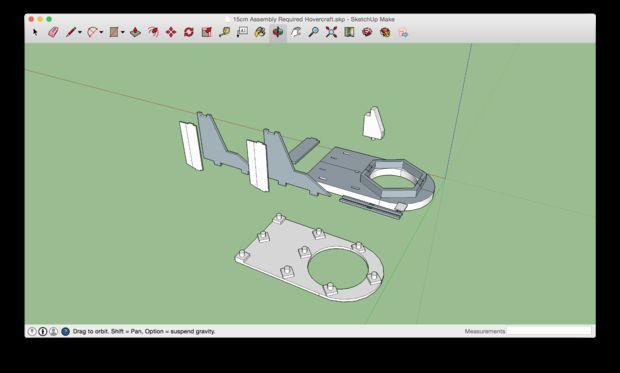
- Motor mount
- Rudder
- Bottom spacers and plate
- Top
- Rudder support
- Files for downloading and 3D printing
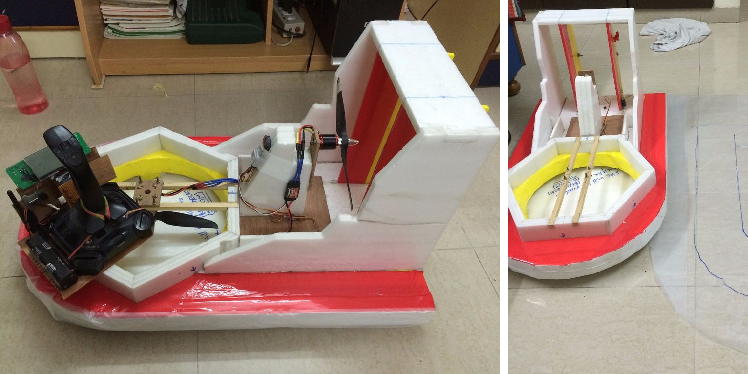
The hovercraft is deceptively simple with the base constructed of the main and lower ‘decks.’ You’ll need foam board for the main deck which is made of 2” foam board, and the lower deck which is a bit more complicated, consisting of two sheets each of 8mm with spacers (also of the same sheet) between the decks.
For ventilation and the skirt, Suvansh resourcefully heated up his knife so that the searing heat would slice easily through to make a hole for the rest of the main pieces to be inserted into and on top of the foam base.
As you get to the lifting tower, refer to Suvansh’s PDF for measuring, and prepare accordingly depending on your size of foam. You will also be able to see where to place the motor mount and its spares. If you are new to the hovercraft hobby world, Suvansh also recommends checking out a line of tutorials from the guys who were his inspiration in building this model–Diehard RC Addicts.

- One 3548 kv1100 80 amps ESC with 11″10 prop for lift motor
- One 2836 kv1120 30 amps ESC with 10″6 prop for pusher
- Two 3000 mAh 30C 3S
Suvansh then used his modified transmitter to control the hovercraft, and you can find more about it here. For all the techies out there who are wondering how he set up the remote control, Suvansh put some thought into it (and he also recommends checking out the video on his Facebook page).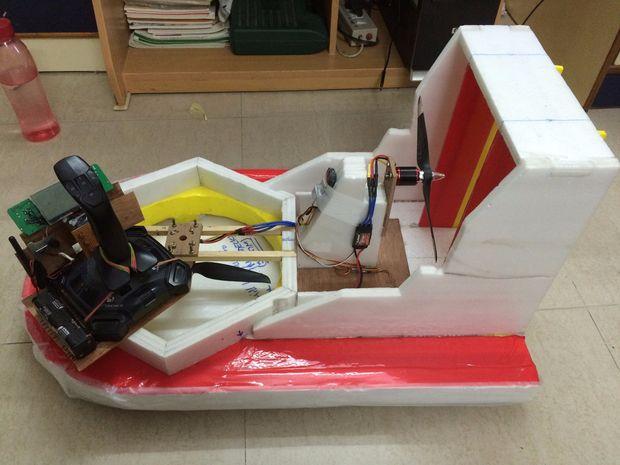
“I got this idea on how to mix both the motors on my hovercraft, like when the lifting motor is at 20 percent,” said Suvansh. “From then, the pusher motor starts but there is no such mixing in RCB 7x and RCB 6i. I calibrated the lifting motor normally, and then for the pusher motor moved the throttle stick back as usual but only 3/4th distance from the top–meaning the one-quarter portion from the bottom–so that way the ‘ESC’ will think that these are the end points of the throttle stick.
“When I move the throttle stick, while testing, the lifting motor will start but the pusher won’t, due to this dead band that I created on purpose. When I move it even further, the pusher motor will come into action!”
At that point, it’s time for take off.
“It’s very powerful,” points out Suvansh more than once, regarding the speed of this machine.
Heed the warnings regarding how strong this hovercraft is once you get going, and watch out for traffic.
Is this a design you are interested in building? Have you 3D printed any parts for a design like this already? Discuss in the 3D Printed Powerful RC Hovercraft forum thread over at 3DPB.com.