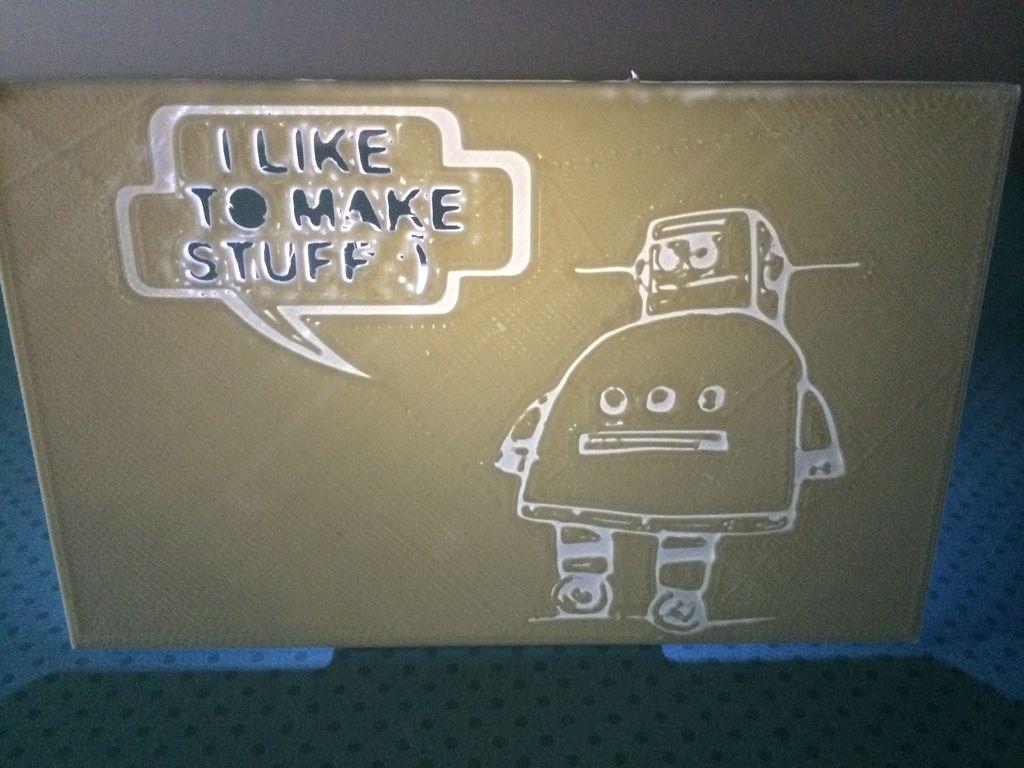
There’s something extra clever about making something appear low-tech when using high-tech tools. Here’s a 3D printed nightlight that hints at origami origins and maker inclinations from a first-time Instructables contributor who goes by the pseudonym “DayDream Unique.”
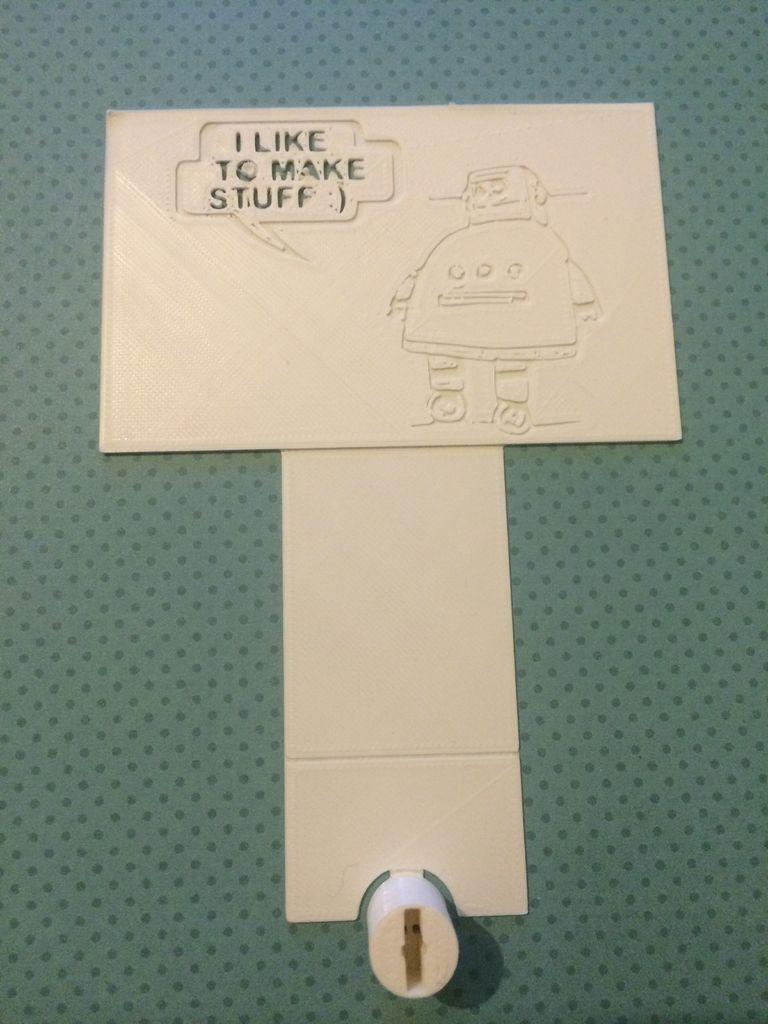
While the finished work looks pretty basic — and it really is, for the most part — it can be customized to add extra flair. You’ll need a few supplies: A coin battery, a white LED (5 or 10 mm, ideally diffused), and, of course, a 3D printer with ABS or PLA filament in the color of your choice.
You’ll have the option of choosing from three different STL files depending on how complicated you want your nightlight to be. This maker used Autodesk 123D Design, so you may need to familiarize yourself with the program first. You can then follow her detailed, step-by-step instructions for setting up your 3D model for printing.
DayDream Unique used a speech bubble along with the robot design from the Instructables logo, but maybe you want to eliminate the bubble and put your child’s name on the nightlight instead. Mayb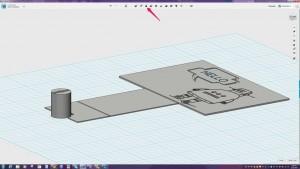

If you don’t have a 3D printer of your own, you can design your nightlight and then download the STL file to a web-based 3D printing site like Shapeways, Sculpteo, or iMaterialize. Remember, though, that you’ll need to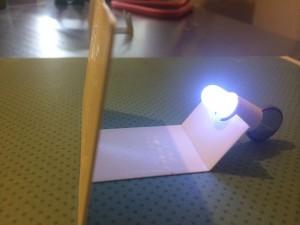

Once your material has cooled, you’re ready to fold the nightlight, assemble, and insert the LED and battery. The finished piece folds easily and looks great when the light shines through the image and text. We think this could be cool printed in white and then painted, so let your imagination help you elaborate on this basic design or keep it simple and low-tech!
Would this nightlight help your child (or you!) sleep at night? Let us know if you’d make this cute piece over at the 3D Printed Nightlight forum thread at 3DPB.com.