While the benefits of the technology are numerous, 3D printing does still have its safety issues: namely the emission of ultrafine particles, chemicals, and other pollutants into the surrounding air. HEPA (High Efficiency Particulate Air) filters can help, but there are some who think that vented enclosures should be standard practice for FFF 3D printers, and the Ultimate 3D Printing Store (U3DPS) even designed a safety enclosure specifically for the Ultimaker S5. But maker and software engineer Mike Buss, who’s from my home state of Ohio, took matters into his own hands, using a fan, a microcontroller, sensors, and 3D printing to build his own air filtration system for his Ultimaker S3.
Buss works at the Cleveland Clinic, writing software to help patients with Parkinson’s, Alzheimer’s, multiple sclerosis, and concussions, so health is obviously pretty important to him.
“I had researched the potential health side effects of owning a 3D printer when I bought it – it turns out they can malfunction and catch fire or release harmful chemicals into the air – but I made excuses,” Buss wrote on his website. “I’m only printing in Polyactic Acid (PLA), one of the least harmful filaments – it’s probably fine. Sure, maybe it releases some tiny plastic into the air, but it’s a big room, and sometimes I keep the windows open. Our smoke detectors are brand new and well tested. We’re probably fine.”
The Ultimaker S3 comes with an excellent API.
But after his son was born a few months ago, Buss wanted to be doubly sure that his 3D printer was safe to use around a newborn, and started developing his own smart filtration system to ensure that the air in his home was clean. His original plan to strap a fan to a HEPA filter, but then he started to think bigger, wondering if it he could build something that would turn on and off automatically when a print job started, could adjust the fan speed if it detected high levels of volatile organic compounds (VOC), and also featured an electric cutoff and fire sensor.
“Eventually, I landed on building a totally ridiculous, completely overkill air filtration system for our 3D printer that probably wasn’t necessary in the first place. And it was lots of fun,” Buss wrote.
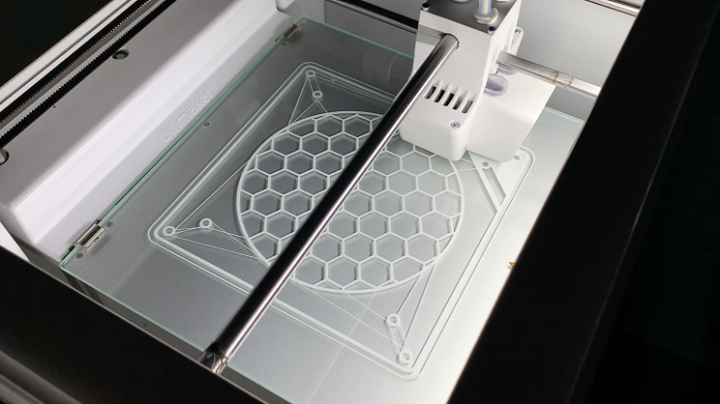
He used his own 3D printer to print parts for his new system.
After sketching out his plan, Buss used his own Ultimaker S3 to print out the components he’d need to build the filtration panel and enclosure. To build a shell for the casing, he purchased Lexan from Home Depot, cut it up, and connected it to all of the 3D printed parts.

Cutting the Lexan in the right dimensions.
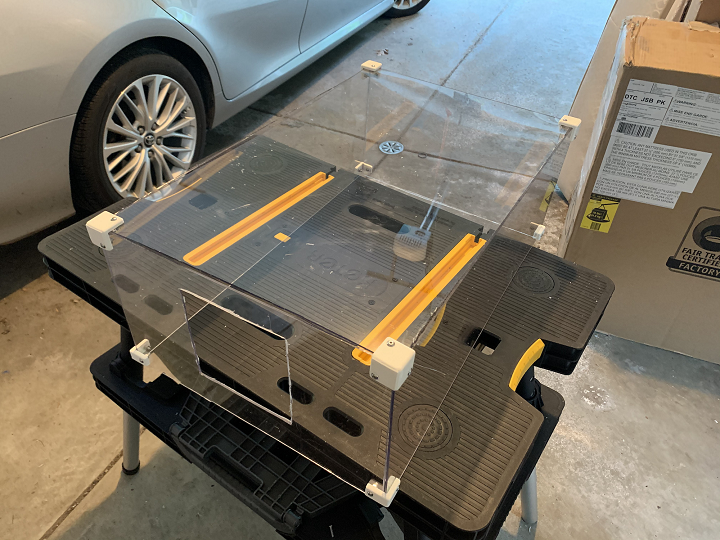
The final Lexan enclosure.
“Now that I had the shell, it was time for the guts: the electronics,” he wrote.
This was apparently his favorite part of the project, but it was definitely complicated—everything needed power, but not all necessarily the same amount of power.
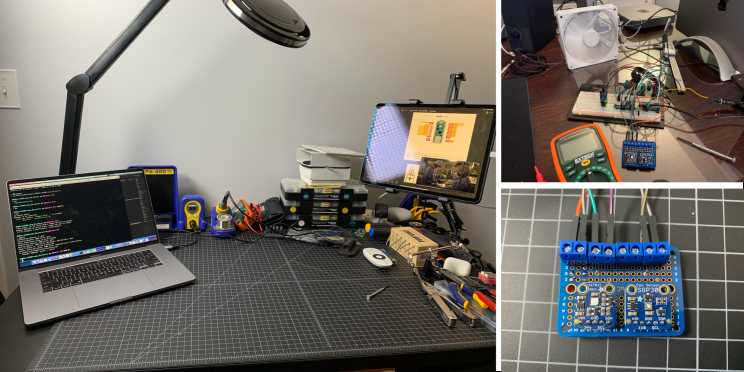
Wiring up the electronics.
“Some needed 12V to work. Others needed 3.3V. Some were controlled with pulse width modulation, others with I2C. Getting them powered and conducting a symphony of functions was, in my opinion, the best part of this project,” Buss said.
He wired a 12V 3A power supply into his Arduino Nano 33 IoT, a relay, and a fan, the latter of which was connected by its own PWM pin to one on the Arduino to control its speed, which in turn made the fan much quieter.
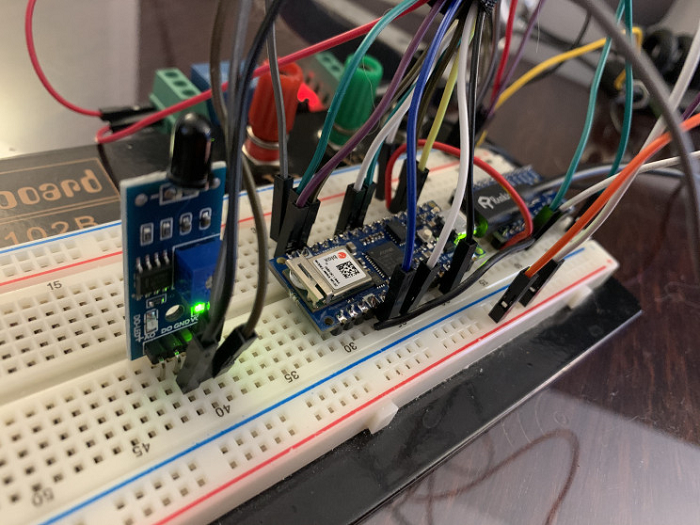
The board with all the sensors.
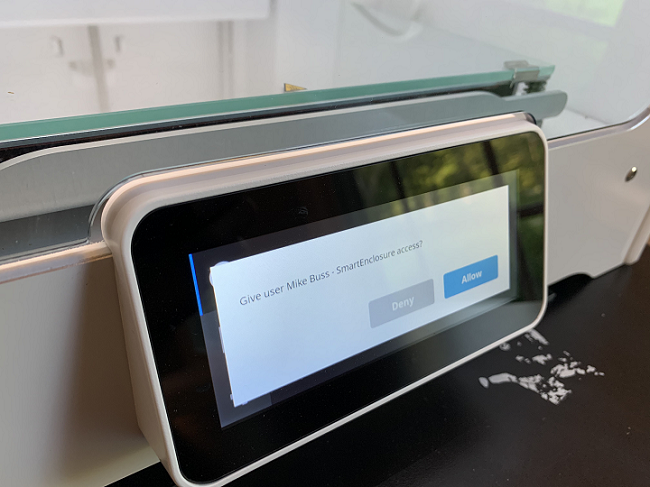
Buss used the 3D printer’s built-in WiFi module poll “periodically” to turn his filtration system into a smart one, and added sensors both inside and outside of the enclosure that measure the humidity, temperature, and VOC levels. The data from these sensors is then sent directly over WiFi to a server running on his “…NAS (a Synology DS918+).”
“Eventually, I’d like to use this data in real-time to control the fan speed, but for now, it’s just filed away along with information on what was printed and when,” he wrote.
“Adding two temperature sensors was a little tricky, considering they share the same hardcoded I2C address. Because of this, the Arduino can’t address them individually. My solution was to use an I2C multiplexer to let me switch between sensors and query them individually.”
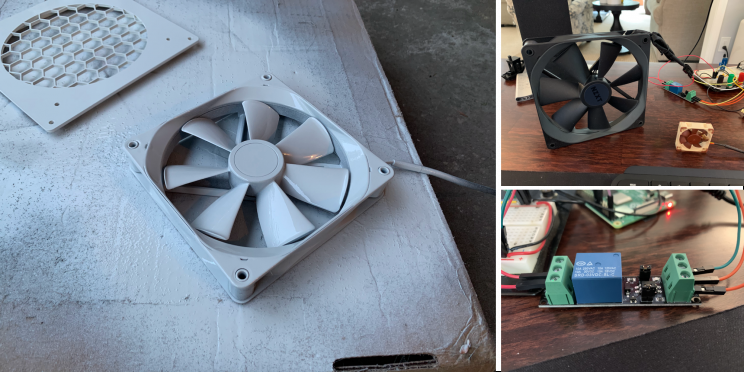
Wiring the fan into the system.
Basically, while it’s functioning normally, the Arduino is checking a flame sensor above the 3D printer at the same time. If a fire is detected, power to the system shuts off immediately, and a piezo alarm begins to sound, which can be heard anywhere in his house. To me, this is the coolest part of an already really awesome DIY project.
So the fan on the filtration system pulls air out of the enclosed chamber on top of the Ultimaker S3, and it goes through a HEPA filter first, then a carbon filter, and finally out the back. Buss already has ideas for how to improve the fan, which “isn’t pushing as much air as I’d like through the two filters.”
“All said and done, this project was fun to build and gives my wife and me some peace of mind,” he concluded.
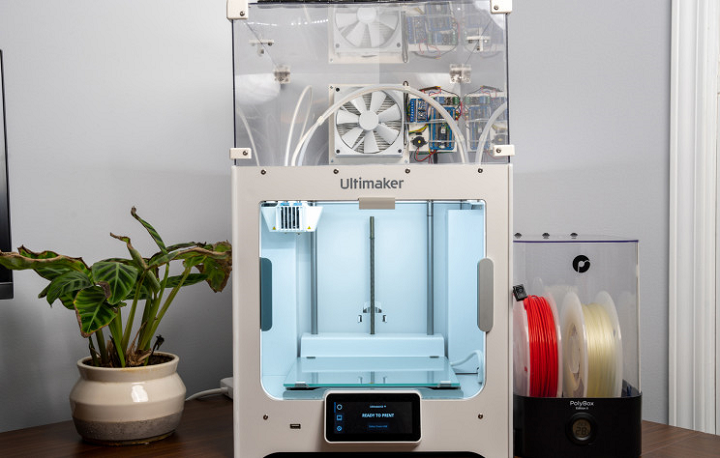
The 3D printer with its new air filtration system atop.
You can find a list of the parts Buss used for this cool project here.
(All images: Mike Buss)