
“Bling it on!” It’s been a common, if tween-sounding, cry in retail spaces, and it’s sure to just pick up more steam now that the holidays are fast approaching.
And of course, now there’s i.materialise‘s new question for you:
Can You Handle All This Sparkle?
Starting this week the company is making available a brand new material for 3D printed objects, and it sure is sparkly. Alumide has been among i.materialise’s offerings for some time, noted as being “perfect for beginning-designers who want a well-priced model, a maximum freedom of creation, and who don’t want to be bothered with the limitations of the printing process.” Until now, though, the only alumide available has been, well… dull. It’s a blend of polyamide fine granular powder and grey aluminum powder, and it’s only been available in the matte grey color it just naturally happens to be.
I mean, that matte grey was fine… if you’re only 3D printing, say, clouds or robot figures. Sure, there were some aluminum sparkles popping out, but on the whole? A little industrial looking. But if you wanted something with a little more pop? Well, you’d have to look into the other materials i.materialise offers. You used to, anyway.
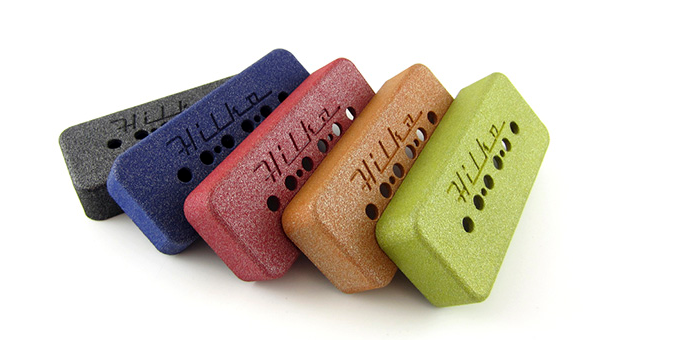
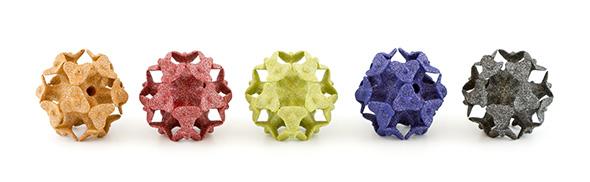
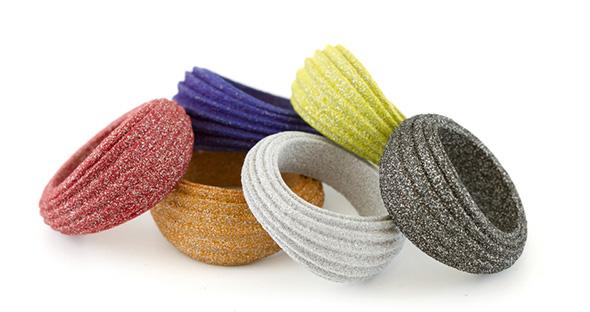
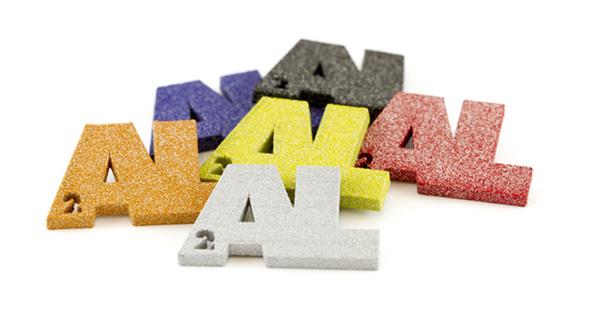
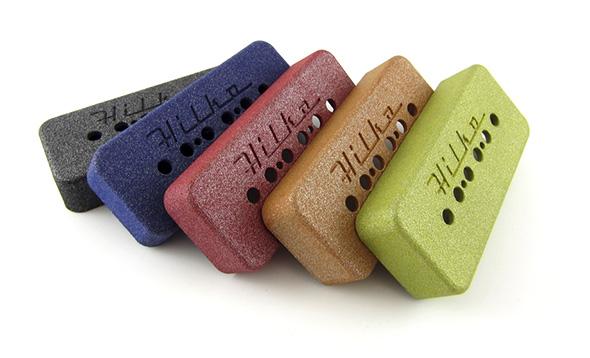
And now? How about Asphalt Black, Brick Red, Rusty Orange, Sparkly Blue, or Moss Green? Now those sound more exciting.
The dyeing process adds more to the 3D print process, and involves submerging a finished model into a color pigment bath — no two pieces will come out of the bath looking the same, due to the random distribution of aluminum particles in the alumide. The pigmentation process has five steps, as described on the i.materialise site:
- First, your model is washed by hand to make sure there are no contaminants present that could influence the dyeing and to make sure the color pigment can properly penetrate the model
- We then mix the color pigments in the right ratio. In principle, we can create any color but as each batch is a manual process it would be very expensive to do this only for one model. To keep prices as low as possible, we limit the number of colors.
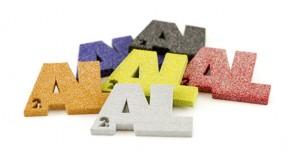
Alumide sample kit
- The pigments are then put into warm water. At this point, additional materials are added so the color pigment can better the impregnate the Alumide.
- Finally, the mixture is heated and your model is added. Your model remains in the mixture for at least 20 minutes so that the color can penetrate the surface(Note: the dye does not penetrate all the way through the entire model).
- Your model is taken out and washed. Done!
The dyeing adds a little time (two extra working days) and cost to the manufacture of 3D printed objects. Cost-wise, there’s a little math involved: depending on the current euro/USD exchange rate, it runs “a startup of 1€ (± $1.38) + 0.2 € per cm³ (±$0.28 /cm3) per model on top of the price for the natural color. The extra cost for dyeing is limited to a maximum of 3 € (± $4.5).” The maximum dimensions available for printing an object in sparkly amide is 200 x 150 x 150 mm, which is a little smaller than the maximum build size for the base amide types (310 x 310 x 400 mm), and these colors are available now for all new shop items (with older items in the shop rolling out availability a little more gradually).
Not totally sure whether these sparkles are the right sparkles for you? You can get a sample kit for just $16.50, showing sample pieces in the five new sparkly dyed colors as well as the original matte.
Will you be ordering anything in these new sparkly alumide materials? We’d love to see how it turns out! Let us know what you think in the i.materialise Dyed Alumide forum thread at 3DPB.com.