

Tell us about your background. How did you get into 3D printing?
“I was a software architect for over a decade and I am able to code in a dozen different languages. That was my job until a few years back when I decided to go full time as a nano brick artist. So, you could say, I have always been into building things. When 3D printing first came along, I really wanted a 3D printer, but the cost was too high for me and the technology wasn’t really matured yet, so I just keep myself in the loop by reading all the latest news about 3D printing. It was only about half a year ago that I noticed the price of 3D printer kits with decent specs have come down to the level that I thought was affordable, and development of 3D printers have come far enough that I felt it was time to get into it. My main reason to go with a kit instead of a fully assembled printer wasn’t really the cost though, as there are fully assembled printers close to the price I paid for my kit (~USD260). I opted for a kit because I wanted to learn everything about how a 3D printer works. There were definitely quite a few challenges in building your own 3D printer, even though it’s from a kit. All the hours spent troubleshooting and fixing issues are all well worth it though, as you gain a lot more insight into how things work.”
Why did you decide to build a Prusa i3?
“I was going back and forth between a delta printer and a cartesian printer when I was trying to decide which direction to go. I ended up with a Prusa i3 based design because I wanted a larger printable area, mine has a 22cm x 22cm print bed. Most delta printer kits out there tend to have much smaller printable area due to the round shape (especially if the stuff you print tends to be rectangular). This was especially true when I was printing my arcade machine, as most of the pieces were 21cm x 21cm, pretty much pushing to the limits of my print bed.”

What inspired this project?
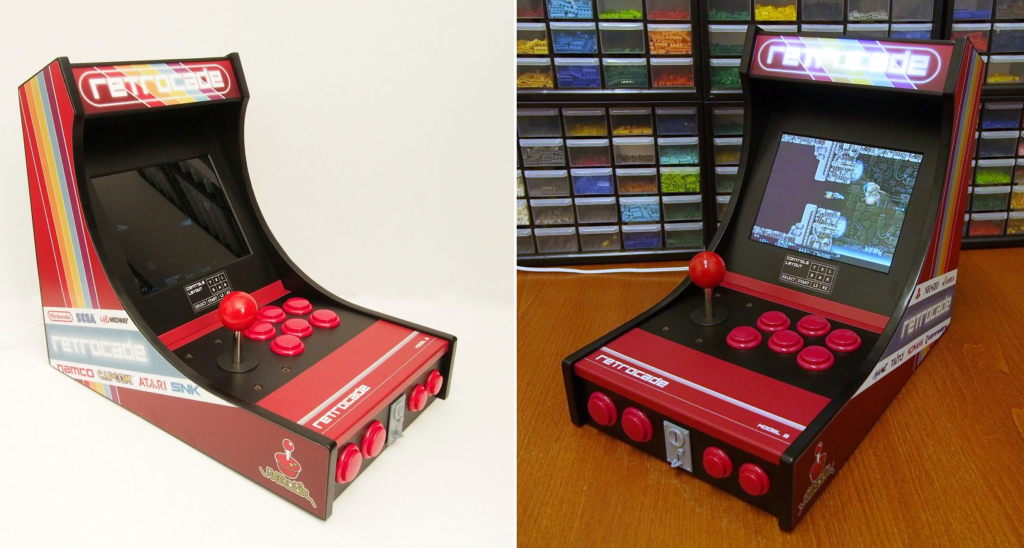
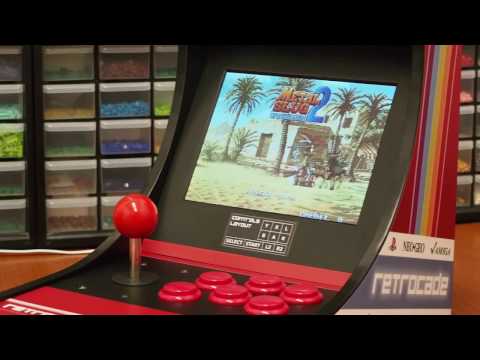
“I have always wanted a real arcade machine. I grew up in the 80s, when arcade machines were everywhere. Nothing beats having a real arcade machine joystick and buttons. So, having a 3D printer and wanting to find a project that would be fun to do, this idea came up. I already had a Raspberry Pi 3 lying around and RetroPie just made it so easy to build the core of an arcade machine. I did a lot of research online and initially considered laser cutting MDF for the main parts of the body and 3D printing the smaller parts, but I couldn’t find easy access to a laser cutter over here in Malaysia and commercial facilities would have cost me a lot more than printing the whole thing myself. So that’s how I ended up printing the whole thing. Anyway, it was a good thing, cause I got to practice my 3D modelling skills and learnt a lot from this project, like how to make sure things fit together properly, how to make sure parts were designed with enough structural strength, etc. Of course, it was a learning process, so some parts, I had to go back and redesign and reprint, but that’s the beauty of 3D printing. You can make tweaks to a design quickly and have the modified part in hand within hours.
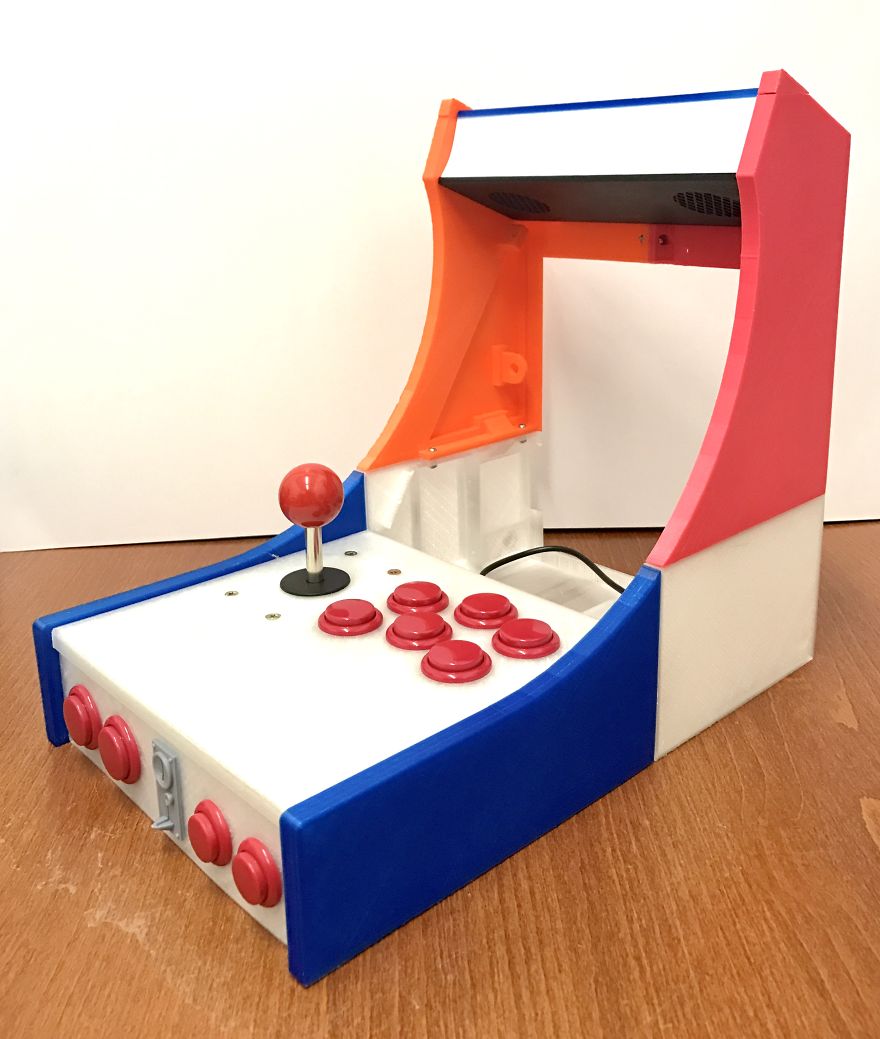
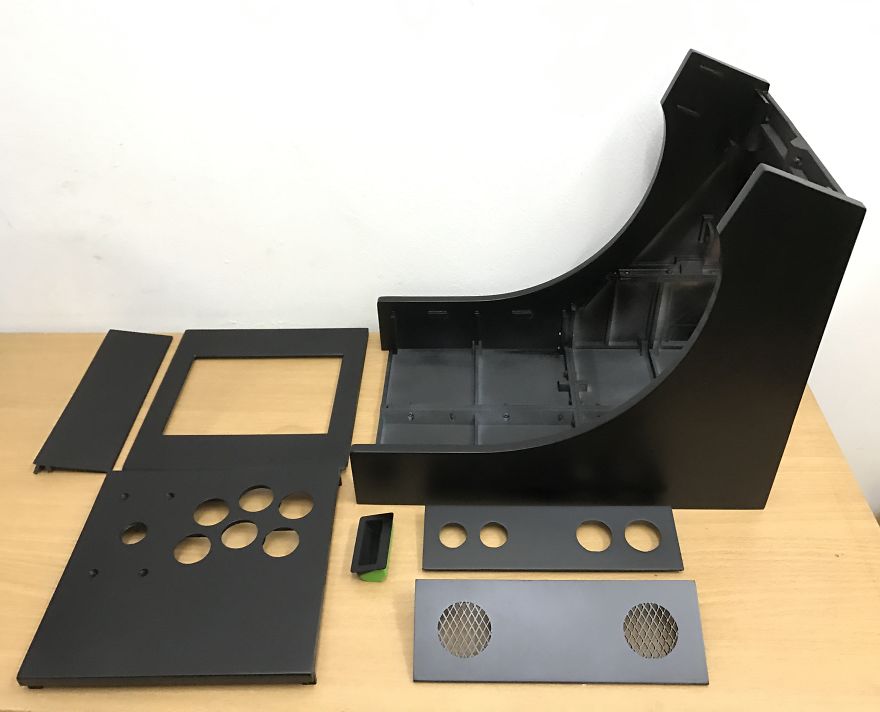
There were already other 3D printed arcade machines out there (you can find them in Thingiverse), but they were not quite what I wanted. I wanted something that looks like it’s production quality, with all the little details. That’s why I included things like the fake coin slot. I also did a lot of research on the designs of old arcade machines and designed the artwork with similar styling, which I sent to a commercial printer to have it printed on vinyl sticker. Another thing I noticed was that most other designs out there had very little or no room for resting your palm. I did some testing and found that to be very tiring if you were playing for long, so in my design, I made sure there were ample room where my palm can rest.”
What modeling software did you use for the design, and what materials did you use in the build?
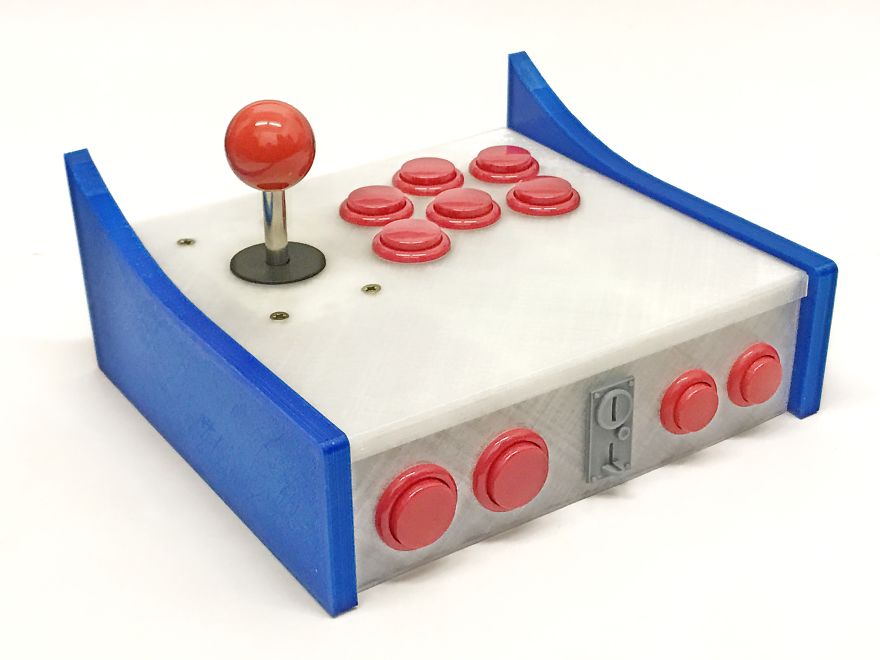
“I used TinkerCAD. This was the easiest to use 3D CAD software for me, and as it turns out, it’s good enough to do fairly complex designs. I used PLA for this project as it’s stiffer than ABS, and being easier to work with is another plus. The stiffness is important because I know I will be putting the joystick and buttons through a lot of punishment…After all the parts were printed and assembled, I sprayed primer putty and sanded it down until I was happy with the finish. This was followed by spraying matte black paint.”

To learn more about Tan’s delightfully retro 3D printed arcade machine – which he appropriately dubbed the “Retrocade” – you can check out his project logs on Hackaday, or watch the video below:
Discuss in the 3D Printed Arcade forum at 3DPB.com.