After reviewing the “Disney Computation Designs of Mechanical Characters” video featuring Cyber Tiger (see below), Greg Zumwalt of Oklahoma talked with a friend who also saw it and decided to take on a similar project, 3D printing a moveable Saber. A former avionics designer and programmer as well as video designer, Zumwalt was up to the challenge, as well as taking a number of liberties to accommodate 3D printing, especially in areas like the gear train and arm design.
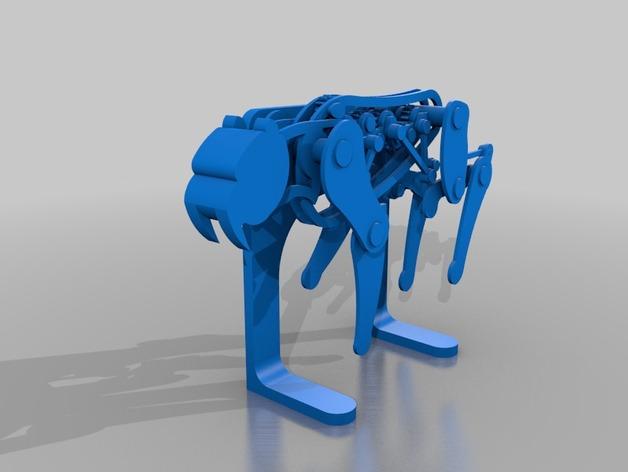
At almost eight inches tall and twelve inches when fully extended from head to toe, Saber is a large design but is able to be printed in smaller components. Zumwalt wanted to be sure that makers with a wide variety of 3D printers would be able to try their hand at creating the Saber. The large base is sliced into two pieces and can be put together with dove tail joinery. He also included small bevels on the build plate to cut down on friction.
“Saber is the most mechanically detailed Thingiverse thing I’ve published and is indeed a challenge to print and build,” says Zumwalt, and for that reason, he invites anyone to ask questions or contact him regarding the project.
To create the Saber, he used SketchUp Make 2015 and his MakerBot Replicator 2, printing in PLA with standard settings.
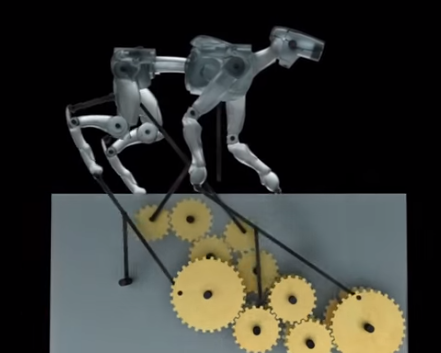
Inspiration from Disney Research
The basic list of parts is as follows:
- Motor
- Coaxial Power Jack: Radio Shack part number 274-1583.
- 3.0 Vdc Power Supply: Radio Shack part number 273-315 with the “N” style plug 273-345 (you get one free with the power supply)
The list of tools used:
- Rubber mallet
- Small vise
- Flat punch set
- Modeling knife
- Small files
- Sandpaper
- Slip joint pliers
- Needle nose pliers
Instructions:
- Print all pieces as shown in “Assembly.skp” or “Assembly.stl”.
- Test fit and trim, file, sand, etc. all parts as necessary for smooth movement and a tight fit. Depending on the colors you choose and printer settings, some trimming and sanding will be required.
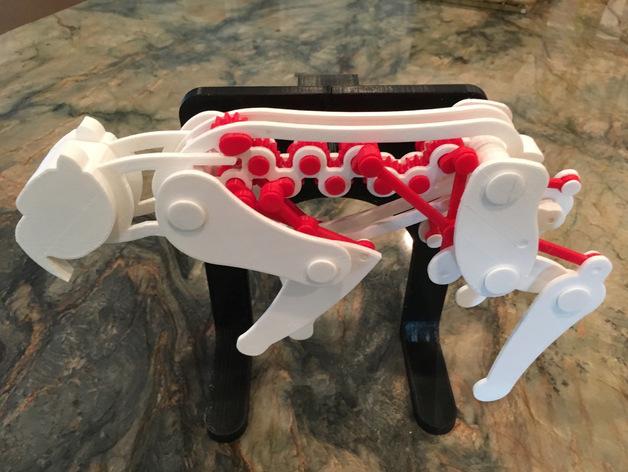
- Assemble as per Assembly.skp (or Assembly.stl). Note: Zumwalt began pressing two frame halves together and then inserted the gear and associated components into the frame, testing the assembly for proper rotation while progressing, and backtracking to trim, file, or sand if needed.
“Once completed, you should easily be able to spin the entire gear train while holding onto ‘Cap Motor.stl’ and spinning the entire assembly by hand,” states Zumwalt. “If not, disassemble and repeat the process, as this is a very important step.”
“Pay very exact attention to the initial orientation of the components ‘Cap Axle Eccentric.stl’ and ‘Arm Axle.stl’ as shown in ‘Assembly.skp’ or ‘Assembly.stl’ within the gear train for both sides, as these orientations are critical to the Saber motions, alignment and clearances,” says Zumwalt.
- Lubricate all moving components with petroleum jelly.
- Wire the motor such that it rotates counter clockwise as viewed from the motor shaft.
“My Sabers run anywhere from 1.5 to 6 VDC,” states Zumwalt. “It was designed for use with the selected motor at 3 VDC which minimizes noise while providing good motion. For break in, after lubrication, I ran my prototypes for 2 hours at 6 VDC, then lowered the voltage to 3.0 VDC. They’ve been running for over a week now at 3 VDC.”
While now retired, Zumwalt is still very involved in designing and 3D printing, and while he had been working on a MakerBot Replicator 2 for three years, he is now also using an Ultimaker 2 Extended, and is experienced in SketchUp. Discuss this story in the Saber forum thread on 3DPB.com.