![]()
While some of can remember getting creative and actually making shoddy clothes for our Barbies, we generally just made do with what we got on Christmas or birthdays. Now…Barbie lovers–and 3D printing enthusiasts–behold. All the benefits 3D printing is affording to the world are coming to you in terms of customization, affordability, and self-sustainability in the world of fashionista dolls. Already a favorite with many kids, the 3Doodler is showing itself as a great tool for the budding fashion designer or stylist, allowing for ease in more detailed projects such as a fancy blouse or intricate dress for Barbie–or classy clothes for Ken.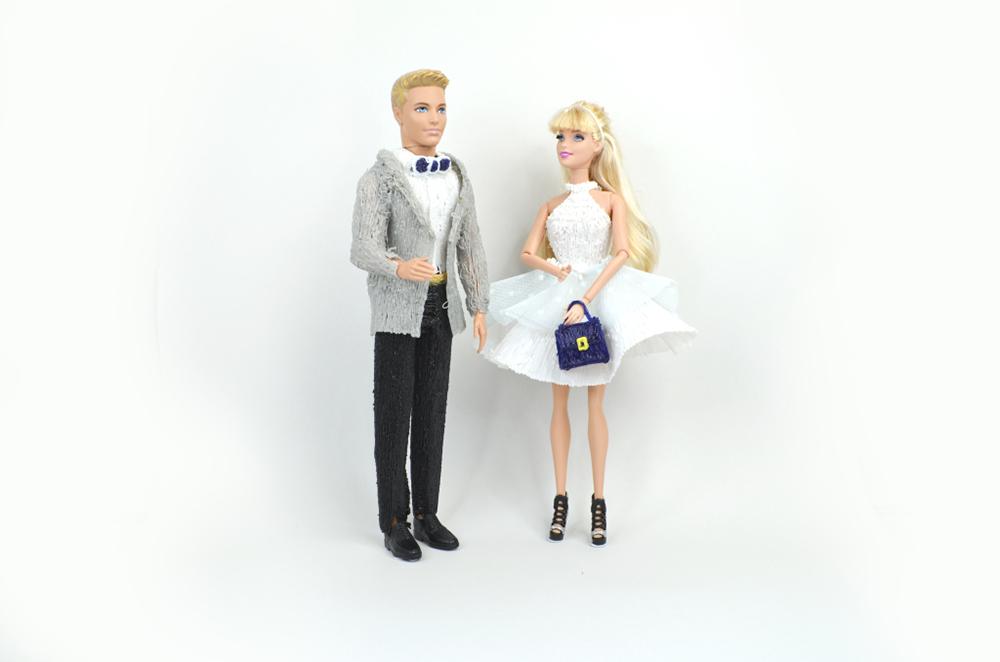
The company famous for creating the 3D printing pen that’s become quite common to kids today leads us through a project in how to tailor Barbie and Ken with technological panache. This looks like so much fun, it’s hard to see how anyone could resist.
The only things you’ll need to complete this fun task are:
- Your 3Doodler (v.1 or 2.0)
- A bunch of 3Doodler plastic strands to include Flexy
- A Barbie and/or Ken (or other fashion) doll
- Masking tape
- Velcro strips
- Fabric (preferably something light and sheer)
- Scissors
For these outfits the 3Doodler group used a lot of 3Doodler Flexy plastic because it allows Barbie to move easily and makes wardrobe changes easier. They recommend that you may want to try using ABS or PLA for their more rigid qualities when making accessories.
The first step is to cover the areas you’ll be ‘dressing’ with masking tape so that the heat from the 3Doodler doesn’t melt or mar Barbie. After that you can start using the 3Doodler to apply the dress directly onto her. The great thing about using 3D printing and the plastic filament is that if you mess something up while practicing your technique, you can just peel it right off. Using a bit of pressure and moving the pen in nice tight lines helps with consistent application. The 3Doodler team reminds you not to seal Barbie up in the back because you are probably going to want to change her clothes at some point. Velcro strips work much better.
The skirt takes a little more work as there’s measuring involved to make sure it fits properly in the waist. But this part looks like even more fun to complete as you remove the top and then basically fabricate the skirt around it while it’s lying flat. They suggest adding other little embellishments–and of course, trying different materials.

Suggesting you might even want to make him some briefs or boxers too, you’ll want to start with the pants by laying them flat and constructing rectangles and then rolling the fabric onto Ken’s legs, doodling the seams together. You can go to town thinking of other accoutrements for his night-on-the-town wardrobe as well adding doodled items like a bowtie, cufflinks, and even monograms.
Is this a project you or your kids might try? Have you had experience with the 3Doodler, and if so, what have been your favorite projects? Discuss in the 3Doodle Some Duds for Ken & Barbie forum thread over at 3DPB.com.
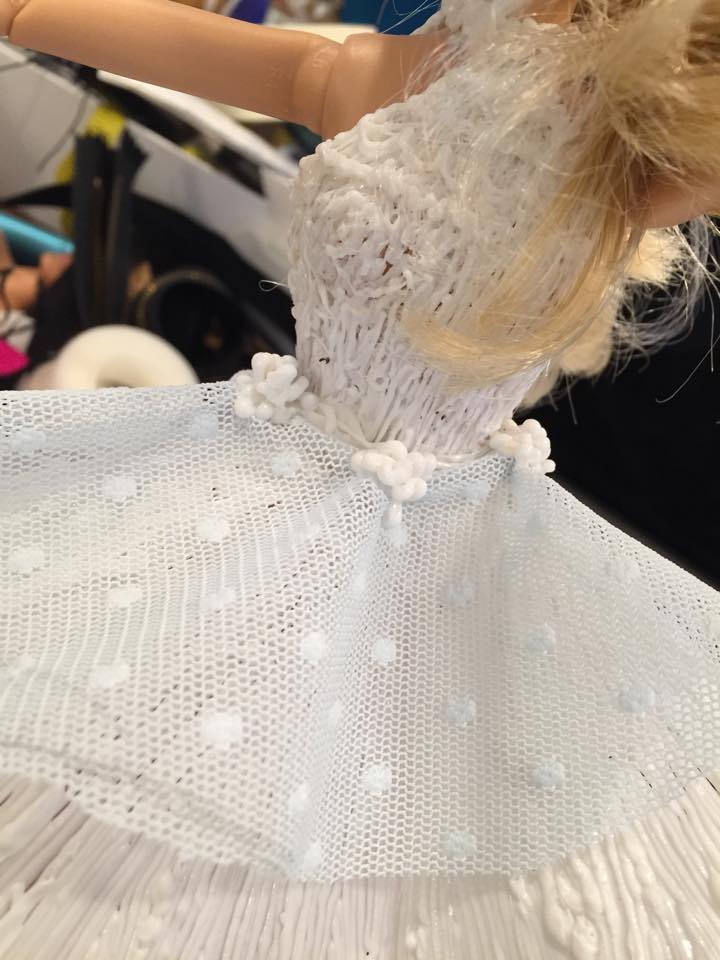
Adding embellishments to Barbie’s 3Doodled clothing
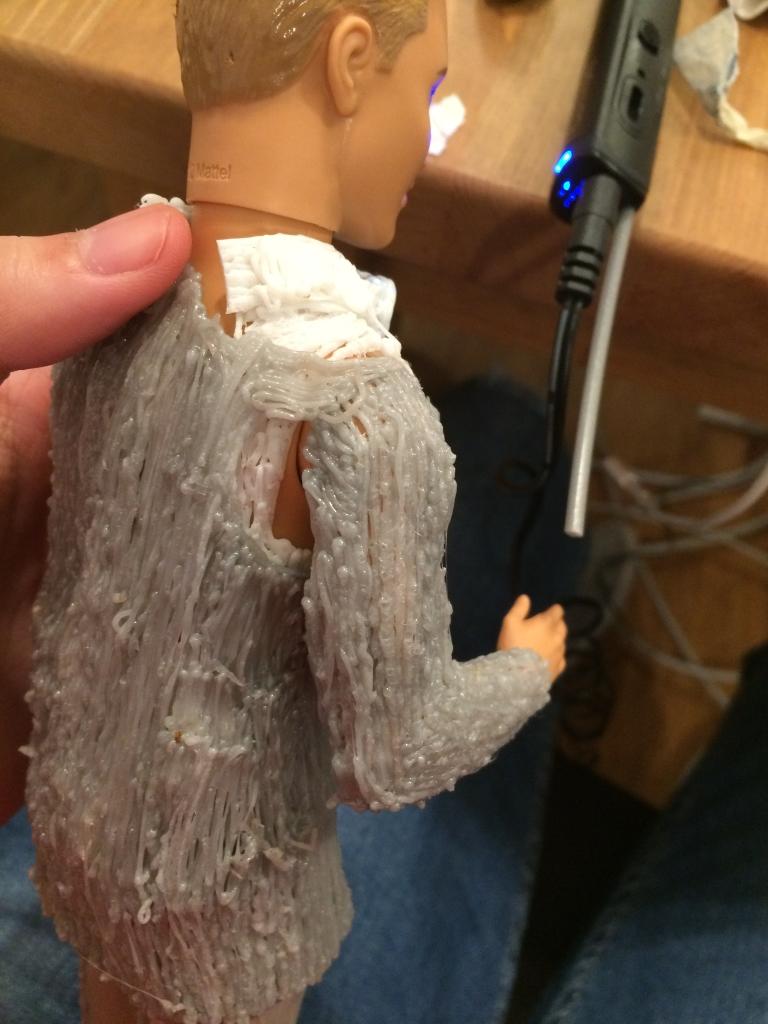
Constructing Ken’s jacket