


Joseph Yang
Previously, it would have been hard imagining devices like the topic of this article–useful products being printed layer by layer, brought into existence at the desktop, and controlled wirelessly by a phone mostly used for taking pictures, texting, and applications.
It truly wasn’t all that long ago that robots were mainly just a thing out of sci-fi, with a smattering of rudimentary walking and talking electronics being brought into existence here and there by eccentric scientists globbing parts together in a Frankenstein-ish manner.
It used to be a rare and very exciting thing when a child received anything involving robots for a holiday or birthday gift. As technology progresses at rapid speed, however, devices including what were once considered complex electronics and software are becoming much easier to obtain–and to construct yourself. Not only that, but many of us are also learning to tell them what to do, and designing and customizing the controls as well.
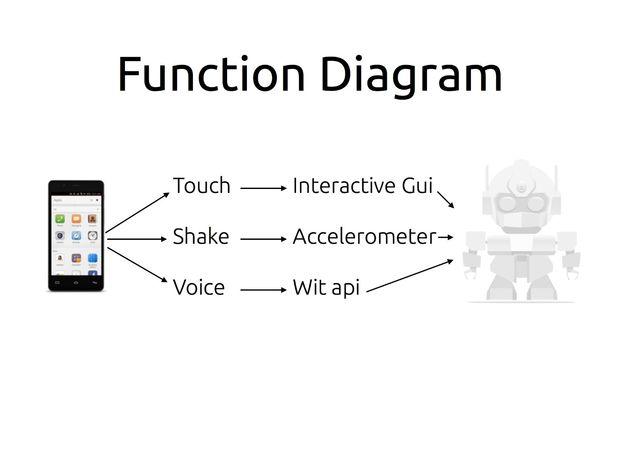
Shared with us by creator Joseph Yang, his Instructable allows you to download all the files needed to begin to manipulate the Rapiro with your Ubuntu phone. With the specialized app, you will have voice, touch, and shake control–all which interact with the Rapiro. Indeed though, you will need an Ubuntu phone and app to run MrRobot, and they are available worldwide.
The bill of materials is a little more interesting–and shorter than usual. Here’s what you will need:
- Ubuntu Mobile
- A Raspberry Pi
- WiFi dongle
- Rapiro robot
- Optional music box
Software tools: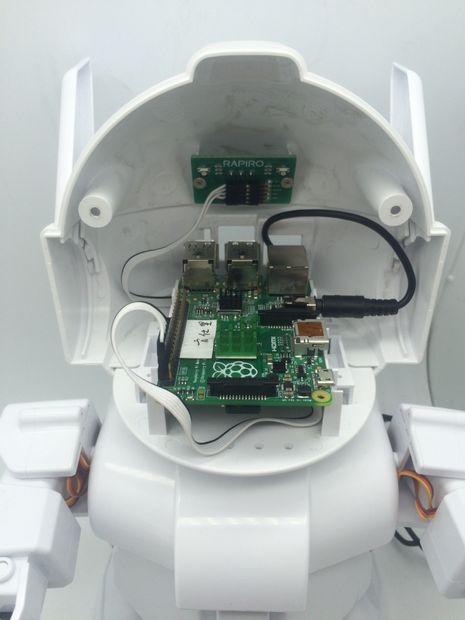
- GitHub files for MrRobot
- Ubuntu QT sdk
- Pi with Raspbian
- Arduino IDE (if you wanna build the robot yourself)
- wit.ai API
Once you have your Ubuntu phone, you need the app, which allows you to:
- Use a touchscreen to control the robot
- Detect serval movement like shaking–and trigger the Rapiro to move
- Record audio with voice control button
Then, you will want to install the Ubuntu QT sdk and deploy the code on the phone with the supplied files. After doing so, you’ll need to also complete the following tasks:
- Install a web server on your PI. First, you’ll need to use your wifi dongle to get online. Once there, the code is downloaded and you’ll add a shell command at startup. This is all detailed in the Instructable.
- Perform hardware assembly (this looks incredibly easy) by opening up the head of the Rapiro and attaching your Pi, plugging in the audio wire, and the WiFi dongle.

