
Louis DeRosa
He’s now an Artist in Residence for 3Doodler, and he’s done live demonstrations of the 3D printing pen during CES in Las Vegas and DesignerCon in LA.
“One of my favorite things about the 3Doodler is that every time I use it I come up with new methods to get the results I’m looking for,” DeRosa says. “I don’t anticipate that exploration ever ending with this product.”
He says that when he got his hands on his 3Doodler, he was determined to use it “just like I had used my sketchbooks and pencils.”
“I like to draw,” said DeRosa. “A lot. Growing up, I would fill sketchbooks with all sorts of characters. Oftentimes my favorite cartoon or comic book characters were the focus of my drawings, oftentimes it was characters that I designed myself.”
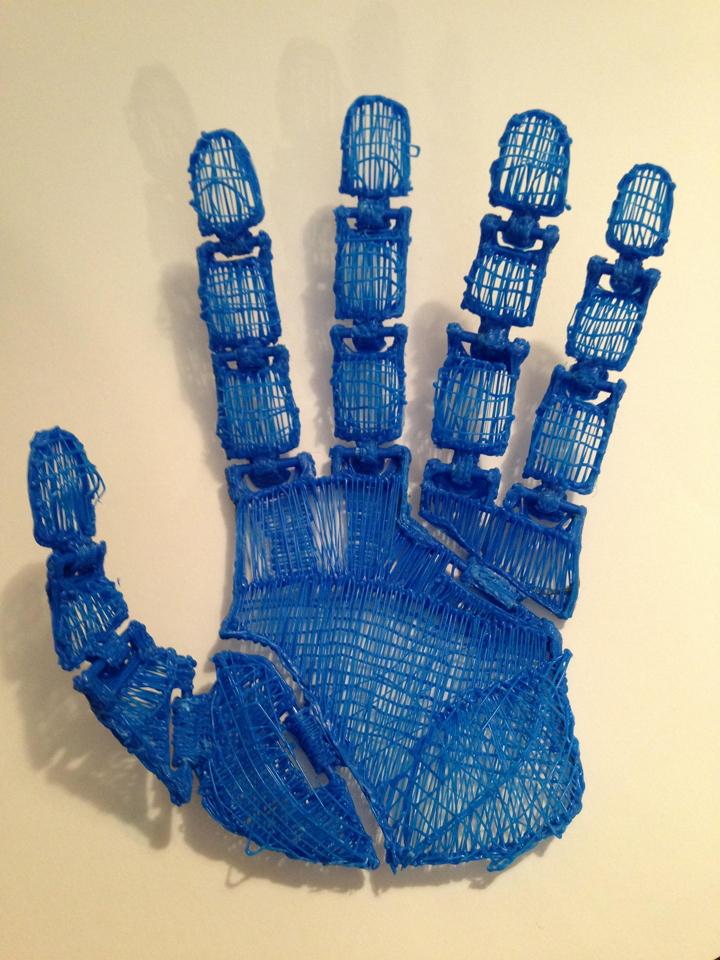
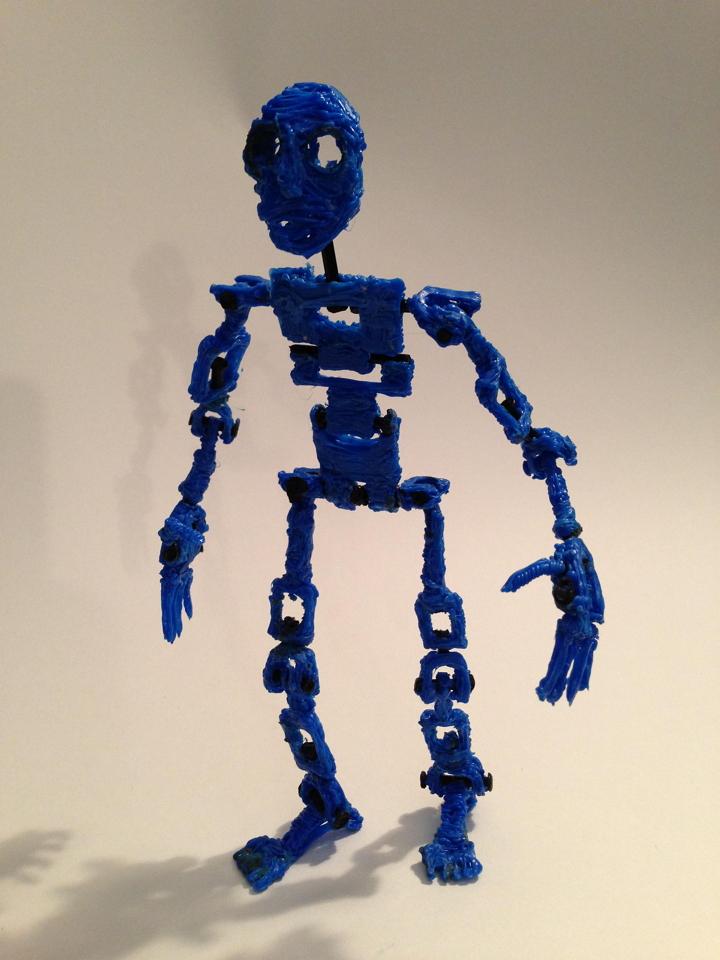
But after a few attempts to create a figure study with two arms, two legs, one body, and one head in a single solid piece, he wasn’t thrilled with his technique and found it “a little messy.”
Ongoing experimentation led him to refine his process, but he wanted to connect separate pieces and have them move independently.
To make it happen, he developed a technique he calls “The 3Doodled Joint.”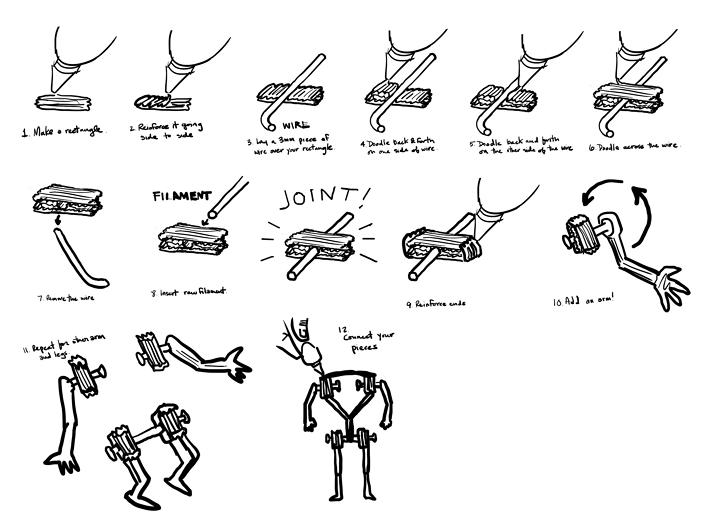

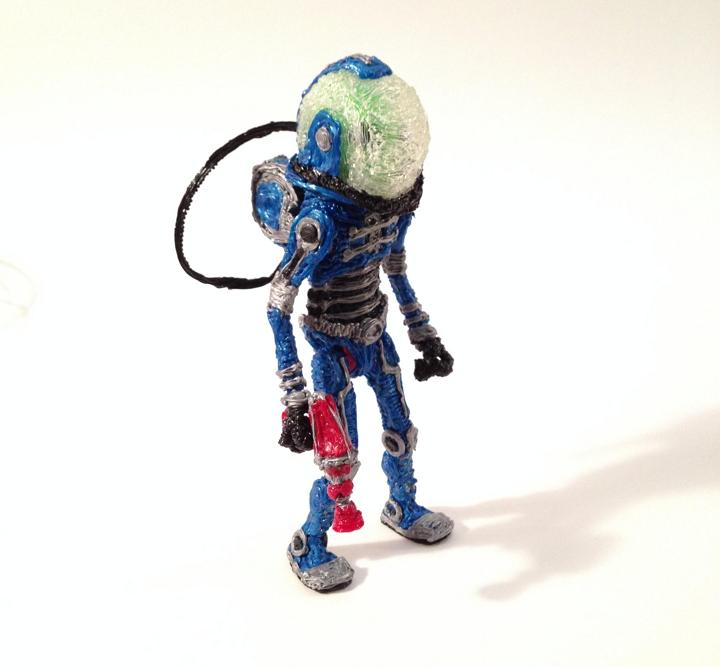
He now says that after a number of iterations, his 3Doodled joints for small action figures allow for the sort of movement which “is as effective as that of your typical store-bought action figure.”
As the plastic is built up on both sides of the wire to create a strong, smooth joint, he simply pulls the wire out the piece and pushes in a strand of unmelted plastic filament to replace it.
He cuts the filament to a preferred length and then caps the ends with more melted filament so that it can’t be pulled loose, and voilà! The joint is ready. You can check out his full step-by-step process at 3Doodler.
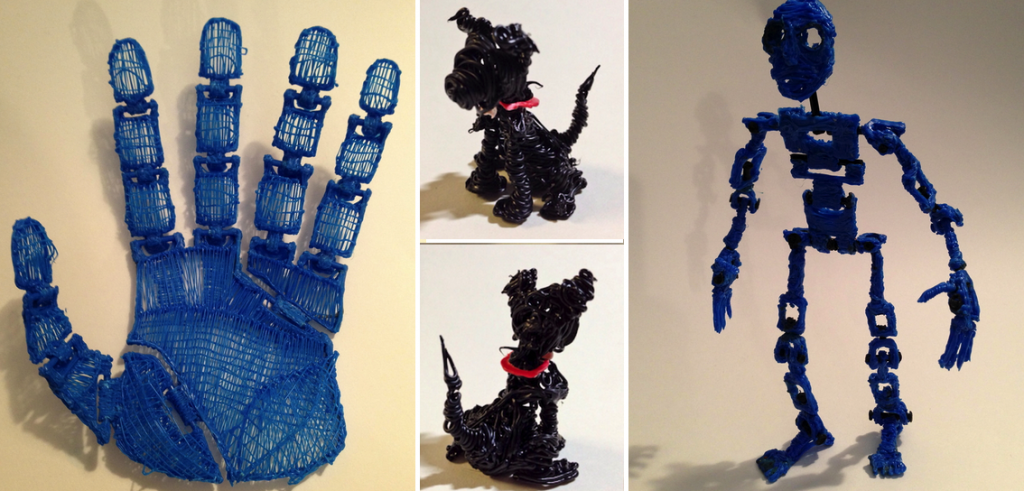
Have you ever used a 3Doodler 3D printing pen? Let us know Articulated Joints With 3Doodler forum thread on 3DPB.com. Check out more examples of his creations below.