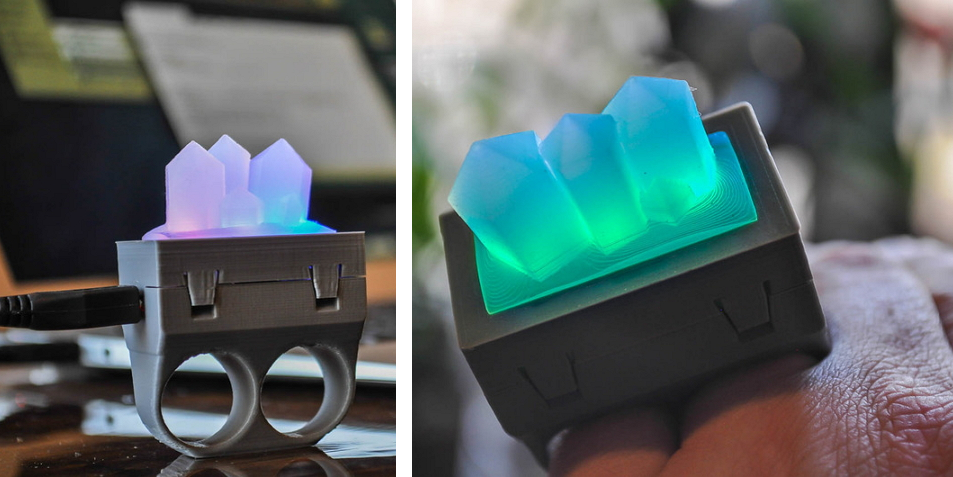
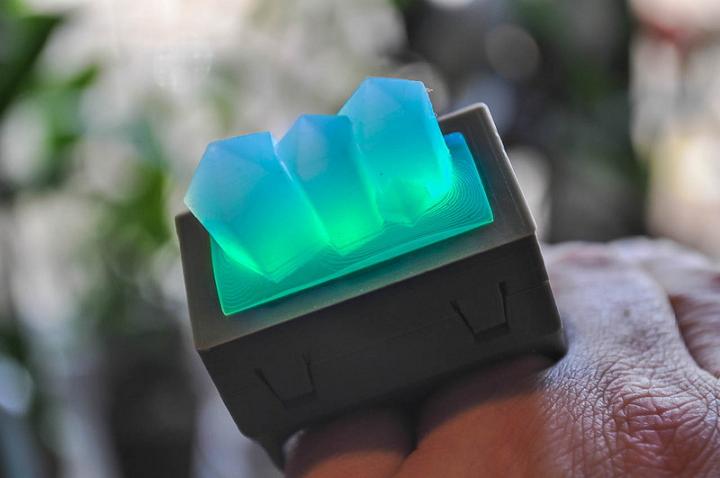
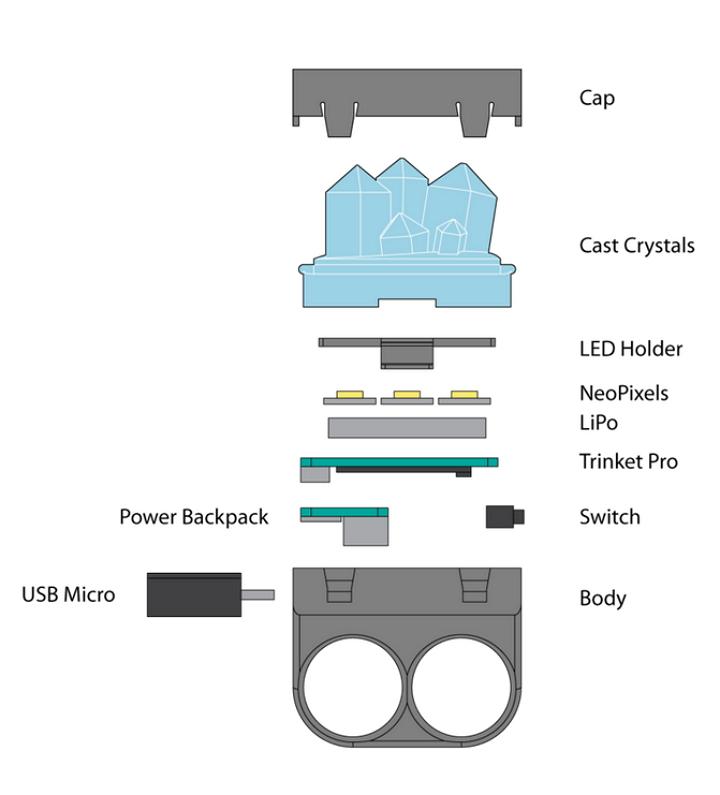
Borgatti, and his collaborator at Adafruit Industries, Becky Stern, designed a wearable, 3D printed, LED glow ring which features a LiPo power source, 3 NeoPixel LEDs, and a power backpack which can be passively charged via USB.

Matthew Borgatti
And to add to the 24 Hour Party People joy? It can all be printed, each component, in a single build without support material.
According to Borgatti, it also serves as an excellent introduction into using 3D printing for mold making and casting as the silicone glow crystals are actually cast from a mold which prints right alongside the other ring components.
“This design stars 3D printed parts,” Borgatti says. “The printed components are designed to fit together pretty closely. They also hug the circuitry pretty tightly. Depending on your printer, infill, material, astrological sign, etc., you may have to file off a little here and there to get everything to snap together. Hopefully the tolerances designed into the components will be enough to equal smooth sailing.”
Built a bit “like a sandwich,” all the various components mount to the ring body layer by layer – other than the cast silicone crystals – which are slotted into a retaining channel designed into the ring cap.
Wire management means a test of the entire circuit, and some extra long wires, are a must until a user has a feel for where everything should fit.
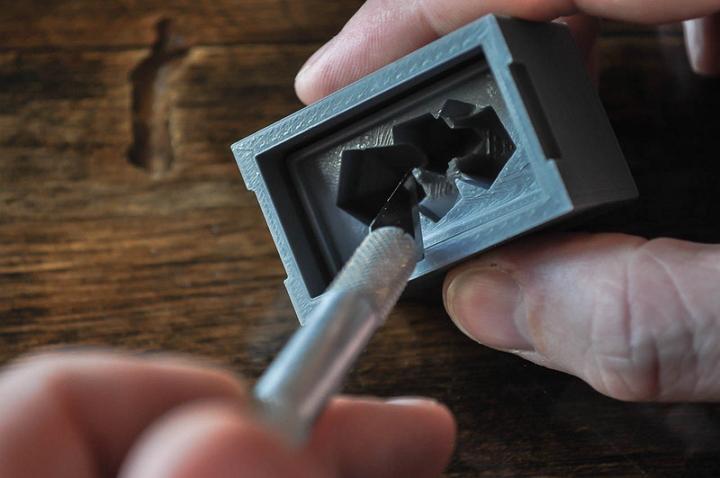
Borgatti says cleaning up the printed parts is one key to success as any whiskers left over from your parts or overflowing blobs of material will ruin the casting process.
He says any two-part, RTV silicone will work here, but adds that he used a 50/50 ratio rubber called EcoFlex 00-50. The whole mold requires just 15 grams of material to fill. Borgatti cautions that mixing 20 to 30 grams of material is a good idea as you’ll have enough left over in case of spills or other shortages.
To take on the molding process, he says to pour the silicone through the holes in the top of the mold and, when the mold is completely filled, rotate the mold around and tap it gently against the work table to make certain any trapped air bubbles are released. Once the silicone is cured overnight – it should be safely cured and ready to demold in 24 hours – you pop off the top and the cast crystals are ready to be fit into the ring cover.
Once the crystals are molded, you’re ready to make them glow. These instructions are fully documented at Adafruit for step-by-step clarity. Some wiring, some soldering, and some programming will bring it all together and ready for assembly and testing.
Once those steps are undertaken for all electronic components, you’re ready to snap the pieces all together, which might include a little more filing and ultimately a satisfying ‘click’ as everything fits and locks into place. The glowing capabilities can then be tested, and once they work, you have your own set of crystal glow knuckles for a stylish accessory! It will need to be USB charged from time to time, as well, to provide hours of glowing fun per charge.
Will you build this set of Crystal Glow Knuckles for your own demented purposes? Let us know in the Crystal Glow Knuckles forum thread on 3DPB.com.