It is earthquake season again. And of course by earthquake season I mean it is that time of the year that Hollywood makes yet another movie about the West Coast being destroyed by the earth’s movement. Every year it seems that there is another disaster porn movie with a threadbare plot and lots of computer generated imagery of landmarks being destroyed. However, despite being silly movies, they do tend to lead to a bump in interest for the real issues that are being fictionalized. The new movie San Andreas, starring The Rock, may give moviegoers a temporary thrill, but it will also encourage a few viewers to learn about the real science of geology and seismology.
The Slinky Seismometer
By day Thomas Schrantz is a mild-mannered operations engineer for an internet company, but by night he fights crime, I mean studies geology for fun. In fact, Schrantz almost pursued geology as a career before becoming an engineer, and still considers himself an amature earth scientist. He was looking to acquire his own seismometer to monitor and study seismic activity but wasn’t able to find anything at the hobby level. All of the models available on the market were created for oil and gas exploration or mining, and any plans to build his own required metal fabrication facilities that he simply didn’t have access to.

3D Print: – How did you go about re-designing the TC-1 Seismometer?
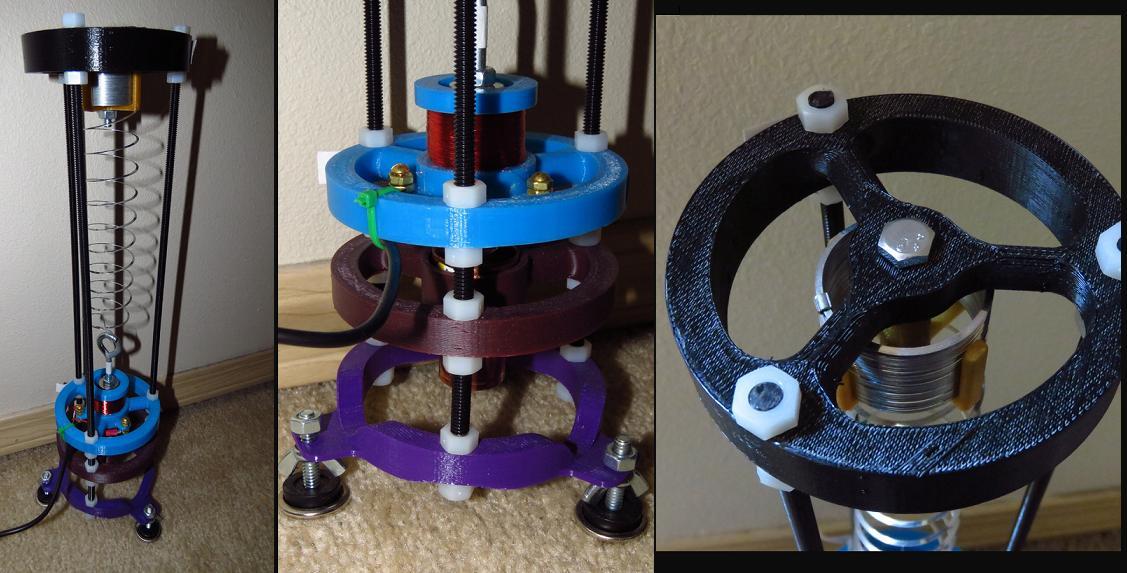
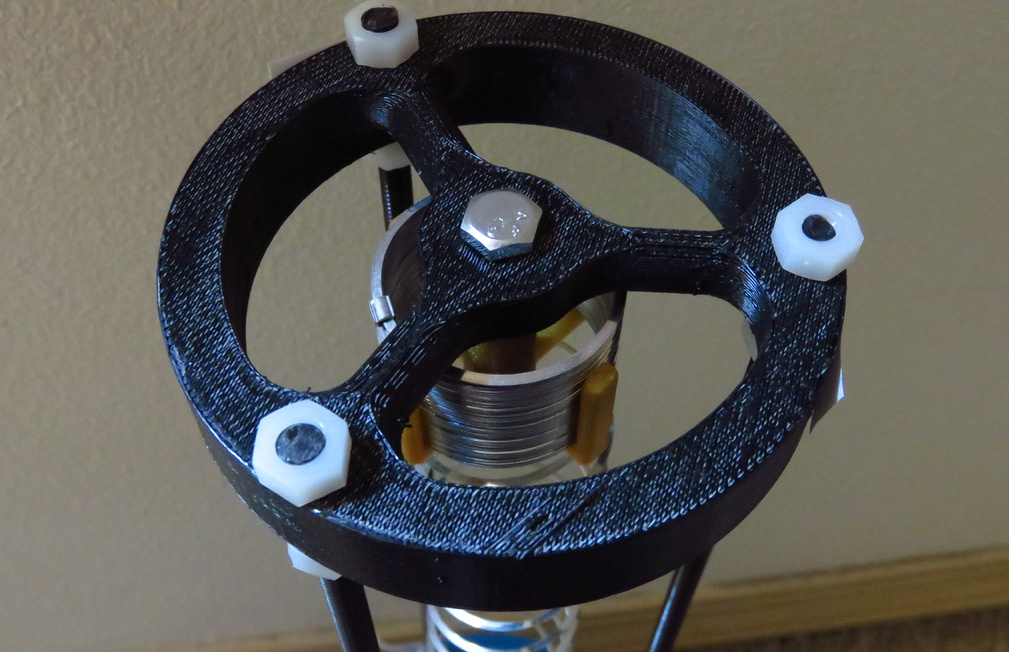
Thomas Schrantz: – I started by building a part to act as the pickup coil, using the specifications from the original design. The TC-1 plans called for cutting and gluing together some pieces of PVC pipe. I simply took those measurements and designed a piece that matched it exactly. After I tried to use it, I realized it needed a few improvements, so I added some support arms and the wings for the connection points. From there, I built a few other parts (The slinky retainer and the damper holder) to replace some of the trickier aspects of the original design. From there, I had my first seismometer.
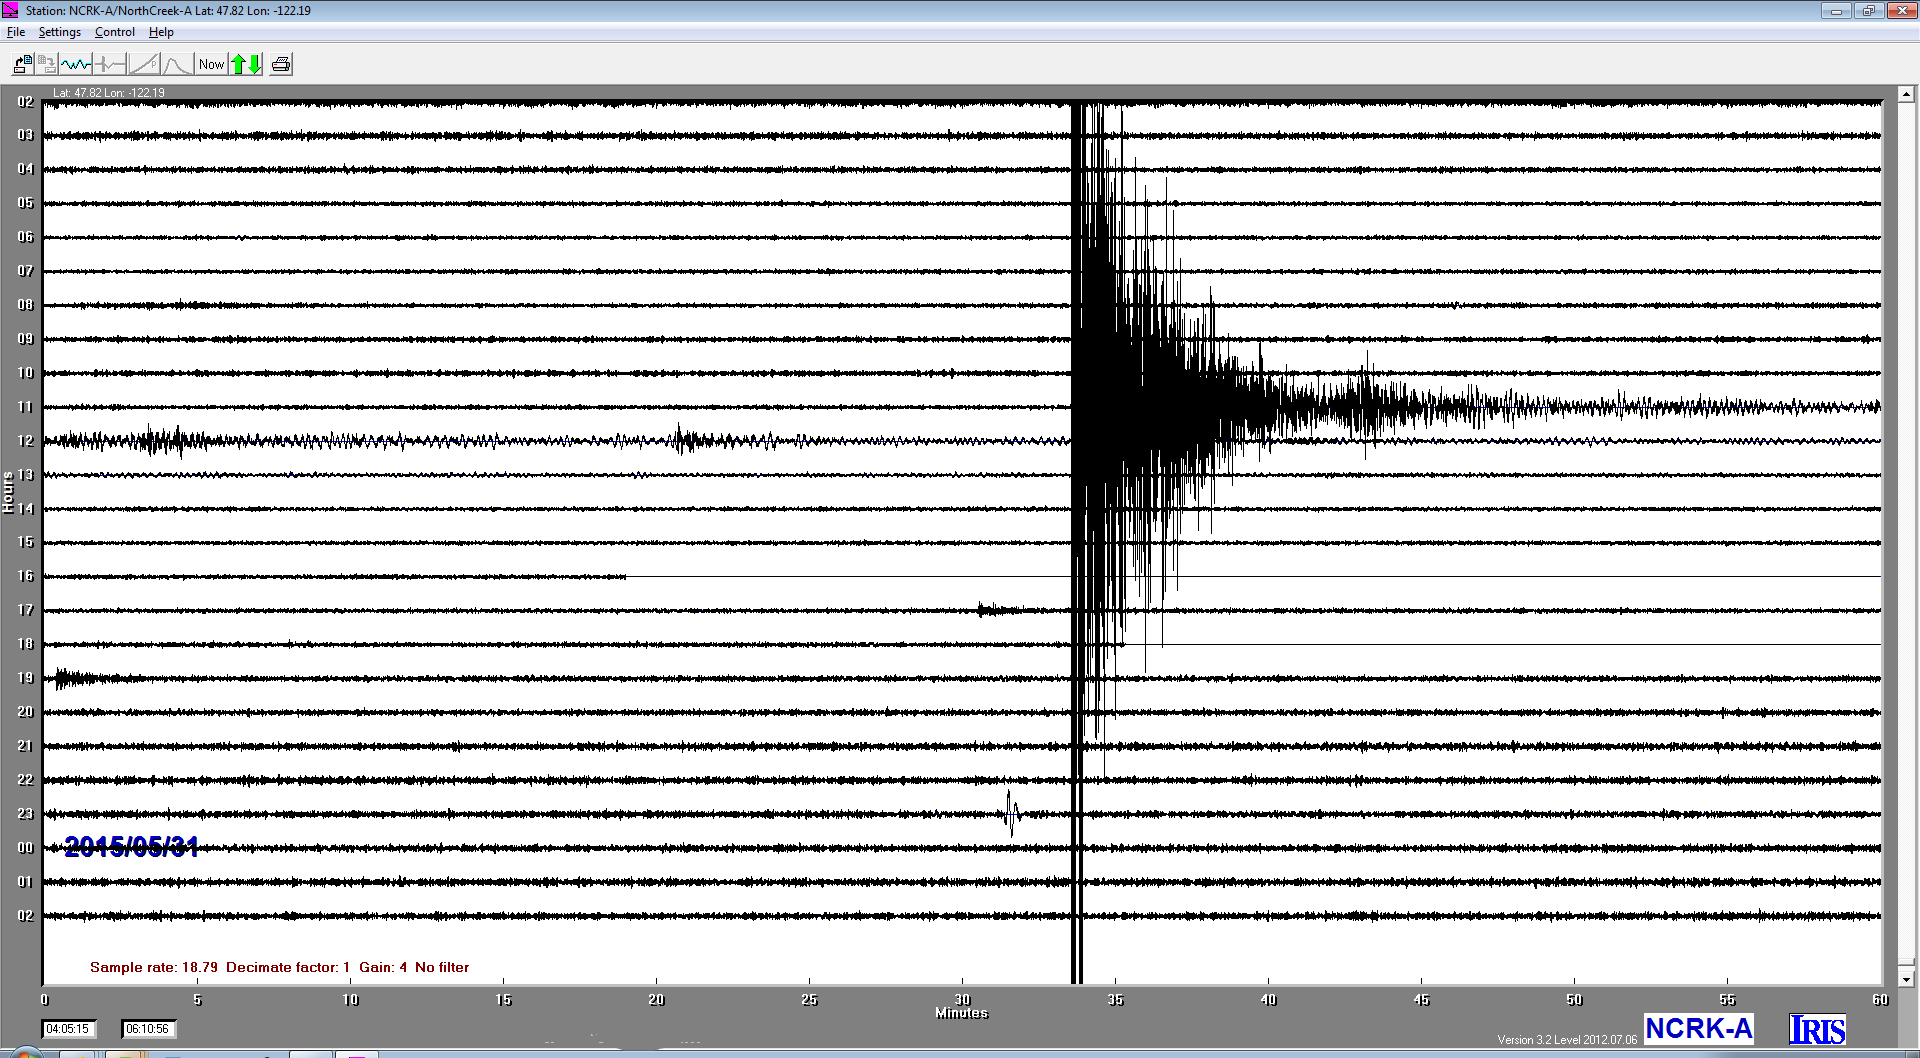
3DP: – Overall can you explain how it works and what exactly a seismometer does?
3DP: – How does it compare with other similar devices?
TS: – While it’s certainly not the highest quality instrument out there, it is definitely good fun to watch. I’ve picked up earthquakes from all over the world, from practically my own backyard, to Japan and Chile, even a few near Antarctica! I think I can pick up Magnitude 5 quakes from anywhere along the West Coast, and 7+ from almost anywhere in the world. It’s remarkable to think that an earthquake in Japan is capable of shaking my house near Seattle (ever-so-slightly) for hours.

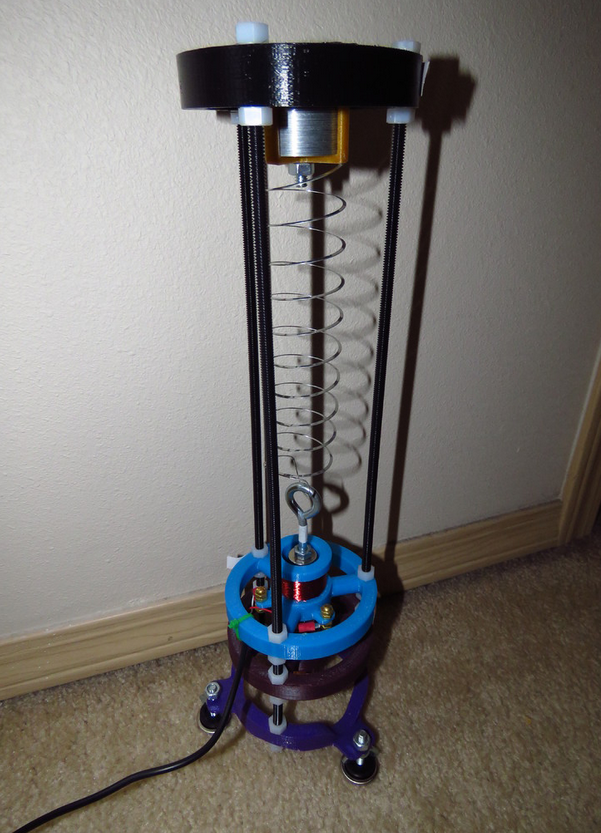
If you want to construct a Slinky Seismometer of your own, you can download the 3D printable parts directly from Thingiverse. You will also need a few other items including some copper pipe to damper the spring motion, some copper wire, several 1/4 inch nylon threaded rods with nylon nuts (Metal will interfere with the device) and of course a Slinky Jr. Schrantz has included a list of everything that you need to construct your own device on Thingiverse. And if you decide to build your own, or if you have already built your own version show it off in the 3D Printable Slinky Seismometer forum at 3DPB.com.