A PowerPoint 3D Printer: Missouri Teacher is Building a Unique $20 3D Printer with His Students
adlughmin
When it comes to 3D printing within the classroom environment, there are some teachers who welcome it with open arms, while there are others who are deathly afraid of the technology. Some teachers have taken it upon themselves to learn how to use various 3D printers, while others have come up with some very unique lesson plans built around these new machines. However, one high school teacher in Union, Missouri is taking 3D printing to an entirely new level.
Dustin Klenke is a physics, robotics, and biology teacher at Union High School, and as part of an NSTA (National Science Teachers Association) conference that he recently attended, he learned a great deal about building his very own microstereolithographic (micro SLA) 3D printer. The presentation, which was given by a man named Joe Muskin, is part of a project run through the University of Illinois at Urbana-Champaign. It showed those in attendance the ins and outs of how to build their very own 3D printer, a printer that is based on the same concepts we see in today’s desktop DLP-based SLA printers, but which operates in its own unique way.
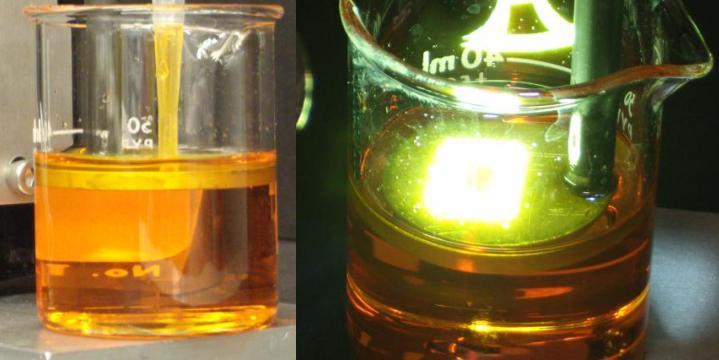
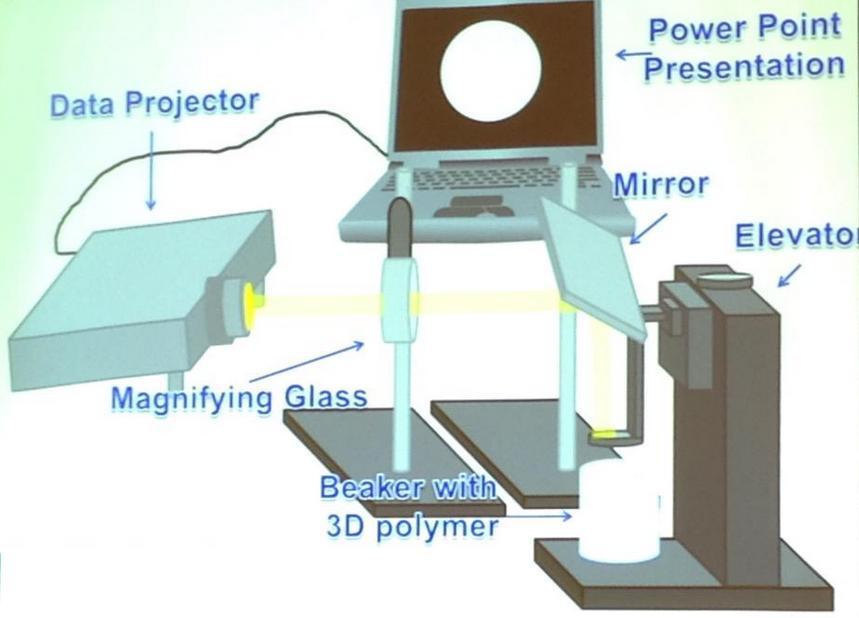
“The process uses an SLA gel, but instead of a laser to initiate polymerization, an ordinary data projector focused through a $3 magnifying glass displays a 2D image of each layer,” Klenke tells 3DPrint.com. “The images can be created with simple shapes in PowerPoint or slides. This solidifies an entire layer at once which eliminates the need for any moving components in the x and y-direction.”
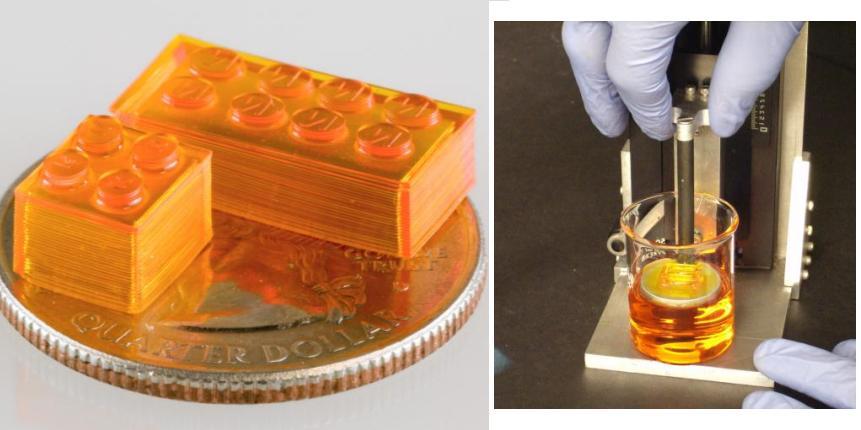
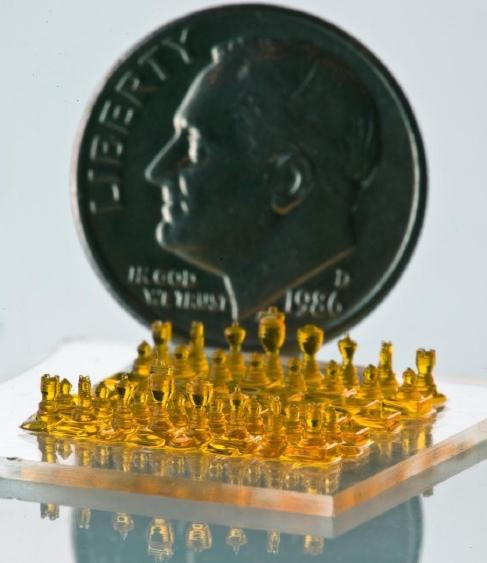
The process is actually based on a research project that was headed up by Professor Nicholas Fang and developed at the University of Illinois. It is called microstereolithography, and it uses a simple projector to create objects with layers as small as just 400nm. Klenke tells us that $20 is enough to purchase all of the needed supplies at a hardware store. This of course doesn’t include the cost of the projector, but then again, projectors are quite common within just about every school.
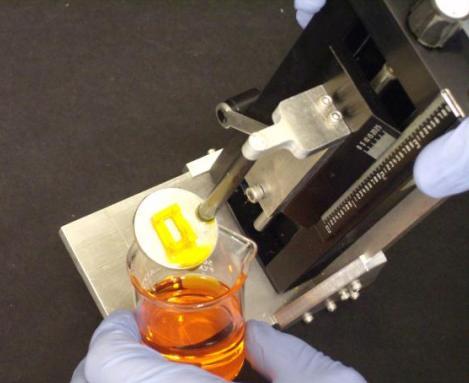
“The only mechanical piece is the elevator which precisely lowers the build platform after each layer has solidified,” explains Klenke.
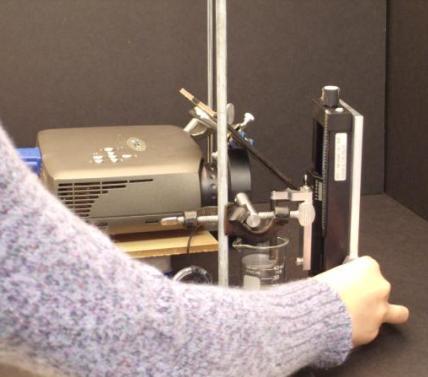
The way the process works is very similar to how other desktop DLP SLA 3D printers operate. A beaker is filled with a liquid polymer, while PowerPoint or a slide show is loaded up on a connected PC. To begin printing, the first PowerPoint slide is displayed through the projector which is focused on the beaker of liquid. Each image slide is exposed for about 5-10 seconds, and after each image slide comes a blank “all black” slide. When this “all black” slide is loaded, the stage on which the beaker sits is lowered, allowing the liquid polymer to flow over the existing structure. Then the next image slide is exposed, and this entire process is repeated until a full 3-dimensional object is complete.
Virtually anyone with a projector can recreate this 3D printer using the following materials:
Drawer slide
¼ x 20 threaded rod
¼ x 20 t-nut
2” L-bracket (2)
3” straight bracket
Carpenters Square
1” x 6” wood
2” x 4” wood
Tape measure
Screwdriver
Wood screws
Saw
Hammer
Tin snips
Aluminum sheet metal
Sharpie
8 x 32 threaded rod
8 x 32 nuts
Drill (with 9/16 bit)
Dremel tool
WD-40 (Lubricant)
The elevator design, which Klenke’s class is in the process of building, is constructed mostly of wood, and as you can see in the images provided, the objects that this printer can create are very detailed and of the utmost quality. Klenke is one more example of a teacher who understands the importance of bringing 3D printing into the classroom. He, unlike most, is taking things a step further by allowing his students to actually build their class’ 3D printer.
What do you think about this process, and what Klenke is doing with his students? Should more teachers be following in his footsteps? Discuss in the PowerPoint MicroSLA 3D Printer forum thread on 3DPB.com.