One man, who goes by the name Ville, was getting tired of seeing multiple 3D printer calibration parts all come about independently of one another, so he set out to create something a bit different. With over 6 years of experience in the 3D printing space, he has had his fair share of issues when testing and calibrating new 3D printers.
“It’s hard to see where a problem is created, e.g. Hardware/Software,” Ville tells 3DPrint.com. “There are a lot of different calibration parts available, but most of them are split up into several parts. I was thinking [about creating] an all-in-one solution to see with one print what’s working or not.”
“Often you don’t know if your printer is ready for complex files, so with this you have an easy option to check problematic printing/slicing stuff,” he explains.
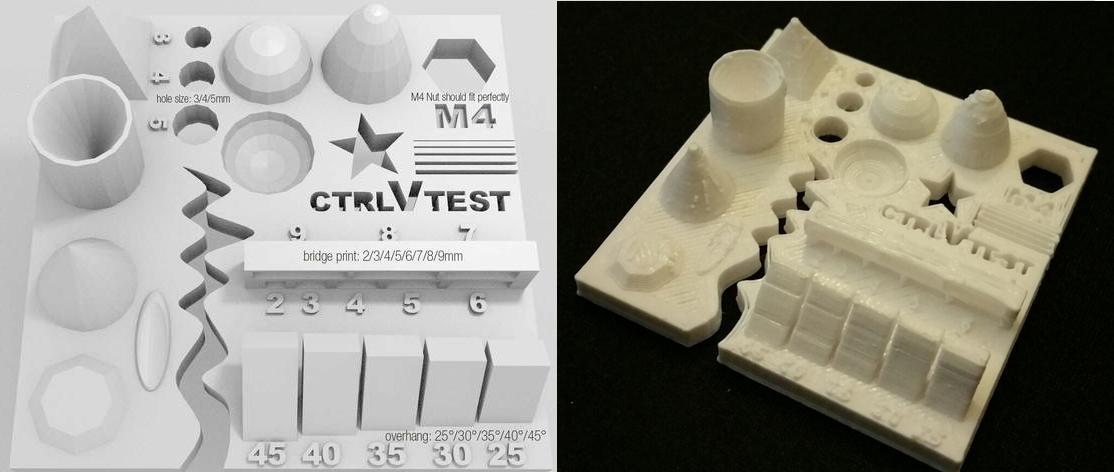
Anyone with a 3D printer can download and print this file free of charge from Thingiverse. The printer settings should be set to its lowest possible layer height (0.1 mm in most cases), with an infill of approximately 33%, in order to ensure that all the details come out correctly. Once the object has finished printing, you can check to make sure everything is calibrated and working correctly by using the following methods, provided to us by Ville, below:
- Size: the object is 4 x 50 x 50 mm (baseplate) — measure with a caliper
- Hole size: 3 holes (3/4/5mm) — measure with a caliper/drill
- Nut size: M4 nut should fit perfectly — insert an M4 nut; it should need a little pressure
- Fine details: pyramid, cone, all numbers — check if all things look nice and smooth
- Rounded print: wave, half sphere — check if all things look nice and smooth (not every printer handles round things similar, e.g, it will be split in polygons) see here for more details
- Minimum distance between walls: 0.1/0.2/0.3/0.4/0.5 mm — depending on your nozzle size and slicer settings you will get different results
- Overhang: 25°/30°/35°/40°/45° — depending on printed material/cooling, these will not be as seen on the rendering provided
- Flatness: all flat areas — these should be flat with no gaps

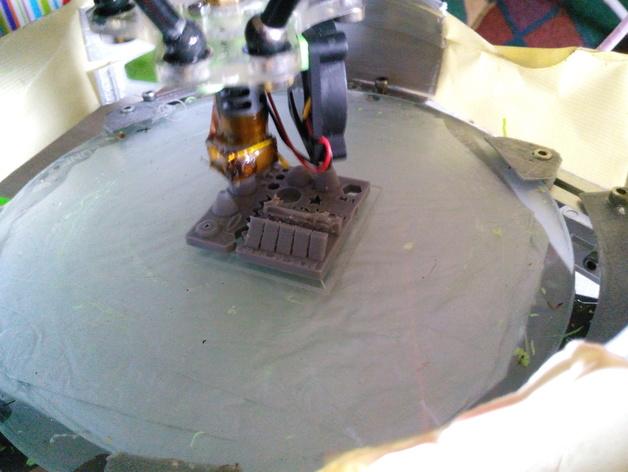
It takes approximately 50 minutes to print this test part on most FFF-based 3D printers, and once complete, it can used to easily determine problems that a particular 3D printer has. The results can then be compared with other users who own the same model of printer, to determine if it is an issue that the manufacturer has with all their machines, or if it is simply a misconfiguration in that particular machine. These tests can also be used in order to compare 3D printers from different manufacturers to see which ones perform better in different situations.
Have you tested this part on your 3D printer? We’d love to see your results. Feel free to post them in the All-in-One Test Print forum thread on 3DPB.com.