One man, named Peter Phelps, apparently had the same problem that I do. He liked the luxury of being able to cut his own hair, but hated the fact that he had no reliable way of trimming the back side of his head. Unlike me, Phelps is a bachelor, so he doesn’t have the luxury of asking his wife to help him out.
Luckily for Phelps, he has become quite versed in 3D design and 3D printing over the past year or so, and has used his ability to create a tool unlike anything seen before.
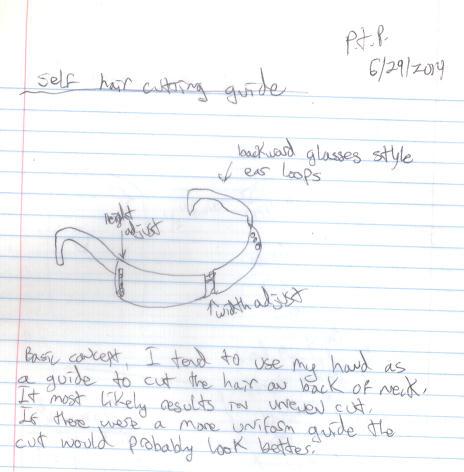
“I have cut my own hair for years now and would always be trying to use my hands as a guide while I cut the back of my neck,” Phelps tells 3DPrint.com. “This often resulted in a line that was rather jagged and I know that co-workers would just ignore the fact or politely imply that I needed to seek professional services. As someone that has been a DIY supporter, I thought there had to be a better way. Having worn glasses since I was seven years old, it dawned on me that all you really needed was something similar that fit on backwards to create a guide to trim the back of my neck.”
Phelp’s original design.
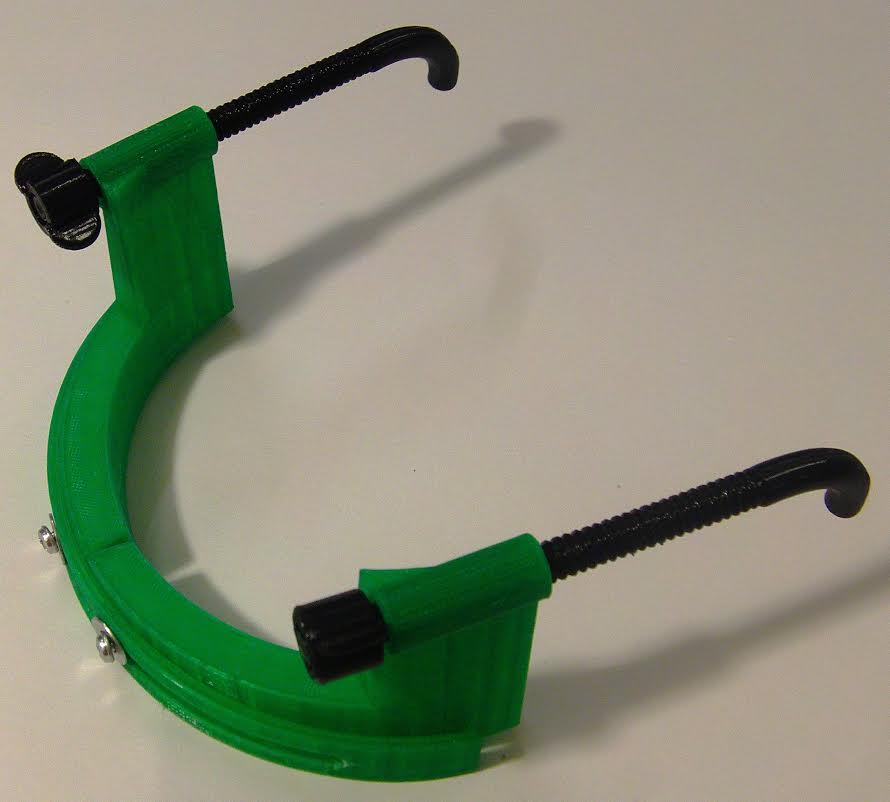
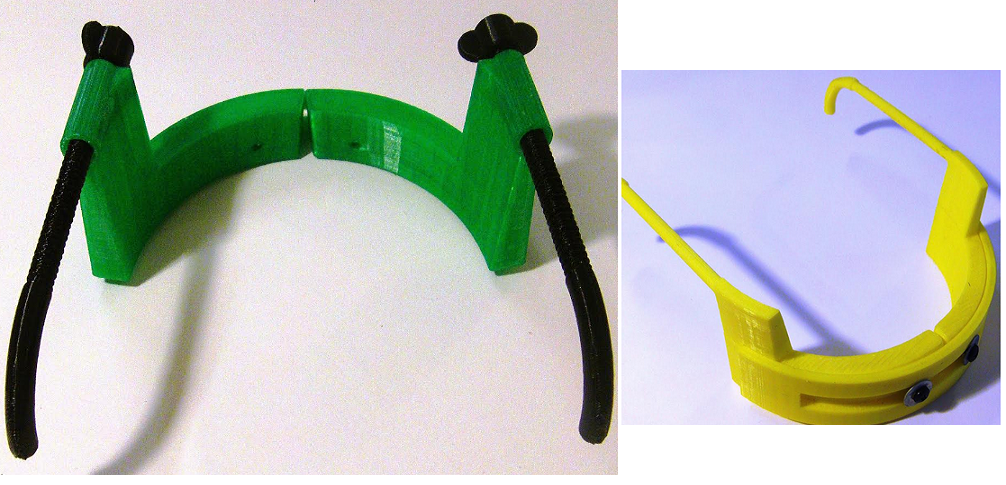
So Phelps set out to create his own DIY neck hair trimmer guide. Using FreeCAD to design his device, he originally created a much bulkier trimmer which did not include as many adjustments as his later iteration did. The second version, which is his latest, allows for both the head width and distance from the ears to the back of the head to be adjusted.
While the 41-year-old Phelps owns a Printrbot Simple (2014) 3D printer, he tells us that he has experienced issues with slanted prints on this machine, so he had to find another option when it came to 3D printing his device.
“My foray into 3D printing began March of last year when I discovered the Sacramento Public Library has a 3D printing lab called the Design Spot which is funded by a grant and donations,” he tells us. “I printed the parts on a MakerBot Replicator 2 at the Library’s Arcade Branch.”
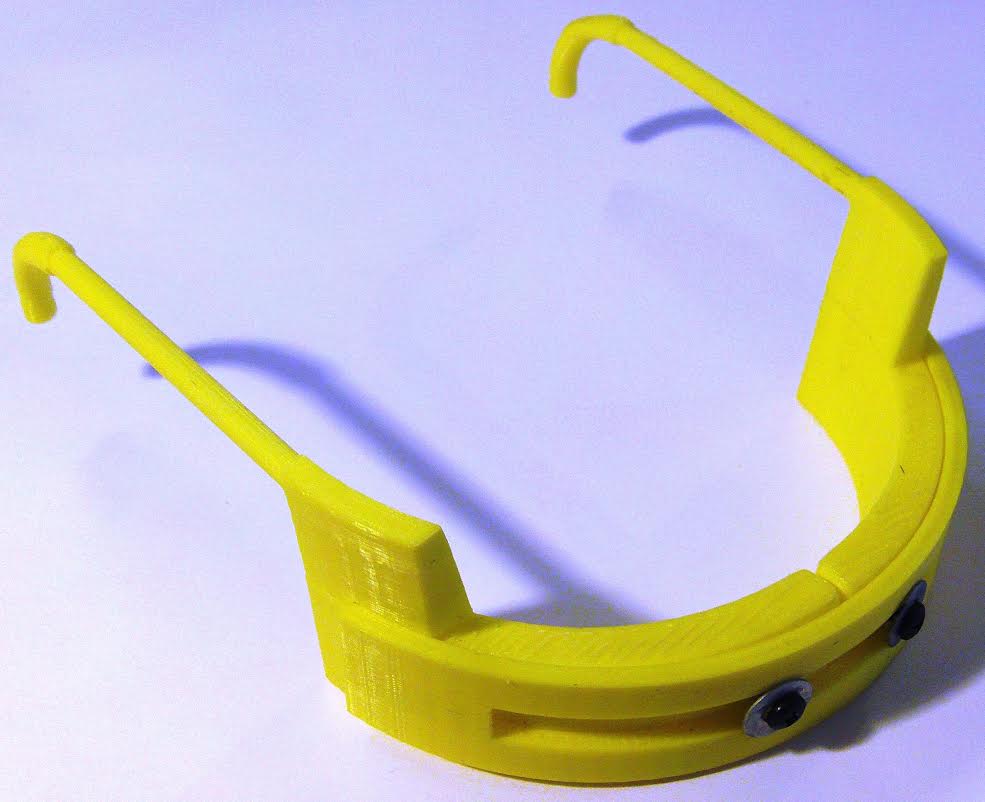
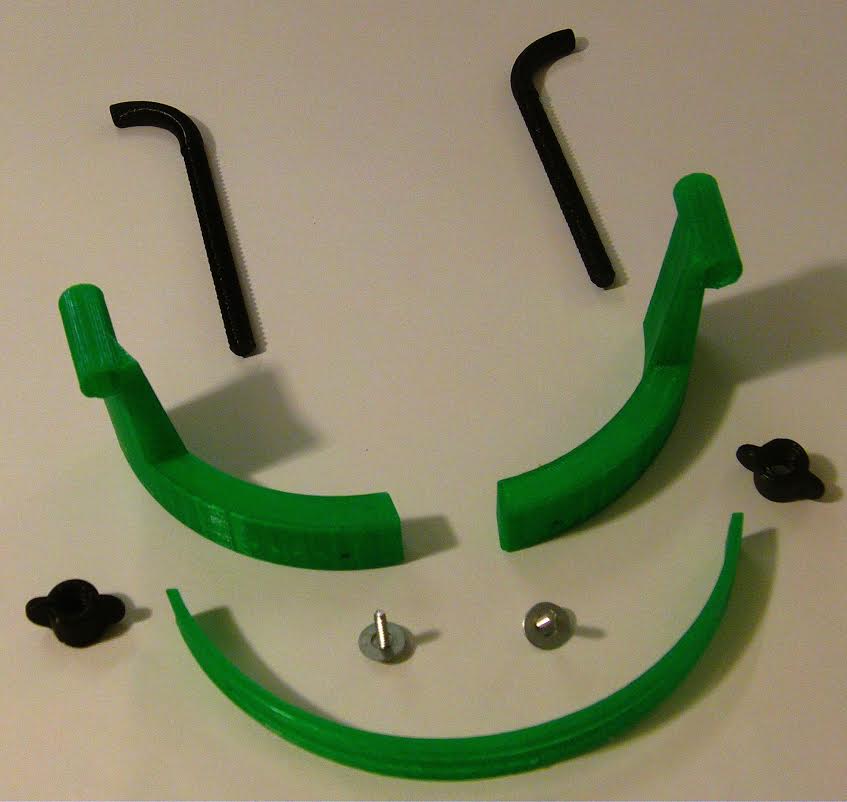
The design was printed in seven pieces: The two threaded ear pieces, two adjustment knobs, left and right “mains,” and the back adjusting plate. This plate is held in place using two screws and washers that fit the 2mm holes. He 3D printed all of the parts using a .3mm layer height and an infill of 10%. In all, it took him approximately 4 hours of print time to complete.

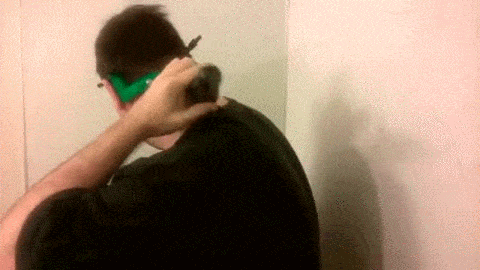
Once the neck hair trimmer is assembled, it can be placed on the back of the neck in a reverse fashion to how one wears eyeglasses. Depending on where you want the line to be cut into your hair, you may loosen or tighten the earpieces so that the device can be lowered raised along on your neck. The device works perfectly, and quite frankly I will probably be 3D printing one of these for myself later this evening. It’s about time that I don’t have to rely on my wife to help me cut my hair any longer.
“I envision a day where the consumer experience will be much more customizable for virtually any product on demand,” he explains. “The biggest reason I have built my own printer is due to the ‘three you print’ limit at the Library. Let’s just say there are a few projects that have been placed on the concept design stage because they are longer. When things don’t go so well in my designs I just think about how many times it took Edison before he got the first light bulb, and it helps put things in perspective.”
If you are interested in printing your own neck hair trimmer, you can download it from Threeding today for just $0.99, and 3D print one yourself.
What do you think about this incredibly useful 3D printed device? Will you be 3D printing one yourself? Discuss in the 3D Printed Neck Hair Trimmer forum thread on 3DPB.com. Check out the video demonstration of this device below.